
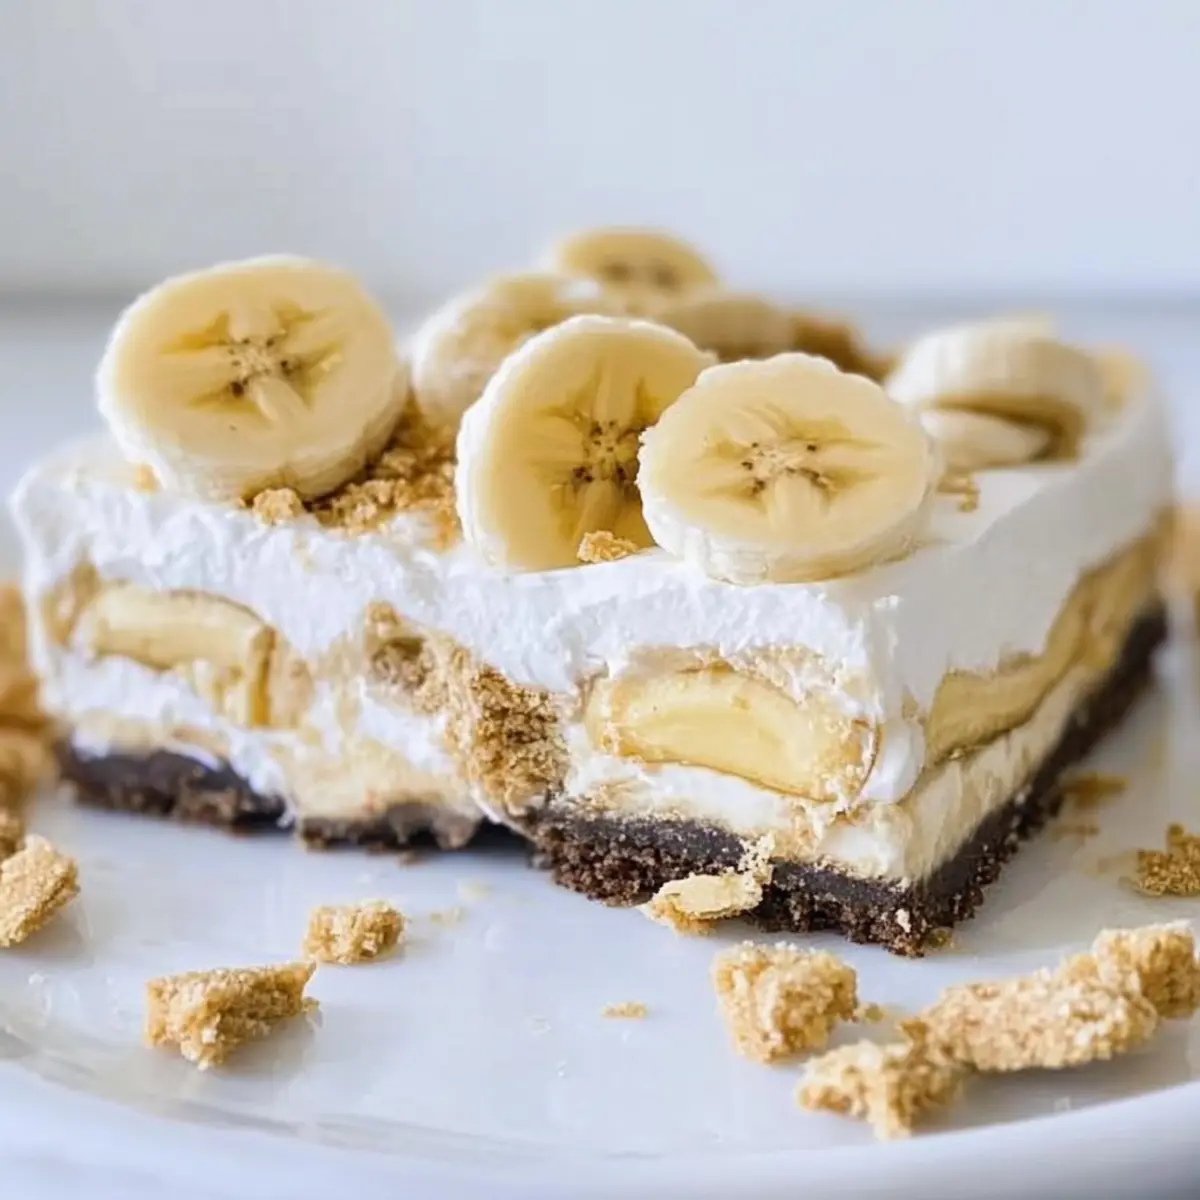
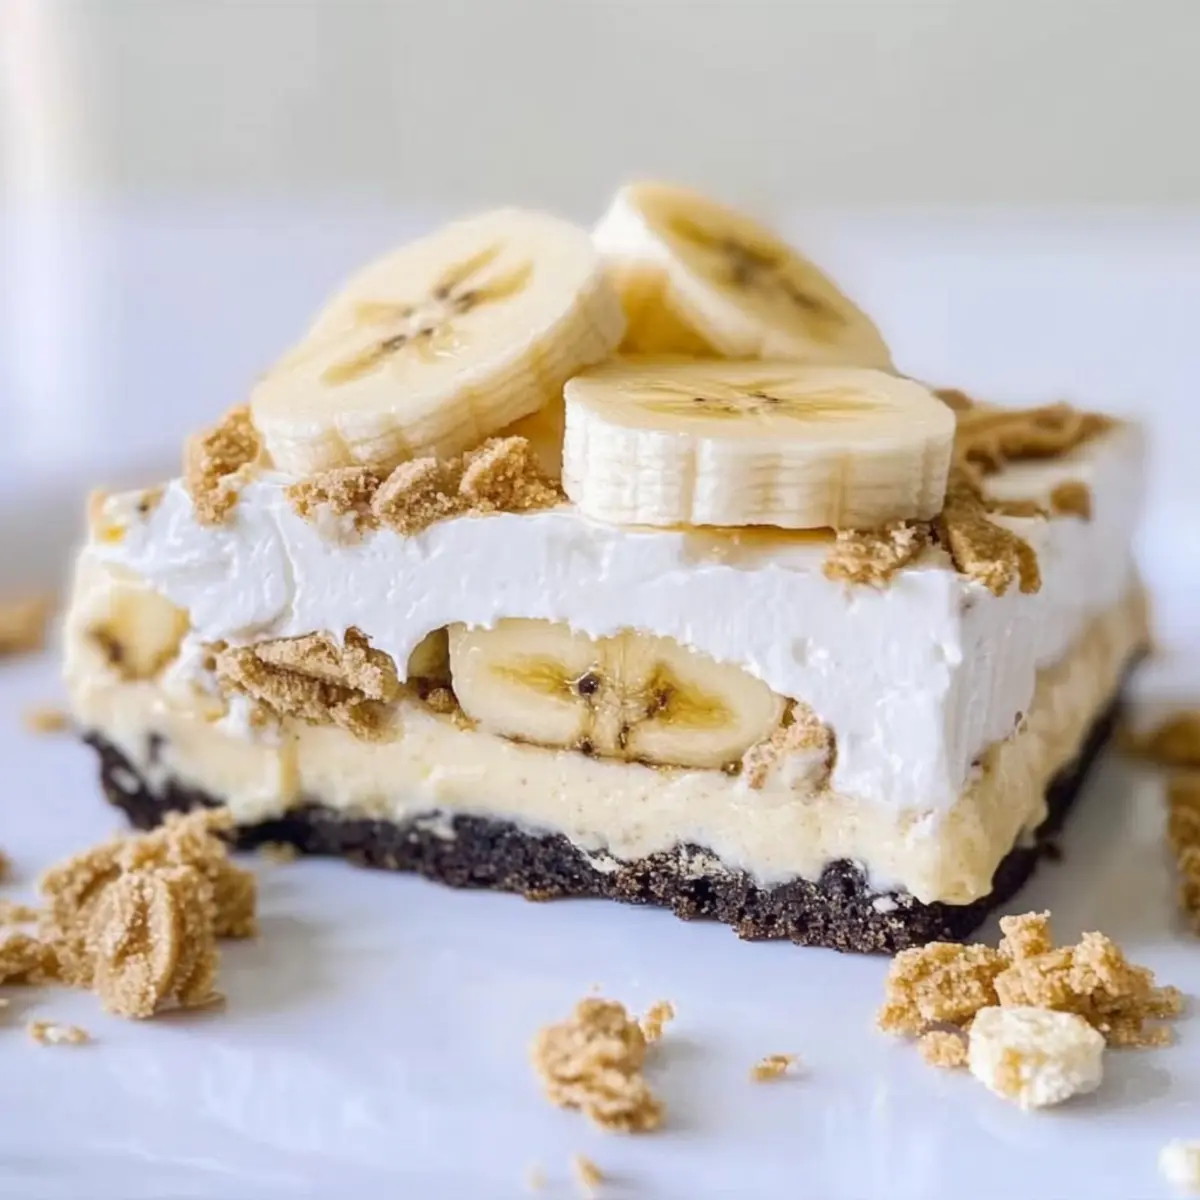
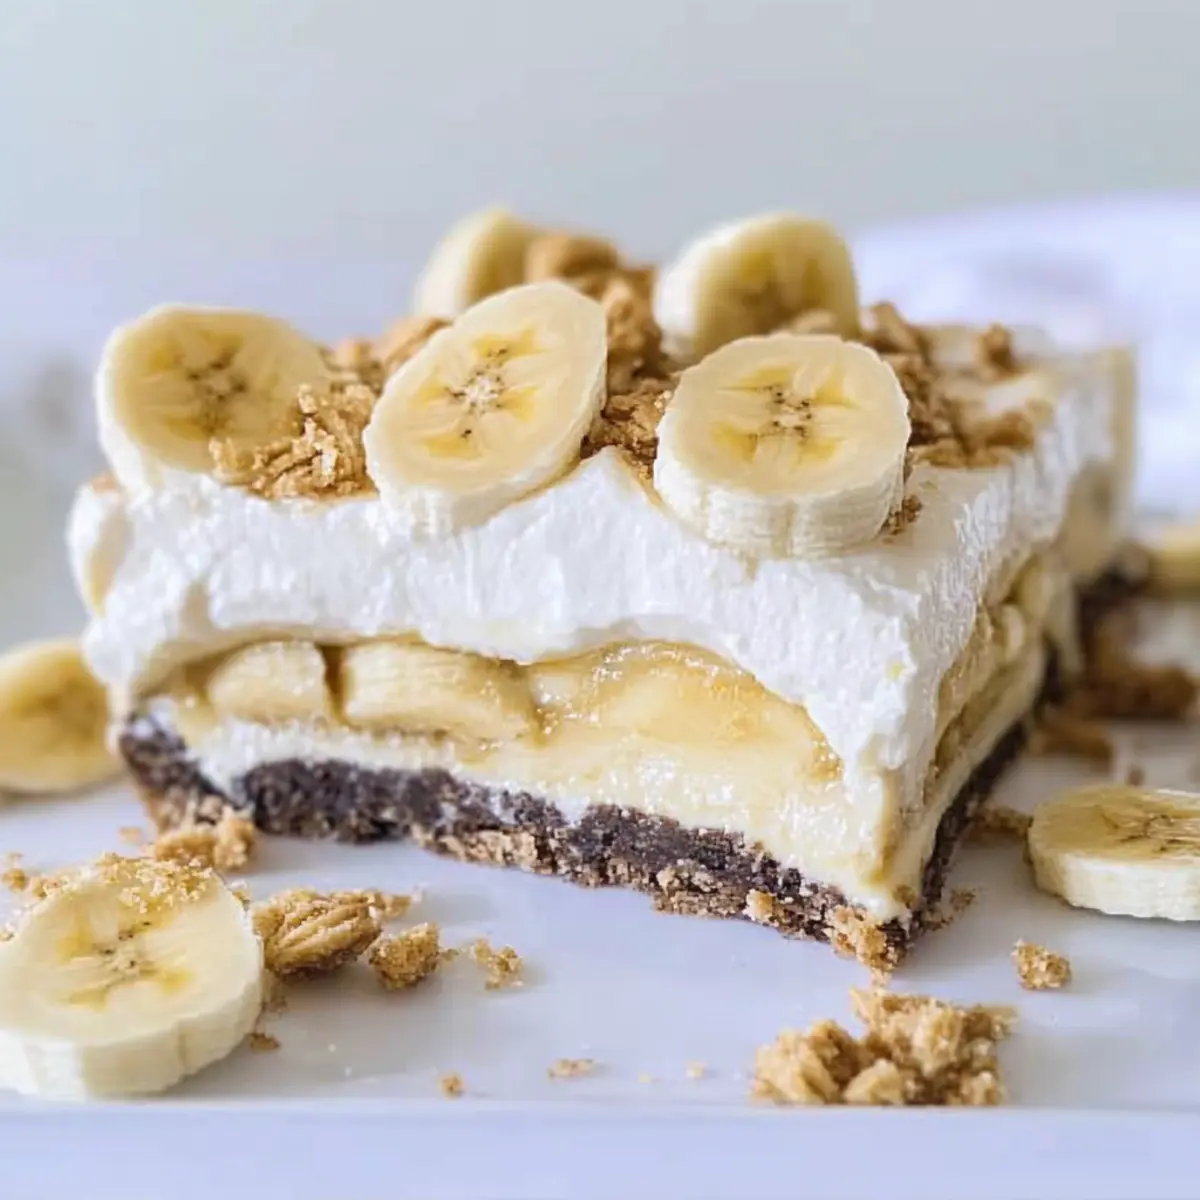
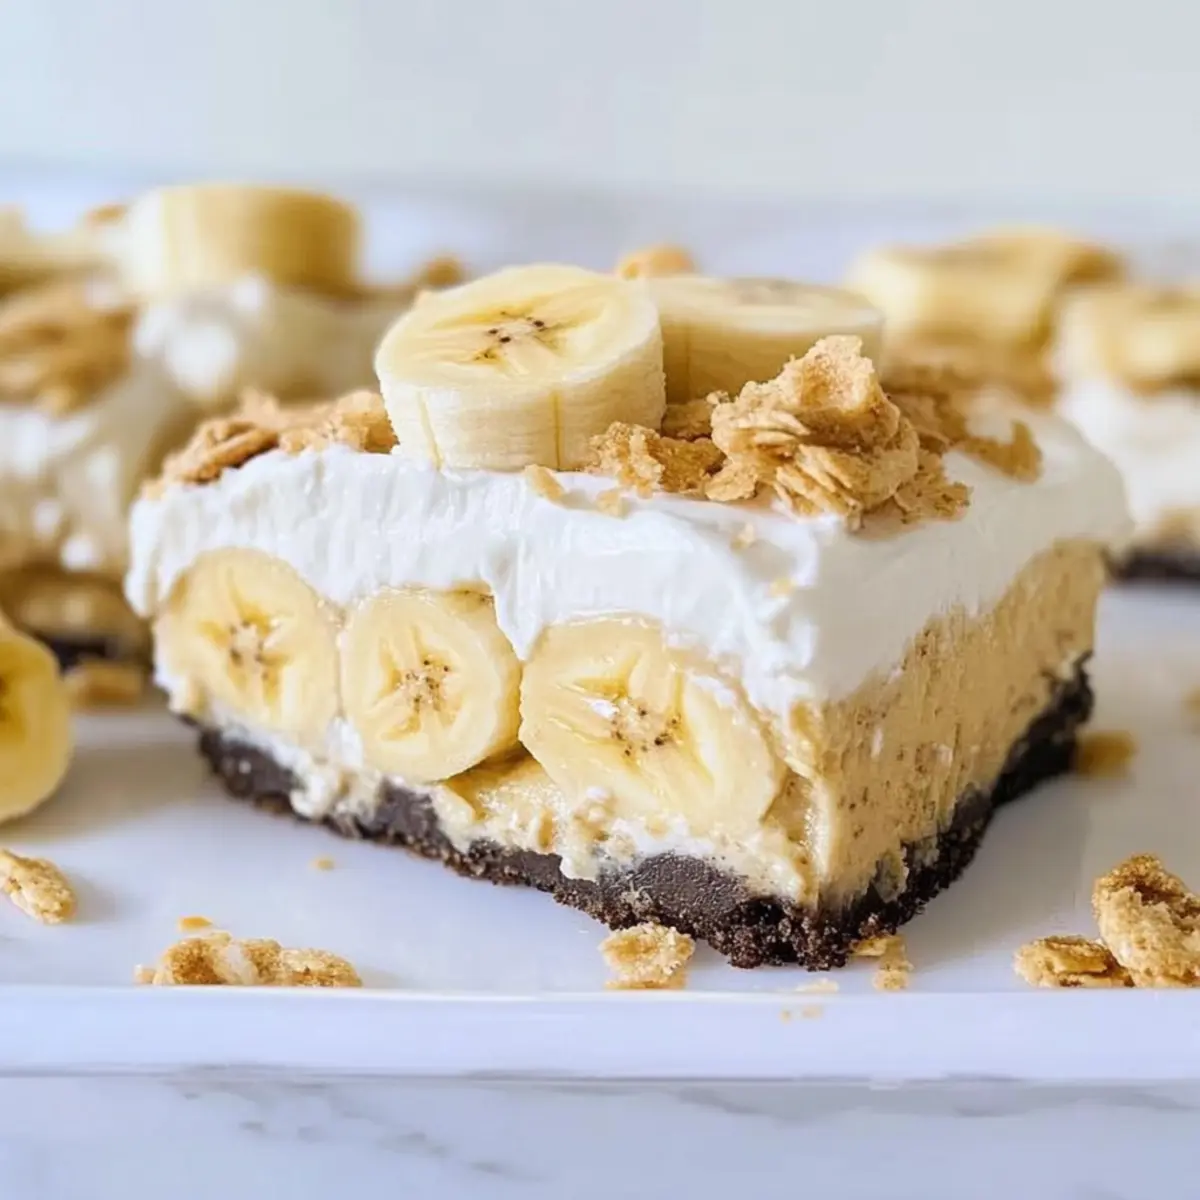
As I rummaged through my pantry the other day, I stumbled upon a forgotten box of Golden Oreos and a few ripe bananas just begging for some attention. That moment sparked the creation of my No-Bake Banana Pudding Dream Bars! This delightful treat adds a twist to the classic banana pudding, featuring a luscious cream cheese filling and a sweet, crunchy Oreo crust that makes it irresistible. Not only are these bars incredibly easy to whip up, perfect for those busy nights, but they also promise a delightful balance of textures that will have your family and friends coming back for seconds. Ready to elevate your dessert game? Let’s dive into this sweet adventure together!
Why Are These Bars So Irresistible?
No-Bake Convenience: Forget the oven! These bars can be whipped up quickly, making them ideal for those evenings when time is short yet dessert cravings run high.
Decadent Flavor Layers: With a rich cream cheese filling, fresh bananas, and a crunchy Oreo crust, each bite delivers an explosion of flavors and textures. It’s like a slice of classic banana pudding evolved!
Crowd-Pleaser: Perfect for gatherings, potlucks, or family dinners, these bars are sure to impress and satisfy a variety of sweet tooths.
Versatile Creation: Feel free to swap out ingredients—try using regular chocolate Oreos or add in your favorite fruits like strawberries for a fun twist.
Make-Ahead Delight: Prepare these bars in advance and keep them in the fridge for easy access to a delicious dessert anytime. You’ll love having them ready to go, just like my Cinnamon Crunch Swirled Banana Bread for last-minute indulgence!
Banana Pudding Dream Bars Ingredients
For the Crust
- Golden Oreos – Provides a sweet, crunchy base; keep filling intact for added sweetness in crust.
- Unsalted Butter – Binds the Oreo crumbs together; substitute with margarine if necessary, but adjust quantity as it may make the crust wetter.
For the Filling
- Bananas – Adds natural sweetness and moistness; use ripe bananas for the best flavor—three are used throughout the recipe.
- Cream Cheese – Creates a rich, creamy layer; ensure it's at room temperature for easy mixing.
- Confectioners’ Sugar – Sweetens the cream cheese layer; can be substituted with granulated sugar, though texture may vary slightly.
- Pure Vanilla Extract – Enhances overall flavor; use high-quality extract for best results.
- Cool Whip – Adds lightness and stability to the dessert; homemade stabilized whipped cream can be used as an alternative.
For the Pudding
- Instant Banana Pudding – Forms the pudding layer with banana flavor; use an equivalent alternative if the 3.9 oz pack is unavailable, a 3.4 oz pack can work but adjust milk accordingly.
- Milk – Activates the pudding mix for a creamy texture; only 1.5 cups needed for a thicker pudding suitable for slicing.
Step‑by‑Step Instructions for Banana Pudding Dream Bars
Step 1: Prepare the Crust
Start by crushing 20 Golden Oreos in a food processor until they form fine crumbs. In a small saucepan over low heat, melt 4 tablespoons of unsalted butter, then combine it with the Oreo crumbs until moistened. Press this mixture firmly into an ungreased 8x8-inch baking dish to form an even layer. Place the dish in the freezer for 30 minutes to harden the crust.
Step 2: Mix the Pudding
In a mixing bowl, combine the instant banana pudding mix with 1.5 cups of cold milk. Whisk vigorously for about 2 minutes until the mixture is smooth and begins to thicken. Set the bowl aside for a minute to allow the flavors to meld and the pudding to reach its creamy consistency, ensuring a delicious pudding layer for your Banana Pudding Dream Bars.
Step 3: Create the Cheesecake Layer
Take one ripe banana and mash it in a bowl until smooth. In a separate mixing bowl, beat together the cream cheese, 1 cup of confectioners' sugar, and 1 teaspoon of pure vanilla extract until well combined and fluffy. Gently fold in 1 cup of Cool Whip to give the mixture a light and airy texture, preparing a delightful cream cheese layer for your dream bars.
Step 4: Assemble the Bars
Retrieve your chilled Oreo crust from the freezer and slice two ripe bananas into thin rounds. Layer the banana slices evenly over the crust, ensuring each bite will have a touch of banana goodness. Next, carefully spread the cream cheese mixture over the banana layer, followed by pouring the prepared banana pudding on top, creating beautiful layers of flavor for the Banana Pudding Dream Bars.
Step 5: Chill and Serve
Cover the baking dish with plastic wrap and refrigerate the assembled bars for at least 2 hours, allowing them to set properly. Once set, crush any remaining Oreos and sprinkle them over the top for an irresistible finish before slicing the bars into squares. Serve them chilled, and watch as everyone enjoys this delightful no-bake treat!
What to Serve with Banana Pudding Dream Bars
These delightful bars are a perfect canvas for a delicious meal; let's build a beautiful spread around them!
-
Classic Fried Chicken: Crispy, savory, and a Southern staple, the richness of the chicken pairs beautifully with the sweet creaminess of the bars.
-
Fresh Fruit Salad: A vibrant mix of seasonal fruits adds brightness and freshness, complementing the luscious dessert while balancing textures.
-
Chocolate Dipped Strawberries: Indulging in these bite-sized treats can elevate the experience, creating a luxurious contrast to the creamy bars.
-
Minted Lemonade: Refreshing and zesty, this drink cuts through the sweetness, providing a delightful palate cleanser between bites.
-
Homemade Vanilla Ice Cream: The creamy, cool nature of this classic ice cream enhances the banana flavors in the bars for an extra touch of indulgence.
-
Pecan Pie Bars: For dessert enthusiasts, the nutty, caramel flavors of pecan pie bars beautifully echo the comforting notes of banana pudding.
Prepare an inviting dessert table that balances sweet and savory elements, ensuring an unforgettable culinary experience!
Banana Pudding Dream Bars Variations
Feel free to make these delicious Banana Pudding Dream Bars your own by trying out these exciting variations!
-
Chocolate Crust: Substitute Golden Oreos with regular chocolate Oreos for a deeper, more decadent chocolate flavor.
-
Flavored Pudding: Experiment with other instant pudding flavors like vanilla or butterscotch while keeping the banana slices for added texture and taste.
-
Fresh Fruit Topping: Add sliced strawberries, blueberries, or kiwi on top for a refreshing, fruity garnish that enhances both flavor and color.
-
Nutty Twist: Stir in crushed walnuts or pecans into the cream cheese layer for a delightful crunch that contrasts beautifully with the creamy filling.
-
Dairy-Free Option: Swap cream cheese for a dairy-free cream cheese alternative and use coconut whipped cream for a vegan-friendly treat.
-
Extra Sweetness: Drizzle homemade caramel sauce over the assembled bars before chilling for an indulgent caramel flavor that complements the bananas perfectly.
-
Cocoa Powder: Mix a tablespoon of cocoa powder into the cream cheese layer for a chocolatey surprise that will elevate each bite.
-
Spiced Version: Add a pinch of cinnamon or nutmeg to the pudding mixture for an unexpected warming spice that fits beautifully with the banana flavor.
These ideas are just the beginning! You can even try these with my other treats like Peach Crumble Bars or delightfully soft Baked Maple Donut Bars for more sweet inspirations. Enjoy creating your perfect twist!
Make Ahead Options
These No-Bake Banana Pudding Dream Bars are a fantastic option for meal prep, making your dessert planning a breeze! You can prepare the crust and cream cheese filling up to 24 hours in advance; just store them separately in airtight containers in the refrigerator. Additionally, the assembled bars can be refrigerated for an impressive 3 days while still tasting just as delicious! To maintain quality, cover the bars with plastic wrap to keep them moist. When you're ready to serve, simply top with crushed Oreos, slice, and enjoy your effortlessly prepared dessert that will impress family and friends with minimal last-minute effort!
Expert Tips for Banana Pudding Dream Bars
-
Use Ripe Bananas: Select ripe bananas for the best flavor and sweetness; under-ripe bananas won’t provide the same indulgent taste in your bars.
-
Room Temperature Cream Cheese: Always let your cream cheese reach room temperature before mixing—it ensures a smooth, lump-free consistency that elevates your cream cheese layer.
-
Milk Measurement: Stick to 1.5 cups of milk when mixing the pudding; adding too much liquid will result in a runny texture that makes slicing difficult for the Banana Pudding Dream Bars.
-
Proper Chilling: Allow the assembled bars to chill for at least 2 hours—this helps them set properly and taste even better as the flavors meld.
-
Storage Tips: These bars can be made ahead and stored in the fridge for a few days; just cover them well to keep them fresh and delicious.
Storage Tips for Banana Pudding Dream Bars
Fridge: Keep your Banana Pudding Dream Bars covered in the refrigerator for up to 3 days. This ensures they stay fresh and delectable for each serving.
Freezer: For longer storage, freeze the bars tightly wrapped in plastic wrap and then in aluminum foil for up to 2 months. Thaw overnight in the fridge before serving to maintain texture.
Reheating: No need to reheat these no-bake bars. Just slice and serve straight from the fridge or after thawing. Enjoy the creamy layers chilled for the best experience!
Serving Freshness: To prevent sogginess, avoid adding crushed Oreos on top until you’re ready to serve. This keeps the topping crisp and adds that delightful crunch!
Banana Pudding Dream Bars Recipe FAQs
What type of bananas should I use for the best flavor?
Absolutely! Always opt for ripe bananas for your Banana Pudding Dream Bars. Ripe bananas are sweeter and richer in flavor, enhancing the overall taste of your dessert. Aim for bananas that develop small brown spots, indicating they have reached perfect ripeness.
How should I store the Banana Pudding Dream Bars?
Very good question! Keep your Banana Pudding Dream Bars covered in the refrigerator for up to 3 days for optimal freshness. If you happen to have leftovers or want to make them in advance, tightly wrap them in plastic wrap and then in aluminum foil to freeze for up to 2 months. Make sure to thaw them overnight in the fridge before serving to maintain that delightful texture.
Can I freeze the Banana Pudding Dream Bars?
Definitely! To freeze your bars, first, slice them into squares. Wrap each piece in plastic wrap, then place them in an airtight container or a heavy-duty freezer bag. Ensure they are well-sealed to prevent freezer burn. These bars can be frozen for up to 2 months. Just remember to thaw them in the fridge overnight when you’re ready to enjoy!
What can I do if my pudding layer turns out runny?
Oh no! If you find your pudding layer isn't setting properly, it’s often due to using too much milk. Always stick to the recommended 1.5 cups of milk for the instant pudding. To salvage a runny layer, consider chilling it longer to help it thicken or add a bit more instant pudding mix to absorb the extra liquid, whisking it in until smooth.
Are there any alternatives for dairy in the recipe?
Very much so! If you're looking for a dairy-free option, you can substitute the cream cheese with a plant-based cream cheese and use almond or coconut milk for the pudding. Just ensure your plant-based milk is chilled before mixing it with the pudding. This way, you can enjoy the Banana Pudding Dream Bars without compromising on flavor or texture!
Irresistible Banana Pudding Dream Bars to Satisfy Your Sweet Tooth
Ingredients
Equipment
Method
- Crush 20 Golden Oreos in a food processor until they form fine crumbs. Melt 4 tablespoons of unsalted butter in a saucepan and combine with the crumbs. Press into an ungreased 8x8-inch baking dish.
- Combine the instant banana pudding mix with 1.5 cups of cold milk in a mixing bowl. Whisk for about 2 minutes until smooth and thickened.
- Mash one ripe banana until smooth. In another bowl, beat cream cheese, 1 cup of confectioners' sugar, and 1 teaspoon of vanilla extract until fluffy. Fold in 1 cup of Cool Whip.
- Layer sliced bananas over the chilled crust. Spread the cream cheese mixture on top, followed by the banana pudding.
- Cover the dish and refrigerate for at least 2 hours. Sprinkle crushed Oreos on top before serving.


Leave a Reply