
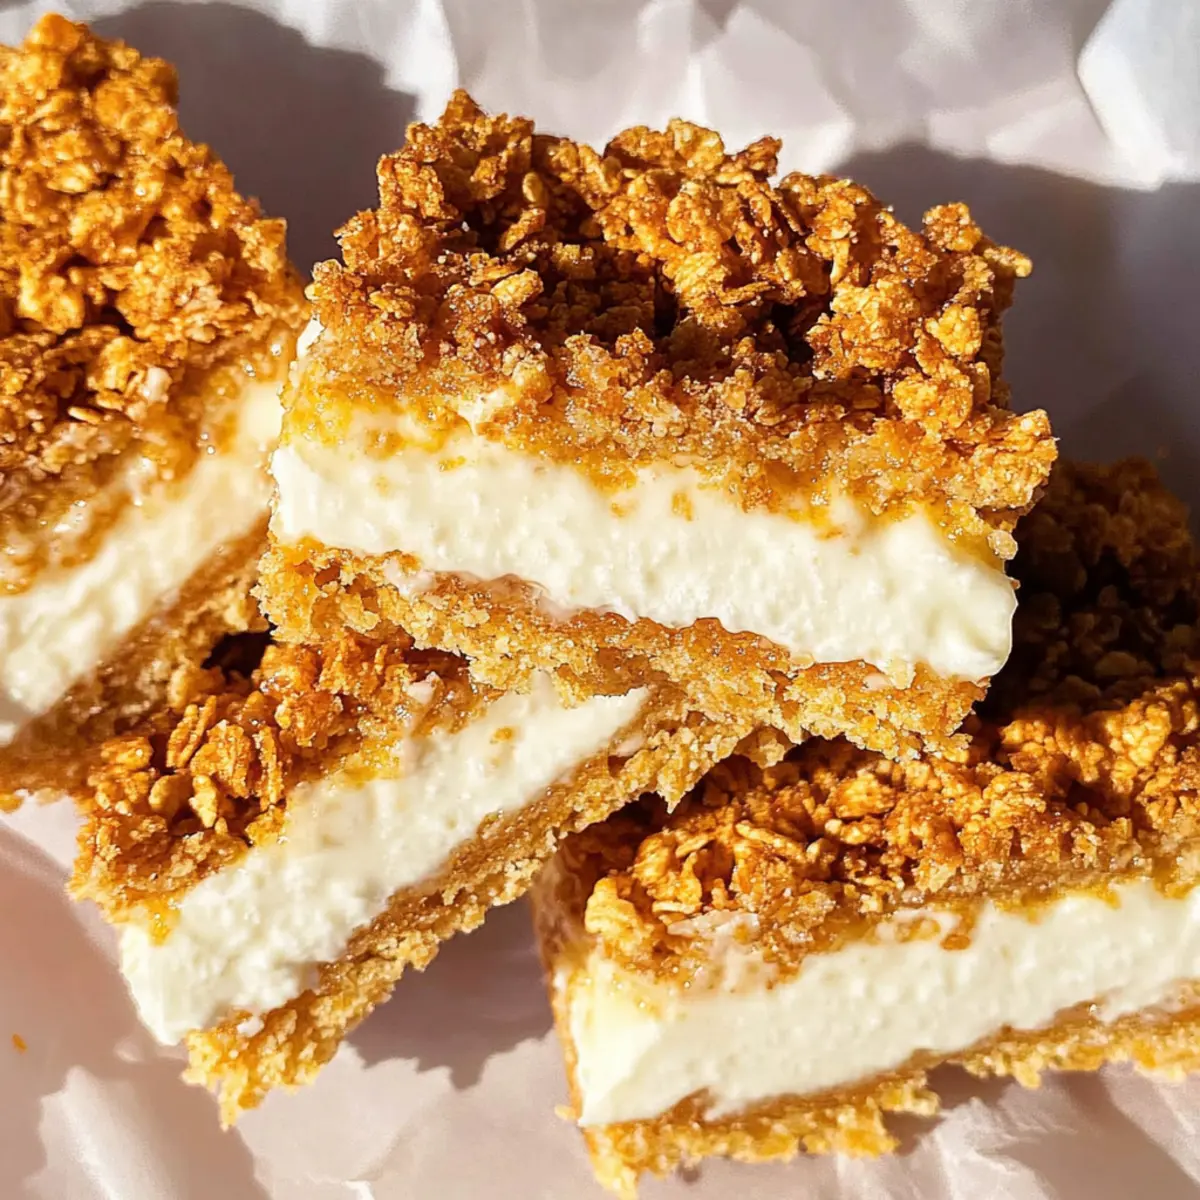
While enjoying breakfast with my kids one sunny morning, I watched as they turned their cereal into a playful masterpiece, transforming every spoonful into a game. That spark of creativity inspired me to whip up these delightful No-Bake Milk and Cereal Bars. A perfect blend of crunchy cornflakes and a silky vanilla filling, these bars are not just a fantastic treat but also a quick and easy dessert to satisfy your sweet tooth. Whether you’re hosting a gathering or simply looking for a fun family snack, these bars are bound to be a crowd-pleaser. Best of all, they can be made without turning on the oven, so you can save time for what truly matters—enjoying those little moments with loved ones. Ready to dive into this sweet adventure? Let’s get started on making your new favorite dessert!
Why Are Milk and Cereal Bars Amazing?
Nostalgic Flavor: These bars capture the essence of childhood mornings, making breakfast fun and delicious again!
Easy to Make: With no baking required, you’ll whip these up in no time, perfect when you’re short on time.
Versatile Arrangements: Feel free to customize with your favorite cereals or flavorful add-ins like chocolate chips for a unique twist!
Perfect for Sharing: Whether it’s a family gathering or a school bake sale, these bars are a hit with everyone.
Make-Ahead Delight: Prepare these bars in advance and store them in the fridge for a quick, tasty treat whenever cravings strike!
You might also enjoy pairing them with some amazing Cheese Croissant Breakfast or serve alongside a refreshing dessert like the Peach Crumble Bars to elevate any get-together!
Milk and Cereal Bar Ingredients
For the Crust
• Cornflakes – Provides the base and structure for the crust; substitute with another crispy cereal if desired.
• Granulated Sugar – Adds sweetness to both the crust and filling; can be adjusted to taste.
• Butter – Binds the crust ingredients together; non-dairy margarine can be used as a substitute.
For the Vanilla Cream Filling
• Whole Milk – Key for the creamy filling; can substitute with almond or oat milk for a lighter version.
• Vanilla Bean – Imparts rich, natural vanilla flavor; vanilla extract can be used as an alternative.
• Large Egg Yolks – Enrich the custard filling and provide a creamy texture; omitting eggs will alter the filling consistency.
• Powdered Gelatin Powder – Assists in setting the custard; vegan gelatin or agar-agar may be used for a plant-based option.
• Heavy Cream – Strikes a balance of rich texture in the filling; whipped topping can substitute for a lighter version.
• Powdered Sugar – Sweetens the whipped cream and helps prevent it from deflating; adjust sweetness to taste.
Topping
• Remaining Cornflake Crumbs – Add to the top for a crunchy finish; use any leftover from the crust preparation.
This easy recipe for Milk and Cereal Bars is sure to become a family favorite. With such simple ingredients, you can indulge in a delightful treat that beautifully combines textures and flavors!
Step‑by‑Step Instructions for Milk and Cereal Bars
Step 1: Make the Cereal Crust
Preheat your oven to 350°F (175°C). In a food processor, crush the cornflakes until fine but still slightly textured. In a medium bowl, melt the butter and mix it with granulated sugar. Stir in the crushed cornflakes until evenly combined, then press firmly into a 9x13 inch baking dish. Bake for 12 minutes until golden brown, and bake the remaining cornflake crumbs for another 5 minutes before cooling them completely.
Step 2: Prepare Vanilla Cream Filling
In a saucepan, bring the whole milk to a gentle simmer along with the scraped seeds from the vanilla bean. While it’s warming, vigorously whisk the egg yolks and additional sugar together until creamy. Gradually pour the warm milk mixture into the yolk mixture, whisking constantly to prevent curdling. Return the mixture to the heat, stirring until it thickens slightly, then incorporate dissolved gelatin. Chill in the fridge until completely cooled, around 2 hours.
Step 3: Combine Cream and Custard
Once the vanilla custard filling is cooled, it’s time to whip up the heavy cream. In a large mixing bowl, beat the heavy cream with powdered sugar until you reach stiff peaks. Gently fold the whipped cream into the cooled custard in thirds, ensuring a smooth and creamy texture for your Milk and Cereal Bars. Be careful not to deflate the whipped cream as you mix to maintain that light and airy feel.
Step 4: Assemble Bars
Spread the luscious vanilla cream filling evenly over the cooled cornflake crust in the baking dish. Take the remaining cornflake crumbs and sprinkle them generously over the top, pressing down gently to adhere. Cover the baking dish with plastic wrap and chill in the refrigerator for at least 4 hours, or ideally overnight, to set the bars perfectly before slicing into delightful squares.
Make Ahead Options
These Milk and Cereal Bars are perfect for meal prep! You can prepare the cereal crust up to 24 hours in advance and store it covered at room temperature to maintain its crispiness. The vanilla cream filling can also be made ahead; simply chill it for up to 3 days in the refrigerator. When you’re ready to enjoy, fold the whipped cream into the cooled custard, then spread it over the crust, top with cornflake crumbs, and chill for at least 4 hours or overnight before slicing. This way, you’ll have delicious homemade bars waiting in the fridge for a quick snack or dessert, saving you time on busy days!
Milk and Cereal Bars Variations
Feel free to explore these delightful twists to elevate your Milk and Cereal Bars. Your creativity can make each batch uniquely delicious!
-
Crunchy Cereal Swap: Use Rice Krispies or Cheerios instead of cornflakes for a different crunchy base. Each cereal brings its own flavor to the table!
-
Chocolate Lovers: Add chocolate chips into the vanilla filling to enrich the flavor with a sweet surprise. Swirls of melted chocolate on top can make them even more decadent.
-
Fruity Burst: Mix in dried fruits like cranberries or apricots for a chewy texture. Not only do they add flavor, but they also bring a pop of color!
-
Nutty Addition: Stir in chopped nuts like almonds or walnuts for a delightful crunch and added nutritional benefits. Just be sure not to overdo it; you want balance in every bite.
-
Creamier Filling: Use cream cheese combined with the heavy cream for an even richer filling. This twist adds a smooth and luscious layer that's irresistibly tasty.
-
Vegan Option: Replace dairy ingredients with plant-based milk, coconut cream, and vegan gelatin for a delicious vegan version that everyone can enjoy. You won’t lose any of the creamy texture!
-
Spice It Up: Add a pinch of cinnamon or nutmeg to the crust for a warm flavor twist. A hint of spice can really awaken the entire bar experience.
-
Fun Shapes: Instead of bars, use cookie cutters to create fun shapes. This is especially fun for kids and makes these treats more playful for parties!
For a complementary treat, try pairing them with a flavorful Cheese Croissant Breakfast or enjoy them alongside a refreshing dessert like the delightful Peach Crumble Bars. Whatever you choose, these variations will keep your dessert table both exciting and irresistible!
Expert Tips for Milk and Cereal Bars
-
Gelatin Matters: Ensure powdered gelatin is fully dissolved before mixing it into the filling; otherwise, your bars won’t set properly.
-
Whipping Wisely: Use a stand mixer when whipping the heavy cream for best results, as it helps achieve stable, fluffy peaks.
-
Crust Caution: Keep an eye on the crust while baking; it should be perfectly golden brown, as overbaking can lead to a tough texture.
-
Egg Alterations: If you’re omitting egg yolks, remember that this will affect the filling's creaminess. Consider using a thickener alternative for best results.
-
Chill Time: Allow adequate chilling time for the bars to set, ideally overnight. Patience pays off in achieving the perfect Milk and Cereal Bars!
What to Serve with No-Bake Milk and Cereal Bars?
To create a delightful spread that enhances your dessert experience, consider these delicious pairings that will keep everyone coming back for more.
-
Fresh Fruit Salad: A vibrant mix of seasonal fruits adds a refreshing contrast to the creamy bars. The sweetness of berries and citrus balances the richness perfectly.
-
Chocolate Dipped Strawberries: Indulgent and sweet, these strawberries bring a touch of elegance to your dessert table. They also add a fun twist that both kids and adults will love.
-
Nutty Granola: Sprinkling crunchy granola on top provides a satisfying texture and nutty flavor that complements the soft, creamy filling of the bars.
-
Creamy Yogurt: A bowl of velvety yogurt offers a delightful dip for your bars. Choose a honey or vanilla-flavored variant for a sweet pairing that enhances the experience.
-
Iced Herbal Tea: Refreshing and lightly sweetened, iced herbal tea quenches your thirst while providing an aromatic contrast to the dessert's richness.
-
Mini Ice Cream Cones: Serve with tiny cones filled with your favorite ice cream for an extra dose of nostalgia! This playful serving suggestion is perfect for summer gatherings.
-
Coconut Whipped Cream: Light and fluffy, this tropical twist enhances the creamy layers of the bars while adding a delightful hint of coconut flavor.
-
Chocolate Milk: This classic beverage echoes the cereal vibe, delighting both kids and adults. For a fun twist, serve it chilled with ice!
How to Store and Freeze Milk and Cereal Bars
Fridge: Store the Milk and Cereal Bars in an airtight container in the refrigerator for up to 1 week. This keeps them fresh and delicious for daily snacking.
Freezer: For longer storage, wrap the bars individually in plastic wrap and place them in a freezer-safe container. They can be frozen for up to 2 months; just thaw in the fridge before enjoying.
Make-Ahead: These bars can be prepared ahead of time! Make them a day before your event and chill, giving flavors time to meld beautifully while saving you time.
Reheating: While these bars are best served chilled, if you prefer a softer texture, let them sit at room temperature for about 15 minutes before serving.
Milk and Cereal Bars Recipe FAQs
How should I select ripe ingredients?
Absolutely! For the best results in your Milk and Cereal Bars, the key is selecting the freshest ingredients. Use crisp cornflakes without any signs of staleness or a broken texture. Look for butter that is kept chilled to avoid separation. Your milk should also be fresh, so check the expiration date—nothing beats that creamy texture from a good quality whole milk!
How do I store Milk and Cereal Bars?
I recommend placing your Milk and Cereal Bars in an airtight container in the refrigerator, where they’ll stay fresh for up to 1 week. This method helps maintain their wonderful texture and flavor. Just make sure to avoid any direct exposure to air, as that can lead to softening or mushiness over time!
Can I freeze the Milk and Cereal Bars?
Yes! Freezing these bars is a great option for longer storage. To do this, wrap each bar individually in plastic wrap and place them in a freezer-safe container. They can be kept for up to 3 months. When you’re ready to enjoy them, just thaw in the refrigerator overnight, and they’ll be perfect for snacking!
What should I do if my filling doesn’t set properly?
Very! If your vanilla cream filling isn't setting, it’s likely the gelatin wasn't fully dissolved. To fix this, make sure you sprinkle the gelatin over cold water and let it bloom for a few minutes before mixing it with your warm ingredients. Next time, ensure to stir continuously while heating, then chill it completely as instructed. Patience is key here!
Are there any allergy concerns I should be aware of?
Absolutely! For those with dietary restrictions, ensure to check for allergies to the egg yolks, dairy, or gelatins used in the bars. For a vegan version, substitute egg yolks with a thickener like cornstarch mixed with almond milk, and choose a plant-based gelatin alternative, like agar-agar. It’s always good to ask about allergies when serving these bars.
How can I customize my Milk and Cereal Bars?
The more the merrier! You can easily personalize your Milk and Cereal Bars by swapping out cornflakes for other crispy cereals like Rice Krispies or Cheerios. You can also mix in exciting add-ins like chocolate chips, dried fruits, or nuts to elevate the flavor and make it uniquely yours. Just remember to maintain the overall structure of the bars!
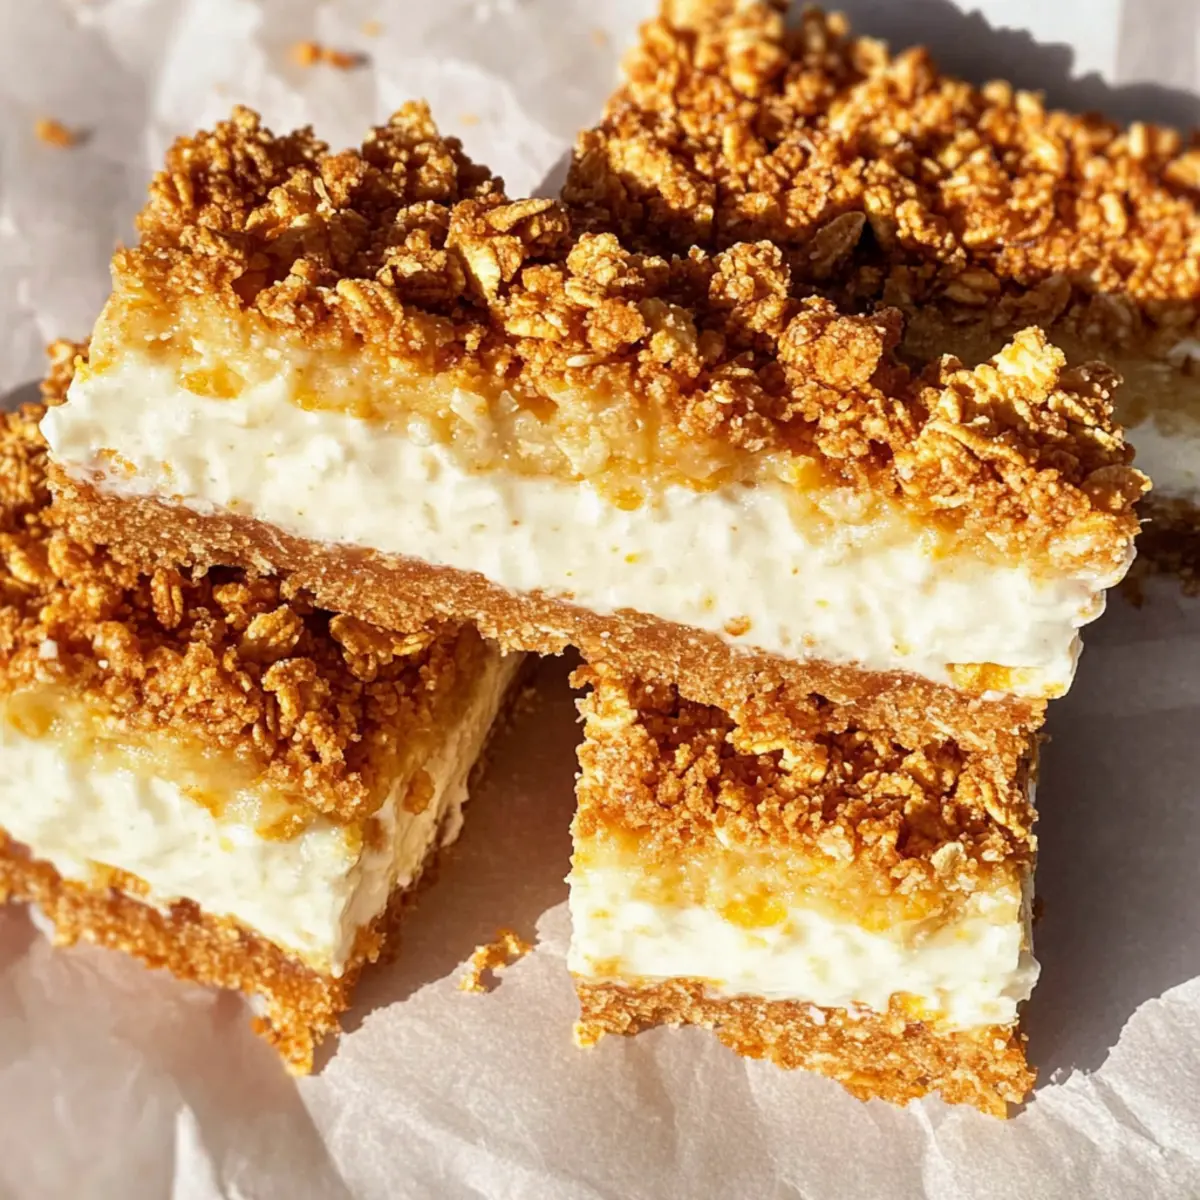
Creamy Milk and Cereal Bars for a Nostalgic Treat
Ingredients
Equipment
Method
- Preheat your oven to 350°F (175°C). In a food processor, crush the cornflakes until fine but still slightly textured. In a medium bowl, melt the butter and mix it with granulated sugar. Stir in the crushed cornflakes until evenly combined, then press firmly into a 9x13 inch baking dish. Bake for 12 minutes until golden brown, and bake the remaining cornflake crumbs for another 5 minutes before cooling them completely.
- In a saucepan, bring the whole milk to a gentle simmer along with the scraped seeds from the vanilla bean. While it’s warming, vigorously whisk the egg yolks and additional sugar together until creamy. Gradually pour the warm milk mixture into the yolk mixture, whisking constantly to prevent curdling. Return the mixture to the heat, stirring until it thickens slightly, then incorporate dissolved gelatin. Chill in the fridge until completely cooled, around 2 hours.
- Once the vanilla custard filling is cooled, it’s time to whip up the heavy cream. In a large mixing bowl, beat the heavy cream with powdered sugar until you reach stiff peaks. Gently fold the whipped cream into the cooled custard in thirds, ensuring a smooth and creamy texture for your Milk and Cereal Bars. Be careful not to deflate the whipped cream as you mix.
- Spread the vanilla cream filling evenly over the cooled cornflake crust in the baking dish. Take the remaining cornflake crumbs and sprinkle them generously over the top, pressing down gently to adhere. Cover the baking dish with plastic wrap and chill in the refrigerator for at least 4 hours, or ideally overnight, to set the bars perfectly before slicing into squares.


Leave a Reply