
With a glance at my colorful kitchen counter filled with scattered wrappers and half-opened bags of Halloween candy, I suddenly found myself in a familiar dilemma: how can I turn these spooky leftovers into something delightful? Enter my Halloween Rocky Road Slices—a no-bake treat that’s incredibly easy to whip up and truly a crowd-pleaser for all ages. Packed with a mix of crunchy, chewy, and gooey goodness, these slices not only make the perfect festive dessert but are also adaptable to whatever treats you've got leftover. Whether it's for a Halloween gathering or a cozy night in, you'll love how simple and fun these slices are to prepare. Curious to see how your leftover candy can transform into a deliciously festive masterpiece?
Why Make Halloween Rocky Road Slices?
Irresistible No-Bake Joy: This recipe requires no baking, making it perfect for busy individuals or anyone wanting a simple, mess-free dessert.
Fun for All Ages: Kids will love helping out in the kitchen, turning leftover candy into fun decorative treats.
Endless Customization: Use any candy you have on hand to craft unique slices, ensuring nothing goes to waste after Halloween.
Visual Appeal: With vibrant colors from candy melts and decorations, these slices are not just tasty but also a feast for the eyes!
Quick and Easy: You can prepare these bites in under an hour, making them an effortless option for last-minute gatherings.
Transform your Halloween leftovers into something magical with these delightful Rocky Road Slices that everyone will adore!
Halloween Rocky Road Slices Ingredients
For the Base
• Semi-sweet chocolate chips – Provides a rich chocolate flavor; can be swapped with dark or milk chocolate for a different taste.
• Butter – Adds creaminess; use unsalted for better salt control.
• Salt – Enhances chocolate flavor; just a pinch will do!
For the Crunch
• Roasted peanuts – Adds a delightful crunch; substitute with any nuts or omit for nut allergies.
• Mini marshmallows – For a chewy texture; any color or type works wonderfully.
For the Candy
• Kit Kat bars – Contributes a crunchy texture; feel free to replace with any chocolate candy bars you prefer.
• Gummy worms – Fun decoration for a playful touch; both regular and sour varieties are great!
• M&M candy – Adds color and fun, ideally in Halloween-themed colors.
• Candy eyes – Perfect for a spooky Halloween look; optional if not on hand.
• Halloween sprinkles – For an extra festive flair; totally optional, but who can resist sprinkles?
For Decoration
• Candy melts – Use to create vibrant designs; select colors that scream Halloween, or use any melting chocolate as an alternative.
With these ingredients in hand, you'll be well on your way to crafting your catchy Halloween Rocky Road Slices, perfect for satisfying those sweet cravings this spooky season!
Step‑by‑Step Instructions for Halloween Rocky Road Slices
Step 1: Prepare the Baking Pan
Start by lining an 8 or 9-inch square baking pan with parchment paper, allowing some overhang for easy removal later. This will help your Halloween Rocky Road Slices release easily when set. Ensure the parchment is smooth against the edges for an even cut.
Step 2: Melt Chocolate and Butter
In a microwave-safe bowl, combine semi-sweet chocolate chips and butter. Microwave on high for 30 seconds, then stir; continue this process until fully melted and smooth, taking care not to burn the chocolate. The mixture should be glossy and cohesive, ready to form your rich base.
Step 3: Prepare Candy Melts
While the chocolate mixture cools, melt your candy melts in separate bowls according to the colors you want for decoration. Heat each bowl in the microwave at 20-30 second intervals, stirring until melted and smooth. This vibrant addition will make your Halloween Rocky Road Slices truly eye-catching.
Step 4: Cut Candy Bars
Next, take your Kit Kat bars and any other chocolate bars you plan to use, cutting them into small pieces. This will ensure that they distribute evenly throughout the chocolate mixture, adding a delightful crunch to the rocky road slices. Set these aside for later incorporation.
Step 5: Combine the Mixture
Once the chocolate mix has cooled slightly, stir in the roasted peanuts and chopped candy bars. Follow with the mini marshmallows, folding gently to combine. Be cautious not to overmix, as you want the marshmallows to maintain their structure while blending into the Halloween Rocky Road Slices.
Step 6: Pour into the Pan
Pour the chocolate mixture into the prepared pan, ensuring an even layer. Create dollops of the melted candy melts across the surface before swirling them gently into the chocolate mix. This will create a beautiful marbled effect when set and add a fun burst of color throughout.
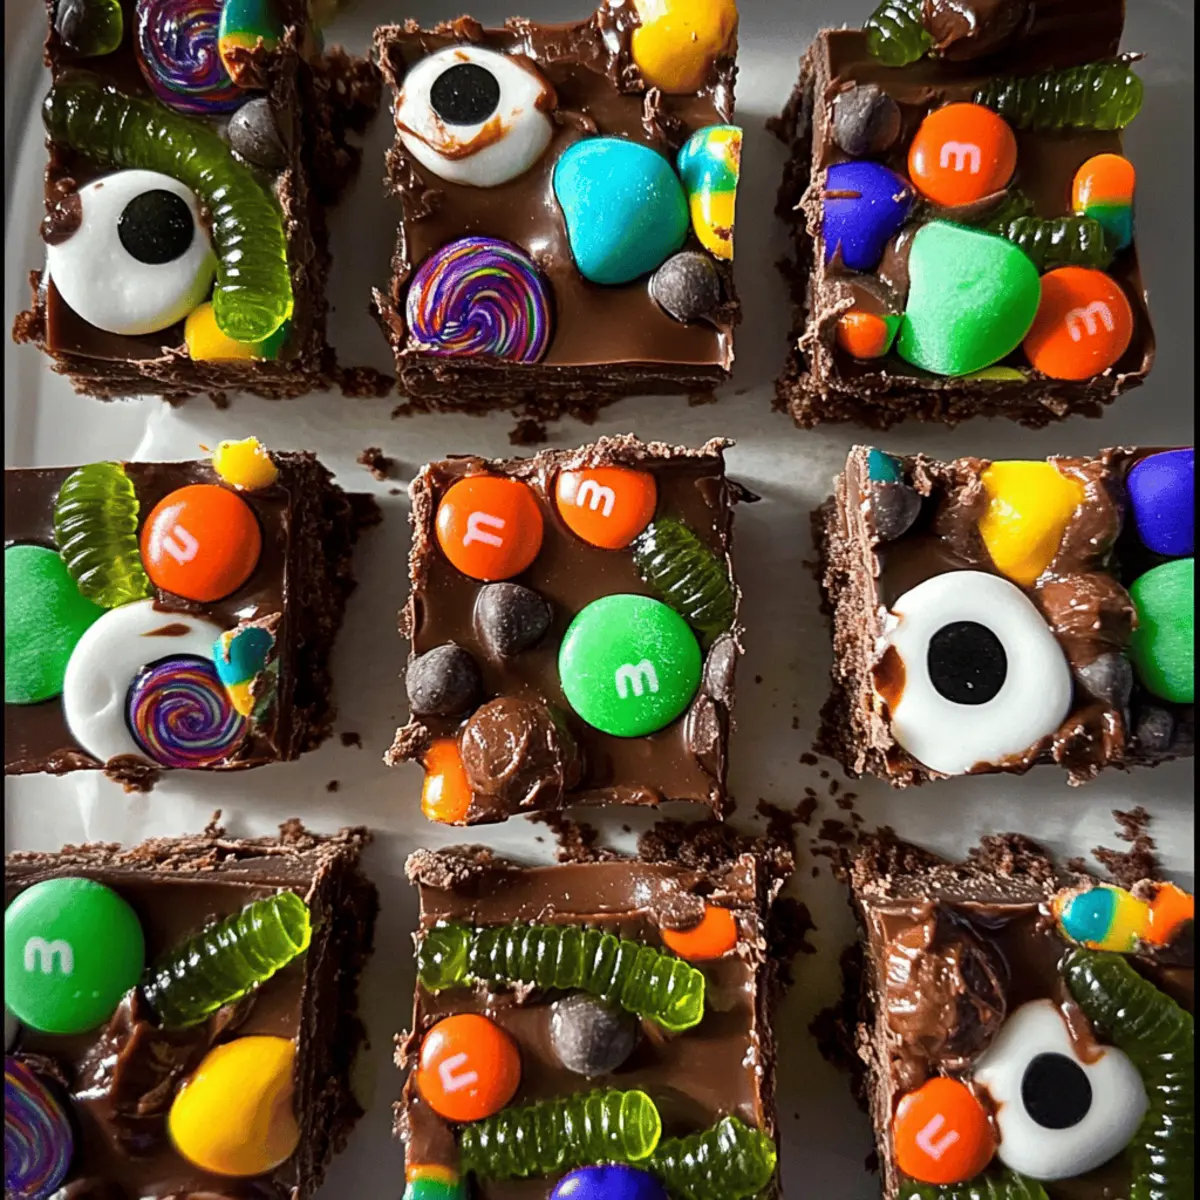
Step 7: Add Festive Decorations
Now it's time to decorate your treats! Scatter gummy worms, M&Ms, candy eyes, and Halloween sprinkles over the top of the mixture. Make sure to avoid the cut lines; this will make slicing easier later. The decorations are essential for that festive flair Halloween Rocky Road Slices are known for!
Step 8: Chill to Set
Place your prepared pan into the refrigerator to allow the mixture to set. Ideally, let it chill for at least 4 hours or overnight for the best results. The chocolate should be firm but soft enough to cut cleanly into slices, revealing your beautifully layered Halloween Rocky Road Slices.
Step 9: Slice and Serve
After chilling, remove the Rocky Road Slices from the pan using the parchment paper overhang. With a sharp knife, slice into squares, wiping the knife between cuts for clean edges. Serve these delightful creations chilled or at room temperature at your upcoming Halloween gatherings!
Make Ahead Options
These Halloween Rocky Road Slices are perfect for meal prep, allowing busy home cooks to get ahead during the spooky season! You can prepare the entire mixture up to 24 hours in advance; simply follow the recipe up until the chilling step. After spreading the mixture in the pan, cover it tightly with plastic wrap to maintain freshness and prevent odor absorption from the refrigerator. When you're ready to serve, simply remove from the fridge, slice into squares, and enjoy! These treats will taste just as delicious as if made fresh, making them ideal for last-minute Halloween gatherings or cozy family nights.
Expert Tips for Halloween Rocky Road Slices
-
Cooling Down: Make sure the chocolate mixture cools slightly before adding marshmallows to prevent them from melting. This keeps your slices chewy!
-
Marking for Slicing: Lightly mark the pan with a knife before the mixture sets. This creates guide lines for even slicing later on.
-
Warmed Knife Trick: For neat, clean cuts, warm your knife in hot water before slicing your Halloween Rocky Road Slices.
-
Candy Overload Caution: Avoid adding too many decorative candies at once, as this can lead to difficulties in setting and slicing the dessert.
With these tips in hand, you’ll be well-equipped to create the perfect Halloween Rocky Road Slices!
What to Serve with Halloween Rocky Road Slices
Creating a spooky sweet feast? Discover delightful pairings that heighten the fun and flavor of these festive no-bake treats.
-
Whipped Cream: Light and airy, this complements the rich chocolate slices, perfect for kids and adults alike. A dollop on the side adds a touch of indulgence!
-
Hot Chocolate: Cozy and warm, invoking childhood memories. Pairing rich chocolate slices with this comforting drink creates a delightful contrast of temperatures.
-
Fruit Salad: Fresh, vibrant fruit provides a refreshing counterpoint to the sweetness of the slices. Choose seasonal fruits for a colorful and nutritious addition.
-
Pumpkin Spice Cake: Embrace the flavors of autumn with this spiced cake that harmonizes beautifully with the sweet and crunchy elements of the Rocky Road.
-
Ice Cream: A scoop of vanilla or pumpkin ice cream complements the candy-studded slices perfectly. The creamy texture balances the crunchy and chewy bites.
-
Gingerbread Cookies: Bring a festive cheer to your table! The spiced warmth of these cookies pairs splendidly with the rich sweetness of your Halloween dessert.
-
Cider Punch: A refreshing, spiced drink to bring a lovely contrast to your Halloween treat. The festive flavors accentuate the seasonal spirit.
-
Chocolate Milkshake: Thick and creamy, this indulgent drink will thrill chocolate lovers while complementing the bites of Halloween Rocky Road Slices.
-
Halloween-Themed Charcuterie Board: A mix of savory bites alongside your sweet treats can create a wonderful experience. Everything from cheeses to mini candies enhances the festivities!
How to Store and Freeze Halloween Rocky Road Slices
Fridge: Store your Halloween Rocky Road Slices in an airtight container in the refrigerator for up to 1 week. This ensures they stay fresh while keeping that lovely chewy texture.
Freezer: For long-term storage, wrap the slices individually in plastic wrap and place them in a freezer-safe container. They can be frozen for up to 2 months.
Thawing: When ready to enjoy, remove the desired number of slices from the freezer and let them thaw in the fridge for a few hours or at room temperature for about 30 minutes before serving.
Reheating: There's no need to reheat these slices, as they are best enjoyed chilled or at room temperature!
Halloween Rocky Road Slices Variations
Feel free to get creative and customize your Halloween Rocky Road Slices with these fun variations!
-
Nut-Free: Replace roasted peanuts with sunflower seeds or simply omit them. These slices can still be irresistibly delicious without nuts!
-
Choco-Peanut Crossover: Mix in crumbled Reese's Peanut Butter Cups for a delightful, nutty flavor that combines chocolate and peanut butter bliss.
-
Chewy Fruit Twist: Add dried fruits like cranberries or apricots alongside the marshmallows for a fruity surprise that complements the chocolate beautifully.
-
S'mores-Inspired: Swap some candy bars for graham cracker pieces and include mini marshmallows to mimic that classic campfire dessert.
-
Spicy Kick: Add a sprinkle of chili powder to the melted chocolate for a surprising heat that harmonizes with the sweetness—a unique twist that adventurous eaters might crave!
-
Drizzle Delight: Instead of candy melts, drizzle with homemade or store-bought caramel sauce for an extra layer of sweetness and richness.
-
Holiday Colors: Prepare your slices with red and green candy melts for a festive holiday spin after Halloween has passed—keeping the fun going all season!
-
Pumpkin Spice Boost: Incorporate a teaspoon of pumpkin spice into the melted chocolate for a warm, seasonal flavor that’s perfect for autumn.
Remember, the essence of these slices lies in their adaptability, so don’t be afraid to experiment and make them truly yours! For more fun ideas on utilizing leftover candy, check out our suggestions on incorporating treats in new ways! You’ll find that using leftovers can inspire delightful concoctions year-round!
Halloween Rocky Road Slices Recipe FAQs
How do I choose the best chocolate for my Halloween Rocky Road Slices?
Absolutely! For a rich flavor, semi-sweet chocolate chips are a must. However, you can easily swap them for dark or milk chocolate based on your taste preference. Just be mindful that varying chocolates might change the sweetness and texture slightly. Always opt for high-quality chocolate for the best results!
How long can I store my Halloween Rocky Road Slices?
Once made, these delicious slices can be stored in an airtight container in the refrigerator for up to 1 week. This keeps them fresh while preserving their delightful chewy texture. Just be sure to keep them covered to prevent any absorption of odors from the fridge!
Can I freeze my Halloween Rocky Road Slices?
Very! For long-term storage, individually wrap each slice in plastic wrap and place them inside a freezer-safe container. They can be frozen for up to 2 months. When you’re ready to enjoy, take them out of the freezer and let them thaw in the refrigerator for a few hours, or at room temperature for about 30 minutes.
What if my chocolate mixture is too hot when adding marshmallows?
To avoid melting the marshmallows, let the chocolate mixture cool down a little until it's just warm. Aim for a temperature where you can comfortably touch the bowl without burning yourself—about 110°F (43°C) is perfect. This ensures the marshmallows retain their lovely chewy texture while blending with the chocolate.
Can I substitute ingredients in my Halloween Rocky Road Slices?
The more the merrier! You can substitute roasted peanuts with sunflower seeds or omit nuts altogether if allergies are a concern. Additionally, if you have leftover candies like Twix or Snickers, feel free to throw them in for extra flavor. Adjust the sweetness level by varying the amount of candy, based on your preference!
Halloween Rocky Road Slices That’ll Delight Everyone
Ingredients
Equipment
Method
- Prepare the Baking Pan: Start by lining an 8 or 9-inch square baking pan with parchment paper, allowing some overhang for easy removal later.
- Melt Chocolate and Butter: In a microwave-safe bowl, combine semi-sweet chocolate chips and butter. Microwave on high for 30 seconds, then stir; continue this process until fully melted and smooth.
- Prepare Candy Melts: Melt your candy melts in separate bowls according to the colors you want for decoration, heating each bowl at 20-30 second intervals.
- Cut Candy Bars: Cut your Kit Kat bars and any other chocolate bars into small pieces.
- Combine the Mixture: Once the chocolate mix has cooled slightly, stir in the roasted peanuts and chopped candy bars. Follow with the mini marshmallows.
- Pour into the Pan: Pour the chocolate mixture into the prepared pan, ensuring an even layer. Create dollops of melted candy melts across the surface before swirling them gently.
- Add Festive Decorations: Scatter gummy worms, M&Ms, candy eyes, and Halloween sprinkles over the top of the mixture, avoiding the cut lines.
- Chill to Set: Place your prepared pan into the refrigerator to allow the mixture to set for at least 4 hours or overnight.
- Slice and Serve: After chilling, remove the Rocky Road Slices from the pan using the parchment paper overhang and slice into squares.


Leave a Reply