
As I stood in my kitchen, the scent of baking cake wafted through the air, instantly transporting me to the thrill of childhood Halloween parties. Halloween Cake Pops are not just treats; they're miniature hand-held treasures brimming with festive charm. Easily adaptable to your little ghosts and goblins' preferences, this recipe allows you to whip up delightful cake pops that are as much fun to create as they are to eat. What I love most is their versatility—easily made using a boxed cake mix to save time, yet perfect for crafting unique, spooky designs that will impress even the pickiest eaters. Whether it's a school event or a family gathering, these cake pops are guaranteed to bring smiles. Are you ready to unleash your inner cake artist and make this festive treat? Let’s dive into the delicious world of Halloween Cake Pops!
Why Will You Love Halloween Cake Pops?
Kid-friendly, these cake pops are a hit with both children and adults, making them an ideal treat for any Halloween gathering. Customizable designs ensure everyone can create their spooky character, from mummies to monsters. Quick preparation means you can whip them up using a boxed mix if you're short on time. Rich flavors come from your choice of cake and frosting, allowing for personal touches. Plus, fun decorations like candy eyes and sprinkles make every pop a delightful surprise, sure to impress at parties or as lunchbox treats. Don't forget to check out my other festive ideas like Copycat Birthday Cake and Chocolate Zucchini Cake for more inspiration!
Halloween Cake Pops Ingredients
These ingredients will help you create delightful Halloween Cake Pops that are perfect for any spooky celebration!
For the Cake
- Cake mix – Use a boxed mix for convenience or your favorite homemade recipe for a personal touch.
- Eggs – Vital for binding and providing moisture; follow package instructions for quantities.
- Oil – Adds richness to the cake; any neutral oil will work well.
- Water – Essential for keeping the cake moist; use as directed on the cake mix package.
For the Frosting
- Frosting – This binds the cake crumbs together and adds flavor; choose a contrasting flavor, like chocolate or vanilla, to complement your cake.
For Coating the Pops
- Chocolate or Candy Melts – Choose your favorite chocolate or colorful candy melts to coat your cake pops, adding to the festive appearance.
- Coconut oil or shortening – A small amount enhances the smoothness of melted chocolate for easier dipping.
For Decorations
- Sprinkles – Opt for Halloween-themed sprinkles to add a festive touch to your pops.
- Candy eyes – These fun additions can transform your cake pops into spooky creatures!
- Edible glitter – Use this for an extra sparkle to make your Halloween treats magical.
With these ingredients at your disposal, you’re all set to create some unforgettable Halloween Cake Pops!
Step‑by‑Step Instructions for Halloween Cake Pops
Step 1: Prepare Cake
Begin by baking your cake according to the package or recipe instructions, using a cake mix or your favorite homemade batter. Preheat your oven to the specified temperature, usually around 350°F (175°C), and grease your pan. Once baked, allow the cake to cool completely on a wire rack. The cooled cake should feel firm yet spongy to the touch, indicating it’s ready for crumbling.
Step 2: Crumble Cake
Once the cake is fully cooled, transfer it to a large mixing bowl. Using your hands, crumble the cake into fine crumbs until no large pieces remain. The consistency should resemble moist sand, which helps in forming the Halloween Cake Pops later on. Take your time to break apart any sections, ensuring an even texture for blending.
Step 3: Mix with Frosting
Add your chosen frosting to the crumbled cake, starting with a few spoonfuls. Use a spatula or your hands to mix, combining thoroughly until the mixture is cohesive and moldable. It should be moist enough to hold together without being overly sticky. This step is essential for achieving the perfect texture in your Halloween Cake Pops.
Step 4: Shape Pops
Begin forming the cake mixture into small balls, about 1 inch in diameter, and place them on a lined baking sheet. You can use a scoop to ensure uniform size, which helps in achieving a consistent look. This is the fun part where you can let your creativity flow, thinking about the spooky designs you’ll create for your cake pops.
Step 5: Chill
Refrigerate the shaped cake balls for about 30 minutes. This chilling step firms up the cake pops, making them easier to handle when you insert the lollipop sticks. Once chilled, they should feel slightly hardened to the touch, ensuring they won’t break apart during the next steps.
Step 6: Coat with Chocolate
While your cake pops chill, melt chocolate or candy melts in a microwave-safe bowl or over a double boiler. Heat in short intervals, stirring until smooth. Dip the tip of each lollipop stick into the melted chocolate, then insert it halfway into each cake ball. Afterward, fully coat each pop in the melted chocolate, smoothing with a spoon to ensure complete coverage.
Step 7: Decorate
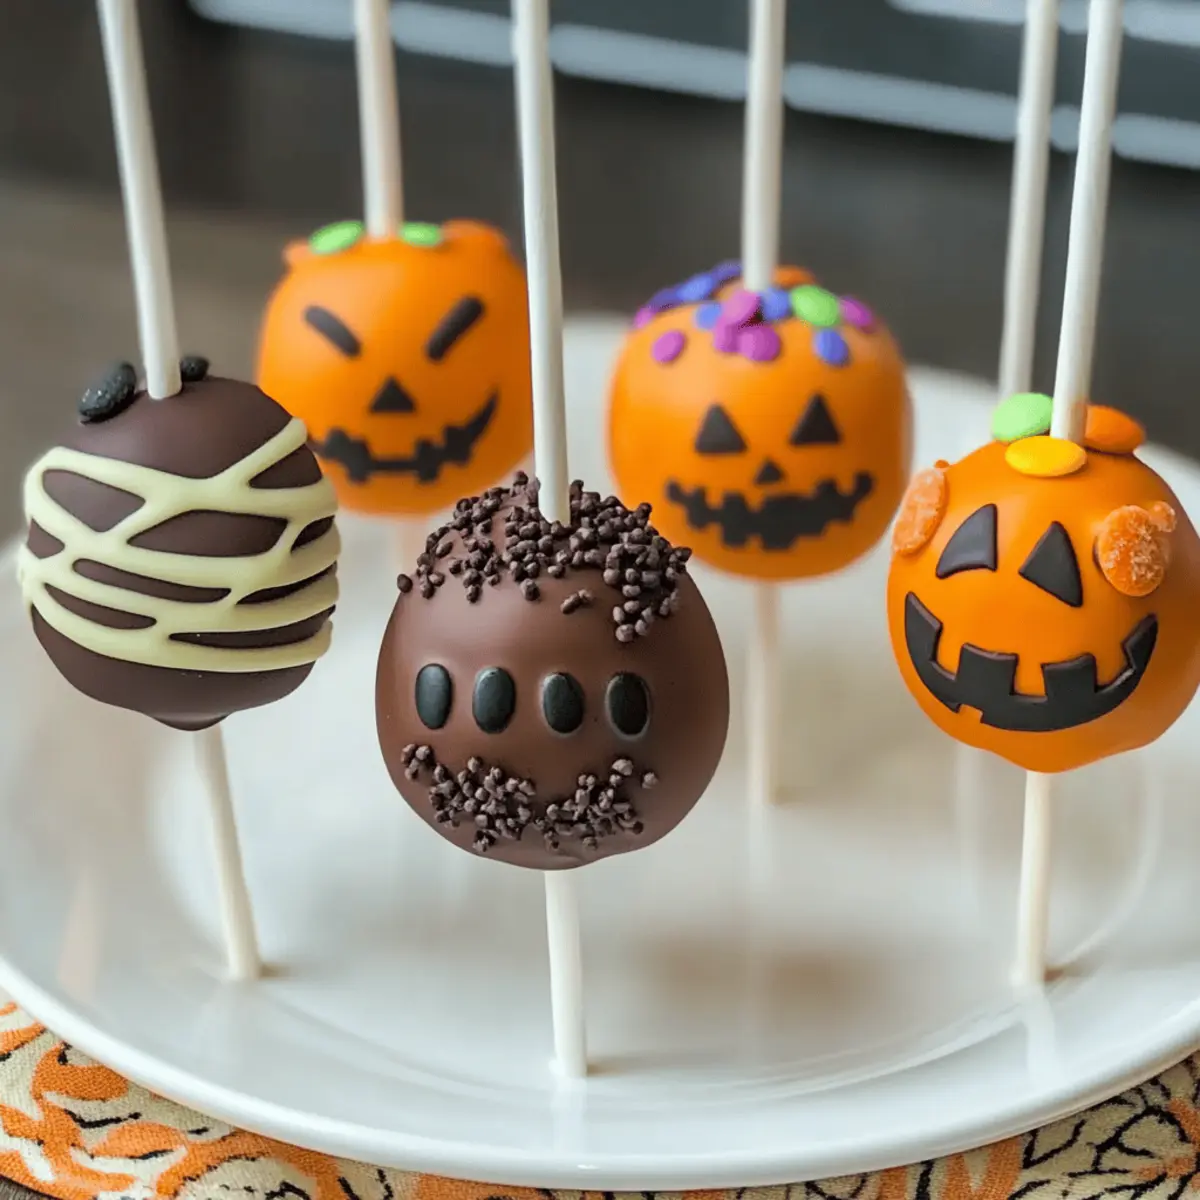
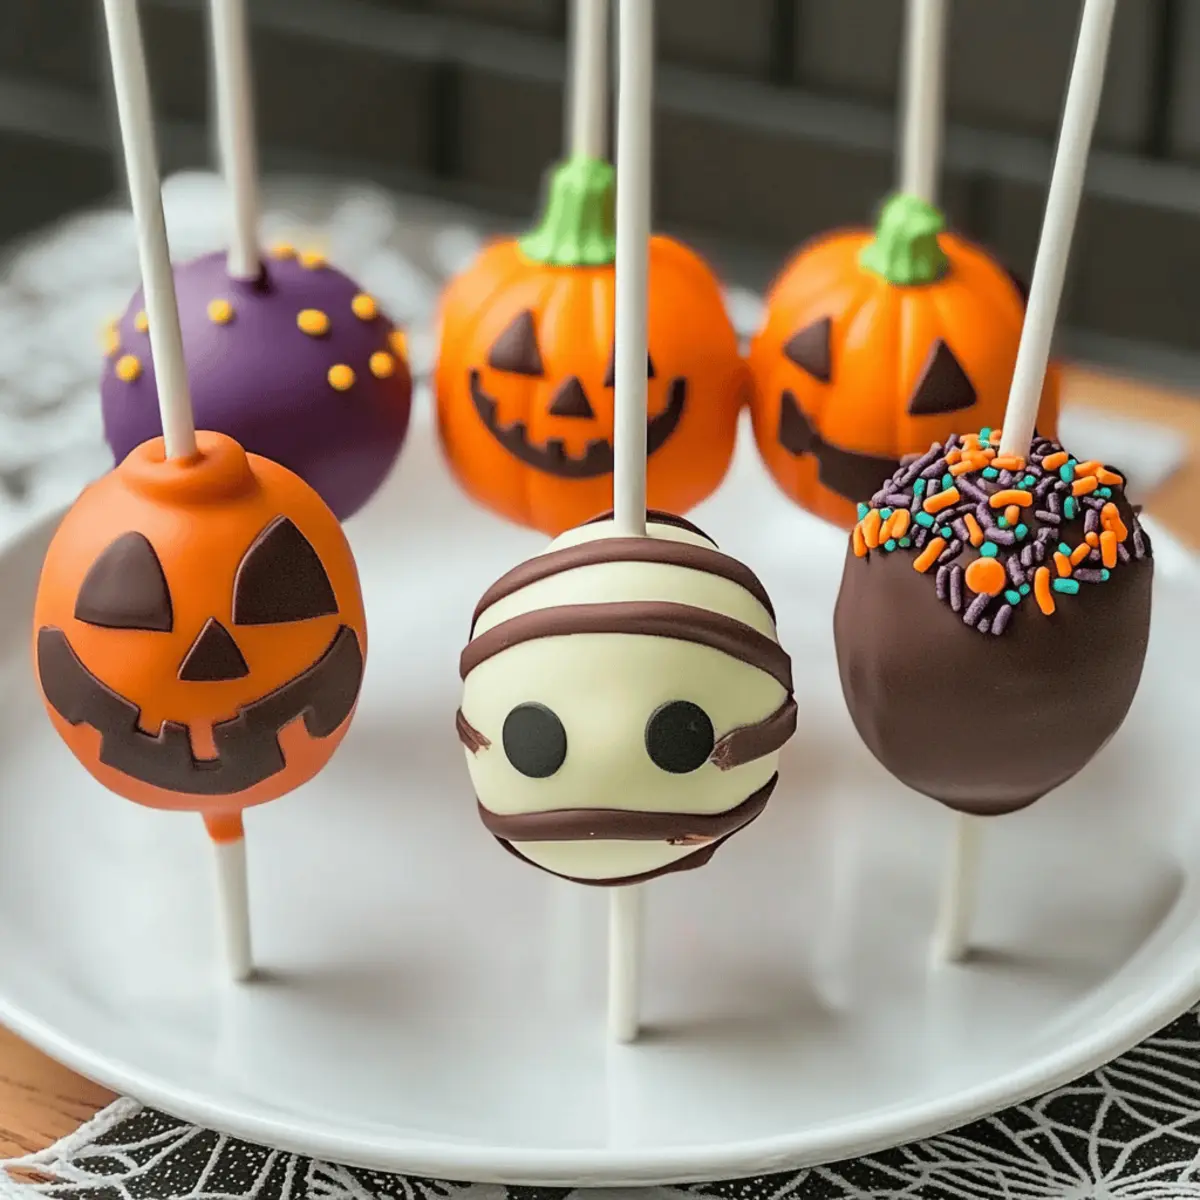
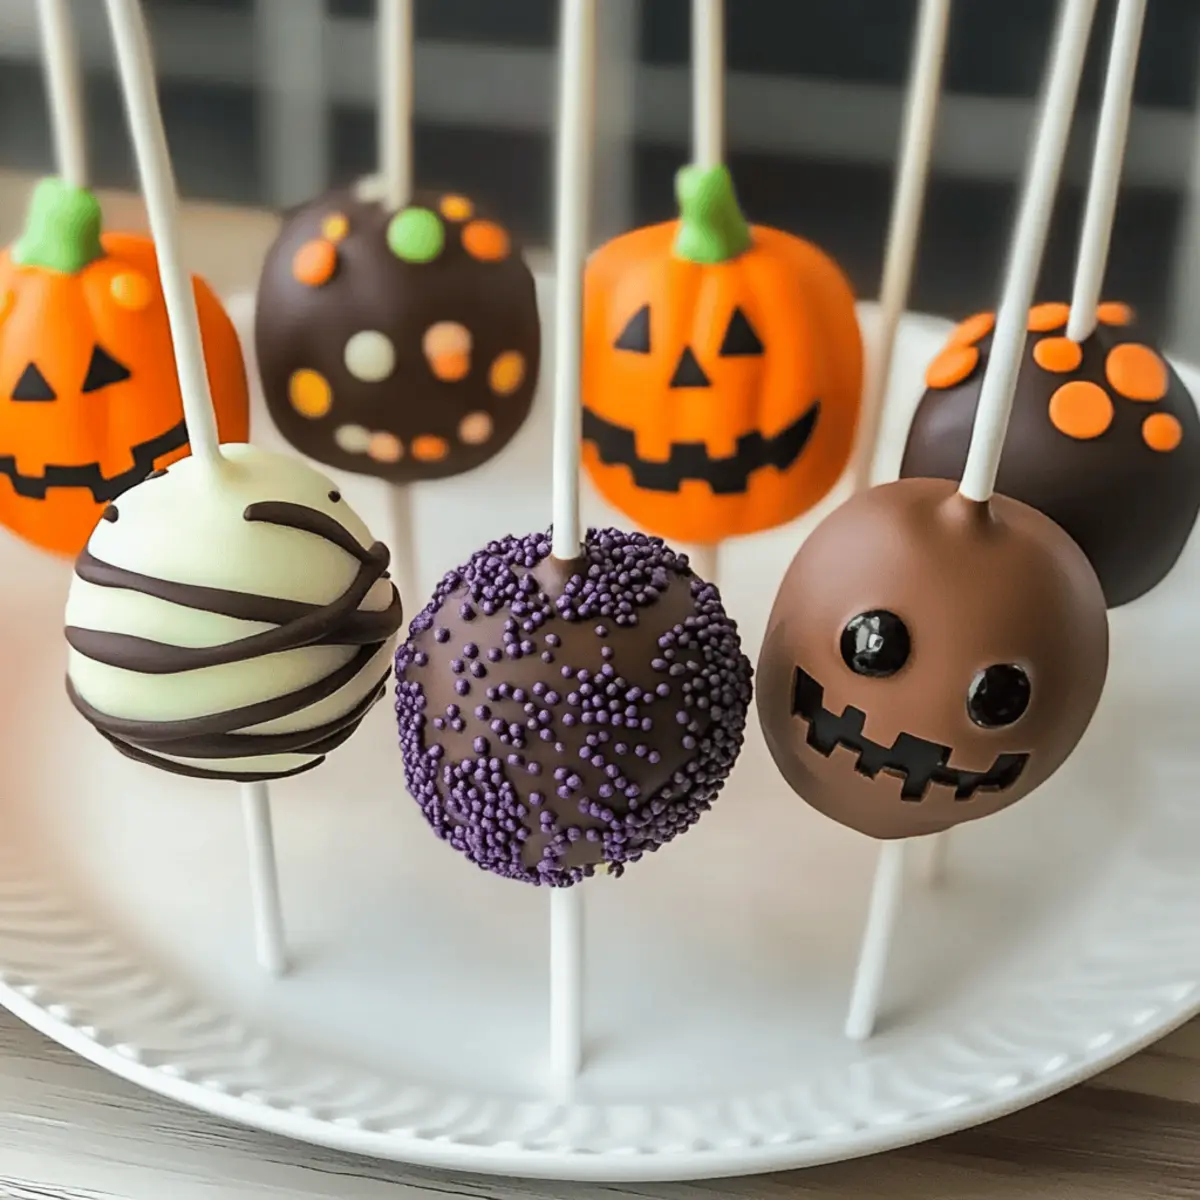
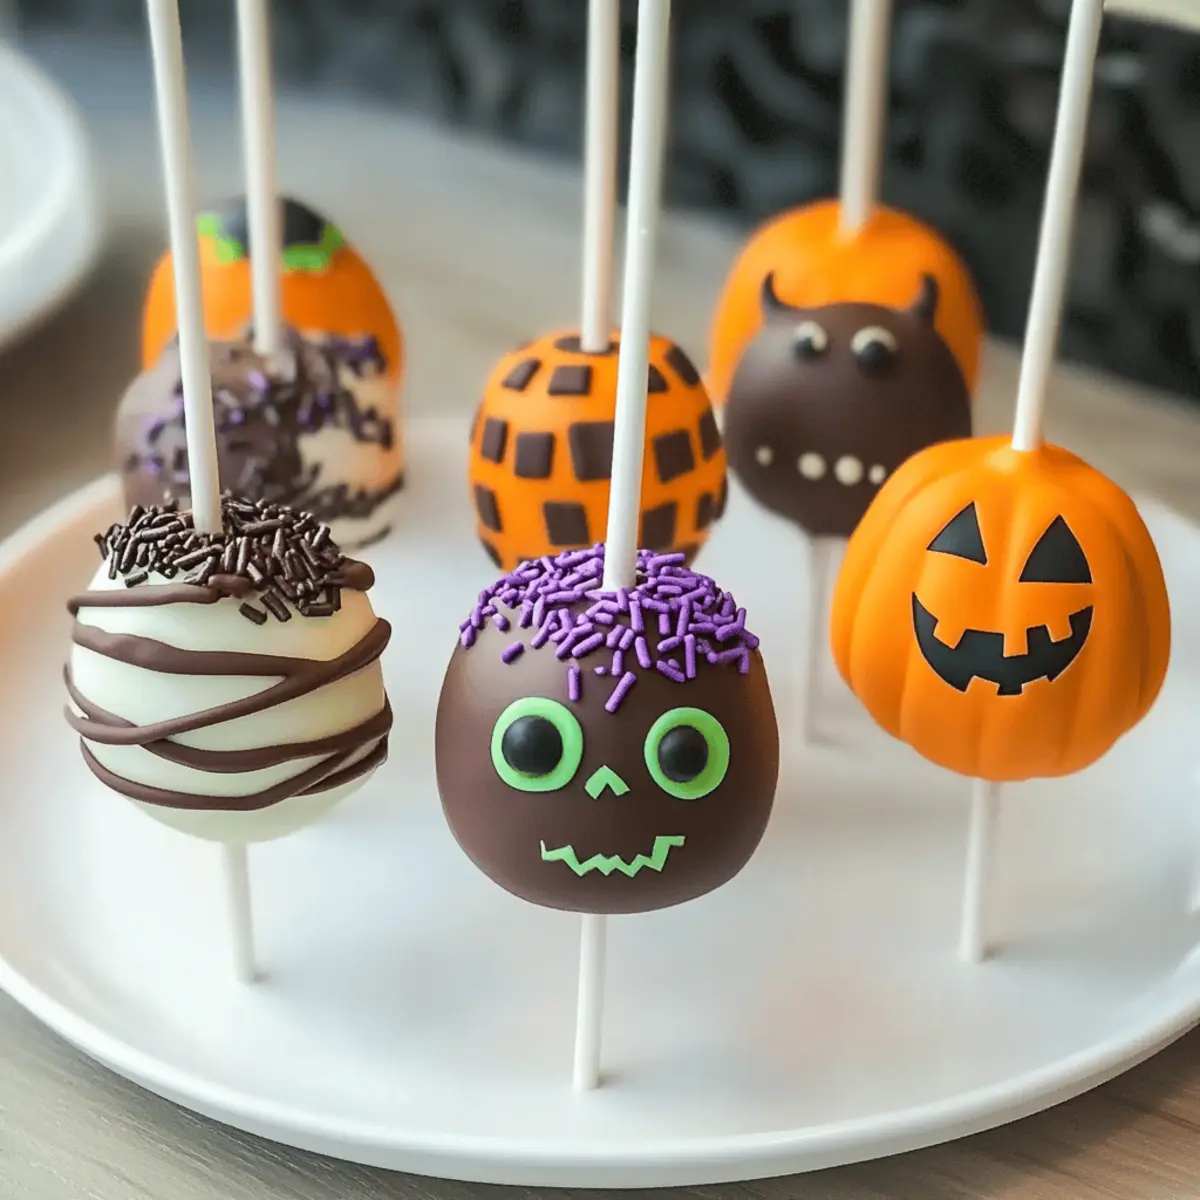
Immediately after coating each Halloween Cake Pop, decorate while the chocolate is still wet. Sprinkle with Halloween-themed decorations, candy eyes, or edible glitter to get them into the spooky spirit. Be as creative as you like—think pumpkins, ghosts, or even monsters! This is where each cake pop becomes a unique little masterpiece.
Step 8: Set
Place the decorated cake pops upright in a block of Styrofoam or a cake pop stand, allowing them to set completely. Leave them at room temperature until the chocolate hardens, which typically takes about 30 minutes. You’ll know they’re set when the coating feels firm to the touch. Enjoy your delicious Halloween Cake Pops!
Expert Tips for Halloween Cake Pops
-
Chill Before Dipping: Refrigerate the cake balls for at least 30 minutes to help them firm up, preventing breaks when inserting the sticks. This is key for perfect Halloween Cake Pops!
-
Choose a Flavorful Cake: For a festive twist, use a red velvet or spiced cake mix to enhance the rich flavors of your cake pops, making them extra special.
-
Mix Thoroughly: Ensure the cake crumbs and frosting are well combined to achieve a moldable consistency. Overmixing can lead to a sticky texture—balance is essential!
-
Use Quality Chocolate: Opt for high-quality chocolate or candy melts for coating. This will not only improve taste but also create a smoother finish on your Halloween Cake Pops.
-
Experiment with Decorations: Don't hesitate to get creative! Use different sprinkles, edible glitter, or even draw faces with melted chocolate for unique designs. Every pop can be a surprise!
Make Ahead Options
These Halloween Cake Pops are perfect for meal prep enthusiasts, saving you valuable time for other festivities! You can make the cake and crumble it up to 3 days in advance; simply store the crumbs in an airtight container in the refrigerator to maintain freshness. Additionally, you can shape the cake balls up to 24 hours ahead, chilling them in the fridge until you're ready to coat them. When it's time to finish, melt your chocolate and dip the chilled cake pops, decorating them immediately after coating. This approach ensures they’re just as delicious and visually striking, making your Halloween gatherings a breeze!
How to Store and Freeze Halloween Cake Pops
Fridge: Store your Halloween Cake Pops in an airtight container in the refrigerator for up to 1 week. This keeps them fresh while the flavors meld beautifully.
Freezer: For longer storage, wrap each cake pop individually in plastic wrap and place them in a freezer-safe bag. They can be frozen for up to 2 months.
Thawing: When ready to enjoy, allow the frozen Halloween Cake Pops to thaw in the refrigerator for several hours before serving. Don’t refreeze once thawed.
Room Temperature: If you plan to serve them the same day, you can keep cake pops at room temperature for up to 4 hours. Just avoid humid conditions to maintain their quality.
Halloween Cake Pops Variations & Substitutions
Get creative and customize your Halloween Cake Pops with these fun variations that will surely delight everyone!
-
Spooky Mummies: Use white chocolate for coating and add candy eyes and thin strips of fondant to create mummy wraps.
-
Pumpkin Pops: Shape your cake balls into small pumpkins and coat them with orange candy melts. Add green icing or fondant for the stems!
-
Ghoulish Ghosts: Coat with white chocolate and use mini chocolate chips for eyes, creating adorable ghostly faces.
-
Crunchy Toppings: Roll your coated cake pops in crushed nuts, graham crackers, or cookies for a delightful crunch and added flavor.
-
Bright Monster Pops: Use vibrant candy melts in different colors to create friendly monsters, complete with sugary eyes and fun sprinkles.
-
Fiery Spiders: Shape some cake pops into regular forms, and use black licorice for legs. Add candy eyes to transform them into spooky spiders!
-
Chili Pepper Surprise: For a sweet-and-spicy twist, add a pinch of cayenne to your frosting for a subtle kick that will surprise your taste buds.
-
Healthy Twist: Substitute regular frosting with a low-sugar version or Greek yogurt for a lighter treat without sacrificing flavor. Try this with red velvet or pumpkin cake for festive flavors!
Whichever variations you choose, your Halloween Cake Pops are sure to be a hit. If you're looking for more delicious inspiration, don't forget to explore my other favorites like Chocolate Zucchini Cake or treat yourself with a slice of Pecan Caramel Cake as a seasonal dessert!
What to Serve with Halloween Cake Pops?
As you prepare these delightful treats, think about creating a full spread of Halloween-inspired delights that will tantalize every taste bud.
- Crispy Apple Slices: Fresh, crunchy apples with a drizzle of caramel are a refreshing contrast to sweet cake pops, perfect for brightening up your dessert table.
- Pumpkin Spice Cupcakes: Fluffy, spiced cupcakes enhance a festive theme while complementing the sweet richness of the cake pops. Their warm flavors whisk everyone into the autumn season.
- Spooky Cheesecake Bites: These creamy, no-bake cheesecake treats topped with ghostly whipped cream can balance the sweetness of the cake pops with their velvety texture.
- Candy Corn Trail Mix: A playful mix of nuts, chocolate, and festive candy corn adds a fun crunch and sweet-salty flavor that pairs wonderfully with the Halloween spirit.
- Hot Chocolate Bar: Set up a cozy hot chocolate bar with marshmallows and whipped cream, allowing guests to sip their way through the festivities while indulging in cake pops.
- Witch’s Brew Smoothie: A vibrant green smoothie packed with spinach, banana, and pineapple offers a fresh taste and a nutritious touch, balancing the sugary treats on your table.
- Monster Fruit Platter: Fill a tray with colorful fruits arranged to look like monster faces, providing a fun and healthy option that beautifully contrasts the cake pops’ sweetness.
- Ghostly Meringues: Light and airy meringue cookies shaped like little ghosts provide a whimsical touch, ideal for rounding out your spooky dessert menu.
By pairing these delightful options, you’re sure to impress your guests and create a memorable feast that celebrates the spirit of Halloween!
Halloween Cake Pops Recipe FAQs
What kind of cake mix should I use?
You can absolutely use any boxed cake mix you enjoy, or even a homemade cake recipe if you have a favorite! For Halloween, consider using spiced or red velvet flavors to add a festive touch. Just ensure it’s a moist cake that combines well with frosting!
How should I store my Halloween Cake Pops?
Store your Halloween Cake Pops in an airtight container in the refrigerator for up to 1 week. This helps maintain their moisture and flavor. If you need to keep them longer, you can freeze them for up to 2 months—simply wrap each pop individually in plastic wrap and place them in a freezer-safe bag.
Can I freeze Halloween Cake Pops?
Definitely! To freeze your Halloween Cake Pops, ensure they are fully decorated and place them on a baking sheet to flash freeze for about an hour. After that, wrap each pop in plastic wrap and store them in a freezer-safe bag. When you're ready to enjoy, just let them thaw in the refrigerator for a few hours.
What should I do if my cake pops are falling apart?
If you're finding that your cake pops are crumbling when you insert the sticks or handle them, the mixture might be too dry. Try adding a bit more frosting to the cake crumbs and mix until the consistency is cohesive and moldable. Also, ensure that the cake pops are well-chilled before dipping to help maintain their shape.
Are these cake pops safe for my kids and pets?
Absolutely! The ingredients in Halloween Cake Pops are kid-friendly, allowing them to join in the fun. Just keep an eye on decorations like sprinkles—they should be safe, but it's always good to check for any allergens. As for pets, chocolate can be harmful to dogs and cats, so be sure to keep these treats stored safely away from them.
How long should I let the chocolate coating set?
After dipping your Halloween Cake Pops in melted chocolate, place them upright in a block of Styrofoam or a cake pop stand. Allow them to set for about 30 minutes until the chocolate feels firm to the touch. If you're short on time, placing them in the refrigerator for a few minutes can also speed up the setting process.
Halloween Cake Pops: Fun, Festive Treats to Make Together
Ingredients
Equipment
Method
- Prepare Cake: Bake your cake according to the package instructions using a cake mix or favorite recipe. Preheat oven to 350°F and grease your pan. Allow cake to cool completely.
- Crumble Cake: Once cooled, crumble the cake into fine crumbs in a large mixing bowl until no large pieces remain.
- Mix with Frosting: Add chosen frosting to the crumbs, mixing until the mixture is cohesive and moldable.
- Shape Pops: Form the mixture into small balls about 1 inch in diameter, placing them on a lined baking sheet.
- Chill: Refrigerate the shaped cake balls for about 30 minutes to firm up.
- Coat with Chocolate: Melt chocolate or candy melts until smooth, dip the lollipop stick in chocolate, then insert it halfway into each cake ball. Coat each pop in melted chocolate.
- Decorate: Immediately decorate while the chocolate is still wet with sprinkles, candy eyes, or edible glitter.
- Set: Place the decorated cake pops upright in a Styrofoam block or cake pop stand until the chocolate sets.


Leave a Reply