
As the clock ticks closer to Halloween, a tinge of excitement fills the air—it's the perfect time for a little culinary mischief! Introducing Spooky Spider Sandwiches, a delightfully eerie recipe that transforms your ordinary lunch into a festive feast. These playful creations are not only quick to whip up but also budget-friendly, making them ideal for Halloween parties or lunch boxes. Whether you’re crafting classic peanut butter and jelly or exploring savory fillings like ham and cheese, even the pickiest eaters will be creeping back for more. So, why not gather your little monsters in the kitchen and enjoy making these fun and edible spiders together? Ready to uncover the secret to these spooky sandwiches? Let’s dive in!
Why are Spooky Spider Sandwiches a Must-try?
Delightful Fun: These Spooky Spider Sandwiches combine the joy of cooking with Halloween spirit, making them the perfect treat for kids and adults alike.
Customization: With a variety of fillings like peanut butter and jelly or ham and cheese, you can tailor these sandwiches to suit any palate or dietary need.
Budget-Friendly: Create a spooky feast without breaking the bank—simple ingredients keep costs low while maximizing fun!
Easy to Make: Even if you're short on time, this quick recipe allows you to whip up a delicious snack with minimal effort.
Visual Appeal: The whimsical presentation with pretzel legs and candy eyes adds an element of surprise that’s sure to impress. Make sure to check out our tips for creative serving ideas to elevate your Halloween meal!
Spooky Spider Sandwich Ingredients
For the Sandwiches
- Bread – Use white or whole-grain as the base; gluten-free bread makes this Halloween treat accessible for everyone.
- Peanut Butter – Rich and creamy, it helps hold the pretzel legs in place; almond or sun butter can be a fun twist!
- Strawberry Jelly – Adds a burst of sweetness; feel free to swap for your favorite jam, like grape or raspberry.
For the Spider Legs
- Pretzel Sticks – Perfect for creating spider legs; opt for gluten-free pretzels if needed to accommodate allergies.
For the Decoration
- Candy Eyes – A playful touch that brings your spooky sandwiches to life; if you’re out, chocolate chips or raisins make great substitutes!
Step‑by‑Step Instructions for Spooky Spider Sandwiches
Step 1: Prepare the Bread
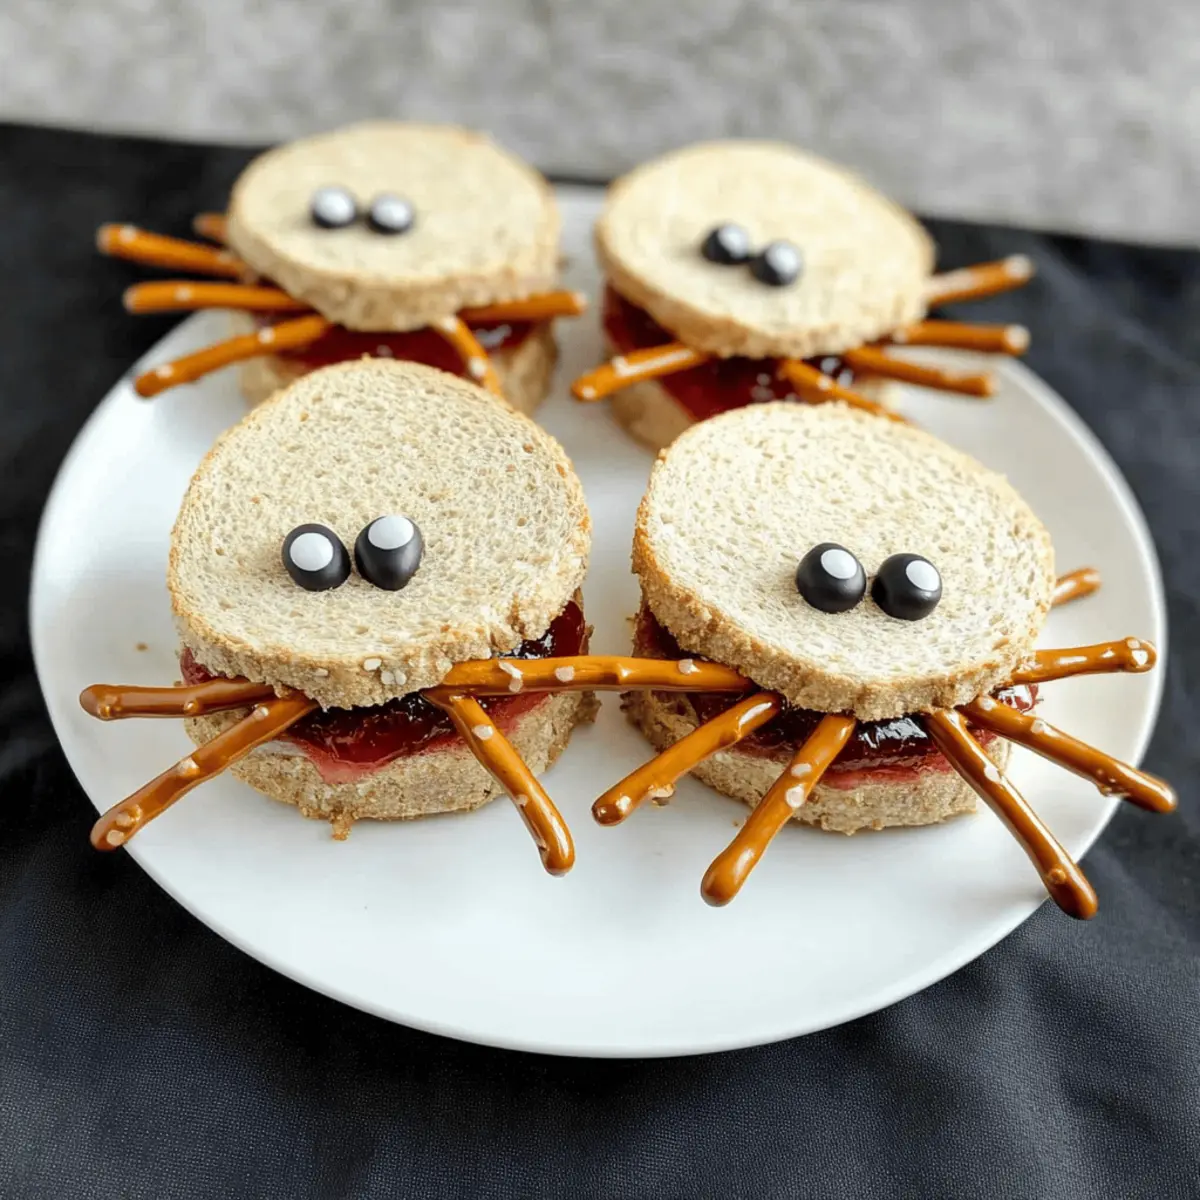
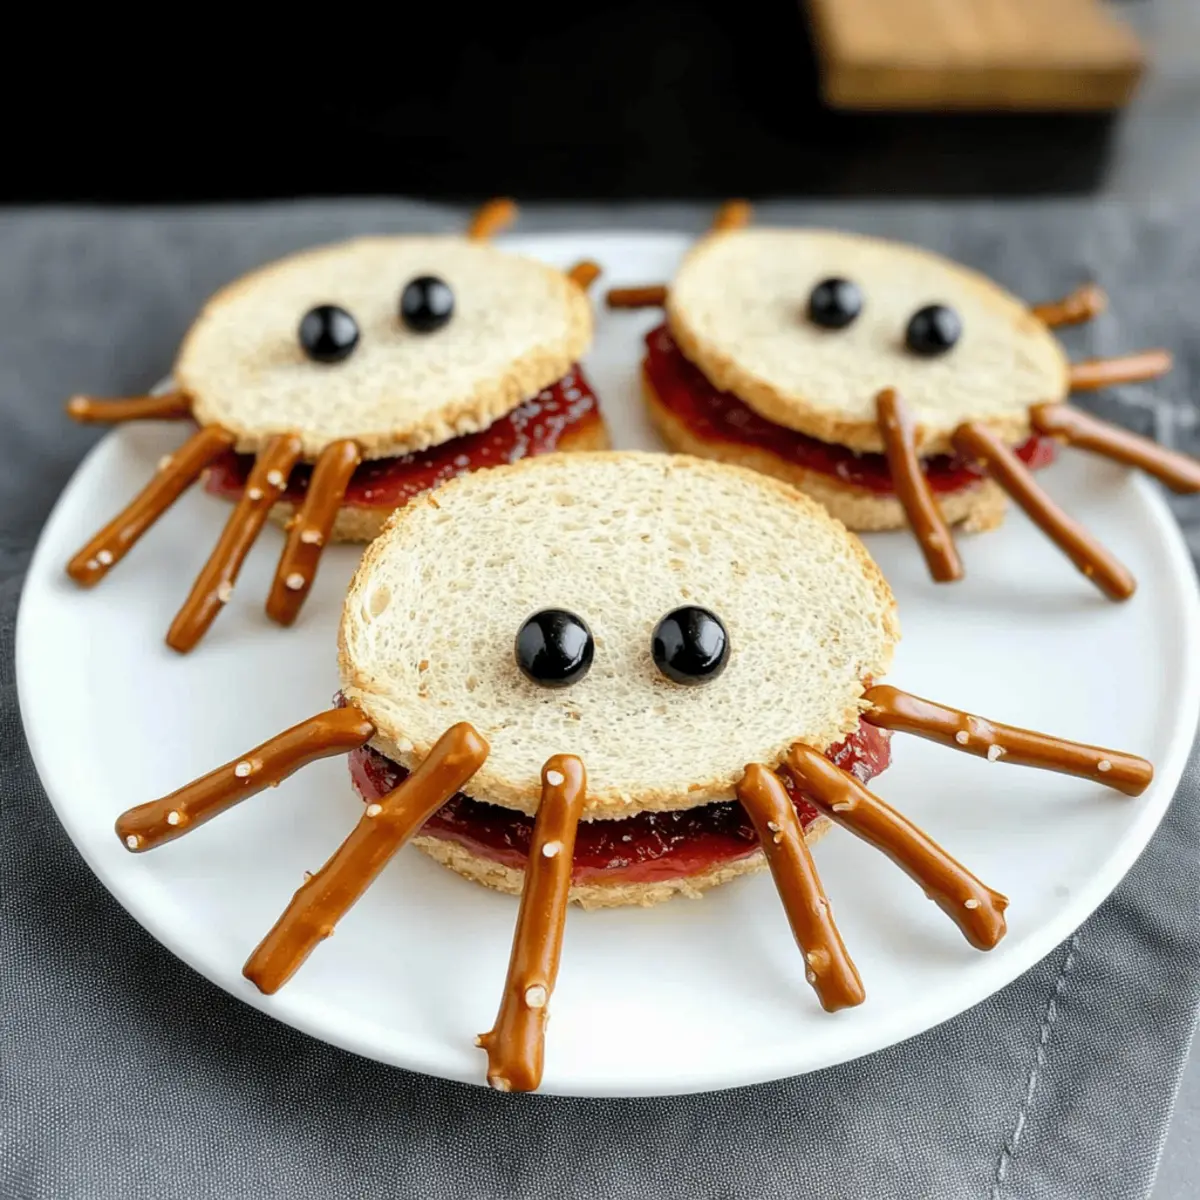
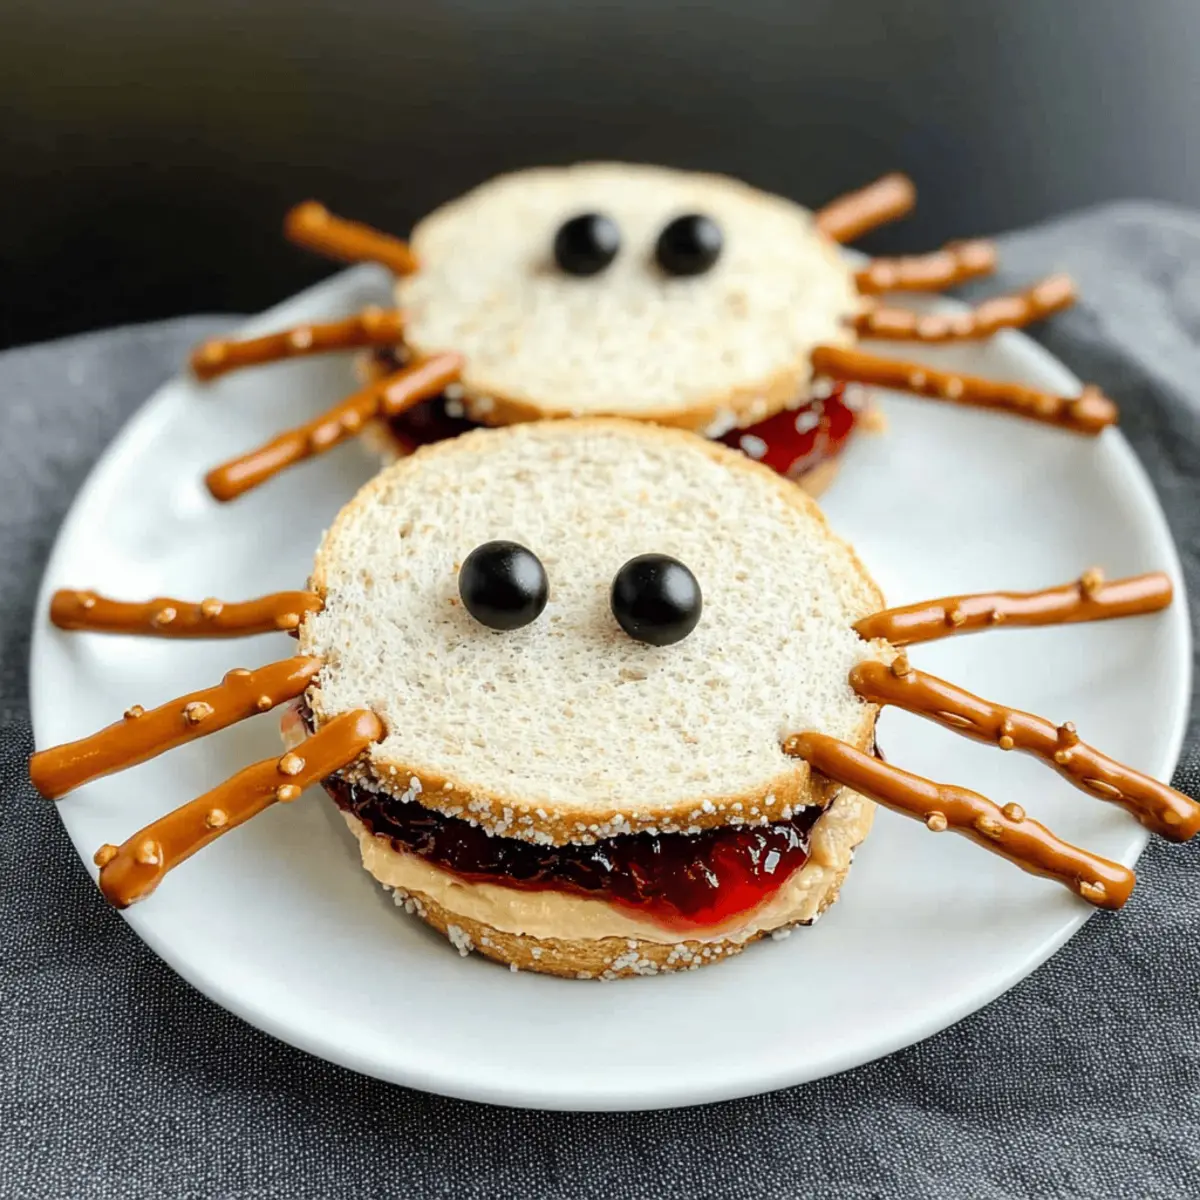
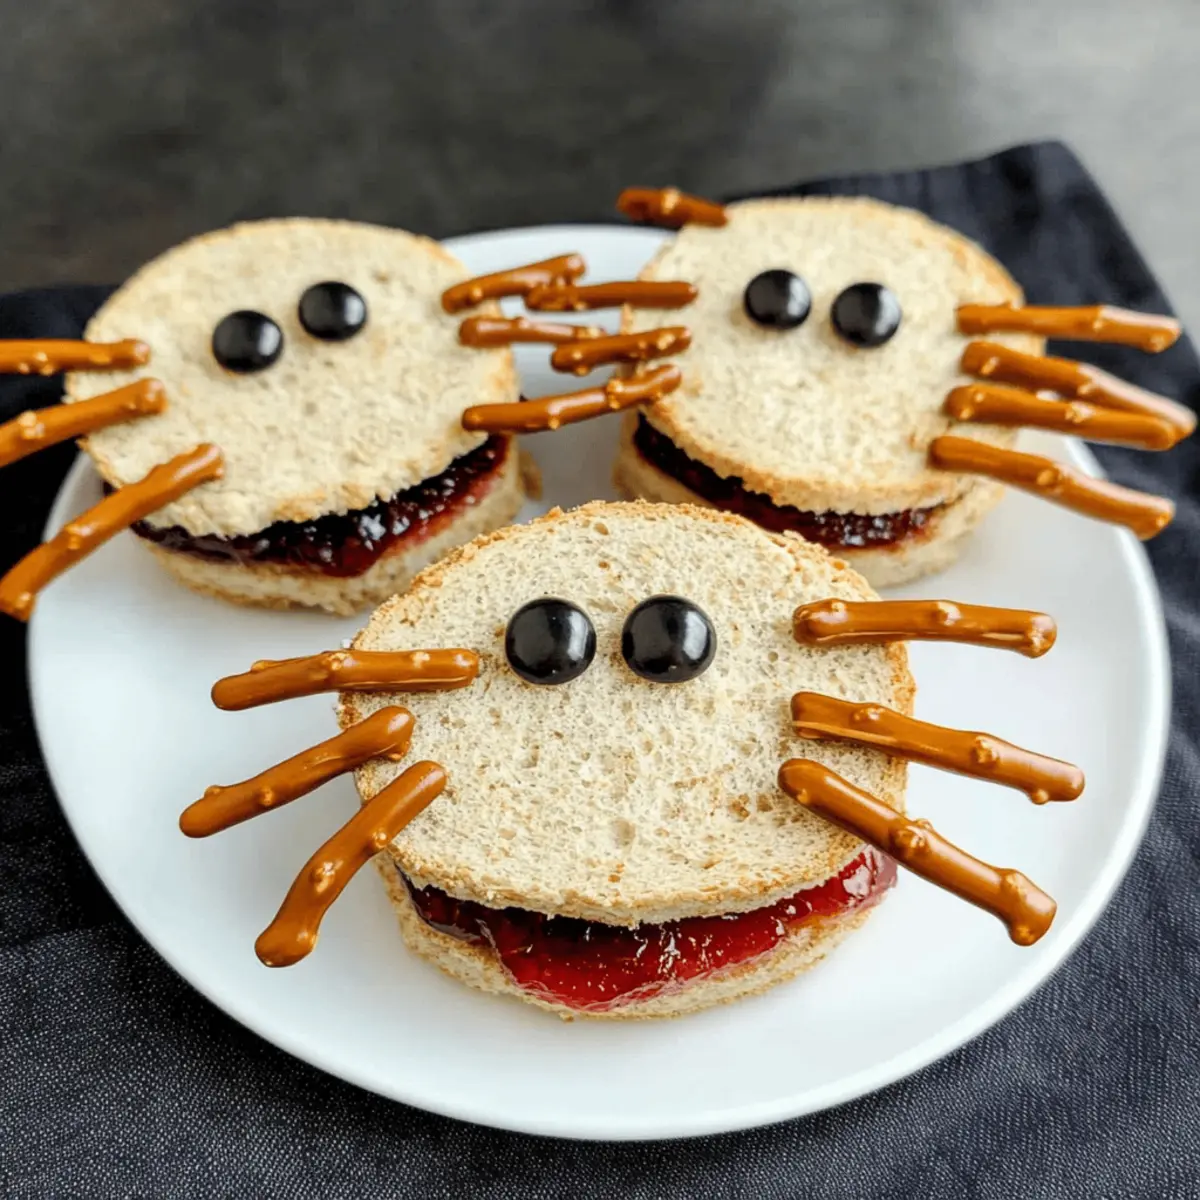
Begin by laying out eight slices of your chosen bread on a clean cutting board. Using a round biscuit cutter, gently press down to cut out the centers of four slices, creating fun, circular shapes perfect for your Spooky Spider Sandwiches. This will form the "body" of your sandwich.
Step 2: Spread the Peanut Butter and Jelly
Select four of the bread pieces and generously spread peanut butter on the top side, ensuring a smooth, even layer. On the other four bread circles, use strawberry jelly to add a pop of sweetness. The contrasting colors and textures will enhance the visual appeal of your spooky sandwiches, so spread it nicely up to the edges.
Step 3: Assemble the Sandwiches
Carefully take a peanut butter slice and place it peanut butter side down onto a jelly slice, creating a delightful sandwich. Gently press them together to ensure they stick, and repeat the process with the remaining slices, forming a total of four Spooky Spider Sandwiches. This is where the fun begins—watch them come to life!
Step 4: Add the Spider Legs
Grab your pretzel sticks and strategically insert them into the sides of the sandwiches for spider legs. Aim for four sticks on each side, securing them firmly into the peanut butter or jelly layers to stabilize. This step is key to creating that iconic spooky look, so take your time to evenly space the pretzel legs.
Step 5: Decorate with Candy Eyes
To finish the spooky presentation, place two candy eyes on top of each sandwich. These fun little accents will bring your Spooky Spider Sandwiches to life and add an element of playfulness. Ensure they are snugly affixed so they stay in place during transportation or serving, making your creation a highlight at any Halloween gathering!
Expert Tips for Spooky Spider Sandwiches
-
Fresh Ingredients: Use fresh bread for a soft and easy-to-cut texture. Stale bread can make assembly tricky and affect the overall taste.
-
Secure the Legs: Ensure the pretzel sticks are firmly inserted into the spreads to prevent them from falling out, especially if you're transporting the sandwiches.
-
Get Creative: Don’t hesitate to mix up the fillings—encourage kids to choose their favorites and create their unique Spooky Spider Sandwiches!
-
Presentation Matters: Arrange the sandwiches on a fun Halloween-themed platter or add decorations like cobwebs made from string candy to enhance the spooky atmosphere.
-
Check for Allergies: Always double-check for potential allergies if you're sharing these treats; customizing the ingredients can help cater to everyone's needs.
What to Serve with Spooky Spider Sandwiches
Elevate your Halloween celebration with delightful pairings that will excite both kids and adults alike.
-
Fruit Ghosts: Fresh fruit cut into ghost shapes with a little bit of chocolate drizzle for eyes. These light snacks balance the sweetness of your sandwiches.
-
Crispy Veggie Platter: A colorful array of crunchy carrots, cucumbers, and bell peppers, served with a spooky dip, adds freshness and a healthy boost to your meal.
-
Chocolate Milk: Rich and creamy, this classic drink complements the sweet and savory flavors of the sandwiches. Kids will love it, while adults will appreciate the nostalgia!
-
Mini Pumpkin Pies: Delightful little pies that bring the flavors of fall to your table. Their warm spices create a wonderful contrast to the playful sandwiches.
-
Spooky Trail Mix: Combine nuts, dried fruits, and festive candies for a fun, crunchy side that adds texture and a touch of sweetness to your Halloween spread.
-
Crispy Apple Slices: Sliced apples with a sprinkle of cinnamon or a drizzle of caramel sauce provide a deliciously fresh and slightly sweet contrast to the Spooky Spider Sandwiches.
Each pairing brings a unique flavor or texture that enhances your festive theme while keeping the smiles wide!
Make Ahead Options
These Spooky Spider Sandwiches are a fantastic choice for meal prep, making Halloween celebrations even more enjoyable with less kitchen time on the big day. You can prepare the sandwich assembly and keep them in an airtight container for up to 24 hours in the refrigerator, which helps maintain freshness and prevents the bread from becoming soggy. Simply assemble the sandwiches without the pretzel legs and candy eyes to keep them in optimal condition. When you’re ready to serve, just insert the pretzel sticks to create the legs and add the candy eyes for a fun finishing touch. This way, you'll have a delicious and spooky treat ready to impress your guests with minimal effort!
How to Store and Freeze Spooky Spider Sandwiches
Fridge: Keep prepared Spooky Spider Sandwiches in an airtight container for up to 3 days to maintain freshness and flavor.
Freezer: For longer storage, wrap each sandwich tightly in plastic wrap and then place in a freezer bag. They can be frozen for up to 2 months.
Reheating: Thaw frozen sandwiches in the fridge overnight and enjoy them cold or reheat in the microwave for about 20-30 seconds if preferred warm.
Prep Ahead: Feel free to make these sandwiches a few hours in advance for a party or school lunch. Just keep them sealed to preserve their spooky appeal!
Spooky Spider Sandwiches Variations & Substitutions
Feel free to unleash your creativity and make these Spooky Spider Sandwiches your own with delightful twists that will tantalize the taste buds!
- Nut-Free: Use sun butter instead of peanut butter to keep it nut-free while still delivering creaminess.
- Savory Switch: Swap in ham and cheese for a heartier option; add mustard for an extra zing! Kids will love this savory spin.
- Vegan Delight: Use avocado or hummus as a spread and incorporate fresh veggies like cucumbers for a vibrant vegan-friendly version.
- Gluten-Free Goodness: Choose gluten-free bread and pretzel sticks, ensuring everyone can join in on the Halloween fun without worries!
- Fruit-Filled: Try using apple butter or banana slices in lieu of jelly for a fruity alternative that keeps things fresh and delightful.
- Spicy Touch: Add a pinch of chili powder to the peanut butter or sneak in some jalapeños for those who enjoy a spicy kick!
- Themed Decor: Twist the candies by decorating with gummy spiders instead of candy eyes for an added creepy factor. Your guests will be thrilled!
- Decorative Shapes: Use themed cookie cutters to shape the bread into spooky forms, enhancing the overall Halloween experience. Check out our tips for creative serving ideas to elevate your Halloween meal!
Spooky Spider Sandwiches Recipe FAQs
How do I choose the best bread for Spooky Spider Sandwiches?
Absolutely! For the best results, select fresh, soft bread—either white or whole-grain works well for this recipe. If you need a gluten-free option, there are many great gluten-free bread varieties available that will hold up nicely. Look for bread that is free from dark spots or any signs of staleness to ensure a tasty sandwich.
How should I store Spooky Spider Sandwiches?
You can keep these delightful sandwiches in an airtight container, where they’ll stay fresh for up to 3 days. If you're making them in advance, it's best to store them in the refrigerator to maintain their flavor and texture.
Can I freeze Spooky Spider Sandwiches for later?
Certainly! To freeze, wrap each sandwich tightly in plastic wrap and place them in a freezer bag. These sandwiches can be frozen for up to 2 months. When you're ready to enjoy, simply thaw them in the refrigerator overnight; they can be served cold or warmed up in the microwave for about 20-30 seconds if you prefer them warm.
What should I do if the pretzels keep falling out of the sandwiches?
Very good question! To secure the pretzel sticks effectively, ensure they are inserted firmly into the peanut butter or jelly layers. You can also try using a thicker spread for better adhesion or place the pretzels at angles to create more surface area for them to stick. Additionally, consider adding more spreads around the edges of the sandwich for extra hold.
Are there allergy considerations for Spooky Spider Sandwiches?
Of course! Be mindful of allergies when preparing these sandwiches. Peanut butter is a common allergen; you can substitute it with almond butter, sun butter, or even cream cheese for a nut-free option. Also, check for gluten-free pretzels if you're accommodating gluten sensitivities. Always double-check ingredient labels to ensure they're safe for any dietary restrictions.
Can pets eat any ingredients from Spooky Spider Sandwiches?
It's always better to be safe than sorry! While bread is generally safe for dogs, peanut butter should be given with caution—make sure it doesn't contain xylitol, which is toxic to pets. Jelly and any candy used, like candy eyes, can also be harmful to pets due to high sugar content. Always consult your vet if you're unsure!
Spooky Spider Sandwiches: Fun & Easy Treat for Halloween Fun
Ingredients
Equipment
Method
- Begin by laying out eight slices of your chosen bread on a clean cutting board. Using a round biscuit cutter, gently press down to cut out the centers of four slices, creating fun, circular shapes perfect for your Spooky Spider Sandwiches.
- Select four of the bread pieces and generously spread peanut butter on the top side, ensuring a smooth, even layer. On the other four bread circles, use strawberry jelly to add a pop of sweetness.
- Carefully take a peanut butter slice and place it peanut butter side down onto a jelly slice, creating a delightful sandwich. Repeat the process with the remaining slices.
- Grab your pretzel sticks and strategically insert them into the sides of the sandwiches for spider legs, aiming for four sticks on each side.
- To finish the spooky presentation, place two candy eyes on top of each sandwich.


Leave a Reply