
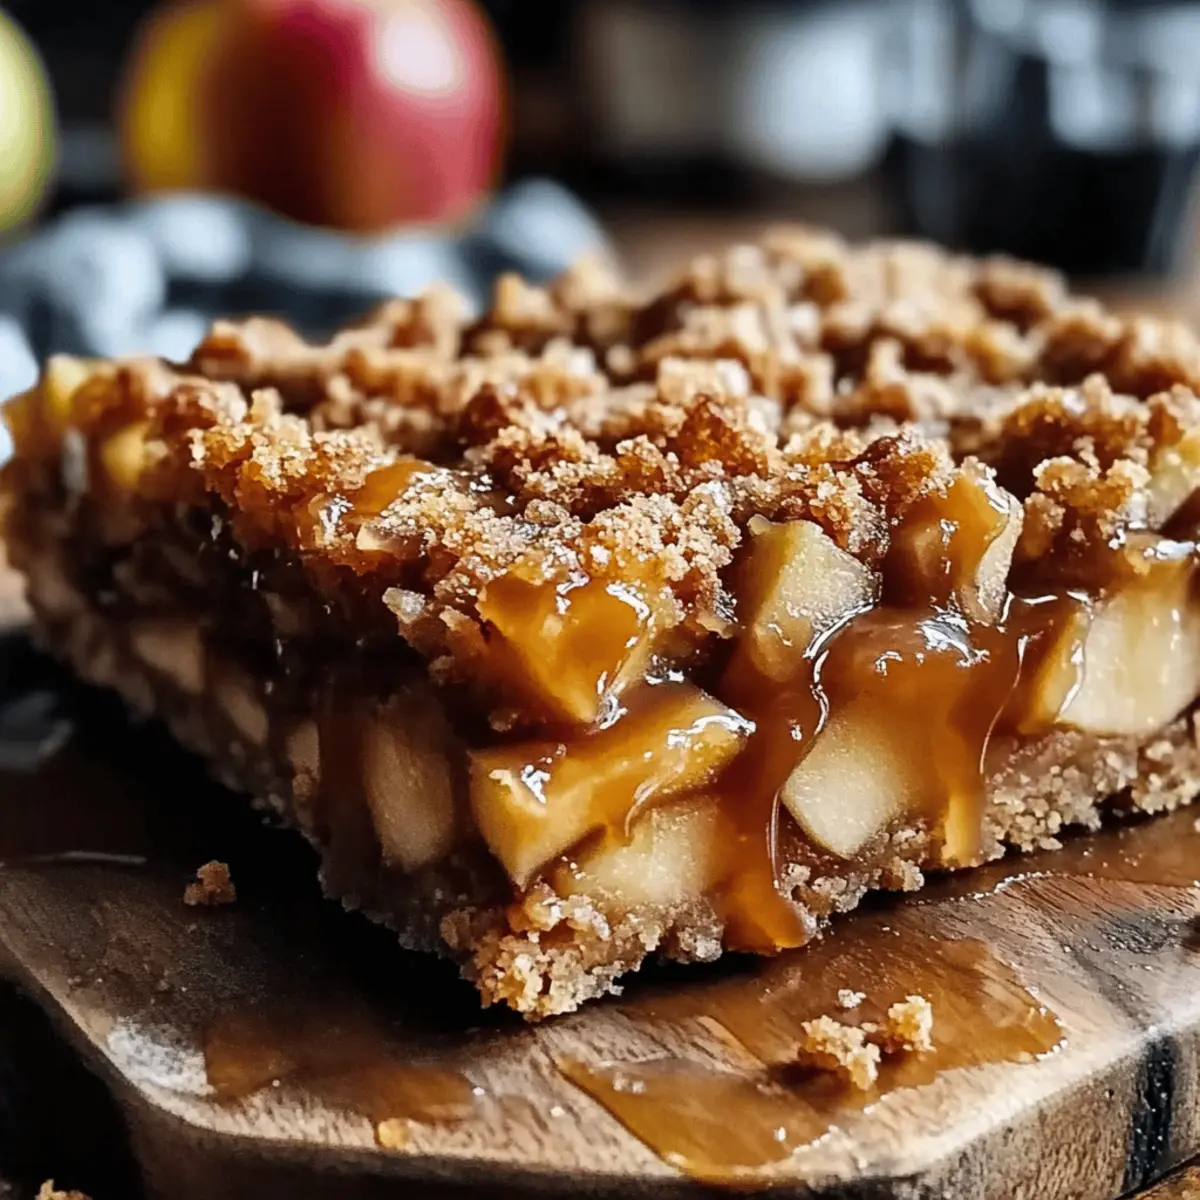
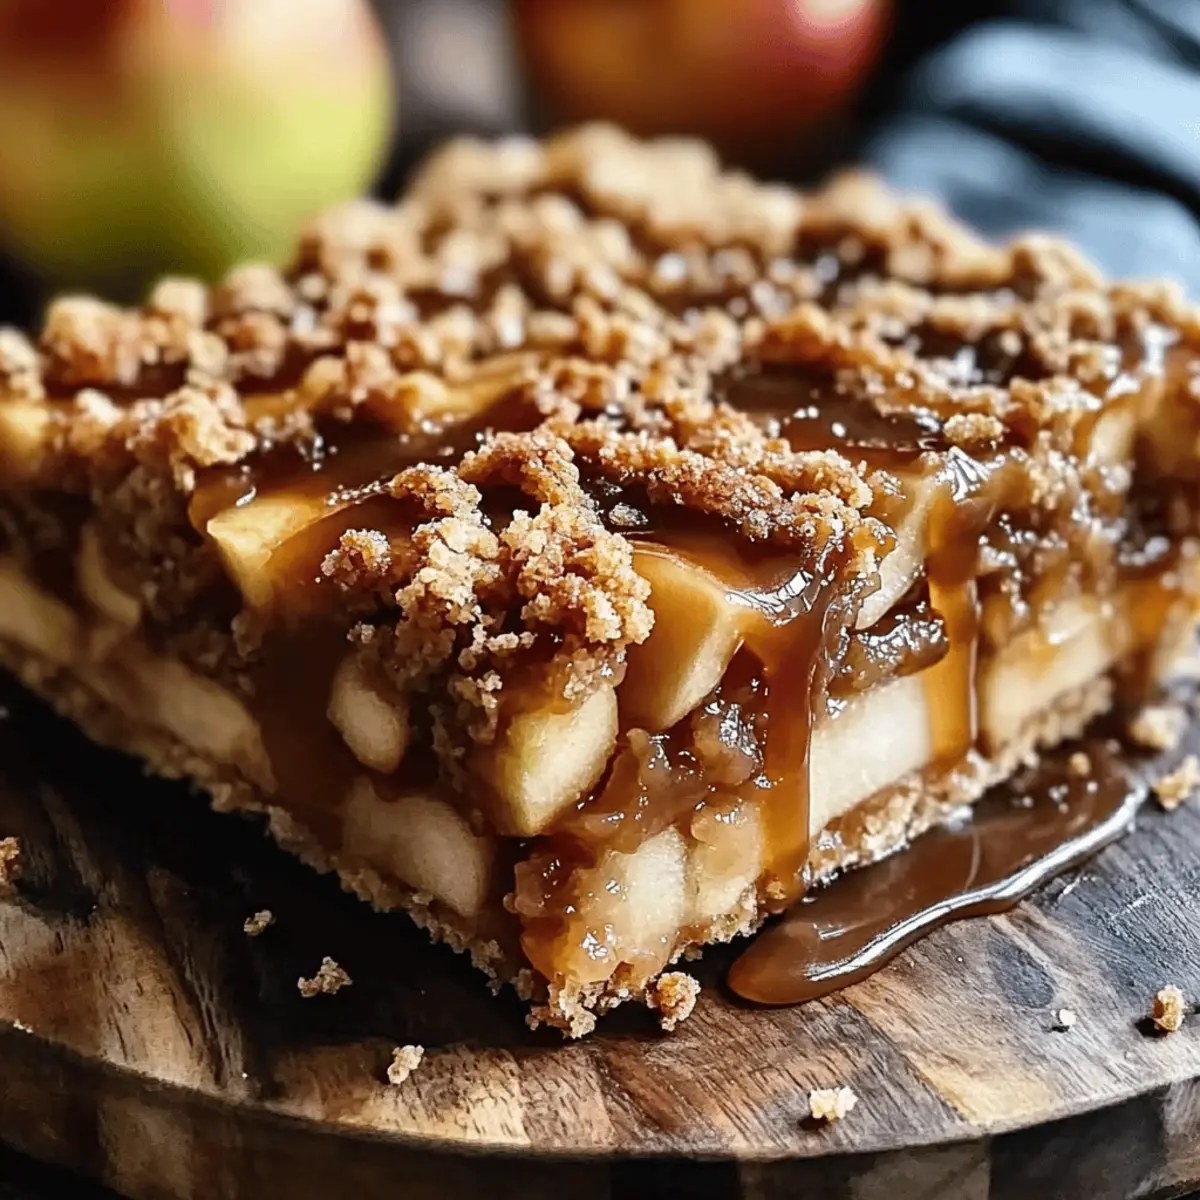
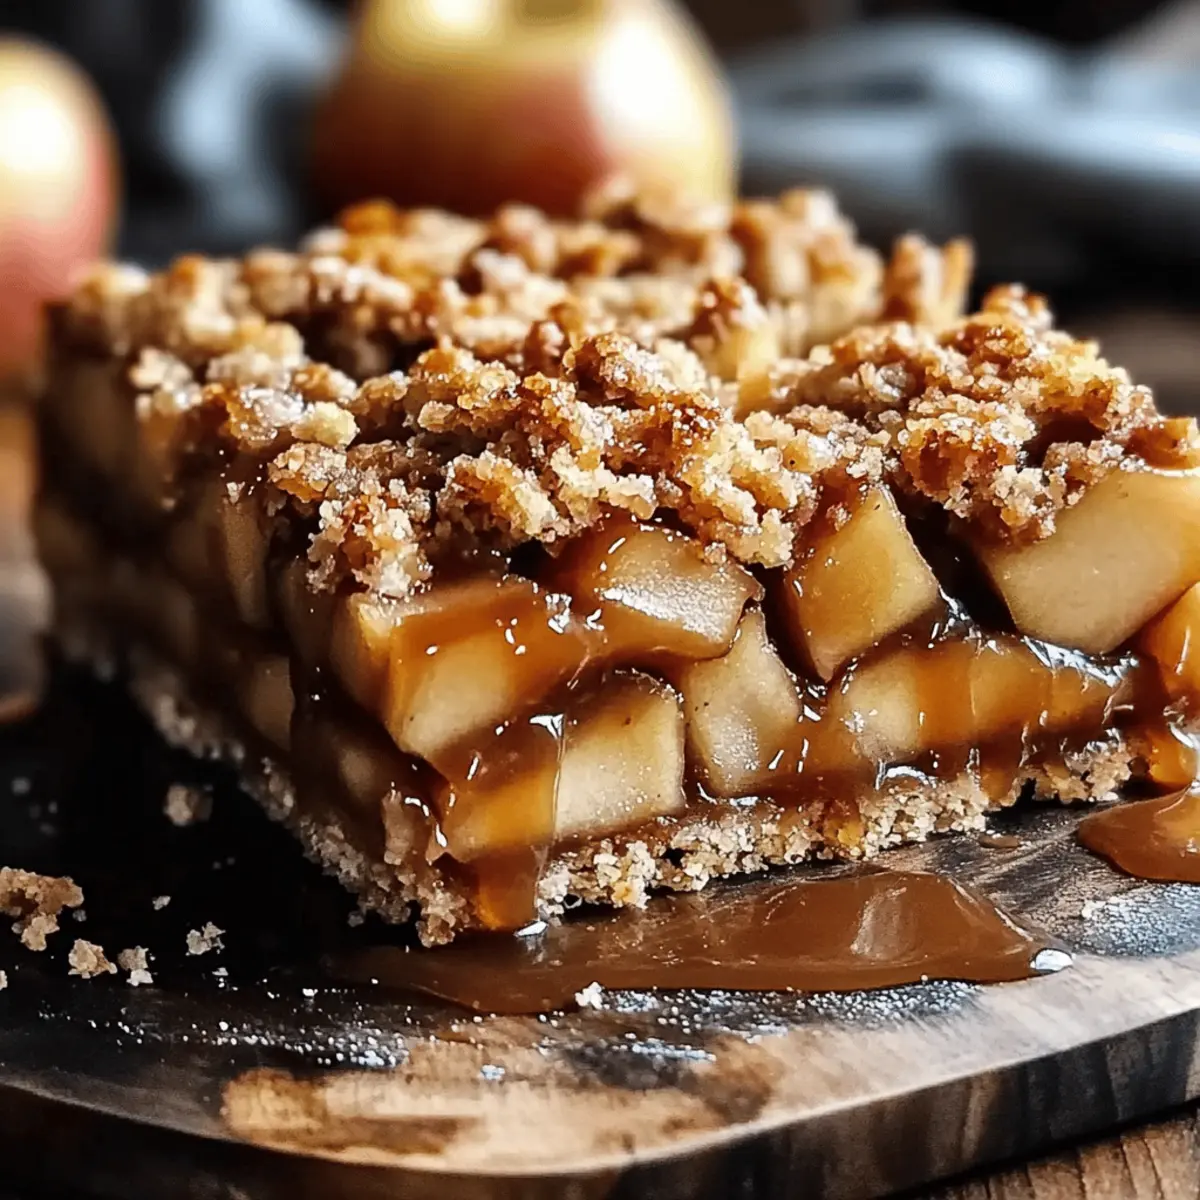
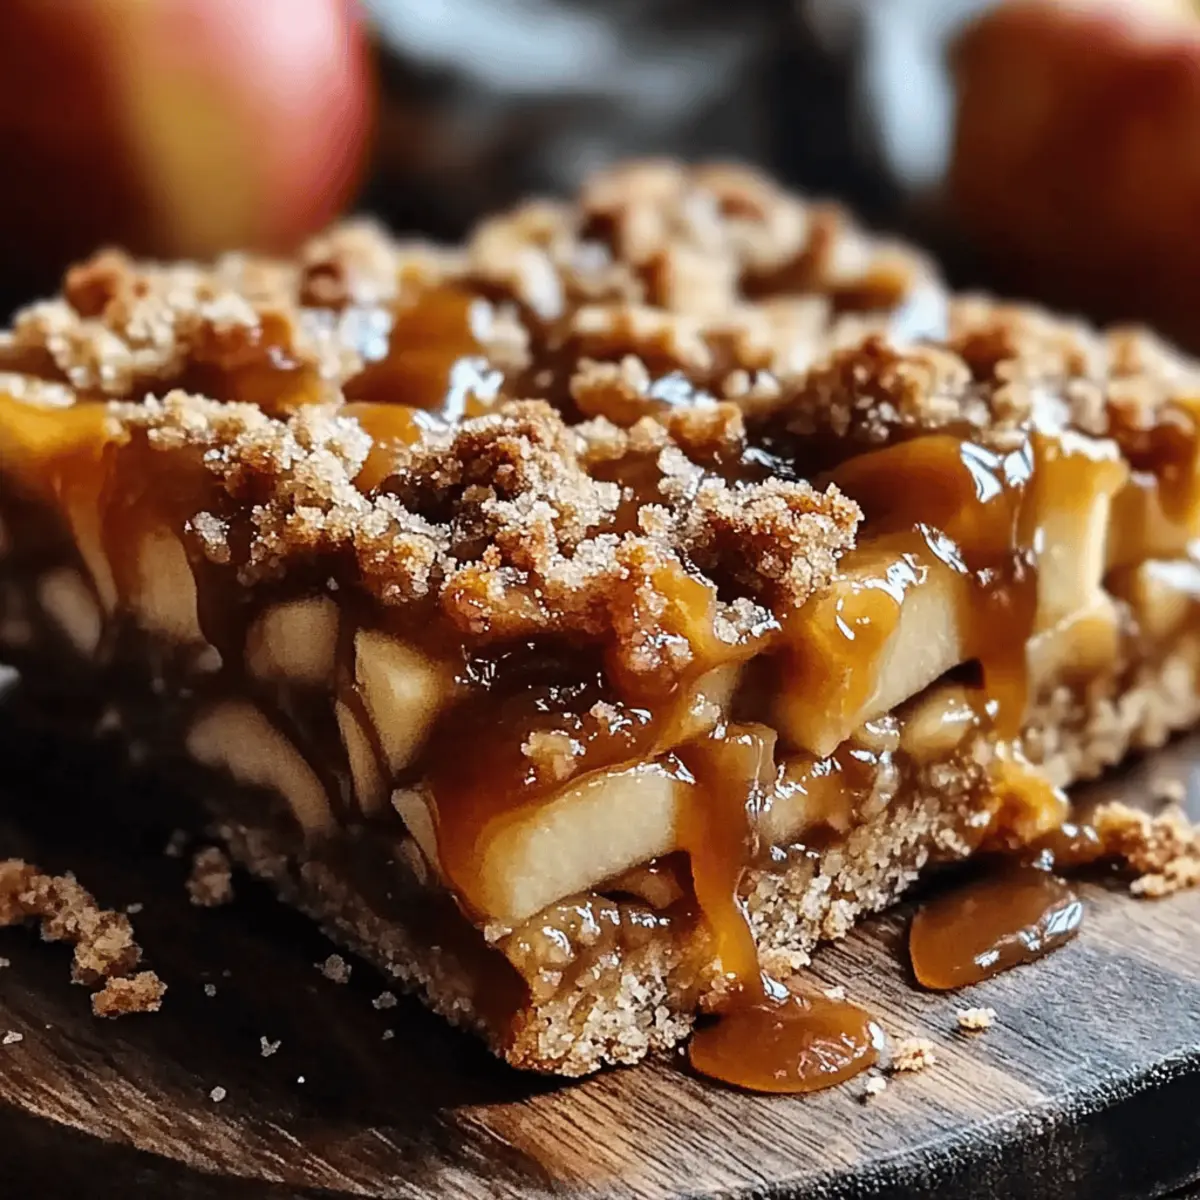
As the leaves begin to crunch beneath my feet and that crisp autumn air fills the streets, I'm reminded of a secret: the best treats often come from our own kitchens. Enter the Irresistible Salted Caramel Apple Bars, a delightful concoction that pairs sweet apples with rich salted caramel, all nestled in a crumbly oat topping. Not only are these bars incredibly easy to whip up, but they also make for a cozy dessert that dazzles at any gathering. Plus, with a gluten-free option lurking up my sleeve, there's a chance for everyone to join in on this seasonal delight. So, are you ready to bake a little magic and bring a warm taste of fall to your table?
Why Will You Love These Bars?
Irresistible Flavors: The combination of sweet apples and luxurious salted caramel creates a flavor explosion that is simply unforgettable.
Customizable Delight: Feel free to mix in nuts or chocolate chips, making these bars your own unique creation.
Easy to Make: The straightforward steps ensure that even novice bakers can create a stunning dessert.
Perfect for Sharing: Whether it's a cozy family gathering or a potluck, these bars are sure to impress a crowd and leave them asking for more.
Seasonal Treat: Celebrate the arrival of autumn with this delicious dessert, capturing the essence of the harvest season in every bite.
Elevate your baking game by serving these with a scoop of vanilla ice cream on the side! Enjoy additional seasonal treats like our Amish Style Apple and Cinnamon Baked Oatmeal for breakfast or indulge in Banana Pecan Caramel for dessert!
Salted Caramel Apple Bars Ingredients
For the Crust and Topping
- All-Purpose Flour – Provides structure; substitute with gluten-free flour for a gluten-free version.
- Old-Fashioned Oats – Adds chewiness and texture; ensure they're certified gluten-free if needed.
- Brown Sugar – Enhances sweetness and adds a caramel-like flavor; can be replaced with coconut sugar for a more natural option.
- Granulated Sugar – Contributes sweetness and aids in browning; use a lower sugar alternative if desired.
- Baking Soda – Acts as a leavening agent; make sure it’s fresh for the best results.
- Salt – Enhances all flavors, particularly the sweetness of the salted caramel.
- Unsalted Butter – Adds richness and moisture; opt for vegan butter or coconut oil for a dairy-free choice.
- Vanilla Extract – Introduces a warm, aromatic essence; consider vanilla bean paste for intensity.
For the Apple Filling
- Apples – Key for sweetness and moisture; select firm varieties like Granny Smith or Honeycrisp for perfect results.
- Lemon Juice – Prevents browning of apples and adds a hint of tang; lime juice works as a substitute.
- Cinnamon – Infuses warmth and fall spice; experiment with nutmeg or ginger for added depth.
- Nutmeg – Adds a subtle warmth to the filling; omit if unavailable or use allspice.
For the Salted Caramel Layer
- Salted Caramel Sauce – A luxurious component that brings the flavors together; feel free to use homemade or store-bought.
- Sea Salt – For garnishing; enhances flavors and adds a delightful savory note.
Dive into this cozy treat with these Salted Caramel Apple Bars as the centerpiece of your fall gatherings!
Step‑by‑Step Instructions for Salted Caramel Apple Bars
Step 1: Preheat the Oven
Begin by preheating your oven to 350°F (175°C). While the oven warms up, grease a 9x13 inch baking dish to ensure easy removal of the Salted Caramel Apple Bars later. This initial step sets the right temperature for baking, allowing the bars to achieve that perfect golden-brown hue.
Step 2: Prepare the Crust Mixture
In a large mixing bowl, combine all-purpose flour, old-fashioned oats, brown sugar, granulated sugar, baking soda, and salt. Stir the dry ingredients together before adding melted unsalted butter and vanilla extract. Mix until the blend is crumbly and well combined, which should take about 2-3 minutes. You want a texture that holds together but is not overly moist.
Step 3: Form the Crust
Take about two-thirds of your crumbly mixture and press it evenly into the greased baking dish using your fingers or the back of a measuring cup. Spread it out to cover the bottom evenly, which creates a solid base for your Salted Caramel Apple Bars. Bake in the preheated oven for about 10-12 minutes or until it turns lightly golden.
Step 4: Prepare the Apple Filling
While the crust is baking, prepare the apple filling. In a separate bowl, toss the diced apples with lemon juice, cinnamon, and nutmeg. Ensure the apples are evenly coated in the mixture, which will enhance their flavor and texture. This step adds a lovely warm spice to the filling and prevents the apples from browning.
Step 5: Assemble the Bars
Once the crust is baked, remove it from the oven and allow it to cool for a moment. Layer the seasoned apple mixture over the baked crust, spreading it evenly. Drizzle generous amounts of salted caramel sauce across the apple layer for that indulgent touch. This sweet sauce brings the flavors together beautifully.
Step 6: Add the Topping
Sprinkle the reserved crumb mixture over the apple filling, ensuring it’s evenly distributed for a delightful texture contrast in your Salted Caramel Apple Bars. Press down gently to help it adhere slightly during baking. This topping will create a lovely, crumbly finish that balances the soft filling beneath.
Step 7: Bake the Bars
Return the assembled bars to the oven and bake for 30-35 minutes, or until the top becomes golden brown and the apples are tender. Your kitchen will fill with an irresistible aroma as the bars bake. Keep an eye on them, as you want to catch that perfect balance of color and sweetness.
Step 8: Cool and Garnish
Once baked, remove the dish from the oven and let the Salted Caramel Apple Bars cool for 15-20 minutes at room temperature. This cooling period allows the filling to set, making slicing easier. After cooling, sprinkle the tops with a pinch of sea salt to enhance the flavor before cutting into squares for serving.
Make Ahead Options
These Salted Caramel Apple Bars are perfect for meal prep lovers! You can prepare the crust and crumble topping up to 24 hours in advance by mixing all the dry ingredients together and storing the mixture in an airtight container. You can also dice the apples and toss them with lemon juice, cinnamon, and nutmeg up to 3 days ahead—just refrigerate them in a sealed bag to keep them fresh. When you’re ready to bake, simply layer the apple mixture and salted caramel over the crust, sprinkle with the topping, and bake as directed. This way, you'll have a deliciously cozy dessert ready with minimal effort, perfect for busy weeknights or gatherings!
Salted Caramel Apple Bars Variations
Feel free to get creative with these bars—the possibilities are as delightful as the dessert itself!
-
Nutty Version: Mix in chopped walnuts or pecans for an extra crunch. Nuts add a rich flavor that complements the apples beautifully.
-
Gluten-Free: Substitute all-purpose flour with a gluten-free blend, ensuring that everyone can join in on the deliciousness!
-
Spiced Up: Experiment with warming spices like cardamom or ginger in the apple filling. This twist introduces an exciting new flavor dimension perfect for fall.
-
Chocolate Lovers: Add chocolate chips to the apple mixture for a surprising, decadent contrast. The melty chocolate pairs splendidly with the caramel and apples.
-
Caramel Apple Crumble: Increase the topping layer to create an extra-crunchy crumble. This adds delightful texture and elevates each bite to pure bliss.
For an additional seasonal treat, don’t forget to try our warm Amish Style Apple and Cinnamon Baked Oatmeal or indulge in our delicious Pineapple Cookies Tropical for a burst of flavor!
How to Store and Freeze Salted Caramel Apple Bars
Room Temperature: Keep the bars in an airtight container at room temperature for up to 3 days to maintain their delicious flavor and texture.
Fridge: For longer freshness, refrigerate your Salted Caramel Apple Bars in an airtight container for up to 1 week. This helps to preserve their delightful creaminess.
Freezer: You can freeze the bars for up to 2 months. Place them in a tight container or freezer bag, layering parchment paper between bars to prevent sticking. Thaw overnight in the fridge when ready to enjoy.
Reheating: For a warm treat, microwave individual bars for 10-15 seconds or bake in a preheated oven at 350°F (175°C) for 5-10 minutes.
Expert Tips for Salted Caramel Apple Bars
-
Choose the Right Apples: Opt for crisp varieties like Granny Smith or Honeycrisp to ensure the best texture and flavor in your Salted Caramel Apple Bars.
-
Don’t Overmix: When combining the crust ingredients, mix just until crumbly to achieve the perfect crumb texture; this prevents dense bars.
-
Cool Thoroughly: Allow your bars to cool completely before cutting. This step is crucial for clean, neat slices that showcase the delicious layers.
-
Experiment with Spices: Don’t be afraid to get adventurous! Adding a bit of cardamom or ginger can elevate the flavors of the apple filling beautifully.
-
Salted Caramel Sauce: If you're using store-bought caramel, warm it slightly for easier drizzling; this makes for a more visually appealing presentation.
What to Serve with Irresistible Salted Caramel Apple Bars
Experience the comfort of a homemade dessert that pairs perfectly with delightful accompaniments, enhancing every bite of these delicious bars.
-
Vanilla Ice Cream: A scoop of creamy vanilla ice cream takes the warm salted caramel apple bars to a luxurious level, creating a delightful contrast of temperatures.
-
Whipped Cream: Soften the sweetness and add a light, airy element with freshly whipped cream. It complements the rich caramel perfectly!
-
Hot Apple Cider: Embrace the season with a steaming cup of spiced apple cider. Its warm spices mirror the flavors of the bars and enhance your cozy experience.
-
Chai Latte: Make it a treat with a spiced chai latte. The aromatic spices in the chai blend beautifully with the flavors of the bars for a perfect afternoon delight.
-
Candied Pecans: Add a crunchy texture with a sprinkle of candied pecans. Their caramel flavor enhances the bars while providing an irresistible crunch.
-
Pumpkin Spice Latte: Celebrate the season with a pumpkin spice latte. Its warm and spicy notes create a festive atmosphere alongside your scrumptious bars.
Pairing these options will turn your Salted Caramel Apple Bars into the star of any gathering, ensuring everyone shares in the warmth and wholesome flavors of this fall favorite!
Salted Caramel Apple Bars Recipe FAQs
How do I choose the best apples for this recipe?
Absolutely! For the best results, opt for crisp and firm apple varieties like Granny Smith or Honeycrisp. These types not only provide a delightful sweetness but also retain their texture during baking, ensuring your Salted Caramel Apple Bars have that ideal bite.
How should I store my Salted Caramel Apple Bars?
You can keep your bars fresh by storing them in an airtight container at room temperature for up to 3 days. For longer storage, they can last up to 1 week when refrigerated. This helps maintain their fluffy texture and delicious flavor!
Can I freeze Salted Caramel Apple Bars?
Very! To freeze your bars, simply cut them into individual squares and layer them between parchment paper in a freezer-safe container. They can last up to 2 months in the freezer. When you're ready to enjoy them, just thaw overnight in the fridge and they're good to go!
What if my bars turn out too crumbly?
Not to worry! If your bars are crumbly, it may be due to overmixing the crust mixture or not enough moisture. Ensure you mix just until crumbly and consider adding a bit more melted butter next time for added richness. If they still crumble, serving them in a bowl with a drizzle of caramel sauce makes for a delightful "deconstructed" dessert!
Are there any dietary considerations I should be aware of?
Absolutely! If you're looking to make the Salted Caramel Apple Bars gluten-free, simply substitute all-purpose flour with a gluten-free blend. Additionally, for a dairy-free version, you can replace the unsalted butter with vegan butter or coconut oil. Always check that other ingredients, such as the oats and caramel sauce, are also gluten-free if needed!
Can I use homemade salted caramel sauce?
Yes, you can definitely use your homemade salted caramel sauce! In fact, I recommend it! Just ensure it's at a pourable consistency for easy drizzling. If it thickens up too much, warming it slightly in the microwave or over the stove will make it perfect for your Salted Caramel Apple Bars.
Delicious Salted Caramel Apple Bars for Cozy Fall Moments
Ingredients
Equipment
Method
- Preheat your oven to 350°F (175°C) and grease a 9x13 inch baking dish.
- In a bowl, combine flour, oats, brown sugar, granulated sugar, baking soda, and salt. Add melted butter and vanilla, mixing until crumbly.
- Press two-thirds of the mixture into the greased dish to form the crust. Bake for 10-12 minutes until lightly golden.
- Toss diced apples with lemon juice, cinnamon, and nutmeg in a separate bowl.
- Layer the apple mixture over the baked crust and drizzle salted caramel sauce on top.
- Sprinkle the reserved crumb mixture over the apple filling evenly and press down slightly.
- Bake for 30-35 minutes until the top is golden brown and the apples are tender.
- Remove from oven and cool for 15-20 minutes. Sprinkle with sea salt before cutting into squares.


Leave a Reply