
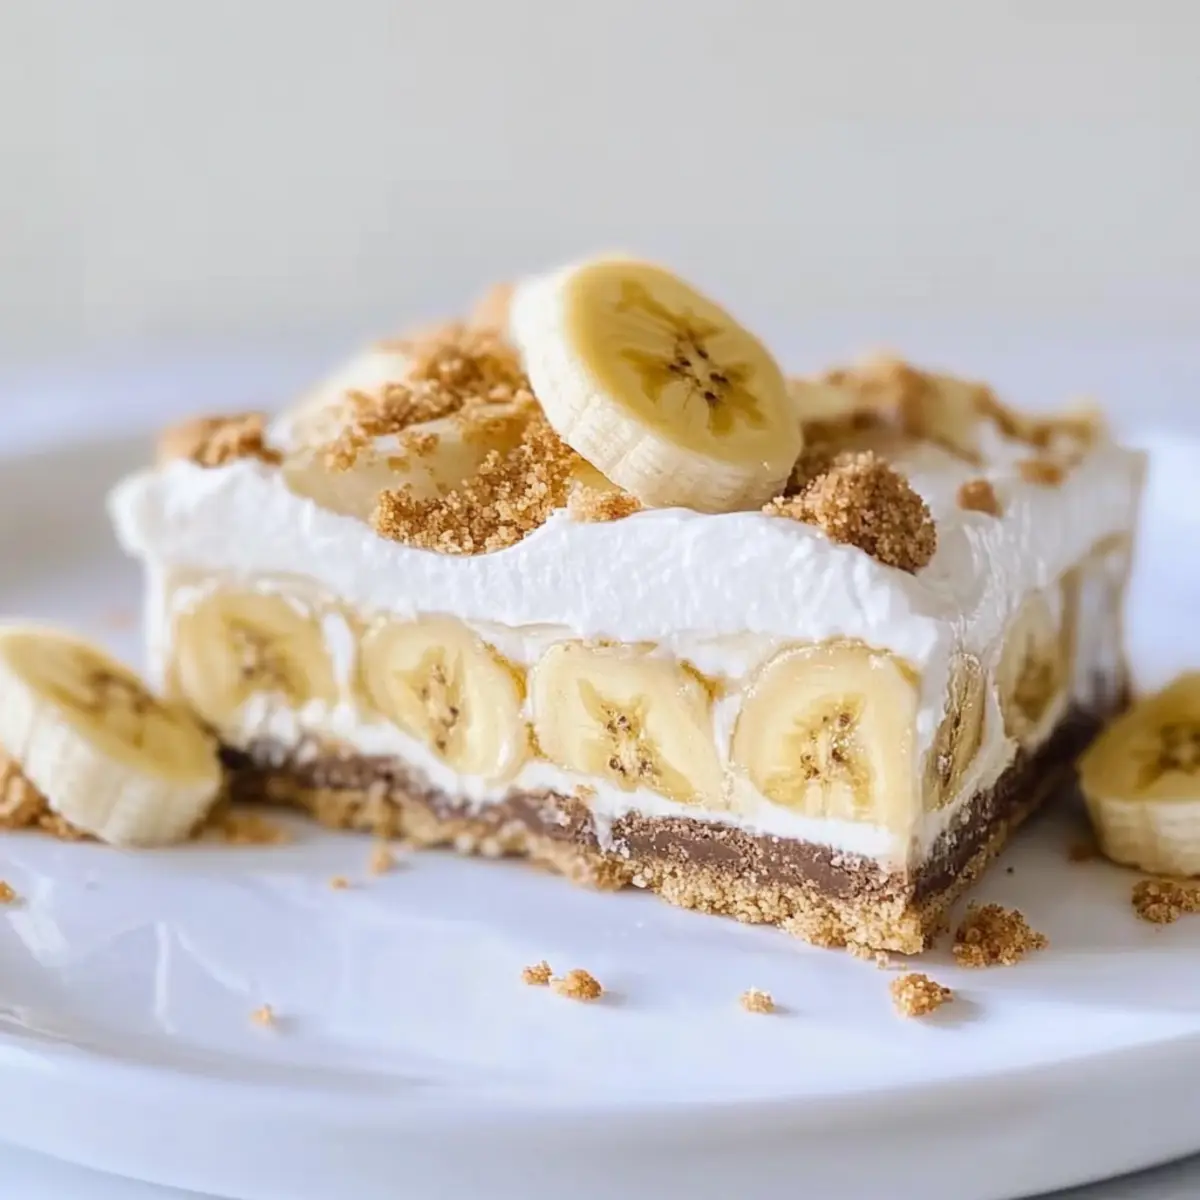
While rummaging through my pantry the other day, I stumbled upon a tub of Cool Whip and a bunch of ripe bananas, sparking an irresistible craving. It was the perfect moment to create my ultimate delight: Banana Pudding Dream Bars! This no-bake dessert is not just a fun and easy recipe to whip up; it transforms the classic comfort of banana pudding into a layered masterpiece that’s sure to impress. With a rich Oreo crust that adds a delightful crunch and a creamy, flavorful filling, these bars are the epitome of comfort food without the fuss of baking. Whether you’re preparing for a casual family gathering or a festive potluck, these dreamy bars are exactly the sweet treat you need. Curious to see how simple ingredients can come together to create such a showstopper? Let’s dive into making your new favorite dessert!
Why Are These Dessert Bars So Irresistible?
Unmatched Convenience: These no-bake Banana Pudding Dream Bars can be prepared in no time, making them perfect for last-minute gatherings.
Ultimate Flavor Fusion: The crunchy Oreo crust and creamy banana filling create an explosion of delightful contrasts that will have your taste buds dancing.
Crowd-Pleasing Treat: Whether for special occasions or casual family nights, this recipe will impress everyone—from kids to adults.
Satisfying Sweetness: With layers of sweet banana goodness and a light, fluffy topping, it's a dessert that perfectly hits the spot without being overly rich.
Looking for more delicious options? Try the heavenly Crunch Swirled Banana or the divine Banana Pecan Caramel for a delightful twist!
Banana Pudding Dream Bars Ingredients
For the Crust
- Golden Oreos – The perfect cookie base that gives a delightful crunch; feel free to swap for regular Oreos or vanilla wafers for a different taste.
- Unsalted Butter – Acts as the binder for the crust; you can substitute with margarine, although it may alter the texture slightly.
For the Filling
- Bananas – Fresh and ripe bananas are essential for natural sweetness; adjust the number based on your preference.
- Cream Cheese – Adds a creamy texture to the filling; Neufchâtel cheese is a lighter alternative if desired.
- Confectioners’ Sugar – Sweetens the cream cheese layer without a gritty texture; granulated sugar can be used but make sure to blend well.
- Pure Vanilla Extract – Enhances the overall flavor of the dessert; imitation vanilla works in a pinch but may lack depth.
- Cool Whip – A light, fluffy topping that elevates the dessert; if you prefer, you can make homemade stabilized whipped cream.
- Instant Banana Pudding Mix – The key flavoring for this dessert, giving it that classic banana pudding taste; vanilla pudding can be used for a different twist.
- Milk – Needed to create a creamy pudding layer; any type of milk works, but remember to use 1.5 cups for the best consistency.
For Garnishing
- Crushed Oreos – A fun topping that adds an extra crunch; reserve some Oreo crumbs from the crust before pressing into the dish.
Creating these Banana Pudding Dream Bars is as simple as gathering your ingredients and layering them for a delightful ending to any meal!
Step‑by‑Step Instructions for Banana Pudding Dream Bars
Step 1: Prepare the Crust
Begin by crushing 20 Golden Oreos into fine crumbs using a food processor, then transfer them to a mixing bowl. Melt 4 tablespoons of unsalted butter and incorporate it into the cookie crumbs until well combined. Press this mixture firmly into the bottom of an 8x8-inch dish to form a smooth base. Once completed, place the dish in the freezer for 30 minutes to set.
Step 2: Make the Banana Pudding
In a medium mixing bowl, combine 1 package of instant banana pudding mix with 1.5 cups of milk. Whisk the mixture vigorously until it thickens, typically within 2 minutes, achieving a smooth and creamy consistency. This banana pudding layer is a key component of your Banana Pudding Dream Bars, and it should be set aside once combined.
Step 3: Prepare the Cream Cheese Layer
While the crust is chilling, take 8 ounces of cream cheese and allow it to soften at room temperature for about 10 minutes. In a mixing bowl, mash 1 ripe banana and then blend it with the cream cheese, ½ cup of confectioners’ sugar, and 1 teaspoon of pure vanilla extract until smooth and well-combined. Gently fold in 1 cup of Cool Whip for an airy texture in this decadent layer.
Step 4: Assemble the Layers
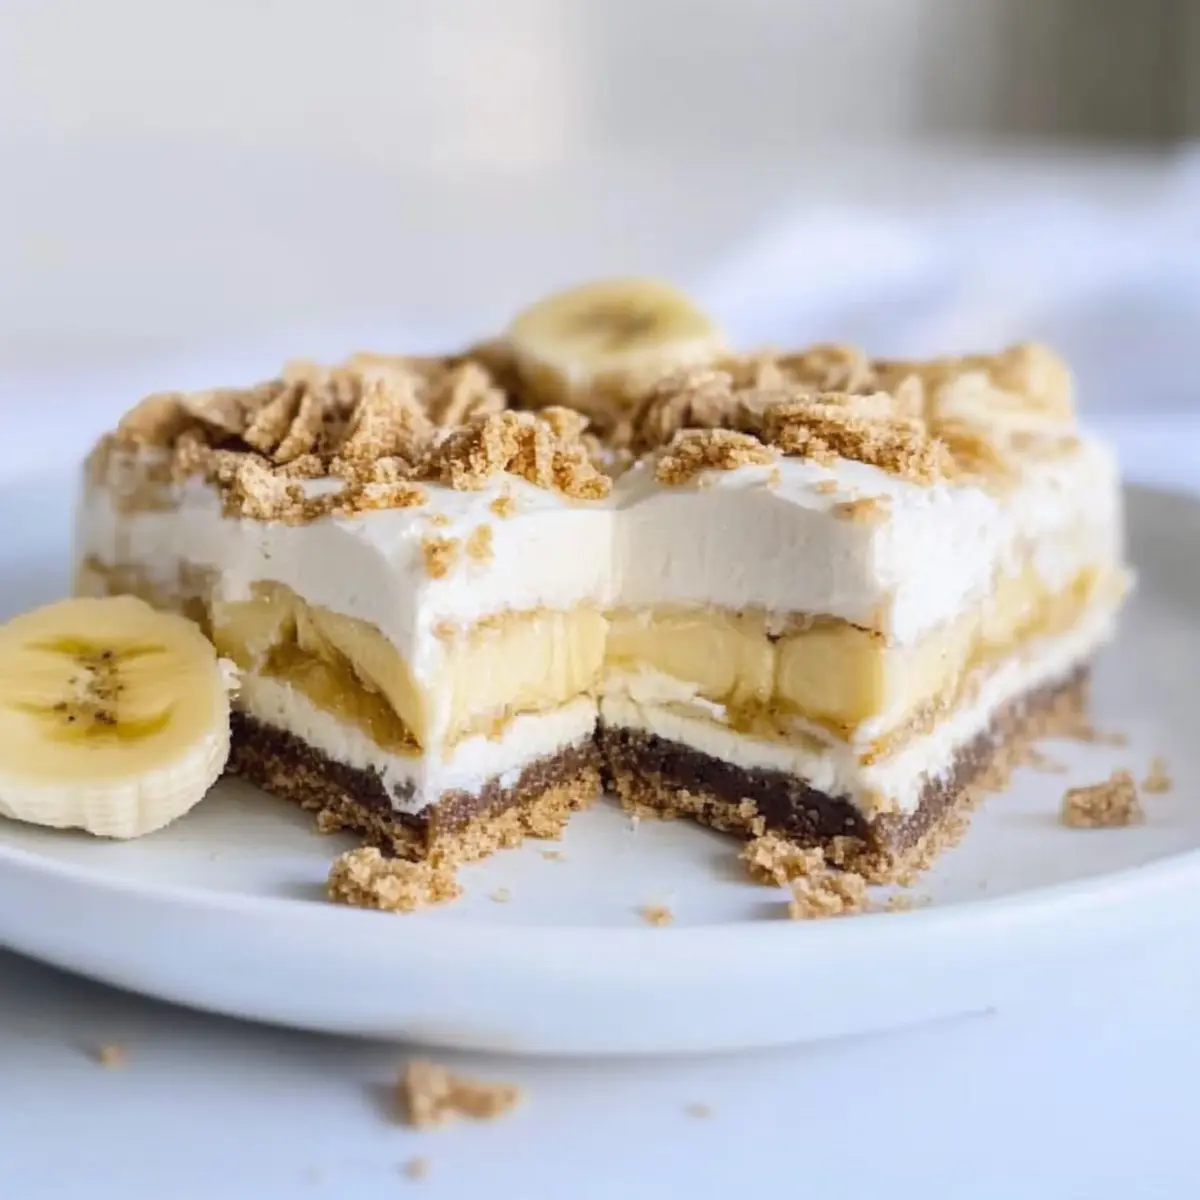
Once the crust has set, begin layering your Banana Pudding Dream Bars. Start by evenly distributing sliced bananas over the Oreo crust, making sure to cover it thoroughly. Next, spread the cream cheese mixture over the bananas, smoothing it with a spatula for an even layer. Finally, pour the prepared banana pudding over the cream cheese, creating a vibrant yellow layer.
Step 5: Finishing Touches
Spread 1 cup of remaining Cool Whip over the top of the pudding layer, smoothing it out for a lovely finish. Cover the dish with plastic wrap and refrigerate for at least 2 hours to allow the flavors to meld and the layers to firm up. Just before serving, sprinkle some crushed Oreos on top for added texture and visual appeal. Enjoy your delightful Banana Pudding Dream Bars!

How to Store and Freeze Banana Pudding Dream Bars
Fridge: Store the Banana Pudding Dream Bars covered in the refrigerator for up to 3 days to maintain their freshness and flavor.
Freezer: If you want to extend their lifespan, freeze the bars tightly wrapped in plastic wrap for up to 1 month. Thaw in the fridge before serving.
Reheating: There’s no need to reheat these bars; they’re best served chilled. Just slice and enjoy straight from the fridge!
Serving Suggestions: For a tidy presentation, slice the bars with a warm knife, which makes cutting through the creamy layers easier.
Banana Pudding Dream Bars Variations
Feel free to let your creativity shine as you customize these delightful Banana Pudding Dream Bars to suit your taste!
-
Chocolate Twist: Substitute chocolate pudding mix for a rich and velvety flavor that will delight chocolate lovers. The combination of chocolate and banana makes for an indulgent treat!
-
Nutty Delight: Add chopped walnuts or pecans to the crust for a crunchy texture and a bit of earthy flavor that elevates the overall dessert. The nuts wonderfully contrast with the creamy filling.
-
Dairy-Free: Replace the cream cheese with dairy-free cream cheese and use coconut whipped cream instead of Cool Whip for a deliciously vegan-friendly option. Enjoying dessert while adhering to dietary needs is now easier than ever!
-
Banana Bliss: Layer in extra slices of banana between the cream cheese and pudding for a delightful surprise in every bite. The added banana takes the flavor profile to new heights!
-
Spiced Up: Incorporate a pinch of cinnamon or nutmeg into the cream cheese mixture for added warmth and depth of flavor. This simple addition can transform the taste, giving it a cozy, comforting vibe.
-
Fruit Fusion: Mix in other fruits like strawberries or blueberries for a fresh burst of flavor. This fruity medley complements the banana and adds a colorful touch to each bar.
-
Cookie Crunch: Top the final layer with crushed chocolate wafers or graham crackers instead of Oreos for a fun twist. It's a wonderful way to play with flavors and textures while keeping it delicious!
-
Mini Bars: For individual servings, pour the mixture into muffin tins lined with paper cups. This fun approach makes it perfect for parties or gatherings, ensuring everyone gets their own little treat!
If you're in the mood for more inventive creations, be sure to check out the delectable Cinnamon Crunch Swirled Banana bread recipe or the luscious Banana Pecan Caramel for even more delicious inspiration!
Make Ahead Options
These Banana Pudding Dream Bars are perfect for meal prep enthusiasts looking to save time on busy weeknights! You can prepare the crust and the cream cheese layer up to 24 hours in advance; simply store them separately in the refrigerator to maintain quality. Slice the bananas and mix them into the cream cheese layer just before assembling to prevent browning. When ready to serve, layer the prepared crust with fresh banana slices, spread the cream cheese mixture, and then pour the banana pudding layer over the top. Finish with Cool Whip and crushed Oreos before chilling for at least 2 hours. Your make-ahead treat will be just as delicious, ready to impress friends and family!
Expert Tips for Banana Pudding Dream Bars
-
Perfect Crust: Ensure your butter is fully melted before mixing with the Oreo crumbs for a cohesive crust. Let it chill for at least 30 minutes to become firm.
-
Ripe Bananas Only: Use only ripe bananas for the filling; they provide the best natural sweetness and flavor. Adjust the number of bananas based on personal taste.
-
Thicker Consistency: Stick to 1.5 cups of milk when making the pudding; adding too much may result in a runny filling.
-
Cooling Time: Don’t rush the refrigeration process! Allow your Banana Pudding Dream Bars to chill for at least 2 hours, or longer if time permits, for a better texture and easy slicing.
-
Enhance Flavors: For a burst of extra flavor, consider adding a sprinkle of cinnamon or nutmeg over the cream cheese layer before the pudding. It elevates the overall taste without overpowering it.
-
Making Ahead: These bars are perfect for prep ahead of time. They can be made a day in advance, making your dessert preparation easy and stress-free.
What to Serve with Banana Pudding Dream Bars
These bars are the ultimate sweet surprise that can transform any gathering into a heavenly dessert experience.
-
Fresh Fruit Salad: A colorful combination of seasonal fruits adds a light and refreshing contrast to the creamy bars.
-
Classic Vanilla Ice Cream: The smooth, creamy texture of vanilla ice cream perfectly complements the rich flavors of the banana pudding layer.
-
Chocolate Sauce Drizzle: A rich, indulgent drizzle of chocolate sauce enhances the sweetness, giving a beautiful visual and taste balance.
-
Whipped Cream Topping: For those who love an extra fluffy layer, serve with additional whipped cream to elevate the dessert’s lightness.
-
Coconut Flakes: Toasted coconut flakes sprinkled on top introduce a tropical twist that pairs wonderfully with the banana flavor.
-
Mint Tea: The soothing freshness of mint tea offers a refreshing palate cleanser between bites, enhancing the overall experience.
-
Peanut Butter Cup Cookies: These cookies provide a nutty crunch that harmonizes with the flavors of the dessert, creating a delicious combination.
-
Sparkling Lemonade: A fizzy and tart drink balances the sweetness perfectly, making every bite delightful and refreshing.
-
Chocolate-Covered Bananas: Add a playful twist with chocolate-covered banana bites for a decadent dip that complements the main dish.

Banana Pudding Dream Bars Recipe FAQs
What type of bananas should I use?
Absolutely, using ripe bananas is essential for the best flavor and sweetness in your Banana Pudding Dream Bars. Look for bananas that have a few brown spots for optimal ripeness. Overripe bananas will add a natural sweetness that perfectly complements the creamy filling.
How should I store these dessert bars?
Very good question! Store your Banana Pudding Dream Bars covered in an airtight container in the refrigerator for up to 3 days. This will help keep them fresh and flavorful, but make sure to consume them within that timeframe for the best taste. If you're making them ahead of time, they can also be enjoyed the day after preparation!
Can I freeze Banana Pudding Dream Bars?
Absolutely! To freeze, wrap the bars tightly in plastic wrap or aluminum foil and place them in a freezer-safe container. They can be frozen for up to 1 month. When you're ready to enjoy, simply transfer them to the refrigerator to thaw for several hours or overnight for easy serving.
What if my pudding layer is too runny?
If your pudding layer ends up too runny, it’s likely due to too much milk. To troubleshoot, you can whisk in a bit more instant pudding mix to help thicken it up. Alternatively, allow it to set in the refrigerator for a bit longer before layering onto the dessert. It should firm up nicely with a little extra chilling time!
Are there any allergy considerations I should be aware of?
Indeed, it’s important to consider potential allergies! The cream cheese and Cool Whip in the Banana Pudding Dream Bars contain dairy. For those with dairy sensitivities, consider using non-dairy cream cheese and whipped topping alternatives. Always read labels to ensure all ingredients are safe for those with allergies, especially if sharing with guests.
Can I use a different crust for this recipe?
Absolutely! While the Oreo crust adds a delightful flavor, you can use Graham crackers or even a nut-based crust if you're looking for a gluten-free option. Just remember to adjust the butter accordingly, depending on the ingredients you choose for your crust!
Irresistible Banana Pudding Dream Bars You'll Want to Dive Into
Ingredients
Equipment
Method
- Crush 20 Golden Oreos into fine crumbs using a food processor, then transfer to a mixing bowl.
- Melt 4 tablespoons of unsalted butter and mix with cookie crumbs until combined.
- Press the mixture into the bottom of an 8x8-inch dish. Freeze for 30 minutes.
- Combine 1 package of instant banana pudding mix with 1.5 cups of milk and whisk until thickened, about 2 minutes.
- Soften 8 ounces of cream cheese for about 10 minutes. Mash 1 ripe banana and mix with cream cheese, ½ cup confectioners’ sugar, and 1 teaspoon vanilla until smooth.
- Fold in 1 cup of Cool Whip for an airy texture.
- Layer sliced bananas over the Oreo crust, then spread the cream cheese mixture over the bananas.
- Pour the prepared banana pudding over the cream cheese layer.
- Spread 1 cup of remaining Cool Whip over the pudding layer. Cover and refrigerate for at least 2 hours.
- Sprinkle crushed Oreos on top before serving.


Leave a Reply