
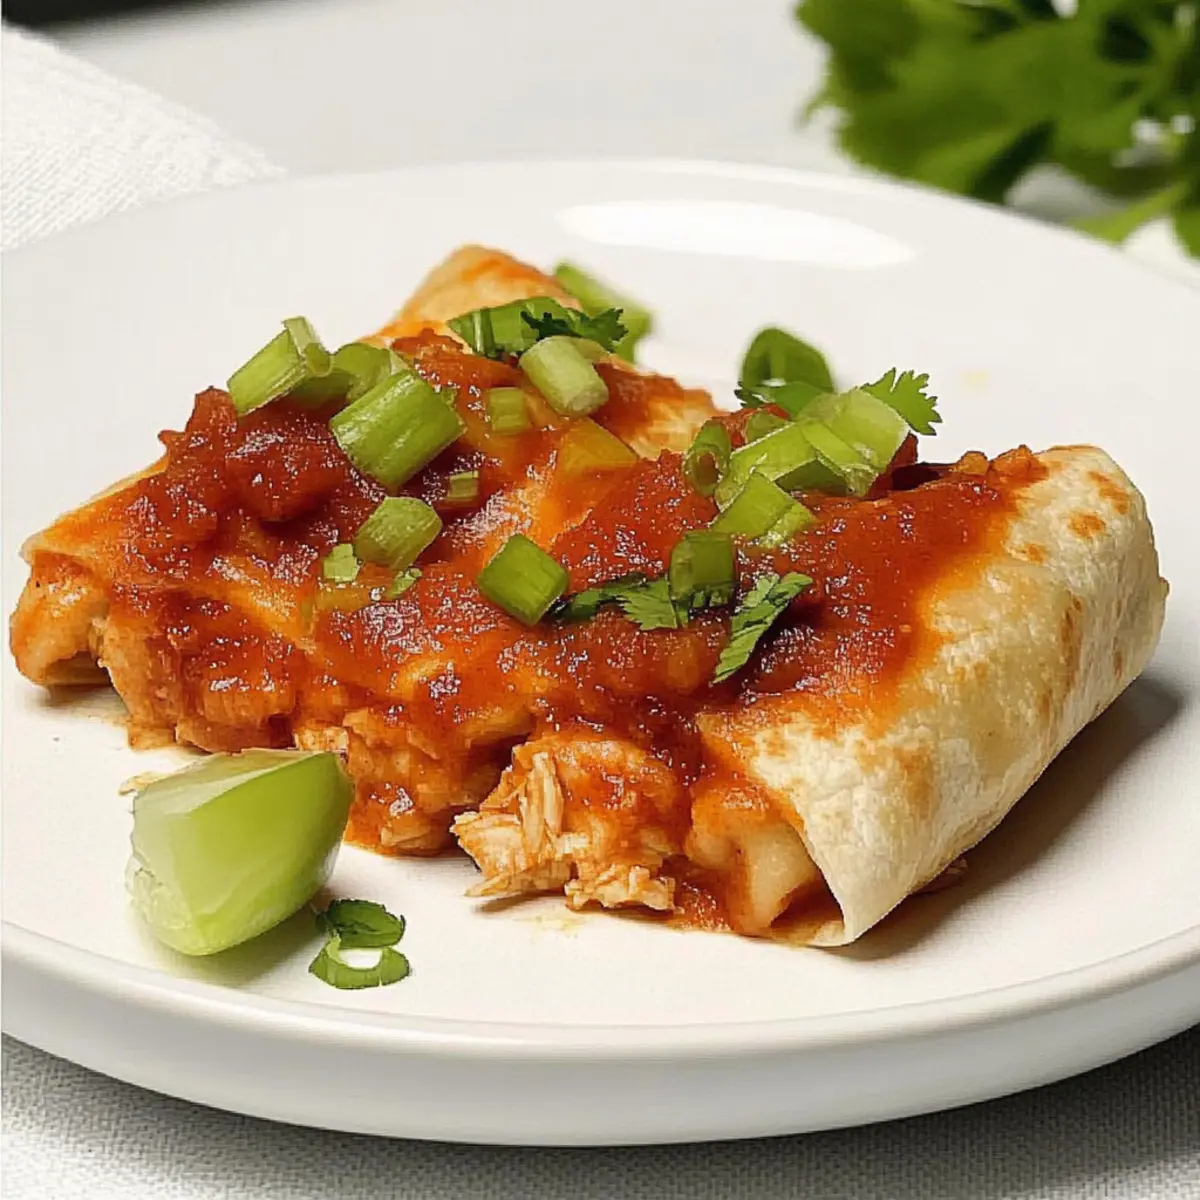
As I stood in my kitchen, the aroma of spices whisked me away to a sun-soaked Mexican street market, where vibrant flavors dance in the air. Today, I’m excited to share my healthier version of Chicken Chimichangas, a dish that combines the joy of cooking with the comfort of a satisfying homemade meal. These baked delights offer a crispy exterior while keeping the inside tender and savory, making them an ideal choice for busy weeknights or effortless meal prep. Plus, you can enjoy all the deliciousness without the guilt of frying! Whether you're looking to impress at a dinner gathering or simply treat yourself to some comfort food, these Chicken Chimichangas are sure to become a family favorite. Are you ready to explore this enticing recipe? Let's dive in!
Why Are Chicken Chimichangas So Irresistible?
Crispy Texture: The baked exterior provides a satisfying crunch that rivals any fried version.
Savory Filling: Combining tender chicken and gooey cheese ensures each bite is packed with rich flavor.
Easy Preparation: Assembly is a breeze, perfect for busy weeknights or when hosting friends.
Healthier Twist: Enjoy the indulgence without guilt; baking cuts down on excess fat compared to frying.
Versatile Options: Feel free to play with different fillings and toppings—whether you’re in the mood for black beans or spicy cheese, the possibilities are endless! Pair these with a side of Cheesy Garlic Chicken or Garlic Parmesan Chicken for a meal that truly satisfies.
Chicken Chimichangas Ingredients
For the Filling
• Cubed Cooked Chicken Breast – This is your primary protein source, offering tender bites; shredded chicken can be a fun substitution for a different texture.
• Picante Sauce – Adds moisture and flavor; swap it with taco sauce for a milder taste if preferred.
• Shredded Reduced-Fat Cheddar Cheese – Delivers richness and creaminess; feel free to use Monterey Jack or pepper jack for a spicy twist.
• Chopped Green Onions – Brings freshness and crunch to the dish; cilantro can be substituted for a different flavor profile.
For the Seasoning
• Ground Cumin – Adds warmth and depth to the flavor; you may reduce or omit it for a milder taste.
• Dried Oregano – Enhances the savory notes; Italian seasoning can be a delightful alternative for added herbaceous flavor.
For the Wrappers
• Flour Tortillas (8 inches) – These encase your delicious filling; corn tortillas make for a gluten-free alternative.
• Melted Butter – Brushed on top before baking, it helps achieve that gorgeous golden crust.
Ready to create a meal that brings your kitchen to life with the aroma of delicious Chicken Chimichangas? Let's enjoy the journey of preparing this delightful dish together!
Step‑by‑Step Instructions for Chicken Chimichangas
Step 1: Preheat the Oven
Begin by preheating your oven to 375°F (190°C). This ensures a perfectly cooked, golden-brown finish for your Chicken Chimichangas. While the oven is heating, ensure you have a 13x9-inch baking pan ready, lightly greased with cooking spray to prevent sticking during the baking process.
Step 2: Prepare the Filling
In a mixing bowl, combine the cubed cooked chicken, ¾ cup of picante sauce, shredded reduced-fat cheddar cheese, chopped green onions, ground cumin, and dried oregano. Stir well until all ingredients are evenly coated and blended together, creating a flavorful filling that embodies the essence of your Chicken Chimichangas.
Step 3: Warm the Tortillas
To make it easier to fold the tortillas, warm them in the microwave for 20-30 seconds, or until just pliable. This prevents tearing and allows for easy rolling. Take one tortilla at a time and place it on a clean surface, ready to be filled with your delicious chicken mixture.
Step 4: Assemble the Chimichangas
Spoon a generous ½ cup of the chicken filling onto the center of each warmed tortilla. Carefully fold the sides over the filling first, then roll it up tightly from the bottom, ensuring the filling stays snug inside. Place each rolled chimichanga seam-side down in your prepared baking pan, ready for baking.
Step 5: Brush with Butter
Once all the chimichangas are in the baking pan, use a pastry brush to lightly coat the tops with melted butter. This step enhances the crispy texture of the Chicken Chimichangas as they bake and gives them a beautiful golden hue, adding visual appeal to your delicious meal.
Step 6: Bake to Perfection
Slide the pan into the preheated oven and bake uncovered for 20-25 minutes. Keep an eye on them; they should be heated through and the tops should turn a delightful golden brown. For an extra touch, turn on the broiler for 1-2 minutes at the end for an irresistible crispiness.
Step 7: Serve and Enjoy
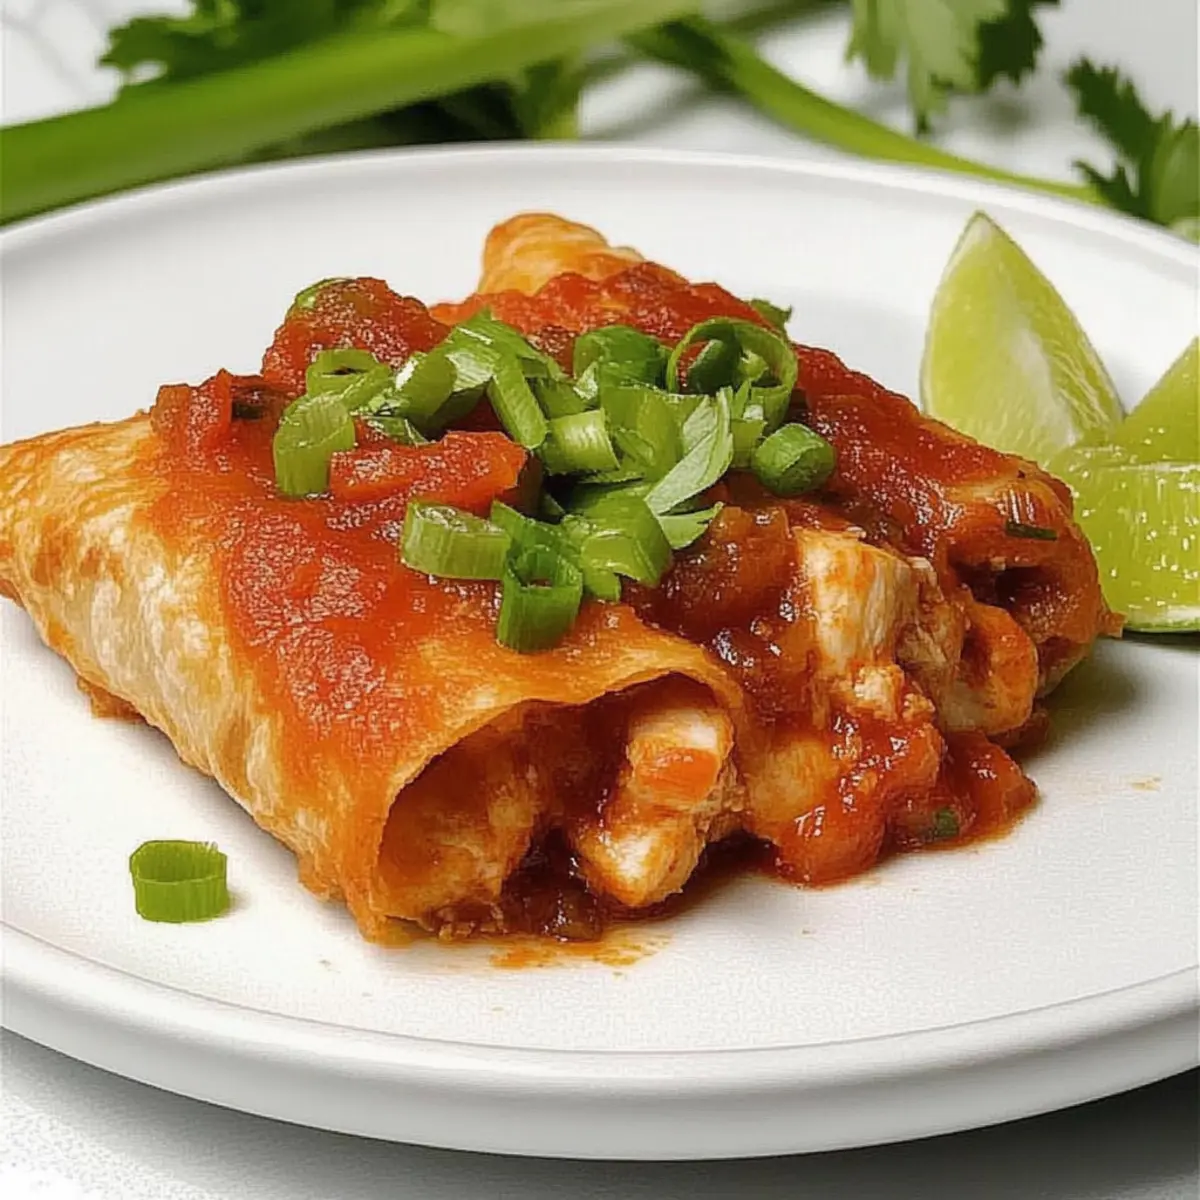
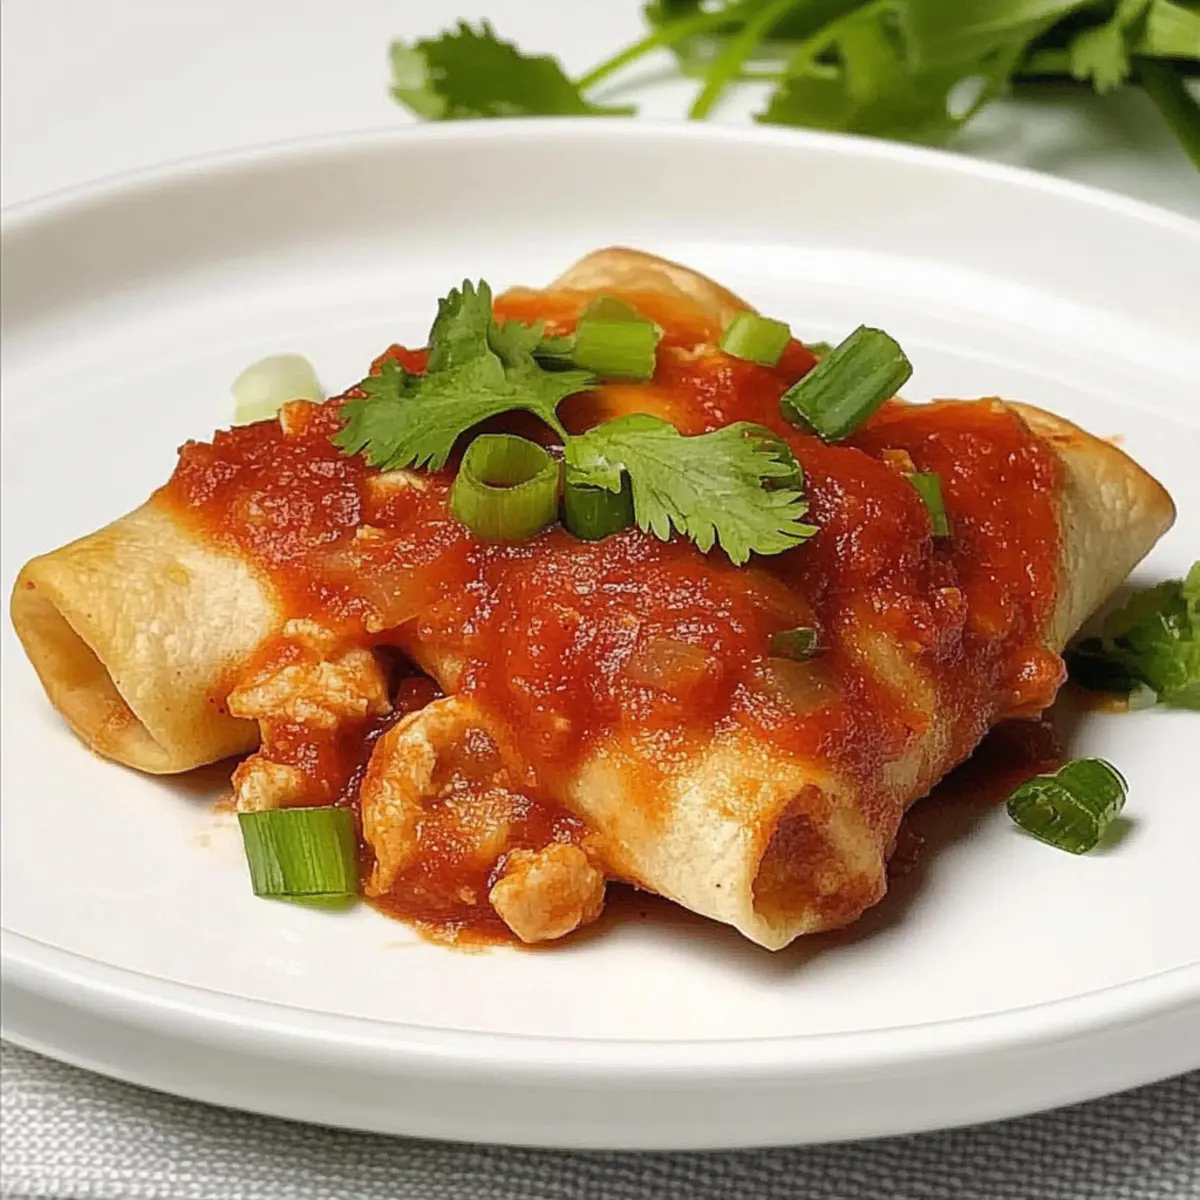
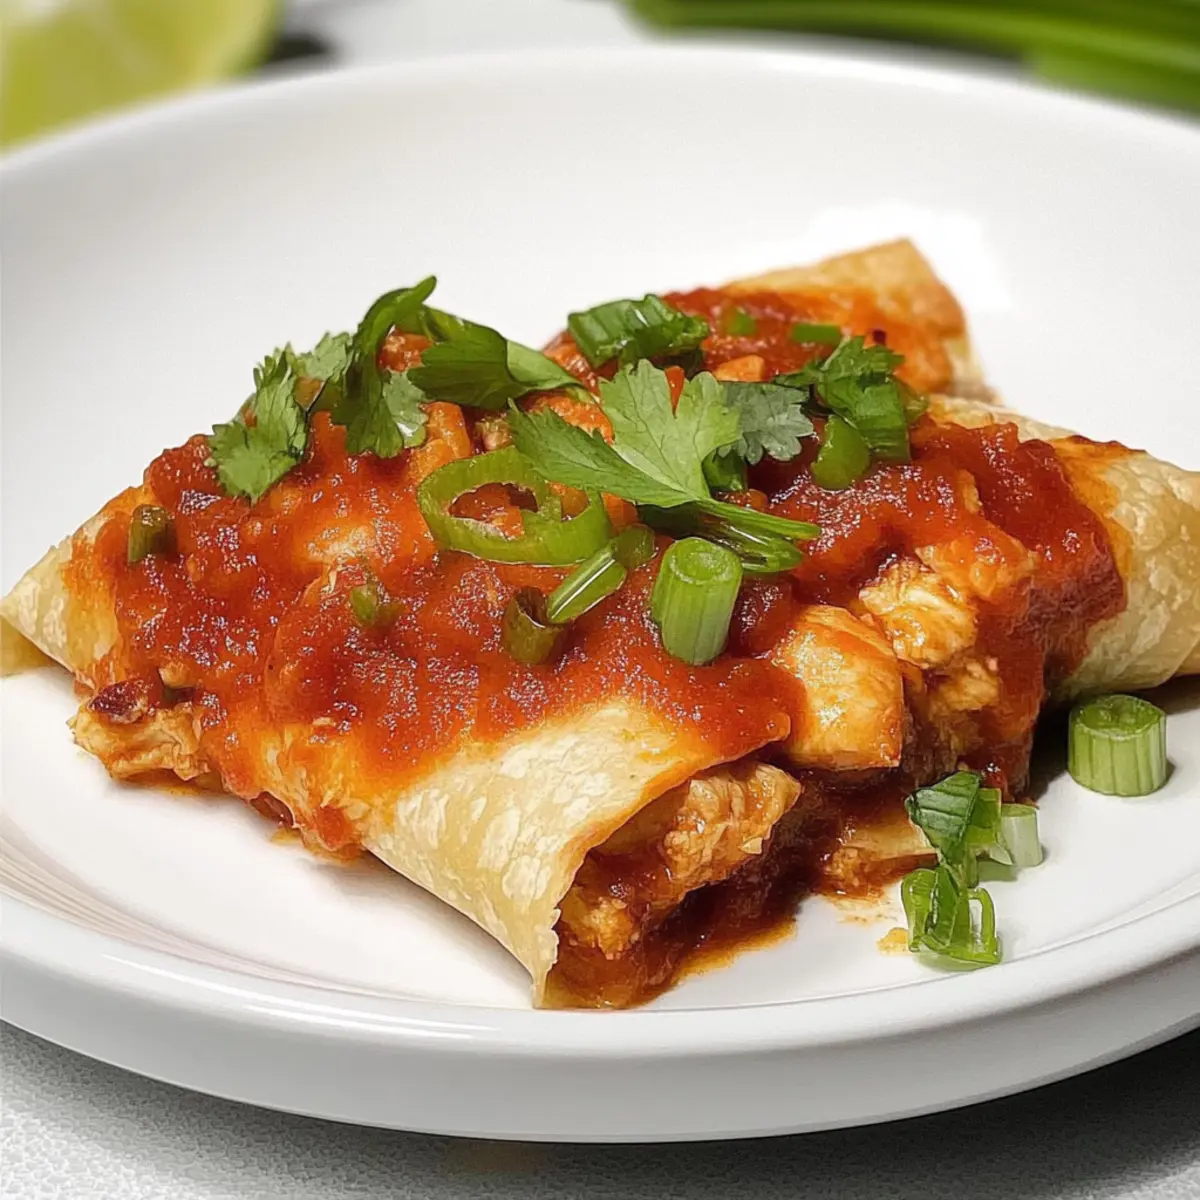
Once the Chicken Chimichangas are beautifully browned, remove them from the oven and let them cool slightly. Serve hot, topped with the remaining picante sauce and a sprinkle of green onions. You can also add a dollop of sour cream for a creamy, satisfying finish to your homemade feast!
Make Ahead Options
These Chicken Chimichangas are perfect for meal prep, saving you time on busy weeknights! You can assemble them up to 24 hours in advance; simply prepare the filling, fill the tortillas, and place them seam-side down in a baking pan. Cover with plastic wrap and refrigerate until you're ready to bake. To maintain quality, brush them with melted butter right before baking, as this helps achieve that golden, crispy exterior. When you're ready to enjoy your delicious homemade meal, just pop the chimichangas in a preheated oven at 375°F (190°C) for 25-30 minutes, and they’ll come out just as delicious as fresh!
Expert Tips for Chicken Chimichangas
• Use Right Pan: Opt for a 13x9-inch baking pan to ensure proper cooking. A larger pan may lead to uneven baking, making your Chicken Chimichangas less crispy.
• Heat Tortillas: Warm tortillas before filling to prevent tearing. This small step ensures easy rolling and keeps your filling secure, enhancing the overall outcome.
• Crispier Finish: For even crunchiness, consider using an air fryer set to 375°F. This method provides a perfect texture without frying, making your Chicken Chimichangas healthier!
• Filling Variations: Don’t hesitate to get creative! Substituting chicken with ground beef or adding black beans will elevate your dish, allowing for exciting flavor combinations.
• Freezing Tips: To prep ahead, wrap uncooked chimichangas in foil and store them in freezer bags for up to three months. Bake directly from frozen, adding a few extra minutes to cooking time.
How to Store and Freeze Chicken Chimichangas
Fridge: Store leftover Chicken Chimichangas in an airtight container for up to 5 days. Reheat in an oven at 350°F (175°C) for the best texture.
Freezer: Wrap uncooked chimichangas tightly in foil and place them in freezer bags for up to 3 months. Bake from frozen, adding a few extra minutes to cooking time.
Reheating: To reheat cooked chimichangas, place them on a baking sheet and warm in a preheated oven at 350°F (175°C) for about 15-20 minutes, ensuring they're heated through.
Airtight Tip: Make sure to wrap your chicken chimichangas well before freezing to prevent freezer burn and preserve their delicious flavor!
Chicken Chimichangas Variations You’ll Love
Feel free to tailor these delightful chimichangas to suit your taste buds and dietary needs!
-
Shredded Chicken: Swap cubed chicken for shredded for a totally different texture that easily absorbs flavors.
-
Vegetarian Delight: Replace chicken with black beans and corn for a hearty and healthy vegetarian option. It's packed with fiber and nutrients!
-
Cheese Choices: Try using monterey jack or pepper jack cheese for a spicy kick, adding an exciting flavor twist to your dish.
-
Spicy Edition: Mix in jalapeños or your favorite hot sauce to the filling for an extra spicy layer that excites the palate. Go bold with the heat!
-
Gluten-Free: Use corn tortillas instead of flour to create a gluten-free version that’s just as delicious and satisfying. It keeps the flavor intact while being easier on the tummy!
-
Creamy Spin: Add a dollop of cream cheese into the filling for a rich and creamy texture that pairs perfectly with the savory chicken.
-
Saucy Toppings: Instead of picante sauce, drizzle a creamy avocado sauce or make your own enchilada-style sauce for a unique spin. Pour it over the top before serving for a beautiful presentation!
-
Freezing Ahead: Make a double batch and freeze half uncooked. You’ll have a ready-made meal for those busy nights when you want a quick and healthy option—just bake directly from frozen!
These variations will elevate your Chicken Chimichangas experience, inviting you to explore flavors and textures in delightful new ways! And if you’re feeling inspired, check out our Cheesy Chicken Spaghetti or Mushroom Chicken Comfort for even more deliciousness. Enjoy cooking!
What to Serve with Chicken Chimichangas
Nothing elevates a delicious meal quite like the perfect side dishes to accompany your Chicken Chimichangas, creating a feast for the senses.
-
Spanish Rice: This flavorful rice dish adds a delightful balance of spices that complements the savory filling beautifully. It provides a filling base, perfect for soaking up any extra sauce.
-
Refried Beans: Creamy and hearty, refried beans elevate your dining experience while adding a comforting texture that harmonizes with the crispy chimichangas.
-
Fresh Guacamole: The creaminess and zesty flavors of guacamole bring a refreshing element, cutting through the richness of the chimichangas. It’s a staple that customers rave about!
-
Corn Salsa: Vibrant corn salsa adds a burst of sweetness and crunch, offering a refreshing contrast to the savory and spiced elements of the meal. Plus, it makes for a colorful plate!
-
Chilled Margarita: For a drink pairing, a classic margarita's tangy and refreshing bite ties everything together. The citrus notes beautifully balance the savory flavors on the plate.
-
Crispy Tortilla Chips: Lightly salted tortilla chips provide a fun crunch and perfect vehicle for dipping into guacamole or salsa, enhancing the rustic charm of your meal.
These pairings create a delightful dining experience that takes your Chicken Chimichangas to the next level!
Chicken Chimichangas Recipe FAQs
What is the best way to select ripe ingredients for Chicken Chimichangas?
Absolutely! For the best flavor, choose ripe ingredients. Look for chicken that is freshly cooked and moist. For your vegetables, pick onions that are firm and aromatic, with no dark spots or soft spots. Fresh, vibrant green onions should have crisp tops. If you’re adding tomatoes or any other toppings, ensure they're plump and have a rich color.
How should I store leftover Chicken Chimichangas?
Very simply! Store your leftover Chicken Chimichangas in an airtight container in the refrigerator for up to 5 days. To maintain their crispness, reheat them in an oven at 350°F (175°C) for about 15-20 minutes until heated through rather than using a microwave, which can make them soggy.
Can I freeze Chicken Chimichangas, and if so, how?
Certainly! To freeze your Chicken Chimichangas, assemble them without toppings and wrap each one tightly in aluminum foil. Place them in a freezer bag, and they can last for up to 3 months. When you're ready to enjoy them, bake directly from frozen at 375°F (190°C) for an additional 5-10 minutes, adjusting the time as needed until they are heated through and crispy.
What are some common troubleshooting tips for making perfect Chicken Chimichangas?
If your Chimichangas aren’t crisping up as expected, you may be using a larger baking pan than suggested. Sticking to a 13x9-inch pan allows for optimal air circulation for even baking. Additionally, ensure that your oven is preheated adequately before baking. If they’re too dry, consider adding a bit more picante sauce to the filling to retain moisture. Lastly, keep an eye on the baking time—overbaking can lead to a too-dry filling.
Are there any dietary considerations I should keep in mind with Chicken Chimichangas?
Absolutely! If you have food allergies, be mindful of the cheese and tortillas. For gluten-free options, use corn tortillas instead of flour. Additionally, if you’re cooking for pets, remember that onion and excessive cheese can be harmful to dogs and cats, so it's best to keep those separate and opt for dog-friendly ingredients if you're sharing some bites.
What is the secret to achieving a crispy texture for baked Chicken Chimichangas?
The secret lies in a few crucial steps. First, ensure you warm the tortillas before filling them; this prevents tearing. Next, brushing the tops generously with melted butter not only adds flavor but also promotes browning. Lastly, using a well-preheated oven and monitoring the cooking time makes all the difference in achieving that perfect, golden-brown, crispy exterior that everyone loves!
Crispy Chicken Chimichangas: Baked for Guilt-Free Indulgence
Ingredients
Equipment
Method
- Preheat your oven to 375°F (190°C) and prepare a greased 13x9-inch baking pan.
- In a mixing bowl, combine the chicken, picante sauce, cheddar cheese, green onions, cumin, and oregano.
- Warm the tortillas in the microwave for 20-30 seconds to make them pliable.
- Spoon ½ cup of the filling onto the center of each tortilla and roll them tightly.
- Brush the tops of the chimichangas with melted butter before placing them seam-side down in the baking pan.
- Bake uncovered for 20-25 minutes until golden brown, optionally broiling for 1-2 minutes for crispness.
- Serve hot, topped with extra picante sauce and green onions, with sour cream on the side if desired.
Leave a Reply