
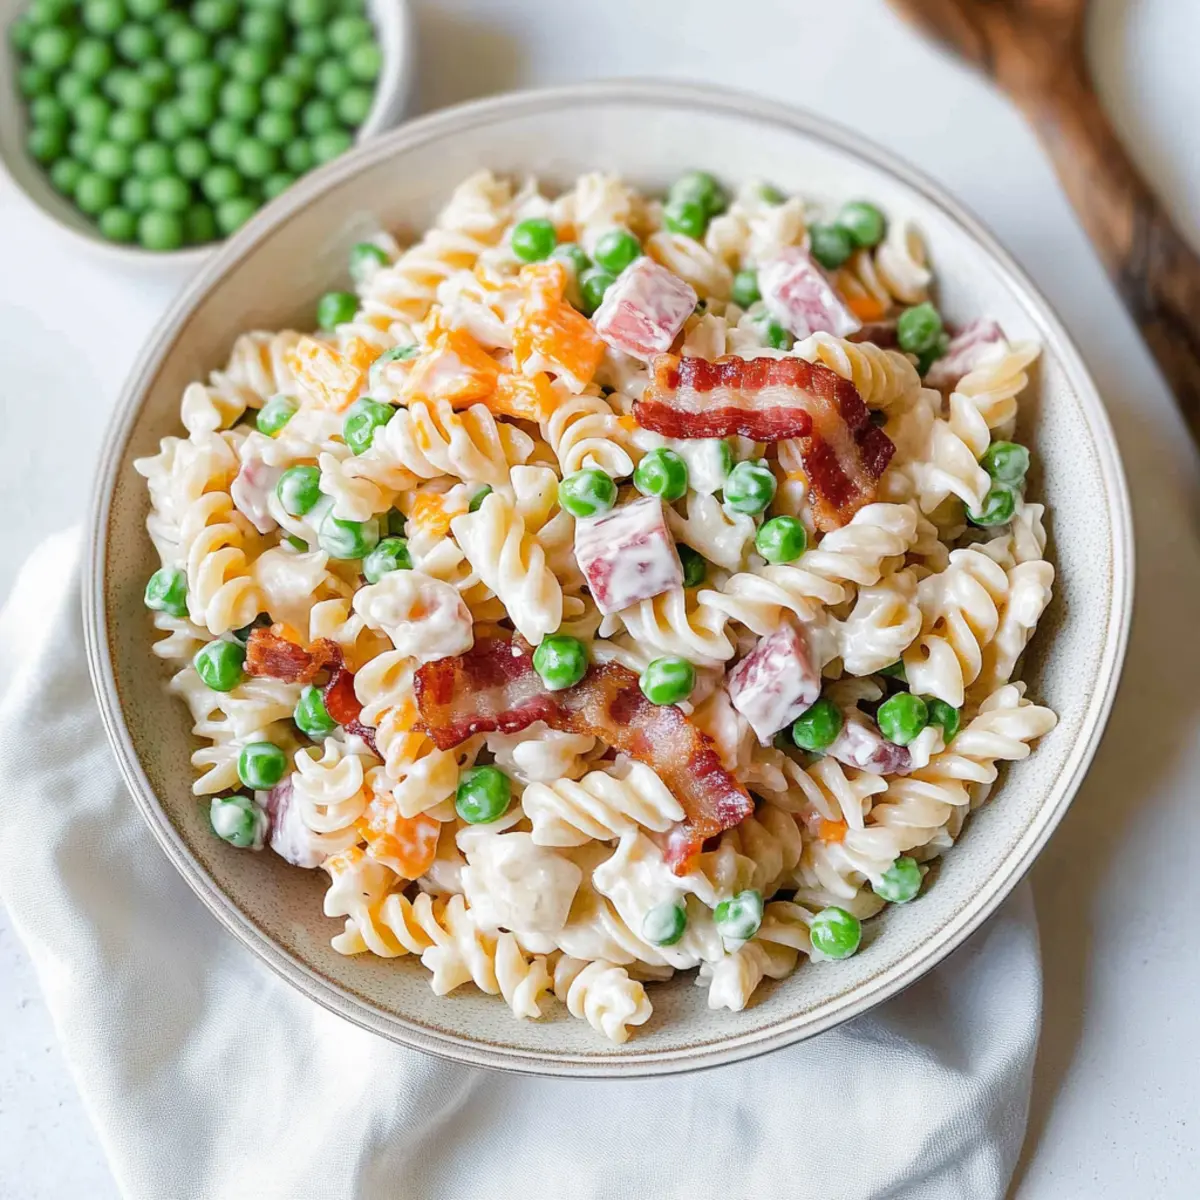
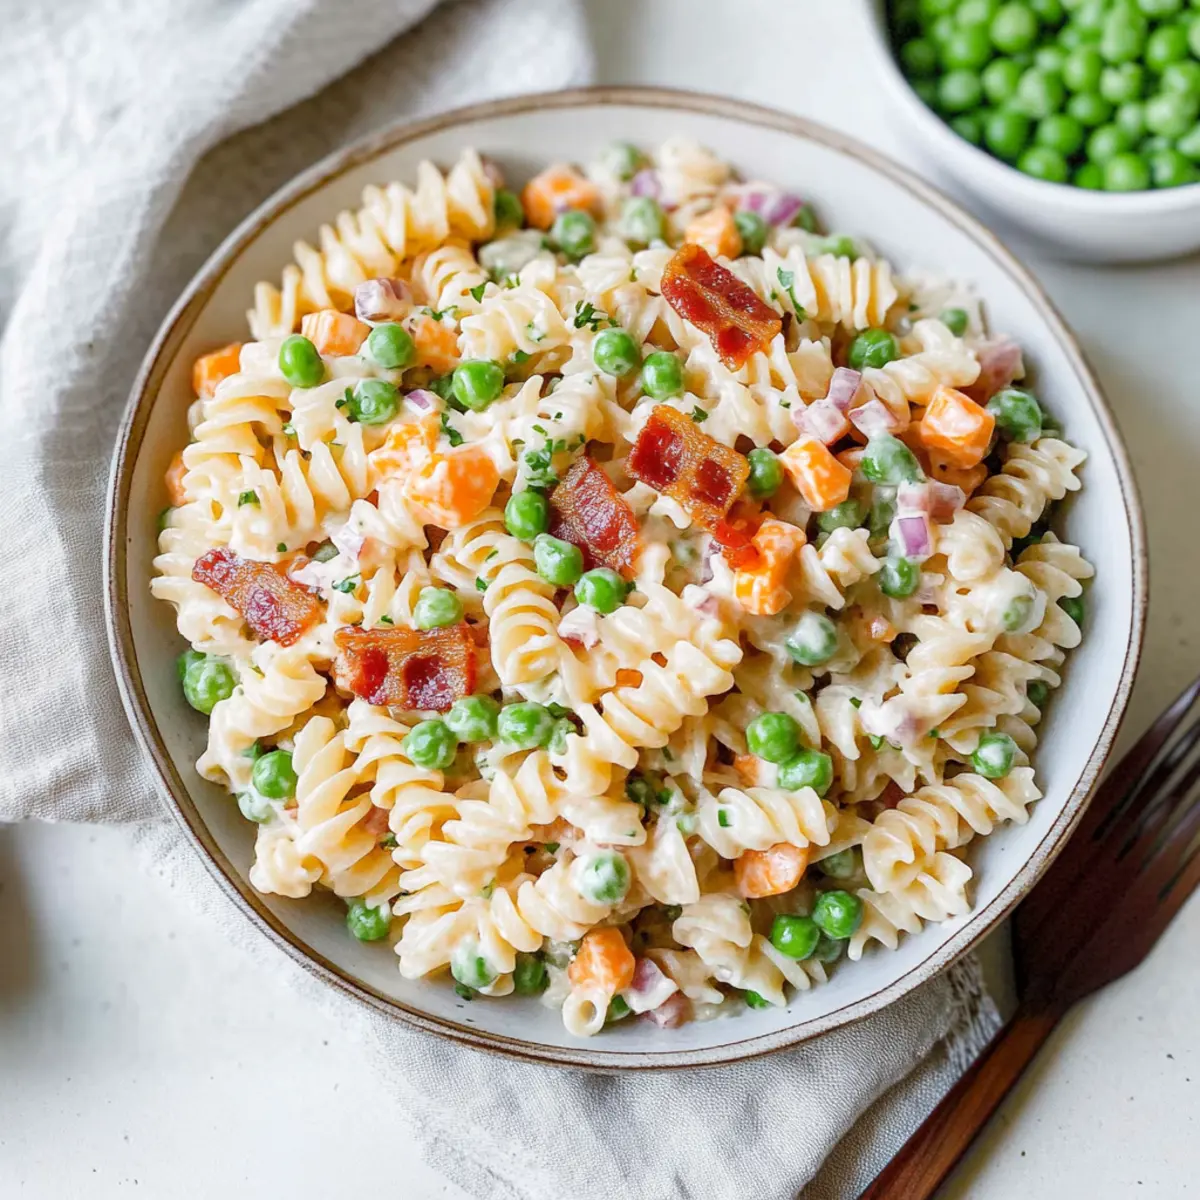
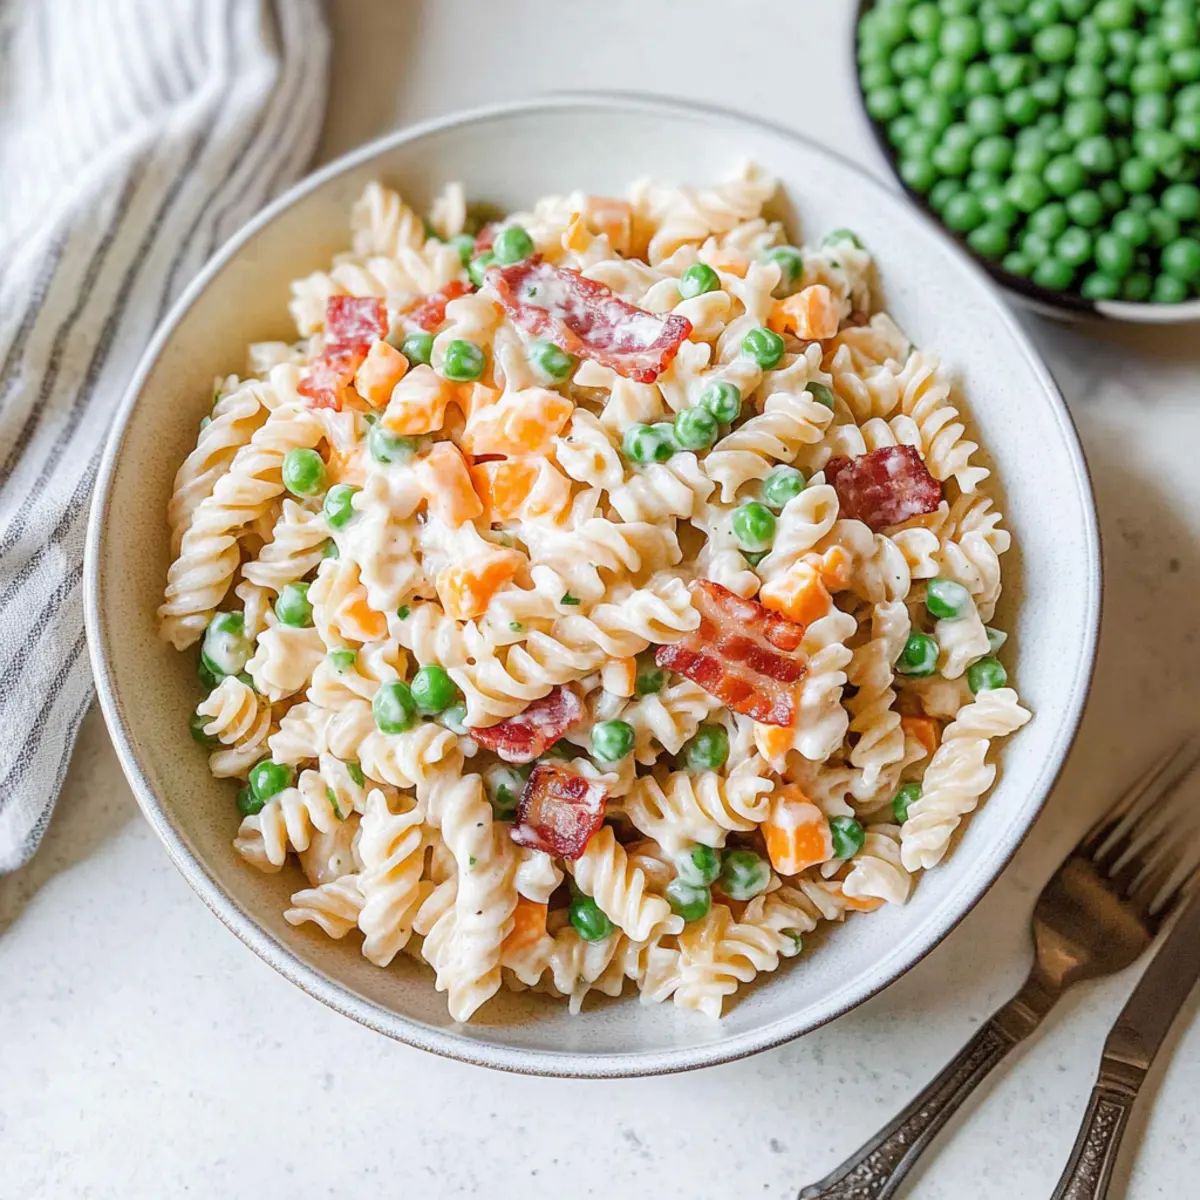
As the sun casts its warm rays and the scent of grilling fills the air, I find myself reminiscing about my favorite summer gatherings. One dish that never fails to steal the spotlight is this creamy ranch pasta salad with bacon. Combining al dente rotini, crisp bacon, and vibrant peas, it’s a crowd-pleaser that delivers both comfort and refreshment. Plus, it’s a breeze to whip up, making it the perfect companion for those busy potluck days or laid-back BBQs. Packed with bold flavors and creamy textures, this salad is delightfully versatile, even though it feels indulgent! Curious about how to make this fantastic dish come together? Let’s dive in!
Why Is This Pasta Salad Perfect for Summer?
Simplicity: This creamy ranch pasta salad comes together effortlessly, perfect for those busy BBQ days when you need a quick yet impressive side dish.
Crowd-Pleaser: It’s hard to resist the combination of crispy bacon, creamy dressing, and sweet peas, making it a hit at any gathering.
Bold Flavor: The rich smoked cheddar and zesty ranch dressing bring a symphony of taste that complements grilled meats beautifully.
Versatile Options: Whether you're serving it at a picnic or as a light lunch, feel free to customize it with ingredients like Chicken Caesar Salad or toss in seasonal veggies for a fresh twist.
Make-Ahead Friendly: Prep your ingredients ahead of time! Store them separately and combine right before serving for a salad that stays fresh and vibrant.
Creamy Ranch Pasta Salad Ingredients
• A delectable blend to create your dish!
For the Pasta
- Rotini – The perfect base for holding the creamy dressing; substitute with penne or bow ties if desired.
For the Dressing
- Mayonnaise – Adds a rich creaminess; Greek yogurt is a lighter alternative.
- Greek Yogurt – Enhances the dressing's creaminess and tang; replace with sour cream if preferred.
- Buttermilk – Helps to achieve a thinner consistency; use milk and lemon juice as a substitute if necessary.
- Dried Dill – Infuses a lovely herbal flavor; fresh dill is a great substitute for more vibrancy.
- Garlic Powder – Contributes depth; fresh garlic can boost the flavor intensity.
- Onion Powder – Provides a subtle sweetness; fresh onions can substitute for a bolder taste.
- Kosher Salt & Black Pepper – Essential for balancing flavors; adjust according to taste.
For the Salad
- Bacon – Crispy, savory goodness; swap with turkey bacon for a lighter touch.
- Frozen Peas – Sweet and colorful addition; fresh peas work beautifully in season.
- Smoked Cheddar Cheese – Adds a rich, smoky flavor; regular cheddar can be used for a milder taste.
- Sharp Cheddar Cheese – Enhances richness and creaminess; reduce quantity for a lighter option.
- Chopped Parsley – Brightens up your salad; substitute with chives for a different flavor profile.
This creamy ranch pasta salad takes the spotlight at summer gatherings, satisfying cravings with its delightful textures and flavors!
Step‑by‑Step Instructions for Creamy Ranch Pasta Salad
Step 1: Cook the Pasta
Begin by bringing a large pot of salted water to a rolling boil. Add the rotini and cook according to the package instructions, usually about 8–10 minutes, until al dente. Once cooked, drain the pasta well and rinse it under cold water to stop the cooking process. Set it aside to cool completely before combining it with other ingredients for the creamy ranch pasta salad.
Step 2: Prepare Dressing
In a mixing bowl, whisk together the mayonnaise, Greek yogurt, and buttermilk until thoroughly combined. Then, add the dried dill, garlic powder, onion powder, kosher salt, and black pepper. Adjust the seasoning to taste. Once smooth, cover the bowl with plastic wrap and refrigerate the dressing for at least 30 minutes, allowing the flavors to meld together beautifully.
Step 3: Cook Bacon
While the dressing chills, heat a skillet over medium heat. Add your bacon slices and cook for about 8–10 minutes, or until they are golden and crispy, flipping occasionally for even cooking. Once crispy, transfer the bacon to a paper towel-lined plate to drain, and let it cool slightly before chopping it into bite-sized pieces for the creamy ranch pasta salad.
Step 4: Combine Ingredients
In a large mixing bowl, combine the cooled rotini, thawed frozen peas (rinsed under cold water), chopped bacon, smoked cheddar, sharp cheddar, and parsley. Use a spatula to gently toss all the ingredients together until evenly distributed, ensuring that every bite is loaded with flavor as you build the perfect creamy ranch pasta salad.
Step 5: Mix and Chill
Pour the prepared dressing over the pasta mixture in the large bowl. Gently stir to combine, making sure every piece of pasta and ingredient is coated with the velvety ranch dressing. Cover the bowl with plastic wrap and let it chill in the refrigerator for at least an hour, allowing the creamy ranch pasta salad to cool and the flavors to deepen.
Creamy Ranch Pasta Salad Variations
Feel free to let your creativity shine with these delightful twists and substitutions!
- Dairy-Free: Substitute Greek yogurt and mayonnaise with avocado or a vegan mayo for a creamy plant-based version that's just as satisfying.
- Protein Swap: Replace bacon with diced ham or grilled chicken for a savory kick, creating a filling protein-packed version perfect for lunch.
- Cheese Choice: Try gouda or pepper jack cheese to add a unique twist to the flavor profile; it infuses a delightful melt-in-your-mouth richness.
- Vegetable Boost: Add fresh veggies such as bell peppers, cherry tomatoes, or cucumbers for a vibrant crunch and to lighten the dish.
- Spicy Kick: Toss in some diced jalapeños or a scoop of your favorite hot sauce to elevate the heat level, making your salad zing with excitement!
- Herb Enhancement: Use fresh herbs like basil or cilantro in place of parsley for a fragrant and flavorful upgrade that sings of summer.
- Nutty Goodness: Sprinkle some chopped nuts like pecans or walnuts for a pleasant crunch that contrasts beautifully with the creamy dressing.
- Pasta Variety: Swap rotini for whole wheat or gluten-free pasta varieties like quinoa or brown rice, adjusting the texture and nutritional profile for a wholesome twist.
There are countless ways to make this creamy ranch pasta salad your own. Need more inspiration? Check out my delicious Tomato Pasta Comforting or Parmesan Chicken Pasta for more savory ideas!
Expert Tips for Creamy Ranch Pasta Salad
-
Pasta Perfection: Ensure pasta is cooked al dente to avoid mushiness. Rinse with cold water after draining to stop cooking and cool it down.
-
Dressing Delight: Make the dressing ahead of time and refrigerate it for at least 30 minutes. This enhances flavors and keeps your creamy ranch pasta salad fresh.
-
Bacon Bliss: Fry bacon until crispy, and allow it to cool before chopping. This prevents sogginess and ensures a delightful crunch with each bite.
-
Peas & Greens: If using frozen peas, be sure to thaw them under running cold water beforehand. This keeps them bright in color and fresh in taste.
-
Chill Out: For the best texture and flavor, let the salad chill for at least an hour after mixing. It allows the ingredients to marry beautifully together!
How to Store and Freeze Creamy Ranch Pasta Salad
Fridge: Store your creamy ranch pasta salad in an airtight container for up to 3 days. Keep it chilled to maintain freshness and prevent spoilage.
Separate Ingredients: For optimal taste and texture, consider storing components like bacon and dressing separately. Combine just before serving to keep everything fresh and delightful.
Freezer: Freezing is not recommended for this salad, as the creamy dressing may separate and affect the overall texture of the creamy ranch pasta salad.
Reheating: If you have leftover portions, enjoy them cold straight from the fridge. For a different twist, gently mix in a bit of fresh dressing to refresh the flavors.
Make Ahead Options
These Creamy Ranch Pasta Salad with Bacon preparations are perfect for busy weeknights or gatherings! You can cook the rotini and let it cool up to 24 hours in advance, storing it in an airtight container in the refrigerator to maintain its texture. Additionally, you can prepare the dressing by whisking the mayonnaise, Greek yogurt, buttermilk, and seasonings, allowing it to chill overnight so the flavors meld beautifully. Keep the crispy bacon and peas separate until just before serving to prevent sogginess. When you're ready to assemble, combine everything in a large bowl, and you'll have a delicious salad that tastes just as fresh and vibrant as if you made it on the same day!
What to Serve with Creamy Ranch Pasta Salad with Bacon
Elevate your dining experience by creating a delightful spread that balances flavors and textures.
- Grilled Chicken Skewers: Juicy, marinated chicken adds protein and pairs beautifully with the creamy salad, enhancing your meal’s heartiness.
- Corn on the Cob: Sweet, buttery corn offers a fresh crunch that contrasts perfectly with the creamy elements of the pasta salad.
- Fresh Garden Salad: A light mix of greens and colorful veggies brightens your plate, providing a refreshing accompaniment to rich flavors.
- Garlic Breadsticks: Warm, garlicky breadsticks deliver an indulgent touch—perfect for soaking up any extra dressing!
- Watermelon Feta Salad: The sweet juiciness of watermelon combined with salty feta adds a refreshing twist that complements the creamy ranch flavor.
- Lemonade or Iced Tea: Light and refreshing drinks enhance the summer vibe and balance the dish’s richness, refreshing your palate.
- Chocolate Chip Cookies: For a sweet ending, classic cookies provide a comforting contrast to the savory pasta salad, rounding out your meal perfectly.
Creamy Ranch Pasta Salad with Bacon Recipe FAQs
How do I choose ripe ingredients for my pasta salad?
Absolutely! For the best flavors, choose fresh and ripe veggies. If using fresh peas, select vibrant, bright green ones without dark spots. For bacon, opt for thick-cut varieties for extra crispiness, and ensure your cheeses are fresh for maximum creaminess!
How should I store creamy ranch pasta salad?
Store your creamy ranch pasta salad in an airtight container in the refrigerator for up to 3 days. To maintain the freshness and prevent any sogginess, I recommend keeping the dressing and bacon components stored separately, combining them only before serving.
Can I freeze creamy ranch pasta salad?
No, freezing is not recommended for this salad. The creamy dressing can separate and lose its delightful texture upon thawing, making the salad less enjoyable. Instead, try to make only what you need for immediate consumption to keep it at its best!
What should I do if my pasta salad is too dry?
If you find your creamy ranch pasta salad has dried out, don't fret! Simply drizzle a bit of extra buttermilk or a splash of yogurt over the salad and gently mix until it reaches your desired creaminess. Tadah! You're back in business!
Is this pasta salad suitable for people with dietary restrictions?
Definitely! If you're making this for someone with dietary restrictions, you can easily customize the ingredients. For those who are lactose intolerant, substitute all cheeses with dairy-free versions and skip the buttermilk. If there's a concern about bacon, swap it out for turkey bacon or omit it entirely for a vegetarian option. Always double-check labels for any potential allergens.

Creamy Ranch Pasta Salad That'll Wow Your Summer BBQ Guests
Ingredients
Equipment
Method
- Cook the pasta in salted boiling water according to the package instructions until al dente, about 8–10 minutes. Drain and rinse under cold water. Set aside to cool.
- Prepare the dressing by whisking together mayonnaise, Greek yogurt, and buttermilk. Add dill, garlic powder, onion powder, salt, and pepper. Refrigerate for at least 30 minutes.
- Cook the bacon in a skillet over medium heat for 8–10 minutes until crispy. Transfer to a paper towel-lined plate to cool, then chop into pieces.
- In a large bowl, combine cooled pasta, thawed peas, chopped bacon, cheeses, and parsley. Toss gently to combine.
- Pour the dressing over the pasta mixture and stir to combine. Cover and chill in the refrigerator for at least an hour before serving.
Leave a Reply