
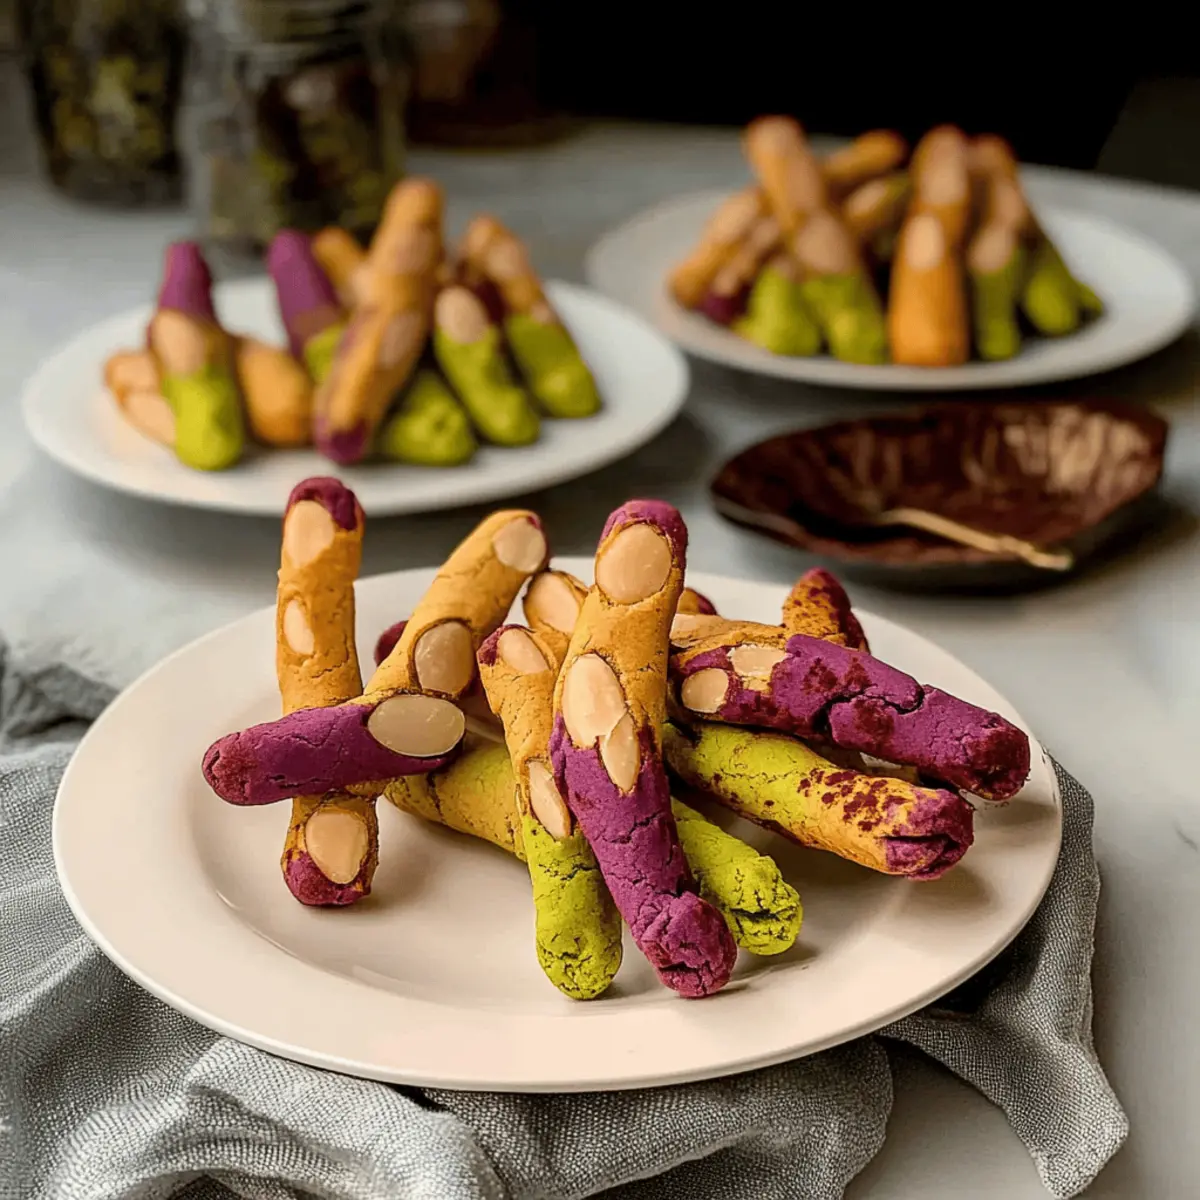
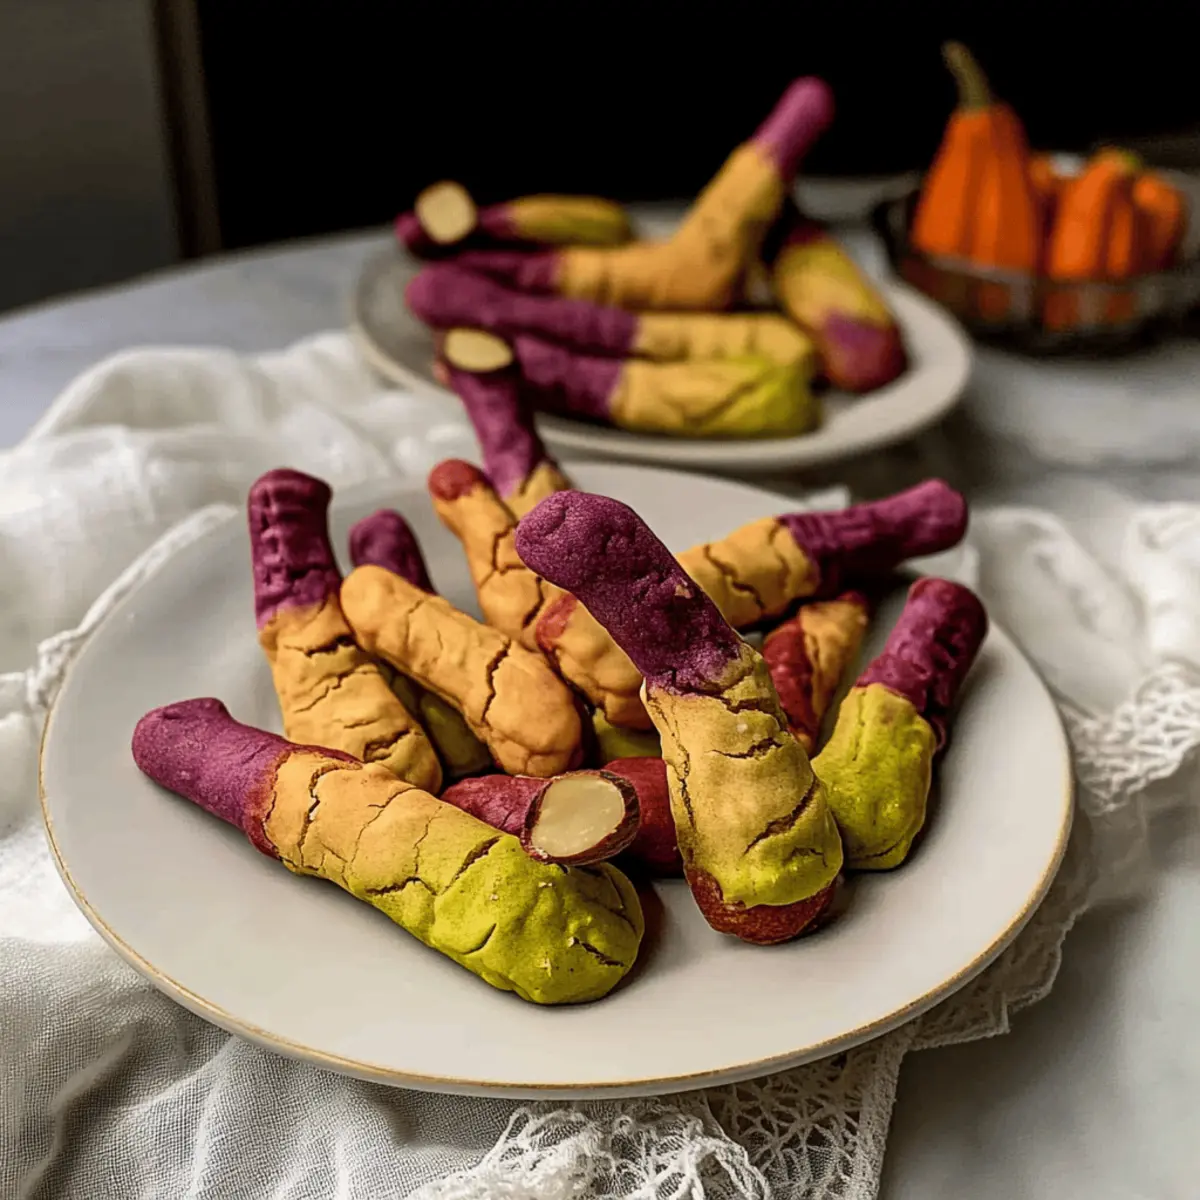
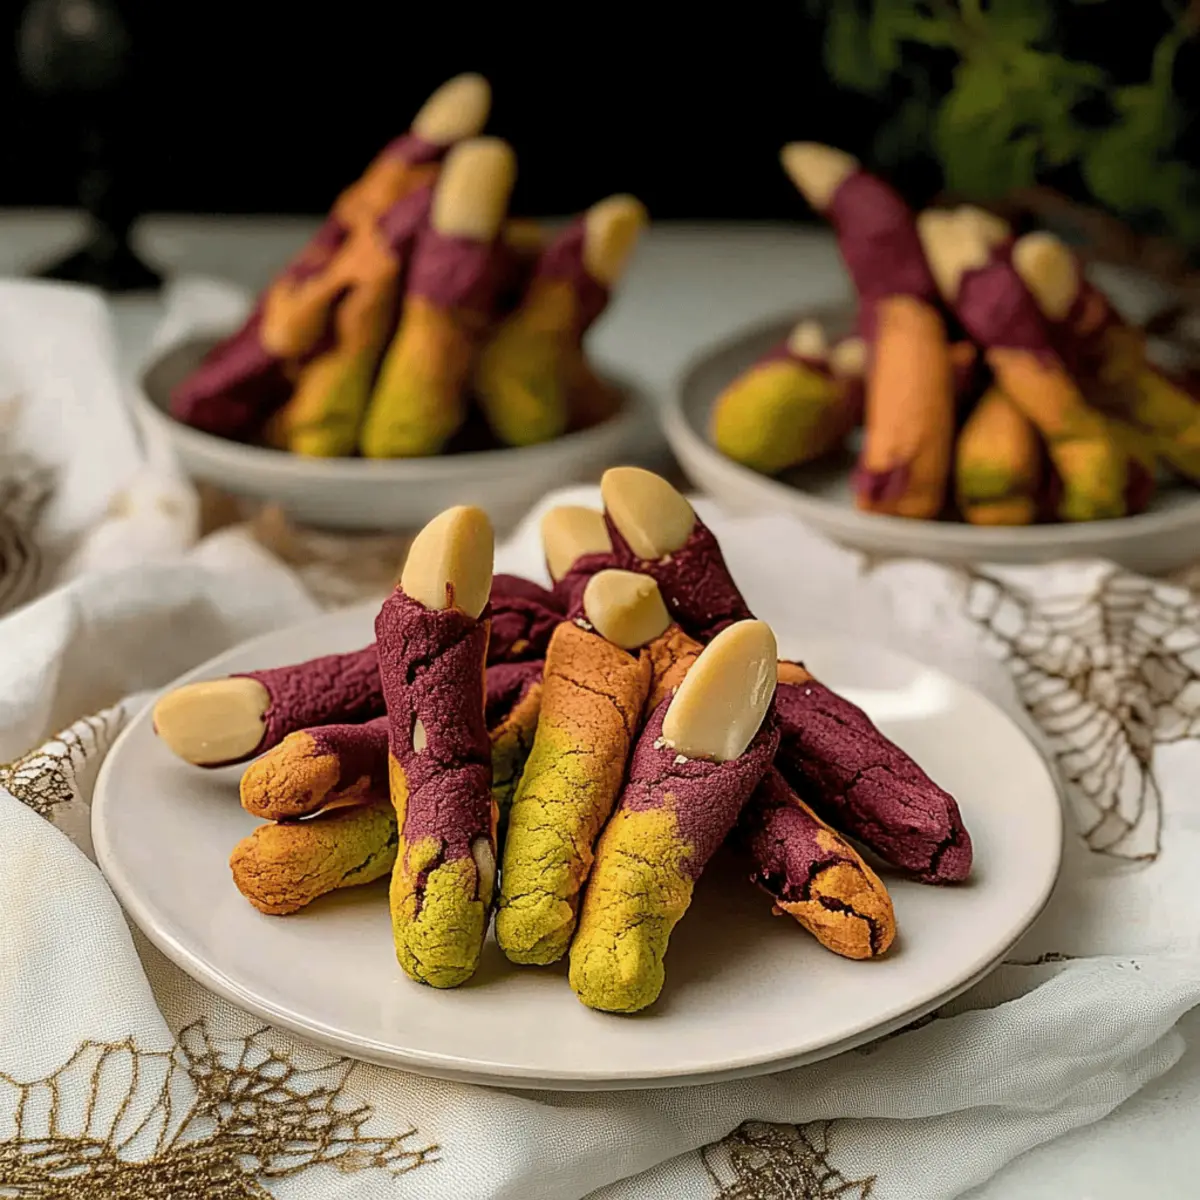
As the wind howls and leaves rustle, there's a mischievous magic in the air that signals Halloween is just around the corner. Enter the star of your next spooky gathering: Creepy Witch Finger Cookies, a delightfully eerie treat that’s sure to be a hit with both kids and adults. Not only are these cookies soft, moist, and buttery—they're made using natural colorings, allowing you to craft an array of festive hues without any artificial additives. Perfect for novice bakers, this recipe invites culinary creativity while keeping things easy and fun! Who wouldn't want to serve a batch of ghastly-looking yet delicious cookies at their next Halloween party? Are you ready to conjure up these spooky delights?

Why Are These Cookies So Special?
Unique Presentation: These Creepy Witch Finger Cookies are not just any cookies; they’re creepy edible sculptures that will spark conversation at your Halloween gathering.
Endless Customization: With natural colorings like matcha and cocoa powder, you can create an array of vibrant cookies—impress your guests with your culinary artistry!
Easy to Make: This recipe is perfect for bakers of all levels. It requires minimal effort, making it a fun family activity to enjoy together.
Deliciously Soft Texture: Once baked, these cookies are incredibly soft and buttery, delivering the perfect balance of spooky visuals and delightful flavor.
Festive Appeal: Pair them with other Halloween treats, like Pineapple Cookies Tropical for an attractive dessert table that’ll enchant both kids and adults alike!
Creepy Witch Finger Cookies Ingredients
For the Cookie Dough
- 226 g unsalted butter – This rich butter brings moisture; make sure it's softened for perfect creaming.
- 140 g confectioner’s sugar – Sweetens the cookies while contributing to a tender texture.
- 1 teaspoon sea salt – Enhances flavors and balances the sweetness beautifully.
- 4 egg yolks – Imparts richness and moisture, ensuring that delightful, soft crumb.
- 5 mL vanilla extract – Adds a lovely flavor; almond extract can be a fun alternative!
- 454 g all-purpose flour – The backbone of the cookie; essential for structure.
- ¼ teaspoon baking powder – Offers lightness to the cookies, making them delightful to eat.
For Decorating
- 50 whole blanched almonds – Gives the creepy “nail” look; swap for melted chocolate for a nut-free version.
For Natural Colorings
- 4-6 g matcha powder – Use this for a vibrant green hue; adjust quantity based on desired color intensity.
- 20-30 g purple sweet potato powder – Incorporates a spooky purple shade; tweak as needed!
- 5-15 g cocoa powder – Perfect for achieving a rich brown color; use it to create depth in your cookies.
Bring these Creepy Witch Finger Cookies to life with natural coloring options—your Halloween festivities are about to get a whole lot spookier!
Step‑by‑Step Instructions for Creepy Witch Finger Cookies
Step 1: Cream Butter Mixture
In a large mixing bowl, use an electric mixer to cream together 226 g of softened unsalted butter, 140 g of confectioner’s sugar, and 1 teaspoon of sea salt. Mix on medium speed until the mixture is light and fluffy, about 3-5 minutes. This step is crucial for achieving the soft texture of your Creepy Witch Finger Cookies.
Step 2: Incorporate Eggs
Add 4 egg yolks and 5 mL of vanilla extract to the creamed mixture, beating until everything is well combined. The mixture should be smooth and slightly thick, indicating that the eggs are fully incorporated. This rich egg yolk addition will help create the delightful, buttery flavor in your cookies.
Step 3: Color the Dough
If desired, divide the cookie mixture into separate bowls to incorporate the colors. For vibrant hues, mix in 4-6 g of matcha powder for green, 20-30 g of purple sweet potato powder for purple, or 5-15 g of cocoa powder for brown. Stir until the colors are evenly distributed, ensuring your Creepy Witch Finger Cookies will look as spooky as they taste.
Step 4: Prepare Dry Ingredients
In a separate bowl, whisk together 454 g of all-purpose flour and ¼ teaspoon of baking powder. This mixture adds the structural foundation for your cookies while the baking powder ensures they remain light. Once combined, it’s time to integrate this dry mixture into the wet ingredients for the next step.
Step 5: Combine Mixtures
Gradually add the dry ingredient mixture to the butter mixture, mixing on low speed until a soft dough forms. Be careful not to overmix, as this can lead to tough cookies. The dough should be cohesive and slightly sticky, ready to be shaped into your eerie witch fingers soon!
Step 6: Chill the Dough
Shape the dough into discs and wrap each disc in plastic wrap. Place the wrapped dough in the refrigerator to chill for about 30 minutes. This chilling process firms up the dough, which will help maintain the shape of your Creepy Witch Finger Cookies during baking.
Step 7: Shape Cookies
After chilling, scoop tablespoons of dough and roll them into finger shapes, adding knuckles to enhance the spooky look. Press a whole blanched almond into the end of each finger for the “nail.” Your cookies should resemble crooked fingers, setting the stage for Halloween fun as they await baking!
Step 8: Freeze
Transfer the shaped cookies to a lined baking tray and place them in the freezer for 1 hour. Freezing the cookies before baking will help maintain their shape and prevent spreading, ensuring that your Creepy Witch Finger Cookies retain their eerie finger-like form.
Step 9: Bake
Preheat the oven to 325°F (163°C). Once heated, bake the frozen cookies for 20-25 minutes, or until they’re lightly golden across the edges. Keep an eye on them; they should look set but still soft. Remove from the oven once done and allow them to cool on the tray before decorating.
Step 10: Decorate
After cooling, gently remove the almond “nails” and fill the indentations with jam or melted chocolate before replacing the almond. For an extra spooky touch, decorate with additional elements like candy eyeballs or edible glitter. Now your Creepy Witch Finger Cookies are ready to delight and terrify your guests!
Storage Tips for Creepy Witch Finger Cookies
Room Temperature: Store cookies in an airtight container at room temperature for up to 4 days. Keep them away from direct sunlight to maintain their softness.
Fridge: For prolonged freshness, these cookies can also be stored in the fridge for up to 6 days. Make sure to place them in a tightly sealed container to prevent drying out.
Freezer: To extend their life, unbaked dough can be frozen for up to 2 months. Wrap it tightly in plastic wrap or place in a freezer bag to avoid freezer burn.
Reheating: When ready to enjoy, simply bake the frozen cookies directly from the freezer for a delightful treat, ensuring they maintain that spooky look of your Creepy Witch Finger Cookies!
What to Serve with Creepy Witch Finger Cookies
As you embark on your Halloween baking adventure, consider pairing these spooky delights with festive accompaniments to complete the experience.
-
Witch’s Brew Punch: A fun, fruity punch with a hint of fizz that adds a magical touch to your gathering. Serve it in a cauldron for extra flair!
-
Ghoulish Cupcakes: Dark chocolate cupcakes topped with green or purple frosting, creating alluring visual contrasts that harmonize with your witch fingers.
-
Spooky Fruit Platter: A medley of creepy-shaped fruits like ghostly bananas, pumpkin oranges, and apple “witches’ fingers” adds a refreshing balance to the sweet cookies.
-
Monster Marshmallow Treats: Colorful marshmallow squares decorated with candy eyes to create playful monsters. These treats will capture kids' hearts and add whimsy to your dessert table.
-
Dark Hot Chocolate: Rich, velvety hot chocolate topped with whipped cream and chocolate shavings for a cozy drink that pairs perfectly with the buttery cookies.
-
Eyeball Cake Pops: These delightful cake pops, decorated to resemble spooky eyeballs, offer a fun bite-sized treat that meshes perfectly with your theme while keeping the fun alive.
With these delicious pairings, your Halloween spread will be mesmerizing and memorable, making your Creepy Witch Finger Cookies the star attraction of the night!
Expert Tips for Creepy Witch Finger Cookies
-
Butter Temperature: Use softened butter, not melted, to achieve the best texture. Overly melted butter can result in greasy cookies.
-
Color Concentration: Adjust natural coloring amounts based on desired vibrancy. Too much can alter texture; aim for a balanced hue.
-
Dough Handling: Minimize your dough handling to prevent tough cookies. Work quickly when shaping to maintain a light texture.
-
Freezing Advantage: Baking from frozen helps maintain cookie shape and prevents spreading, preserving that delightfully eerie finger look.
-
Nail Decor Tips: For a creepy effect, consider using cocoa powder around knuckles for a “dirty” look; it adds to the spooky aesthetic of your Creepy Witch Finger Cookies.
Creepy Witch Finger Cookies Variations
Feel free to explore and make these cookies your own with delightful swaps and adjustments!
-
Nut-Free Alternative: Replace almonds with decorated melted chocolate for a nut-free twist. Your guests will love the surprise!
-
Flavorful Extract Swap: Use almond or hazelnut extract instead of vanilla for a unique flavor profile that adds depth to the cookies. What a lovely aromatic addition!
-
Color Options: Experiment with other natural colorants like beetroot powder for a vibrant red hue or turmeric for a bright yellow. The possibilities are endless!
-
Chewy Twist: For extra chewiness, try swapping half the all-purpose flour for almond flour. It brings a pleasing texture to each bite. This slight change keeps those spooky cookies moist and tender.
-
Whimsical Sprinkles: Before baking, add spooky sprinkles or edible glitter for a playful finish that enhances your Halloween table. A festive touch that all ages will adore!
-
Fruit Flavors: Incorporate zest from an orange or lemon into the dough for a hint of citrus, which perfectly contrasts the sweetness. You’ll be amazed at the refreshing burst!
-
Tempered Heat: Add a pinch of cayenne pepper or chili powder for a surprising hint of heat that pairs wonderfully with the sweetness. A fun twist if you're feeling brave!
-
Try Different Shapes: Forget the finger form! Roll into round shapes or create ghostly figures instead. These cookies will still taste fantastic and be visually memorable! Pair with some Oatmeal Cookies Chewy for variety.
Let your imagination run wild and create unforgettable treats this Halloween season!
Make Ahead Options
These Creepy Witch Finger Cookies are a fantastic option for busy home cooks looking to save time! You can prepare the dough up to 24 hours in advance by chilling it in the fridge after shaping the fingers. Alternatively, shape the cookies and freeze them for up to 2 months; this helps maintain their spooky form and quality. When you're ready to bake, simply take the frozen cookies out and pop them directly into the oven—no need to thaw! This way, you can whip up eerie treats with minimal hassle, making your Halloween celebrations easier and more enjoyable for everyone!
Creepy Witch Finger Cookies Recipe FAQs
How do I choose ripe ingredients for the Creepy Witch Finger Cookies?
Absolutely! Choose fresh ingredients for the best results. For the butter, make sure it’s softened just enough to leave an indentation when pressed gently with your finger. Egg yolks should be fresh, ideally from a reputable source, which helps in achieving a rich, buttery flavor in your cookies.
What is the best way to store Creepy Witch Finger Cookies?
Very! Store your cookies in an airtight container at room temperature for up to 4 days. If you want to keep them a bit longer, you can refrigerate them for up to 6 days. Just ensure they’re sealed tightly to keep their moisture and flavor intact.
Can I freeze unbaked dough for Creepy Witch Finger Cookies?
Definitely! To freeze the unbaked dough, wrap it tightly in plastic wrap or place it in a freezer-safe bag. It can be kept frozen for up to 2 months. When you're ready to bake, let it thaw slightly for easier shaping and then follow the baking instructions.
What should I do if the cookie dough is too sticky?
Don’t worry! If your dough is too sticky to handle, try dusting your hands and the work surface with a light sprinkle of flour while shaping. If the dough remains difficult to work with, consider adding a touch more flour—just be cautious not to overdo it, as this could make your cookies tough.
Are there any dietary considerations for Creepy Witch Finger Cookies?
Absolutely! For a nut-free version, you can replace whole blanched almonds with decorated melted chocolate for those who are allergic. Also, ensure that any colorings you use are free from allergens if serving to guests with dietary restrictions. Always check labels for any hidden allergens!
How long do the textures of the Creepy Witch Finger Cookies last?
Very! The cookies remain soft and delicious for about 4 days at room temperature. Beyond that, they may dry out. If you’d like to keep the cookies on the softer side, refrigerate them, where they’ll stay fresh and chewy for up to 6 days.
Creepy Witch Finger Cookies: Fun Halloween Treats to Bake!
Ingredients
Equipment
Method
- In a large mixing bowl, cream together 226 g of softened unsalted butter, 140 g of confectioner’s sugar, and 1 teaspoon of sea salt using an electric mixer until light and fluffy, about 3-5 minutes.
- Add 4 egg yolks and 5 mL of vanilla extract to the creamed mixture, beating until well combined.
- Divide the cookie mixture into bowls to incorporate colors, mixing in matcha powder, purple sweet potato powder, or cocoa powder as desired.
- In a separate bowl, whisk together 454 g of all-purpose flour and ¼ teaspoon of baking powder before integrating this into the wet ingredients.
- Gradually add the dry mixtures to the butter mixture, mixing on low speed until a soft dough forms.
- Shape the dough into discs, wrap in plastic wrap, and chill in the refrigerator for about 30 minutes.
- Scoop tablespoons of dough, roll them into finger shapes, and press a whole blanched almond into the end for the 'nail'.
- Transfer shaped cookies to a lined baking tray and freeze for 1 hour.
- Preheat the oven to 325°F (163°C) and bake the frozen cookies for 20-25 minutes until lightly golden.
- Once cooled, gently remove the almond 'nails', fill indentations with jam or melted chocolate, and replace the almond.


Leave a Reply