
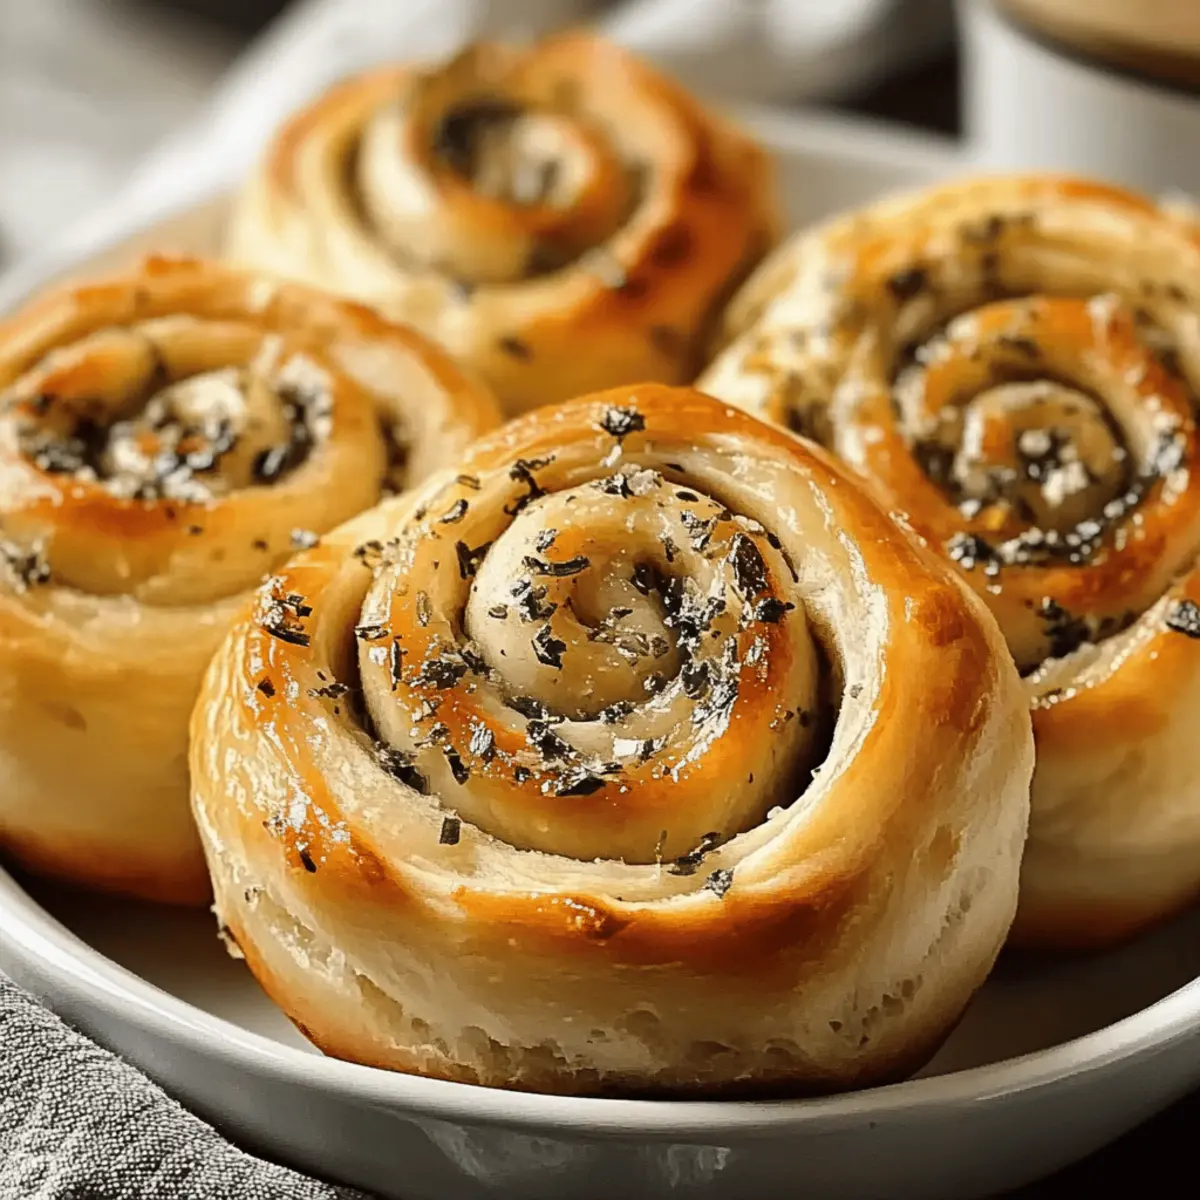
Stepping into the kitchen, I’m greeted by the enchanting aroma of warm garlic butter, filling my heart with anticipation. Today, I’m thrilled to share my recipe for Fluffy Garlic-Swirl Rolls—a true gem for anyone craving homemade comfort food. Not only are these rolls irresistibly fluffy and golden brown, but they also serve as a versatile sidekick, pairing beautifully with pasta, soups, or simply enjoyed on their own. What’s even better? They're surprisingly easy to customize—you can mix in your favorite herbs or add a cheesy surprise for an extra delight. Whether you’re hosting friends or treating yourself, these delightful rolls are sure to impress. Curiosity piqued? Let’s dive into the world of garlic-swirled goodness!
Why Are Garlic-Swirl Rolls So Good?
Irresistible Aroma: The moment these rolls bake, your kitchen becomes a haven of warm, inviting scents that draw everyone in.
Endless Customization: Feel free to explore your creativity; add cheese, herbs, or even sautéed veggies to make each batch uniquely yours.
Perfect Texture: Fluffy and soft inside, with a beautifully golden exterior, these rolls deliver a satisfying bite every time.
Quick Preparation: With straightforward steps and minimal fuss, you'll be enjoying fresh rolls in no time.
Crowd-Pleasing: Ideal for gatherings, they'll have everyone reaching for seconds, and make for a fantastic addition to dinners or picnics.
Make-Ahead Possible: Prep these delicious rolls in advance, allowing you to spend more time with loved ones and less time in the kitchen. Serving suggestions abound—you might like them with a side of marinara for dipping, or simply drizzled with olive oil!
Garlic-Swirl Rolls Ingredients
• Dive into the deliciousness of these Garlic-Swirl Rolls with this essential ingredient list.
For the Dough
- All-Purpose Flour – Provides structure and fluffiness; avoid using whole wheat for the best texture.
- Active Dry Yeast – Ensures a good rise; be sure it's fresh to achieve the perfect fluff.
- Salt – Controls yeast activity and enhances flavor; don't skip this vital ingredient!
- Granulated Sugar – Aids in yeast activation while adding a hint of sweetness.
- Milk – Keeps the dough moist and soft; feel free to use non-dairy alternatives if needed.
- Unsalted Butter – Adds a rich, buttery flavor; using unsalted gives you better control over saltiness.
For the Filling
- Minced Garlic – Infuses the rolls with savory goodness; the fresher, the better for bold flavor!
- Fresh Herbs (e.g., parsley, rosemary) – Elevate the flavor and aroma; fresh herbs provide the best results.
- Optional Add-Ins – Cheese, caramelized onions, or spinach allow for personal creativity; make it uniquely yours!
Step‑by‑Step Instructions for Garlic-Swirl Rolls
Step 1: Prepare the Dough
In a large mixing bowl, combine 4 cups of all-purpose flour, 2 teaspoons of active dry yeast, 1 tablespoon of granulated sugar, and 1 teaspoon of salt. Warm 1 cup of milk until lukewarm, then stir in ¼ cup of melted unsalted butter. Gradually pour the milk mixture into the dry ingredients, mixing until a sticky dough forms. Knead the dough on a floured surface for about 8-10 minutes until smooth and elastic.
Step 2: Allow the Dough to Rise
Place the kneaded dough in a lightly greased bowl and cover it with a clean kitchen towel. Let it rise in a warm, draft-free area for about 1 hour or until it has doubled in size. You will know it's ready when you gently press the dough, and it springs back slightly while holding a slight indent. This will create the fluffy texture needed for the Garlic-Swirl Rolls.
Step 3: Prepare the Filling
While the dough rises, create the delicious garlic filling. In a small bowl, mix together ½ cup of minced garlic, 2 tablespoons of fresh herbs (such as parsley or rosemary), and ¼ cup of melted butter. Combine well to ensure the garlic and herbs are evenly distributed in the melted butter. Set this mixture aside so the flavors can meld together while you shape the rolls.
Step 4: Shape the Rolls
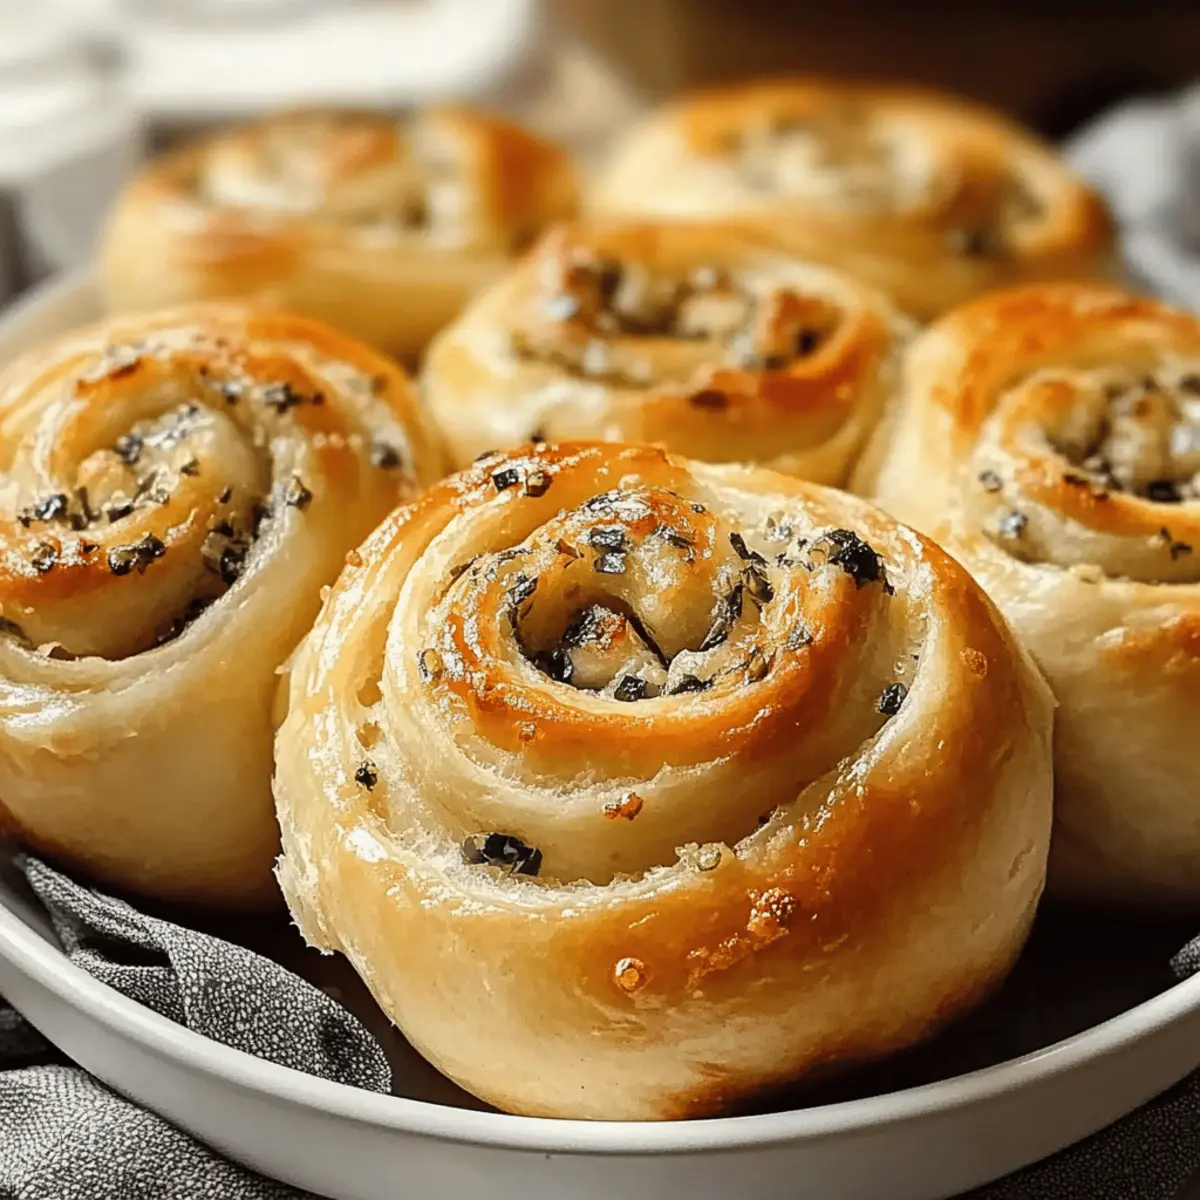
Once the dough has risen, punch it down gently to release air. Transfer it to a floured surface and roll it out into a rectangle approximately ¼ inch thick. Spread the garlic filling evenly over the dough, leaving a small border around the edges. Roll the dough tightly from the long side into a log, pinching the edges to seal. Cut the rolled dough into 12 equal slices to form your Garlic-Swirl Rolls.
Step 5: Second Rise
Place the sliced rolls in a greased baking sheet, ensuring they are touching for the best rise. Cover the rolls with a kitchen towel and let them rise again for about 30 minutes, or until they have noticeably puffed up. The rolls should look fluffy and soft, signaling they are ready to be baked to golden perfection.
Step 6: Bake the Rolls
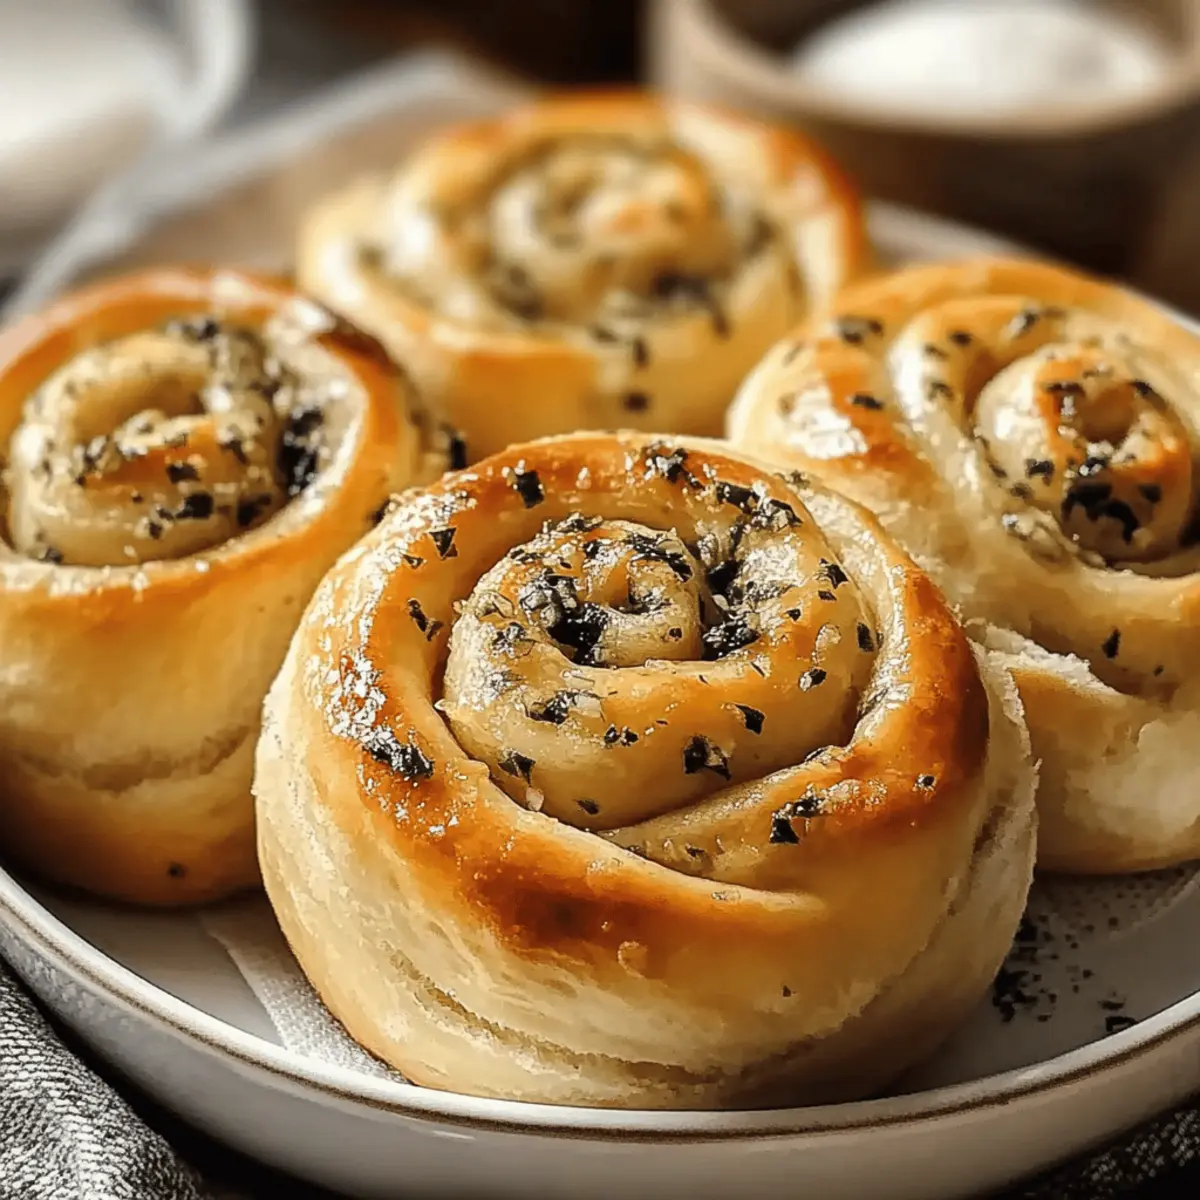
Preheat your oven to 350°F (175°C). Once preheated, bake the Garlic-Swirl Rolls in the center of the oven for 20-25 minutes or until they turn a lovely golden brown. The aroma of garlic and herbs will fill your kitchen, making it hard to resist checking on them. To ensure doneness, you can tap the bottom of a roll; it should sound hollow when fully baked.
Step 7: Serve and Enjoy
Remove the rolls from the oven and let them cool slightly on a wire rack. These Fluffy Garlic-Swirl Rolls are best enjoyed warm! Serve them alongside your favorite pasta, soups, or simply on their own as a delightful treat. Drizzle with olive oil or extra garlic butter for an extra touch of yum!

How to Store and Freeze Garlic-Swirl Rolls
Room Temperature: Keep the rolls in an airtight container at room temperature for up to 2 days to maintain softness and freshness.
Fridge: If you need to store them longer, place the rolls in the fridge for up to 5 days. Reheat them in the oven for the best texture.
Freezer: For longer storage, freeze the Garlic-Swirl Rolls in a freezer-safe bag or container for up to 3 months. Thaw overnight in the fridge before reheating.
Reheating: When ready to enjoy, wrap the rolls in foil and warm them in a preheated oven at 350°F (175°C) for about 10-15 minutes until heated through.
Expert Tips for Garlic-Swirl Rolls
-
Yeast Activation: Always allow your yeast to foam before mixing it in. This ensures that it’s alive and ready to help your rolls rise beautifully.
-
Kneading Technique: Be gentle when kneading; you want a smooth dough, not a tough one. Over-kneading can lead to dense rolls instead of the fluffy Garlic-Swirl Rolls you desire.
-
Flavor Infusion: For a deeper flavor, let the garlic filling sit for a few minutes before spreading it on the dough. This allows the herbal notes to meld beautifully!
-
Correct Dough Temperature: Make sure your milk is lukewarm—not too hot or too cold. Too hot can kill the yeast while cold won't activate it properly.
-
Tap Test: To check if the rolls are baked perfectly, tap the bottom of one. If it sounds hollow, they're ready to be taken out of the oven—golden perfection awaits!
What to Serve with Garlic-Swirl Rolls
Nothing completes a meal quite like the comforting warmth of these delightful rolls, made for sharing around the table.
-
Creamy Tomato Soup: The rich and velvety texture of tomato soup complements the garlic rolls beautifully, creating a cozy pairing.
-
Fresh Green Salad: A crisp salad filled with vibrant mixed greens and a tangy vinaigrette cuts through the richness, offering a refreshing balance. Add slices of avocado for extra creaminess!
-
Herbed Pasta: Tossed with garlic-infused oil and roasted veggies, pasta harmonizes perfectly with the flavors of the rolls for a satisfying feast.
-
Savory Marinara Sauce: Serve alongside a warm bowl of marinara sauce for dipping. The robust flavors elevate your garlic-swirled goodness to new heights.
-
Grilled Vegetables: Sweet, charred veggies add a delightful contrast in texture and flavor, making for a colorful and nutritious addition to your meal.
-
Chilled White Wine: A glass of crisp, chilled white wine, like Sauvignon Blanc, enhances the garlic aroma, making each bite all the more enjoyable.
-
Creamy Garlic Mashed Potatoes: For a double dose of garlic, these creamy potatoes create a rich, decadent side that your taste buds will love!
-
Herb Butter: Whipped herb-infused butter allows for a luxurious dip option that adds an extra layer of flavor to every bite of your rolls.
With these pairings, your Garlic-Swirl Rolls will flourish into an unforgettable feast!
Make Ahead Options
These Garlic-Swirl Rolls are perfect for busy home cooks looking to streamline their meal prep! You can prepare the dough and shape the rolls up to 24 hours in advance. Simply follow the instructions to create the dough, allow it to rise, and then slice the rolls before placing them in a covered container in the refrigerator. When you're ready to bake, let the rolls sit at room temperature for about 30 minutes before baking to ensure a fluffy texture. This way, you'll enjoy fresh, warm rolls with minimal effort—just imagine the delightful aroma filling your kitchen while you spend more time with loved ones!
Garlic-Swirl Rolls Variations & Substitutions
Feel free to get creative and personalize your Garlic-Swirl Rolls—there are countless ways to make this recipe truly yours!
-
Herb Infusion: Swap parsley for fresh basil or thyme to elevate flavor profiles for an aromatic twist.
Adding unique herbs can transform the overall taste, inviting a new culinary experience to your dinner table. -
Cheesy Delight: Incorporate shredded mozzarella or cheddar cheese into the filling for a rich, gooey surprise.
Melted cheese adds a comforting texture that beautifully complements the savory garlic. -
Vegetarian Boost: Toss in sautéed spinach, roasted red peppers, or caramelized onions for extra nutrition and flavor.
The combination of earthy veggies not only enhances taste but also offers a lovely burst of color. -
Gluten-Free Option: Use a gluten-free all-purpose flour blend to make these rolls celiac-friendly, ensuring everyone can enjoy!
With the right flour, you’ll still achieve that fluffy texture and rich garlic flavor. -
Spice It Up: Add red pepper flakes or finely chopped jalapeños for a kick of heat that ignites the senses.
This fiery twist will delight those who enjoy a bit of spice in their meals. -
Extra Sweetness: Brush the rolls with a honey-butter mixture before baking for a touch of sweetness that balances the garlic.
The sweet and savory combo creates a delightful contrast that keeps everyone coming back for more. -
Mini Rolls: Roll out small dough pieces for bite-sized garlic swirls—perfect for parties or as a fun appetizer!
These mini delights are sure to be a hit, allowing guests to savor them in one quick bite.
Don’t forget to pair your beautifully baked rolls with your favorite marinara sauce or a drizzle of olive oil for dipping! For more delightful side options, consider serving alongside a classic Caesar salad or pairing with a rich creamy butternut squash soup to complete your cozy meal. Enjoy your culinary adventure!
Garlic-Swirl Rolls Recipe FAQs
What type of flour should I use for Garlic-Swirl Rolls?
You should use all-purpose flour for these rolls; it provides the best structure and fluffiness. Avoid whole wheat flour, as it may lead to denser rolls.
How should I store leftovers from my Garlic-Swirl Rolls?
To keep your rolls fresh, store them in an airtight container at room temperature for up to 2 days. If you want to keep them longer, you can refrigerate them for up to 5 days. Just reheat in the oven for the best softness and texture!
Can I freeze Garlic-Swirl Rolls?
Absolutely! You can freeze your Garlic-Swirl Rolls in a freezer-safe bag or container for up to 3 months. To enjoy them later, simply thaw them overnight in the fridge and then reheat. For reheating, wrap them in foil and warm them in a preheated oven at 350°F (175°C) for about 10-15 minutes.
What if my dough hasn’t risen properly?
If your dough hasn’t risen, it might be due to inactive yeast or a too-cool environment. Make sure your yeast is fresh and check that your water or milk is lukewarm (not too hot or cold). You can also try moving your dough to a warmer area—this can help jumpstart the rising process!
Are Garlic-Swirl Rolls suitable for a vegetarian diet?
Yes! These rolls can be easily adapted to fit a vegetarian diet since they are made with basic pantry staples. Just ensure any add-ins, like cheese, are vegetarian-friendly. If you're avoiding dairy, you can substitute with non-dairy milk and use plant-based butter.
Can I customize the filling for my Garlic-Swirl Rolls?
Of course! Feel free to get creative with the filling. You can add in cheese, sautéed vegetables like spinach, or even different herbs such as basil or thyme. It’s a fantastic way to make your Garlic-Swirl Rolls even more personal and delightful!
Melt-in-Your-Mouth Garlic-Swirl Rolls for Cozy Nights
Ingredients
Equipment
Method
- In a large mixing bowl, combine 4 cups of all-purpose flour, 2 teaspoons of active dry yeast, 1 tablespoon of granulated sugar, and 1 teaspoon of salt. Warm 1 cup of milk until lukewarm, then stir in ¼ cup of melted unsalted butter. Gradually pour the milk mixture into the dry ingredients, mixing until a sticky dough forms. Knead the dough on a floured surface for about 8-10 minutes until smooth and elastic.
- Place the kneaded dough in a lightly greased bowl and cover it with a clean kitchen towel. Let it rise in a warm, draft-free area for about 1 hour or until it has doubled in size.
- In a small bowl, mix together ½ cup of minced garlic, 2 tablespoons of fresh herbs, and ¼ cup of melted butter. Combine well and set aside.
- Once the dough has risen, punch it down gently to release air. Transfer it to a floured surface and roll it out into a rectangle approximately ¼ inch thick. Spread the garlic filling evenly over the dough. Roll the dough tightly from the long side into a log, pinching the edges to seal. Cut the rolled dough into 12 equal slices.
- Place the sliced rolls in a greased baking sheet, cover with a kitchen towel, and let them rise again for about 30 minutes.
- Preheat your oven to 350°F (175°C). Once preheated, bake the Garlic-Swirl Rolls for 20-25 minutes or until golden brown.
- Remove the rolls from the oven and let them cool slightly on a wire rack. Serve warm.


Leave a Reply