
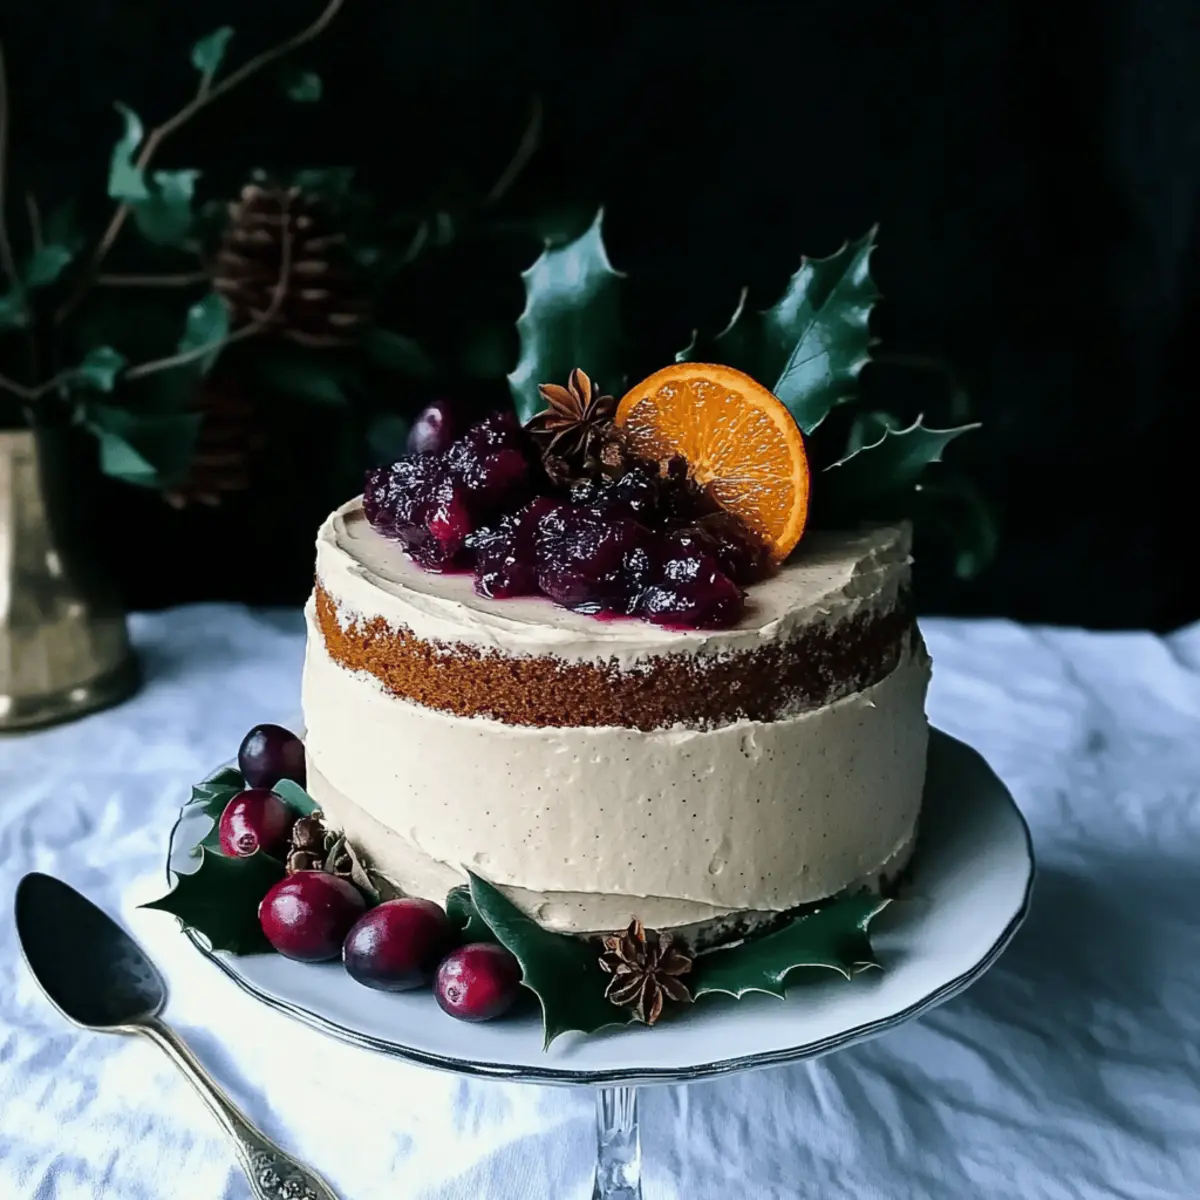
As the aroma of warm spices wafts through the kitchen, memories of bustling holiday gatherings come to life. This Moist Vegan Gingerbread Layer Cake is the perfect centerpiece for those sweet moments, bringing together the vibrant flavors of ginger and cinnamon in a delightful, gluten-free treat. Not only is it a healthier alternative to traditional cakes, but it’s also a quick and easy recipe that will impress both seasoned chefs and baking novices alike. Layered with tangy cranberry chia jam and topped with creamy cashew frosting, this cake beautifully marries comfort and festivity. If you’re ready to elevate your dessert game this season, let’s dive into this scrumptious recipe—who’s excited to bake?
Why is Gingerbread Layer Cake a Must-Bake?
Festive Flavors: The combination of ginger and cinnamon infuses this cake with the warm spice that defines the season, making it a true holiday delight.
Vegan & Gluten-Free: This recipe shines by being both vegan and gluten-free, allowing everyone to indulge without worry.
Delectable Texture: Each bite boasts a soft, fluffy crumb complemented by the tartness of cranberry chia jam and the creaminess of cashew frosting.
Easily Customizable: With options like varied flour types and frosting flavors, you can craft your perfect cake each time. If you enjoy creative baking, don’t miss our Chocolate Zucchini Cake for an extra surprise!
Quick & Simple: Designed for busy bakers, this recipe is straightforward, allowing you to whip up a stunning dessert in no time.
Crowd-Pleasing: Whether for a festive gathering or a cozy family dinner, this cake is sure to be the star of the table, appealing to both kids and adults alike.
Gingerbread Layer Cake Ingredients
• Prepare to mix a delightful blend of flavors and textures with this delicious gingerbread layer cake!
For the Cake
- Teff Flour – Provides structure and a nutty flavor; substitute with buckwheat if you need a gluten-free option.
- Ginger – Adds warmth and spiciness; adjust the amount to suit your taste.
- Cinnamon – Enhances the festive flavors; a must-have for any gingerbread cake recipe!
- Coconut Oil – Promotes a tender crumb; can be replaced with a neutral oil, though the flavor may change.
- Apple Sauce – Keeps the cake moist and flavorful; you can use mashed banana for a different sweetness.
- Baking Powder – Essential for texture; ensure it’s fresh for optimal rising.
For the Cranberry Chia Jam
- Fresh Cranberries – Provides a tartness that beautifully contrasts with the sweetness of the cake.
- Chia Seeds – Help thicken the jam; they also add a nutritious crunch.
- Maple Syrup – Sweetens the jam naturally; modify to your preferred level of sweetness.
For the Cashew Frosting
- Cashews – The base for this creamy frosting; soak them ahead of time for a smoother consistency.
- Coconut Oil – Adds richness to the frosting; use more for a thicker texture.
- Vanilla Extract – Enhances the flavor profile; a little goes a long way.
- Maple Syrup – Sweetens the frosting; adjust based on your taste preference.
With these ingredients, you're just a step away from creating a stunning gingerbread layer cake that will be the highlight of your festive celebrations!
Step‑by‑Step Instructions for Gingerbread Layer Cake
Step 1: Prepare the Cranberry Chia Jam
Start by making the cranberry chia jam to allow flavors to meld overnight. In a medium saucepan, combine fresh cranberries and maple syrup over medium heat, stirring until the cranberries soften and burst, approximately 5–7 minutes. Stir in chia seeds and let the mixture thicken for about 10 minutes before transferring to a jar and refrigerating.
Step 2: Make the Cashew Frosting
Next, prepare the cashew frosting. In a blender or food processor, add soaked cashews, coconut oil, maple syrup, and vanilla extract. Blend until the mixture is completely smooth and creamy, scraping down the sides as needed. If it's too thick, add a splash of water or more coconut oil to achieve your desired texture.
Step 3: Preheat the Oven and Prepare Pans
Preheat your oven to 350°F (175°C) while you prepare the cake pans. Grease two 8-inch round cake pans with coconut oil or line them with parchment paper for easy removal later. This step ensures your Gingerbread Layer Cake comes out effortlessly after baking, preserving its lovely shape.
Step 4: Combine Dry Ingredients
In a mixing bowl, whisk together teff flour, ginger, cinnamon, baking powder, and any additional dry ingredients. The dry mixture should be well-combined, creating a fragrant blend that promises to bring a wonderful spiced flavor to your gingerbread cake layers.
Step 5: Mix Wet Ingredients
In a separate bowl, combine wet ingredients, including apple sauce and melted coconut oil. Whisk until the mixture is smooth and well-blended. This step is crucial, as it helps create the moist texture that makes the Gingerbread Layer Cake so delightful.
Step 6: Combine Wet and Dry Ingredients
Gradually mix the dry ingredients into the wet mixture, stirring gently to combine. Be careful not to overmix; just combine until there are no large lumps remaining. The batter will be thick and fragrant, perfect for your spiced gingerbread layers.
Step 7: Bake the Cake
Pour the gingerbread batter evenly into the prepared cake pans. Bake in your preheated oven for about 25–30 minutes, or until a toothpick inserted in the center comes out clean. The cake layers should be golden brown and spring back when lightly pressed.
Step 8: Cool Completely
Once baked, remove the cake layers from the oven and let them cool in the pans for 10 minutes. Then, carefully transfer them to a wire rack to cool completely. This step is essential to prevent the frosting from melting when you assemble your moist Gingerbread Layer Cake.
Step 9: Assemble the Cake
To assemble, place one layer of gingerbread cake on a serving platter. Spread a generous layer of cranberry chia jam on top, followed by the second gingerbread layer. Finally, frost the sides and top with your smooth cashew frosting, creating an inviting and festive presentation.
Step 10: Serve and Enjoy
Slice your gorgeous Gingerbread Layer Cake and serve with fresh seasonal fruit or a treat of vegan ice cream for an extra festive touch. The combination of flavors and textures is sure to delight and impress your family and friends during any celebration!
Make Ahead Options
These Gingerbread Layer Cakes are perfect for meal prep enthusiasts! You can prepare the cranberry chia jam up to 3 days in advance, allowing the flavors to deepen (just store it in an airtight container in the refrigerator). Additionally, you can make the cashew frosting the night before to save time on your baking day. Just remember to refrigerate it and give it a good stir before using to ensure a creamy consistency. The cake layers can also be baked up to 24 hours ahead; simply cool completely, wrap tightly in plastic wrap, and store at room temperature. When ready to serve, assemble the cake by layering the jam and frosting, and you’ll have a show-stopping Gingerbread Layer Cake without the last-minute rush!
Expert Tips for Gingerbread Layer Cake
-
Fresh Ingredients: Always use fresh baking powder for a light and fluffy cake; expired ingredients can ruin the texture.
-
Mixing Matters: Avoid overmixing the batter. Just combine until the dry ingredients are moistened; too much mixing can make the cake dense.
-
Cooling Time: Let cake layers cool completely before frosting to prevent melting. Patience is key to achieving a beautifully frosted Gingerbread Layer Cake!
-
Jam Prep: Make the cranberry chia jam ahead of time. This allows the flavors to develop and results in a brighter, more vibrant filling.
-
Flavor Adjustments: Feel free to tweak spices like ginger and cinnamon according to your preference—this is your cake, after all!
-
Frosting Consistency: If your cashew frosting is too thick, add a splash of water or more coconut oil until you reach a creamy consistency.
What to Serve with Moist Vegan Gingerbread Layer Cake?
Indulge in a festive feast by pairing this delightful cake with complementary dishes that enhance its warm flavors and rich textures.
-
Cinnamon Spiced Apples: The warm sweetness of cinnamon-spiced apples adds a cozy, fruity contrast, elevating your cake experience.
-
Vegan Vanilla Ice Cream: Creamy vanilla ice cream provides a refreshing chill that harmonizes beautifully with the gingerbread's spicy warmth.
-
Roasted Nuts: A mix of roasted almonds and walnuts introduces a satisfying crunch, giving a lovely texture balance alongside the cake's softness.
-
Herbal Tea: A cup of aromatic herbal tea, like chamomile or peppermint, brings a soothing element, perfect for sipping while enjoying your dessert.
-
Whipped Coconut Cream: Light and fluffy coconut cream adds a luscious, non-dairy touch that enhances each slice beautifully.
For an extra treat, consider serving slices with a dollop of cranberry chia jam, amplifying the tartness and making each forkful a burst of flavor that celebrates the season!
How to Store and Freeze Gingerbread Layer Cake
Fridge: Store leftover gingerbread layer cake covered in an airtight container for up to 5 days to maintain moisture and flavor.
Freezer: For longer storage, wrap individual slices or the whole cake tightly in plastic wrap, then place in a freezer-safe bag. It can be frozen for up to 3 months.
Thawing: When you're ready to enjoy it, thaw the gingerbread layer cake in the fridge overnight for the best texture and taste.
Reheating: If desired, warm individual slices in the microwave for about 15-20 seconds for that fresh-out-of-the-oven experience.
Gingerbread Layer Cake Variations
Feel free to get creative with this gingerbread layer cake—every twist offers a delightful surprise that tantalizes the taste buds!
-
Gluten-Free Flour: Replace teff flour with a gluten-free blend for a different flavor profile without sacrificing texture.
-
Nutty Frosting: Swap cashew frosting for a creamy macadamia frosting, adding a rich, buttery flavor to your cake.
-
Fruit Add-In: Mix in chopped dried fruits or nuts to the batter for additional texture and bursts of sweetness with every bite. The contrast elevates the cake, creating a treat that is as fun to eat as it is to make.
-
Spice Boost: Add a pinch of nutmeg or allspice to your dry ingredients for a warming depth and exciting twist that complements the ginger.
-
Lower Sugar: For a healthier option, replace maple syrup with a sugar alternative or reduce the quantity. This makes it a great choice for health-conscious gatherings or when you’re trying to cut back without skimping on sweetness.
-
Fruity Jam: Try mixing the cranberry chia jam with other berries like raspberries or blueberries for a tart, fruity filling that sings with seasonal flavor—perfect for summer occasions.
-
Chai Flavor: Integrate chai spice into the cake mix for an aromatic twist that truly embraces the seasons. Think warm, cozy flavors that's a hug in a dessert!
Indulging in inventive variations can enhance your baking adventures. For instance, try our Pecan Caramel Cake if you’re inspired!
Gingerbread Layer Cake Recipe FAQs
What type of flour can I use for this gingerbread layer cake?
For this gingerbread layer cake, teff flour is recommended for its nutty flavor and structure, but you can also substitute it with buckwheat flour if necessary. Both flours are gluten-free, making them ideal for this recipe.
How should I store leftover gingerbread layer cake?
Absolutely! Store any leftover cake covered in an airtight container in the fridge for up to 5 days. This keeps it moist and flavorful. If you plan to store it longer, consider freezing it.
Can I freeze the gingerbread layer cake?
Yes! To freeze the gingerbread layer cake, wrap individual slices or the whole cake tightly in plastic wrap, ensuring no air escapes. Then, place it in a freezer-safe bag. It can be frozen for up to 3 months. When you're ready to enjoy it, simply thaw it in the fridge overnight.
What if my cake comes out dense?
If your gingerbread layer cake turns out dense, check that your baking powder is fresh, as stale leavening agents can lead to poor rising. Additionally, overmixing the batter can create a dense texture; make sure to mix just until your dry ingredients are moist.
Is this cake suitable for people with nut allergies?
Since this gingerbread layer cake features cashew frosting, it's not suitable for those with nut allergies. However, you could make a nut-free frosting using a blend of coconut cream and powdered sugar for a sweet and creamy alternative.
How do I make sure my cranberry chia jam sets properly?
To ensure that your cranberry chia jam sets nicely, cook the cranberries until they are soft and bursting, about 5-7 minutes. After adding chia seeds, let it sit for at least 10 minutes for it to thicken before refrigerating. This helps to achieve the perfect consistency.
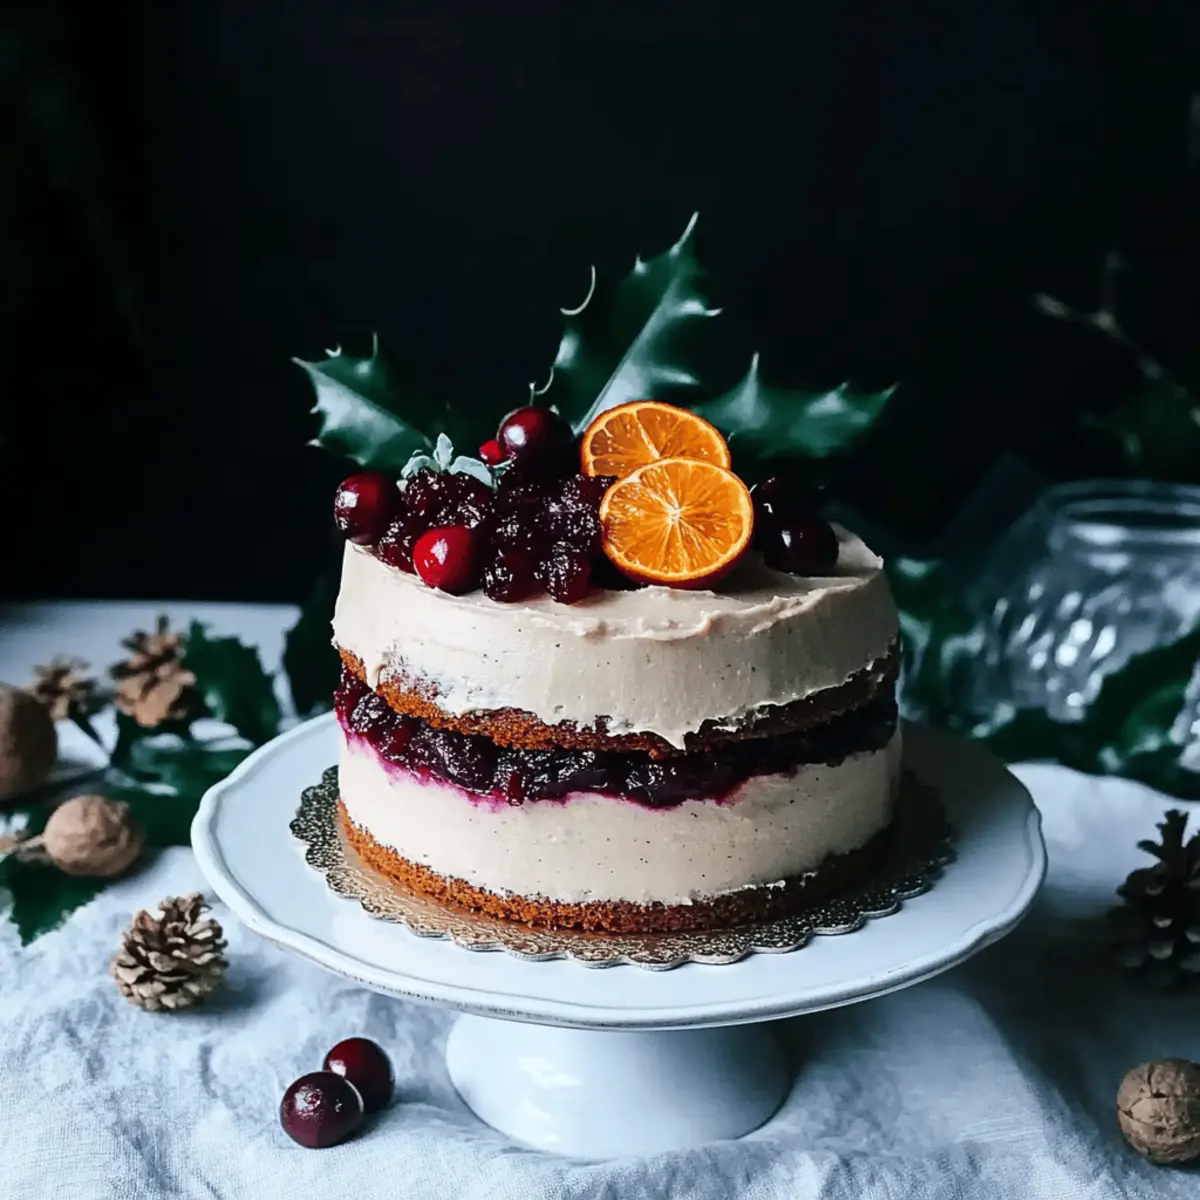
Delicious Vegan Gingerbread Layer Cake for Festive Celebrations
Ingredients
Equipment
Method
- Prepare the cranberry chia jam by combining fresh cranberries and maple syrup in a saucepan over medium heat for 5-7 minutes, then stir in chia seeds and let thicken.
- Make the cashew frosting by blending soaked cashews, coconut oil, maple syrup, and vanilla extract until smooth.
- Preheat your oven to 350°F (175°C) and grease two 8-inch cake pans with coconut oil.
- Combine the dry ingredients (teff flour, ginger, cinnamon, baking powder) in a mixing bowl.
- Mix wet ingredients (apple sauce and melted coconut oil) in a separate bowl until smooth.
- Gradually mix dry ingredients into wet mixture until just combined, being careful not to overmix.
- Pour the gingerbread batter into prepared pans and bake for 25-30 minutes or until a toothpick comes out clean.
- Cool the cake layers in pans for 10 minutes then transfer to a wire rack to cool completely.
- Assemble the cake by placing one layer on a platter, spreading cranberry chia jam, topping with the second layer, and frosting with cashew frosting.
- Slice and serve your Gingerbread Layer Cake with seasonal fruit or vegan ice cream.


Leave a Reply