
You might think sugar cookies are a holiday staple, but have you tried making a Holiday Butter Cookie Box? These buttery delights melt in your mouth, enveloped in rich vanilla and almond flavors that evoke warmth and nostalgia. Not only are they incredibly simple to whip up—making them perfect for home bakers of all skill levels—but they also offer endless customization options. Whether you prefer chocolate chips or a splash of different extracts, you can make these cookies truly your own. They are ideal for sharing with friends and family during festive gatherings or gifting in beautifully wrapped boxes. Curious about how to bring this sweet tradition into your kitchen? Let's dive in!
Why Try a Holiday Butter Cookie Box?
Festive Appeal: These cookies are perfect for the holiday season, creating a warm atmosphere at gatherings with their inviting aroma and delightful taste.
Effortless Customization: With simple swaps like chocolate chips or different extracts, you can easily tailor these cookies to suit your family's preferences.
Perfect for Sharing: Their melt-in-your-mouth texture makes them not just a treat, but a gift of joy to share with friends, family, or at cookie exchanges.
Hassle-Free Baking: Ideal for novice bakers, this recipe requires minimal time and effort, allowing you to enjoy the process without stress.
Enduring Tradition: Making these cookies brings families together, creating joyful memories that last beyond the holiday season. Enjoy the charm of these creations alongside other classics like Oatmeal Cookies Chewy or Pineapple Cookies New.
Holiday Butter Cookie Box Ingredients
• Get ready to bake! Dive into the delightful world of these Holiday Butter Cookie Box ingredients, perfect for creating melt-in-your-mouth treats.
For the Dough
- Unsalted Butter – ensures a rich, creamy texture; be sure it's softened for the best mixing results.
- Granulated Sugar – adds sweetness and contributes to a lovely golden color in the cookies.
- Powdered Sugar – provides a soft texture and sweetness, blending seamlessly into the dough.
- Egg Yolk – adds richness and helps bind the dough for a tender bite.
- Vanilla Extract – enhances flavors beautifully; can be replaced with peppermint or orange for a twist.
- Almond Extract – offers a unique nutty flavor; omit or use extra vanilla if preferred.
- All-Purpose Flour – forms the essential backbone of your cookies, giving them structure.
- Salt – balances the sweetness, making each bite more flavorful.
For Optional Add-ins
- Chocolate Chips – a sweet addition that provides texture; feel free to swap with nuts or dried fruits.
- Decorative Sugar/Sprinkles – make your cookies shine with visual appeal; perfect for festive occasions.
With these ingredients, you're on your way to whipping up a joyous Holiday Butter Cookie Box that friends and family will love!
Step‑by‑Step Instructions for Holiday Butter Cookie Box
Step 1: Prepare the Dough
In a large mixing bowl, cream together 1 cup softened unsalted butter, ¾ cup granulated sugar, and ¾ cup powdered sugar until the mixture is light and fluffy—about 3-5 minutes. Next, add in 1 egg yolk, 2 teaspoons vanilla extract, 1 teaspoon almond extract, and ¼ teaspoon salt, mixing until evenly combined. Gradually sift in 2 cups of all-purpose flour while stirring until a soft dough forms. Optionally fold in 1 cup of chocolate chips for an extra treat.
Step 2: Chill the Dough
Wrap the prepared cookie dough tightly in plastic wrap and refrigerate for at least 1 hour, allowing it to firm up. This chilling step not only enhances the flavors but also makes the dough easier to handle once you’re ready to shape the cookies. While waiting, you can easily tidy your kitchen or think about your creative cookie presentation ideas.
Step 3: Preheat and Prepare Baking Sheets
Approximately 15 minutes before you’re ready to bake, preheat your oven to 350°F (175°C). While the oven heats up, line your baking sheets with parchment paper to ensure easy removal of the cookies post-baking. This preparation ensures that your Holiday Butter Cookie Box cookies will bake evenly and have that beautiful golden edge.
Step 4: Shape Cookies
Once chilled, take the dough out of the refrigerator. Roll the dough into 1-inch balls and place them 2 inches apart on the lined baking sheets. Gently flatten each ball with the bottom of a glass or your palm, ensuring a consistent cookie shape. If desired, sprinkle decorative sugar on top for a festive touch that will add sparkle to your cookie box.
Step 5: Bake
Place the baking sheets in the preheated oven and bake for 10-12 minutes. Keep an eye on your cookies; they should be lightly golden around the edges while remaining soft in the center. Once done, remove the baking sheets and let the cookies cool for about 5 minutes before transferring them to wire racks to cool completely. This cooling period helps maintain their melt-in-your-mouth texture.
Step 6: Presentation
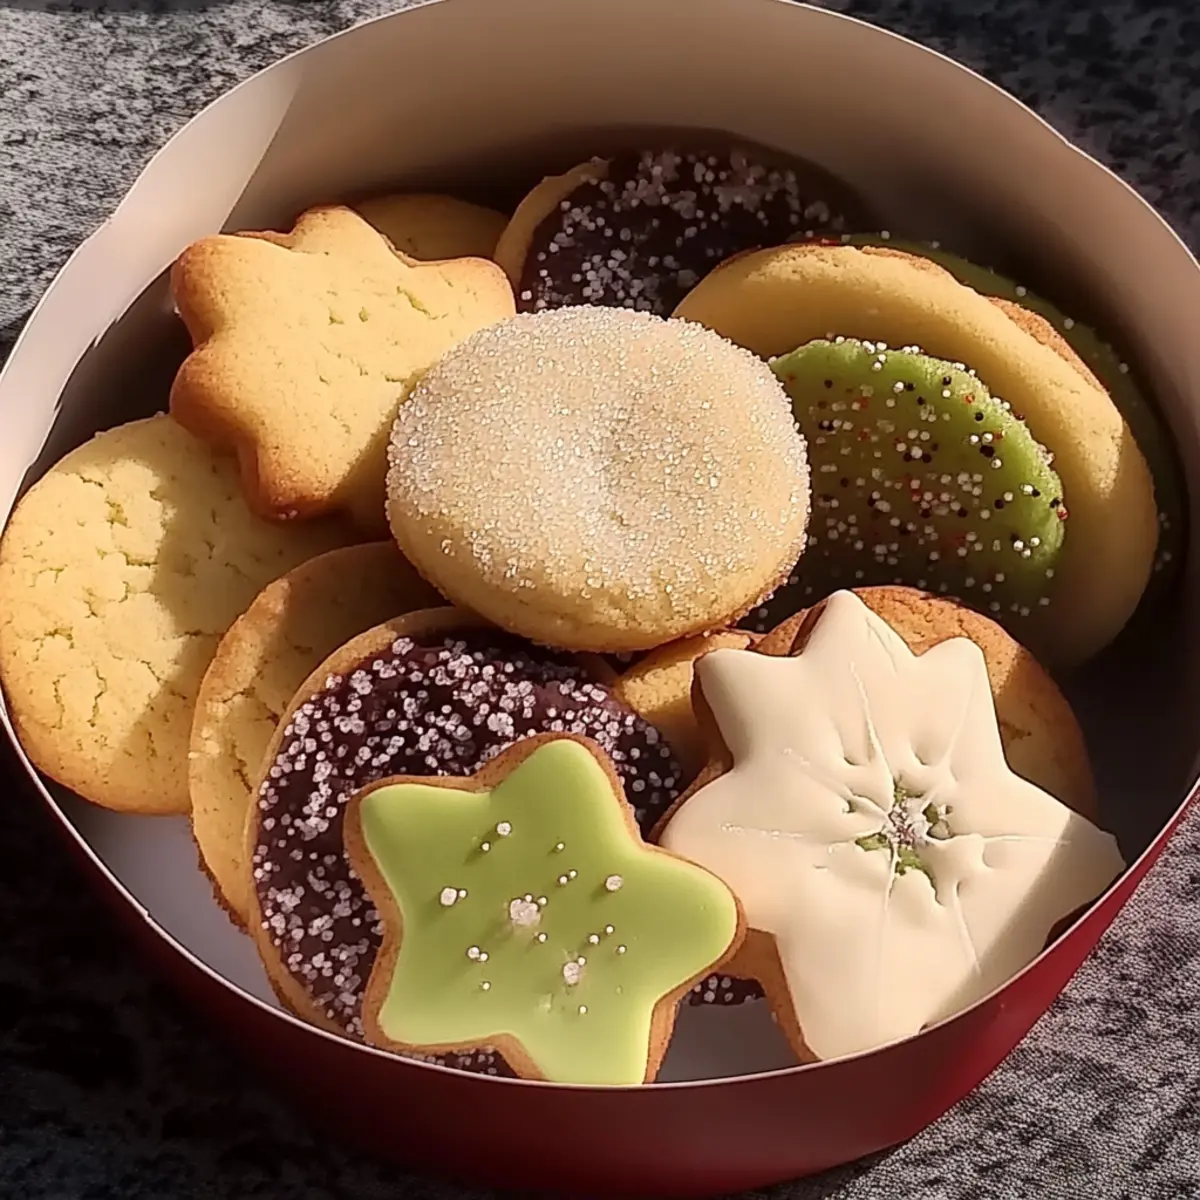
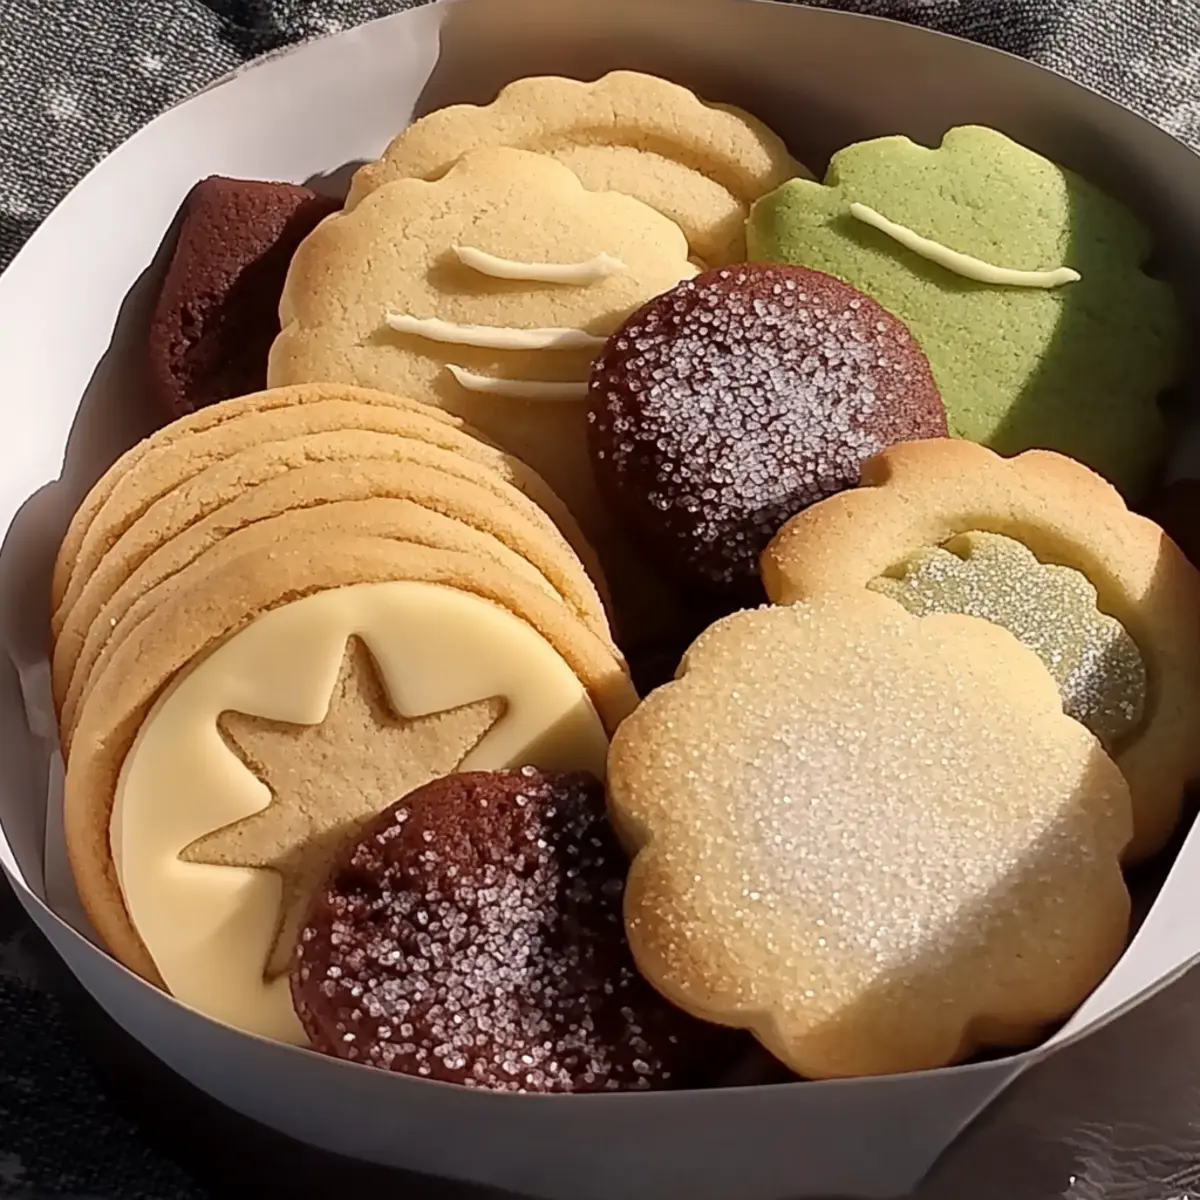
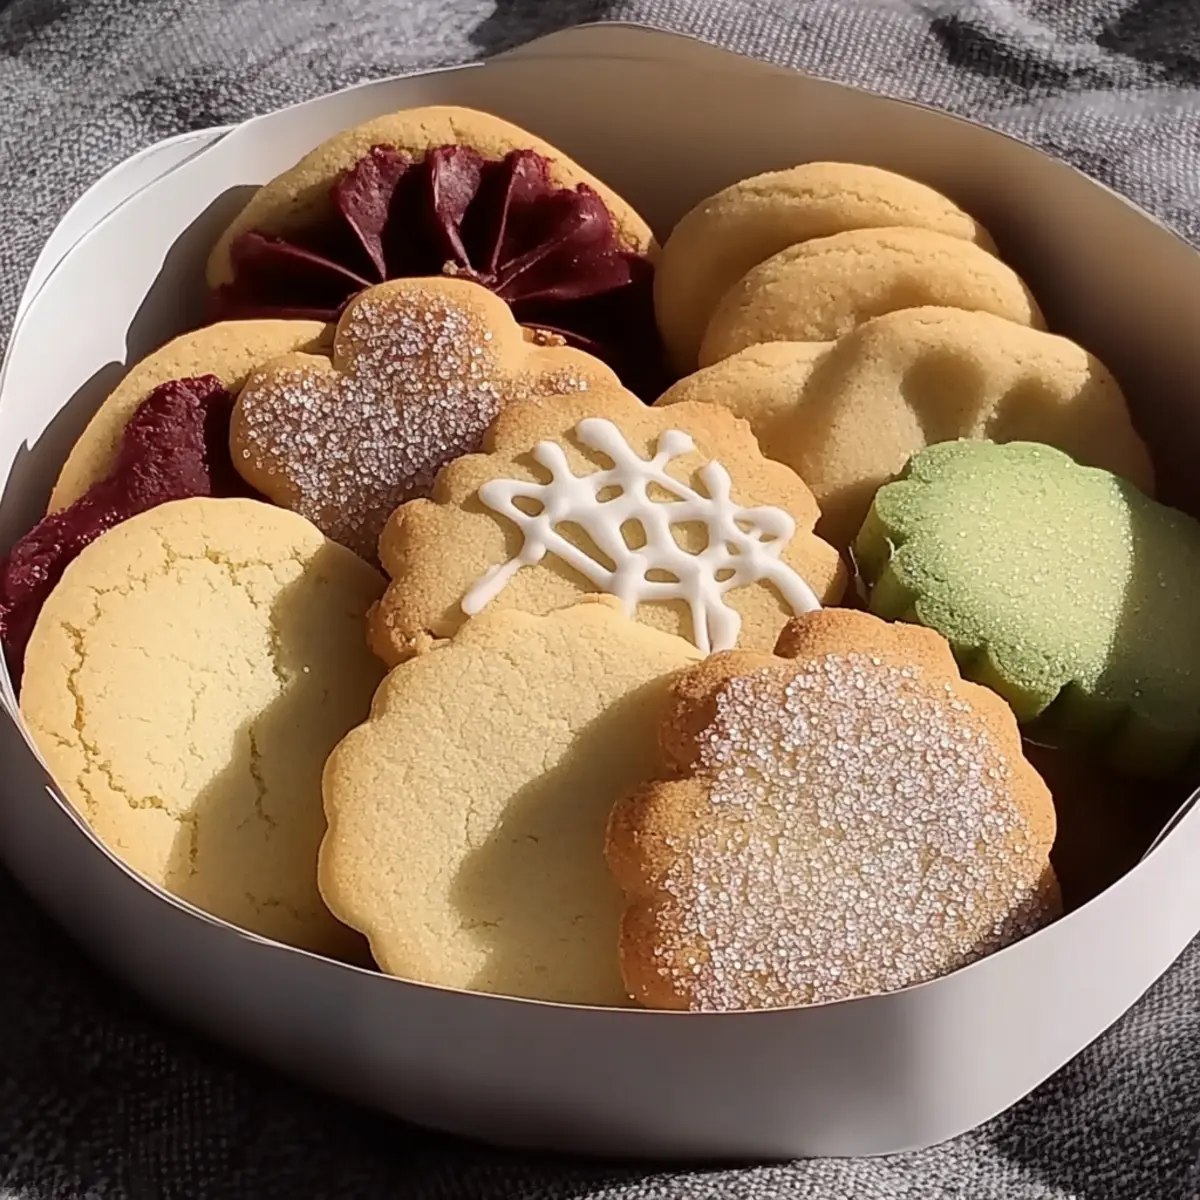
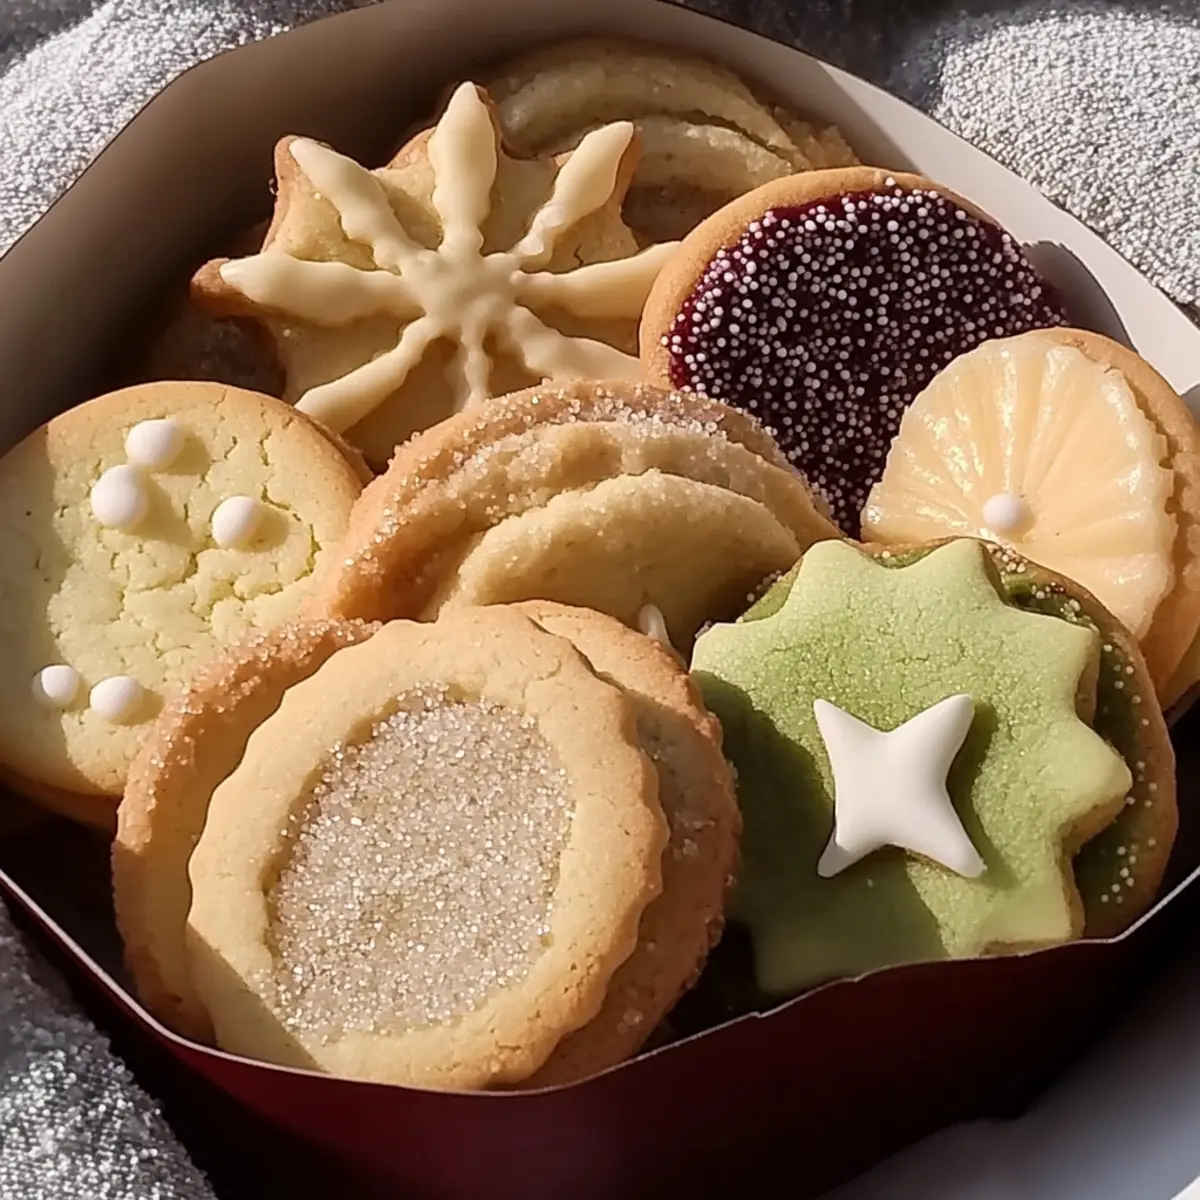
After the cookies have cooled, arrange them beautifully in a decorative box or gift tin. To elevate your Holiday Butter Cookie Box, layer the cookies with parchment paper, showcasing their delightful shapes and textures. These sweet, buttery treats are perfect for sharing or gifting, capturing the essence of holiday cheer in every bite.
Storage Tips for Holiday Butter Cookie Box
Room Temperature: Store cookies in an airtight container at room temperature for up to 1 week. This helps maintain their soft, melt-in-your-mouth texture.
Freezer: For longer storage, freeze the cookies in a single layer on a baking sheet, then transfer to an airtight container for up to 3 months.
Reheating: When ready to enjoy, thaw frozen cookies at room temperature for about 30 minutes, or gently warm them in a low oven for a few minutes to restore their softness.
Wrapping: If gifting or sharing, layer cookies in a decorative box with parchment paper between layers to prevent sticking and preserve freshness in your Holiday Butter Cookie Box.
Holiday Butter Cookie Box Variations
Customize your Holiday Butter Cookie Box to indulge in delightful, unique flavors that make your cookies even more special!
-
Nutty Flavor: Swap almond extract for hazelnut or coconut extract for a surprising twist that elevates the traditional taste. Try different extracts to find your perfect combination!
-
Spice It Up: Incorporate warm spices like cinnamon, nutmeg, or ginger into the dough to create a festive aroma that fills your kitchen. A touch of spice will definitely awaken the holiday spirit!
-
Chocolate Lovers: Add dark, milk, or white chocolate chips instead of traditional chocolate chips for a rich flavor experience. For a gourmet touch, consider drizzling your favorites over baked cookies!
-
Fruity Flair: Toss in some dried cranberries, cherries, or even orange zest for a vibrant burst of flavor that complements the buttery goodness. Think of adding a touch of fruity pleasure for a fresh twist!
-
Gluten-Free Option: Substitute all-purpose flour with a 1:1 gluten-free flour blend to cater to gluten-sensitive family members. You won’t sacrifice taste—just buttery goodness!
-
Decorative Delight: Get creative with icing, flavored sprinkles, or decorative sugar on top for a visual treat. Simple decorations can make your cookies even more festive!
-
Savory Touch: Explore a sweet & savory twist by adding bits of crispy bacon or pretzel pieces for unexpected crunch and flavor. Think of those extra layers of fun in every bite!
-
Mini Cookie Sandwiches: Make small sandwich cookies by adding a layer of frosting or ganache between two cookies for a whole new experience. This fun approach will wow your holiday guests!
Feel inspired? Transform your Holiday Butter Cookie Box into a masterpiece perfect for any gathering or holiday celebration. Pair these delightful treats with a cup of hot cocoa or showcase them alongside classics like Pineapple Cookies New for a fabulous cookie spread!
Expert Tips for Holiday Butter Cookie Box
-
Butter Temperature: Ensure your unsalted butter is at room temperature. This crucial step helps in creating a creamy, fluffy mixture essential for the perfect cookie texture.
-
Chilling is Key: Don’t skip the chilling step! Refrigerating the dough for at least an hour allows flavors to meld and prevents overly spread cookies during baking.
-
Watch the Bake Time: Keep a close eye on your cookies while they bake. They should be lightly golden around the edges and soft in the center—overbaking will lead to dry cookies.
-
Mixing Carefully: Avoid overmixing the dough once you add the flour. Gentle folding leads to a tender, melt-in-your-mouth cookie, while overmixing can lead to toughness.
-
Creative Customizations: Feel free to experiment with flavor profile adjustments such as different extracts or mix-ins like nuts. The Holiday Butter Cookie Box is all about making these cookies your own!
-
Storage Wisdom: Store your cookies in an airtight container at room temperature for up to a week, or freeze to enjoy later. Just ensure they are completely cool before storing to maintain freshness.
What to Serve with Holiday Butter Cookie Box
The perfect holiday spread deserves delicious pairings that elevate your festive experience and warm your heart.
- A Cup of Hot Cocoa: This rich, chocolatey drink complements the buttery sweetness of the cookies, creating a cozy pairing perfect for winter nights.
- Vanilla Ice Cream: Adding a scoop of creamy vanilla ice cream creates a delightful contrast in temperature and texture, elevating the cookie experience.
- Fruit Medley: Fresh berries or citrus slices add a refreshing burst of flavor, balancing the sweetness of the cookies with vibrant zing.
- Spiced Chai Latte: The warming spices of chai resonate beautifully with the holiday flavors of the cookies, making for a comforting beverage pairing.
- Milk or Dairy Alternative: A classic choice, the simplicity of milk enhances the cookie flavors, making each bite feel nostalgic and wholesome.
- Cheese Platter: A selection of soft cheeses like brie or cream cheese offers a savory contrast to the sweet cookies, creating a delightful balance.
Consider serving these cookies alongside your favorite warm drink or a refreshing fruit medley for a festive gathering that feels just right. Each pairing enhances the joy of sharing and celebrating together.
Make Ahead Options
These Holiday Butter Cookies are perfect for meal prep enthusiasts! You can prepare the dough up to 24 hours in advance by following the first two steps: cream the butter and sugars, and mix in the remaining ingredients until a soft dough forms. Wrap the dough tightly in plastic wrap and refrigerate it; this not only saves you time on busy baking days but also enhances the flavors. When you're ready to bake, simply shape the chilled dough into balls and follow the baking instructions. For even longer storage, you can freeze the shaped dough balls for up to 3 months—just bake them straight from the freezer, adding a minute or two to the baking time for perfectly fresh Holiday Butter Cookies with minimal effort!
Holiday Butter Cookie Box Recipe FAQs
How do I choose the right butter for making Holiday Butter Cookies?
Absolutely! Use unsalted butter for the best flavor control—it allows you to manage the saltiness of your cookies. Ensure that the butter is softened to room temperature before creaming; it should feel like a slightly firm cushion when pressed with your finger. This makes mixing much easier, resulting in a light and fluffy dough.
What is the best way to store my Holiday Butter Cookies?
After cooling completely, store your cookies in an airtight container at room temperature for up to 1 week. This keeps their melt-in-your-mouth texture intact! Alternatively, you can freeze cookies for up to 3 months. Just be sure they are completely cool before freezing, then place them in a single layer on a baking sheet until frozen solid. Once frozen, transfer them to a freezer-safe container and layer them with parchment paper to prevent sticking.
Can I freeze the cookie dough for later use?
Absolutely! To freeze the dough, wrap it tightly in plastic wrap, then place it in a freezer-safe bag. It can be stored for up to 3 months. When you’re ready to bake, thaw the dough in the refrigerator overnight, then follow the baking instructions as usual. This is perfect for those last-minute cravings or holiday rushes!
What should I do if my cookies spread too much while baking?
Very! If your cookies are spreading too much, it could be due to overly soft butter or not enough chilling time. Make sure your butter is softened but not melted, and chill the dough for at least an hour before baking. If you find the dough is too warm when shaping, popping it in the fridge for another 15-30 minutes can help maintain their shape during baking.
Are there any allergy considerations for this recipe?
Certain! For nut allergies, you can easily omit almond extract from the recipe and replace it with extra vanilla or other extracts. Always double-check ingredient labels for hidden allergens, especially when using store-bought chocolate chips or decorative sugars. If you're sharing cookies with pets or individuals with specific dietary restrictions, make sure to inform them if any modifications have been made to the original recipe.
How do I make my Holiday Butter Cookie Box visually appealing?
Of course! Presentation adds an inviting touch. After baking, arrange the cookies in a decorative box or tin, layering them with parchment paper for an attractive look. You can elevate the visual appeal by sprinkling colored sugar on top before baking or drizzling melted chocolate over cooled cookies. These little touches will make your Holiday Butter Cookie Box not only a treat for the taste buds but also a feast for the eyes!
Holiday Butter Cookie Box: Melt-in-Your-Mouth Family Treats
Ingredients
Equipment
Method
- In a large mixing bowl, cream together unsalted butter, granulated sugar, and powdered sugar until light and fluffy. Add egg yolk, vanilla extract, almond extract, and salt, mixing until combined. Sift in the all-purpose flour gradually, stirring until a soft dough forms. Optionally fold in chocolate chips.
- Wrap the prepared cookie dough tightly in plastic wrap and refrigerate for at least 1 hour to firm up.
- Preheat your oven to 350°F (175°C) and line your baking sheets with parchment paper.
- Roll the chilled dough into 1-inch balls, placing them on the lined baking sheets 2 inches apart. Flatten each ball gently, and sprinkle with decorative sugar if desired.
- Bake in the preheated oven for 10-12 minutes until lightly golden around the edges. Cool on wire racks.
- Arrange cooled cookies in a decorative box or gift tin, layered with parchment paper.


Leave a Reply