
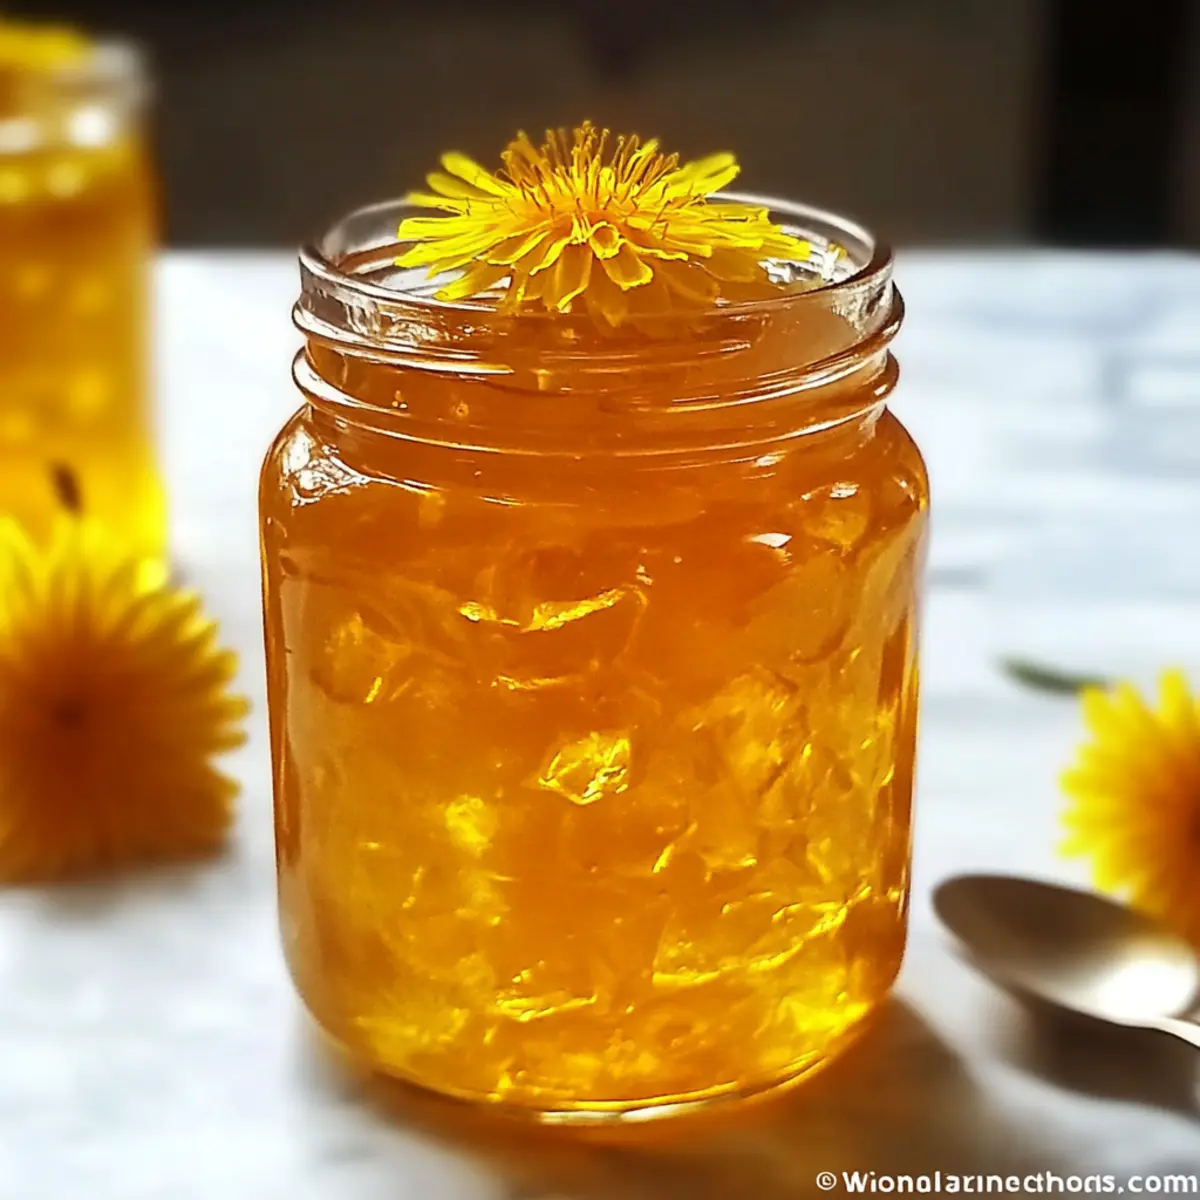
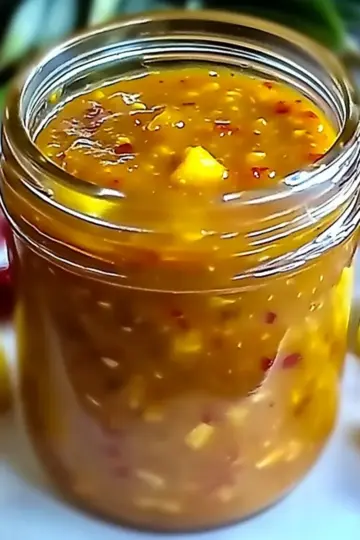
As I wandered through a sun-drenched meadow, the cheerful yellows of dandelions caught my eye, whispering secrets of springtime magic. With this Sunshine in a Jar Homemade Dandelion Jelly, you'll transform these vibrant flowers into a luscious, honey-flavored spread that elevates your breakfast and dessert game. The beauty of this recipe lies in its simplicity and the joy of foraging your own ingredients, bringing the taste of nature right into your kitchen. Not only is it a fun culinary project, but it also packs a delightful punch that’s sure to impress friends and family alike. Imagine serving this unique jelly alongside artisanal cheeses or spreading it on warm scones—it’s a guaranteed conversation starter! Curious about how this floral gem can brighten up your meals? Let’s dive into the recipe!
Why Use Dandelions for Jelly?
Uniqueness: This Sunshine in a Jar captures a floral note that’s surprisingly delightful!
Simplicity: With just a handful of ingredients, this homemade jelly requires minimal effort yet offers maximum flavor.
Seasonal Cooking: Make the most of foraged ingredients, bringing the essence of spring to your table.
Versatility: Ideal as a spread for toast or a gourmet addition to cheese boards, it seamlessly fits into any meal.
Crowd-Pleaser: Impress your friends and family with a unique treat that sparks conversation and curiosity.
Dive into the world of foraging with this recipe, and if you’re interested in related techniques, check out our Pickle Brine Essentials for more fun ways to preserve nature's bounty!
Jar Homemade Dandelion Jelly Ingredients
- For the Jelly
- Fresh Dandelion Flower Heads – 4 cups provides the floral flavor and bright color for the jelly; make sure to use only yellow petals, as the green bases can create bitterness.
- Boiling Water – 4 cups is essential for steeping the dandelion petals, extracting their essence. Ensure the water is at a rolling boil for best results.
- Lemon Juice – 4 tablespoons adds acidity to enhance flavor and helps with the setting process; freshly squeezed lemon juice is recommended for the richest taste.
- Granulated Sugar – 4 cups provides the necessary sweetness and is crucial for the jelly's structure.
- Powdered Pectin (optional) – 1 package assists in achieving a firm set; if you prefer a softer jelly, you can omit this.
- Unsalted Butter (optional) – ½ teaspoon helps reduce foam during boiling for a clearer jelly.
This Jar Homemade Dandelion Jelly will bring a taste of spring into your home, perfect for spreading joy at your family breakfast or alongside gourmet treats!
Step‑by‑Step Instructions for Jar Homemade Dandelion Jelly
Step 1: Prepare Dandelions
Begin by thoroughly washing 4 cups of fresh dandelion flower heads under cold water, ensuring all dirt and insects are removed. Carefully separate the yellow petals from the green bases, as only the bright petals will create a sweet, floral flavor. This vibrant yellow color will be the essence of your Sunshine in a Jar Homemade Dandelion Jelly.
Step 2: Steep
In a heatproof container, combine the cleaned yellow dandelion petals with 4 cups of boiling water. Cover tightly and allow the mixture to steep for 8-12 hours. This process will extract the beautiful floral essence and bright hue from the petals, resulting in a pale yellow infusion that forms the base of your jelly.
Step 3: Strain
After steeping, take a fine-mesh sieve or cheesecloth and strain the mixture to separate the liquid from the dandelion petals. Discard the spent petals, ensuring you have a clarified, pale yellow liquid. This step is crucial for creating a smooth, crystal-clear jelly, setting the stage for your delightful Sunshine in a Jar Homemade Dandelion Jelly.
Step 4: Combine Ingredients
In a large pot, mix together the strained dandelion infusion with 4 tablespoons of freshly squeezed lemon juice and 1 package of optional powdered pectin. Stir well to combine all the ingredients. This tart acidity from the lemon juice will brighten the flavor and help the jelly set properly, enhancing the overall taste of your dandelion jelly.
Step 5: Boil
Heat the mixture over medium-high heat until it reaches a rolling boil, stirring constantly to prevent sticking. Gradually add 4 cups of granulated sugar, continuing to stir until it's fully dissolved. Keep that vibrant concoction boiling, as this is the magical moment where the flavors meld to create your unique Sunshine in a Jar Homemade Dandelion Jelly.
Step 6: Check for Set
Continue boiling the mixture and monitor closely until it reaches a temperature of 220°F (104°C) on a candy thermometer or passes the "wrinkle test" on a chilled plate. Achieving this temperature ensures the jelly will set properly, transforming your liquid gold into a luscious spreadable delight.
Step 7: Skim Foam
Once the desired temperature is reached, remove the pot from the heat. Carefully skim off any foam that has formed on the surface using a spoon to achieve a clearer jelly. This step is key to ensuring your Sunshine in a Jar Homemade Dandelion Jelly looks as beautiful as it tastes.
Step 8: Canning
Ladle the hot jelly into sterilized jars, leaving about ¼ inch of headspace at the top. Secure the lids tightly and process the jars in a boiling water bath for 10 minutes to ensure proper sealing. If you aren’t canning, simply refrigerate the jars to enjoy your jelly fresh.
Step 9: Cool
Allow the jars to cool completely on a wire rack, ensuring they seal properly. As you hear the joyful "pop" of the lids sealing, you'll know your Sunshine in a Jar Homemade Dandelion Jelly is ready to be enjoyed. Once cooled, store in a cool, dark place, and savor the taste of spring all year round!
Storage Tips for Jar Homemade Dandelion Jelly
Cool, Dark Place: Properly processed jars can be stored in a cool, dark place for up to one year. This helps maintain the freshness and vibrant color of your dandelion jelly.
Refrigerator: Once opened, keep the jar in the fridge and consume within 3-4 weeks for the best flavor and quality. Always ensure the lid is tightly sealed to prevent contamination.
Airtight Containers: If you prefer not to can, store the jelly in airtight containers in the refrigerator. This method will also extend its freshness for several weeks.
Freezing: For longer storage, you can freeze dandelion jelly in freezer-safe jars or bags. Be sure to leave some space at the top, as contents may expand when frozen.
Make Ahead Options
These Sunshine in a Jar Homemade Dandelion Jelly are perfect for meal prep enthusiasts! You can prepare the dandelion petals and steep them up to 24 hours in advance, keeping the petals in a covered container in the refrigerator to maintain their freshness. After straining the infusion, you can mix in the lemon juice and powdered pectin, then refrigerate the mixture for up to 3 days before cooking. When you're ready to finish, simply bring the mixture to a rolling boil, add the sugar, and proceed with canning. This approach not only saves time but ensures you have homemade jelly that’s just as delicious and vibrant as when you first made it!
Variations for Jar Homemade Dandelion Jelly
Feel free to experiment and make this delightful jelly truly yours with a twist or two!
-
Citrus Zest: Add the zest of one lemon or orange for an aromatic flavor boost that brightens the jelly.
-
Herbal Infusion: Infuse the boiling water with fresh herbs like mint or basil for a unique, refreshing touch. It adds an unexpected depth that pairs wonderfully with cheese.
-
Spicy Sweet: Stir in a pinch of cayenne pepper for a gentle kick. This subtle heat complements the floral notes beautifully, creating a jelly that's perfect for adventurous palates.
-
Berry Bliss: Incorporate fresh or frozen raspberries or strawberries for a fruity variation. This twist not only adds beautiful color but also enhances the taste profile.
-
Ginger Kick: Grate a small piece of fresh ginger into the boiling mixture for a warm, spicy undertone. Its zing harmonizes surprisingly well with the jelly's sweetness.
-
Honey Substitute: Replace granulated sugar with honey for a deeper, richer sweetness. Just remember, honey can alter the jelly's color to a lovely golden hue!
-
Dried Petals Option: Use ½ to 1 cup of dried dandelion petals instead of fresh ones. Just rehydrate them in hot water before steeping to get the floral essence out.
Enhance your culinary adventure even further by exploring our Pickle Brine Essentials for new ways to incorporate flavors from your garden!
Tips for the Best Dandelion Jelly
-
Choose Wisely: Select dandelions from areas free of pesticides and pollutants. This ensures your homemade dandelion jelly is safe and tastes fresh.
-
Herb Care: Only use the yellow petals—discard any green parts. The greens can impart bitterness, ruining your jelly’s flavor.
-
Water Temperature: Make sure your boiling water is at a rolling boil when steeping. This helps extract the maximum floral essence from the petals for your jelly.
-
Setting Point: Use a candy thermometer to reach the exact temperature of 220°F (104°C). This guarantees your dandelion jelly achieves the perfect consistency and doesn’t turn syrupy.
-
Skim for Clarity: Don’t skip the skimming step! Removing foam not only enhances the visual appeal but ensures a clearer, more elegant finished jelly.
-
Storing Safely: Properly sealed jars can be stored long-term. Keep them in a cool, dark place to preserve the quality of your homemade dandelion jelly!
What to Serve with Sunshine in a Jar Homemade Dandelion Jelly?
Imagine brightening your morning or elevating a gathering with delightful pairings to complement this vibrant floral spread.
-
Scones: Light and buttery scones provide a perfect canvas for the sweet floral notes of dandelion jelly, creating a delightful breakfast treat.
-
Artisan Cheese Platter: Pair with creamy brie or tangy goat cheese for a wonderful contrast in flavors and textures, making your cheese board a conversation starter.
-
Greek Yogurt Parfaits: Layer dandelion jelly with creamy yogurt and fresh berries for a refreshing brunch option that bursts with flavor and color.
-
Buttermilk Pancakes: Drizzle over warm pancakes for a unique twist on the traditional syrup, adding a floral sweetness to your comfort food favorites.
-
Toast with Cream Cheese: Spread a layer of cream cheese on your favorite bread and top with dandelion jelly for a creamy, sweet snack that feels gourmet.
-
Chai Tea: The warmth and spice of chai tea beautifully complement the floral notes of the jelly, creating a soothing beverage perfect for afternoon gatherings.
-
Fruit Salad: Enhance a fresh fruit salad with a spoonful of dandelion jelly for a touch of sweetness and an unexpected pop of flavor.
-
Spiced Nuts: Serve spiced nuts as a crunchy bite alongside your jelly, providing a satisfying texture contrast with every sweet spread.
-
Lemonade: Refreshing lemonade can balance the sweetness of the jelly, making it a great beverage pairing for backyard picnics and warm afternoons.
-
Shortbread Cookies: Crisp, buttery cookies topped with dandelion jelly create a lovely dessert that feels elegant yet simple, perfect for any occasion.
Sunshine in a Jar Homemade Dandelion Jelly Recipe FAQs
How do I select the right dandelions for the jelly?
Absolutely! Choose dandelions that are freshly bloomed, bright yellow, and free from any pests or damage. It's essential to harvest them from areas that haven't been treated with pesticides or chemicals, ensuring your homemade jelly is safe and flavorful. Look for vibrant flowers and avoid any that have dark spots or are wilting.
What is the best way to store homemade dandelion jelly?
Once you’ve processed and sealed your jars, store them in a cool, dark place for up to one year. If you've opened a jar, keep it refrigerated and consume it within 3-4 weeks. Always ensure the lid is tightly sealed to maintain freshness. It’s like preserving a little bit of sunshine for your breakfast!
Can I freeze dandelion jelly for longer storage?
Yes, you can! To freeze your dandelion jelly, ladle it into freezer-safe jars or plastic containers, leaving about an inch of headspace to allow for expansion. Ensure they are airtight to prevent freezer burn. Your jelly will maintain its flavor for up to 3 months in the freezer. Just thaw in the refrigerator when you're ready to enjoy it again.
What if my jelly doesn't set properly?
Very often, jelly that doesn’t set can be due to several factors, such as not reaching the correct temperature (220°F or 104°C). If you find that your jelly is too runny, you can always re-process it. Simply pour it back into a pot, add a bit more pectin, and boil it again, stirring continuously. Be sure to check the temperature again, and use the "wrinkle test" to determine when it's ready to set.
Is dandelion jelly safe for pets or should I be mindful of allergies?
While dandelion jelly is made from non-toxic ingredients, be cautious if you have pets. Some pets may be sensitive to dandelions, so it’s best to monitor them during the first few tastings. Additionally, if anyone has allergies to pollen or certain flowers, consider skipping the jelly or consulting your doctor. Always prioritize safety above all!
Sunny Jar Homemade Dandelion Jelly: A Blooming Delight
Ingredients
Equipment
Method
- Wash 4 cups of dandelion flower heads under cold water.
- Combine the cleaned petals with 4 cups of boiling water in a heatproof container, cover tightly, and steep for 8-12 hours.
- Strain the mixture using a fine-mesh sieve to separate the liquid from the petals.
- In a large pot, mix the strained dandelion infusion with 4 tablespoons of lemon juice and powdered pectin.
- Heat the mixture over medium-high heat, add 4 cups of sugar gradually, stirring until dissolved.
- Boil and monitor until it reaches 220°F (104°C) or passes the 'wrinkle test'.
- Remove from heat and skim off any foam that forms.
- Ladle hot jelly into sterilized jars, secure lids, and process in a boiling water bath for 10 minutes.
- Allow jars to cool completely on a wire rack before storing.
Leave a Reply