
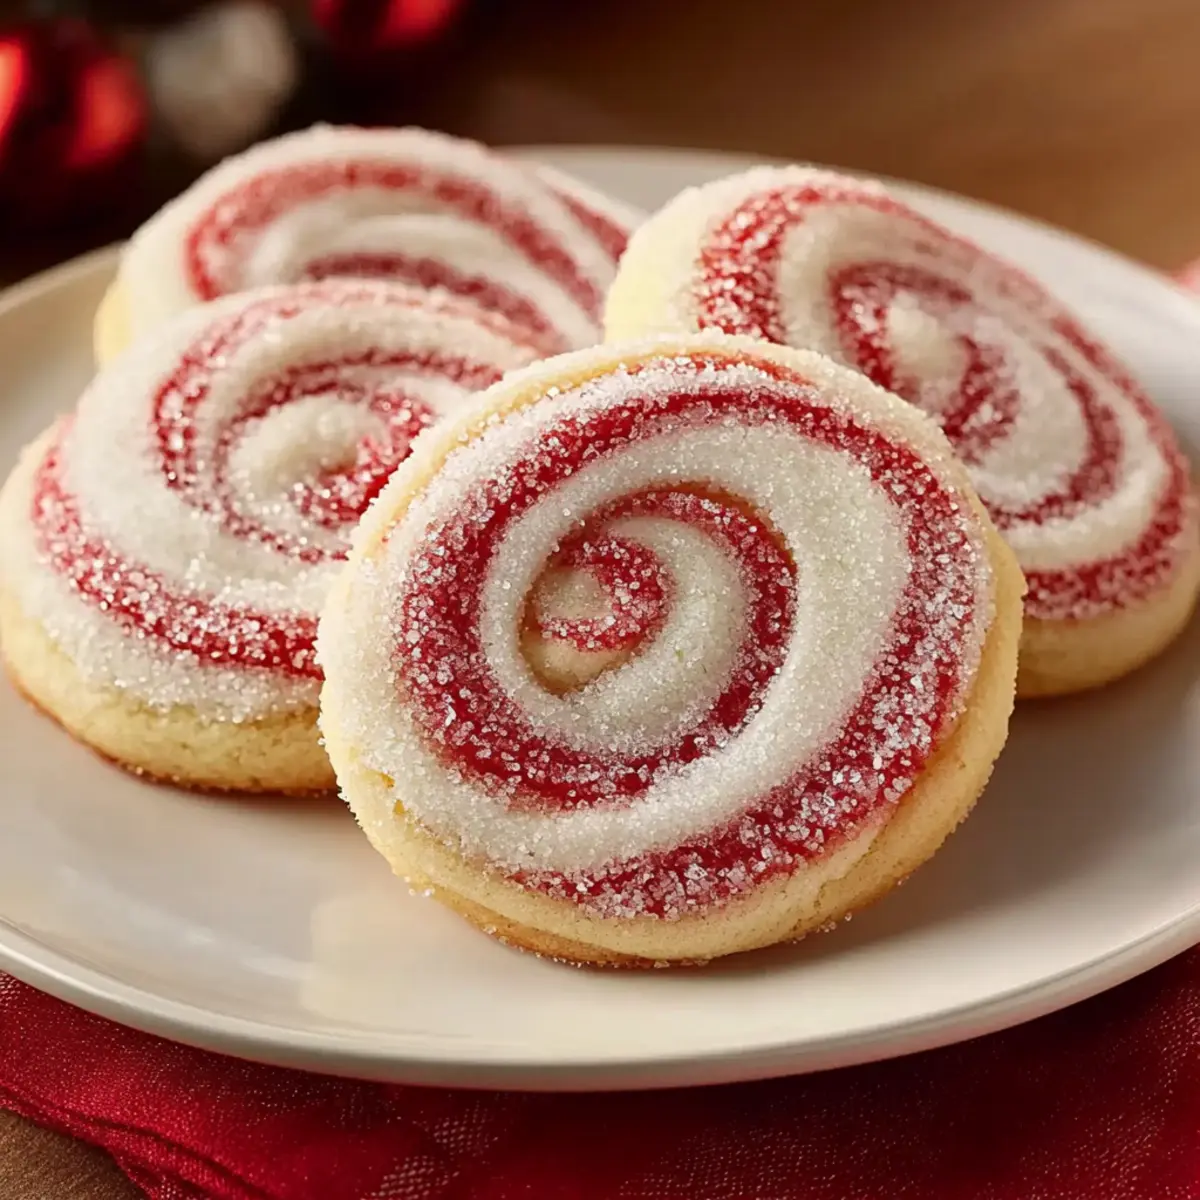
The first bite of a freshly baked cookie can transport you back to childhood warmth and joy, and these Bakery-Perfect Peppermint Swirl Cookies are no exception. As I roll out the vibrant dough, enveloped in the intoxicating aroma of peppermint, I know I'm creating something incredibly special. Not only are these cookies a visual delight with their stunning swirls, but they also promise to be a crowd-pleaser at any gathering. Perfect for holiday celebrations or as a heartfelt gift, this recipe ensures a soft, tender crumb that melts in your mouth. Plus, the double-chilling method means you’ll never have to worry about cookie mishaps again. Are you ready to impress your friends and family with these festive treats? Let's dive into the details!
Why Make Peppermint Swirl Cookies?
Irresistible Flavor: The enchanting blend of peppermint and vanilla ensures every bite bursts with refreshing flavor, making these cookies a delightful holiday treat.
Baking Made Easy: With just a few steps and no complicated techniques, whipping up these cookies is an approachable task even for novice bakers.
Festive Presentation: The stunning visual swirls not only wow guests but also make for beautiful gifts alongside other sweet favorites, like Cinnamon Crunch Swirled Banana Bread.
Ideal for Sharing: These cookies are sure to be a hit at holiday parties, adding a touch of homemade charm to any gathering.
Storable Goodness: Make-ahead tips, like freezing the dough, mean you can prepare for your holiday baking marathon and keep stress at bay!
Peppermint Swirl Cookies Ingredients
• Dive into the essentials for these festive delights!
For the Cookie Base
- All-Purpose Flour – Gives structure to the cookies, ensuring they hold their beautiful swirl when baked.
- Baking Powder – This leavening agent provides a gentle rise, helping your cookies achieve the perfect texture without being too cakey.
- Salt – A pinch of salt enhances flavor, balancing the sweetness for a deliciously well-rounded cookie.
- Unsalted Butter – Softened to room temperature, it adds richness and ensures a tender crumb in your Peppermint Swirl Cookies.
- Granulated Sugar – Sweetens the cookies while contributing to a fluffy texture when creamed with butter.
- Large Egg – Binds the ingredients together, ensuring a cohesive and tasty cookie dough.
- Vanilla Extract – Adds depth of flavor, beautifully complementing the peppermint essence.
- Peppermint Extract – The star ingredient that infuses the cookies with that signature holiday minty flavor.
For the Color and Coating
- Red Gel Food Coloring – Use this to create those eye-catching, vibrant swirls that make your cookies visually stunning without altering moisture levels.
- Coarse Sugar or Crushed Peppermint Candies – Sprinkle for a festive crunch on the exterior, enhancing both texture and appeal.
These Peppermint Swirl Cookies are not just about taste; they are a visual treat that captures the spirit of the holiday season!
Step‑by‑Step Instructions for Peppermint Swirl Cookies
Step 1: Mix Dry Ingredients
In a medium bowl, whisk together 2 cups of all-purpose flour, 1 teaspoon of baking powder, and ¼ teaspoon of salt until well combined. This step ensures uniform distribution of the baking powder and salt, crucial for achieving the perfect texture in your Peppermint Swirl Cookies. Set this bowl aside while you prepare the wet ingredients.
Step 2: Cream Butter and Sugar
In a large mixing bowl, use a hand mixer or stand mixer to cream together 1 cup of softened unsalted butter and 1 cup of granulated sugar on medium speed until the mixture turns light and fluffy, about 3-5 minutes. The fluffy texture indicates that the sugar granules have incorporated air, which is vital for a tender cookie.
Step 3: Incorporate Wet Ingredients
Add 1 large egg, 1 teaspoon of vanilla extract, and 1 teaspoon of peppermint extract to the creamed butter and sugar. Mix on low speed just until everything is well combined. The mixture should be smooth and slightly glossy, with a light peppermint scent filling the kitchen, ensuring a delightful flavor for your Peppermint Swirl Cookies.
Step 4: Combine Mixtures
Gradually add the dry ingredients to the wet mixture, mixing on low speed. Stop mixing when just combined; this should take about 30 seconds. Be cautious not to overmix, as this could result in tough cookies. The dough will be slightly sticky but should hold together well.
Step 5: Divide and Color Dough
Carefully split the cookie dough in half. Leave one half plain while adding a few drops of red gel food coloring to the other half. Using your hands, knead the red food coloring into the dough until uniformly colored, reminiscent of festive peppermint swirls.
Step 6: Chill Dough
Wrap each half of the dough separately in plastic wrap and chill in the refrigerator for at least 30 minutes. This chilling step is crucial to firm up the dough; it will help preserve the shape and design of your Peppermint Swirl Cookies during baking.
Step 7: Roll Out Dough
Once chilled, take each colored dough out of the refrigerator and roll them individually into rectangles, approximately 10x12 inches and about ¼ inch thick. Use a rolling pin to ensure an even thickness, making it easier to create beautiful swirls later.
Step 8: Layer and Roll
Stack the red dough rectangle on top of the white dough and press gently to adhere. Start from one edge and carefully roll the layered dough tightly into a log shape, ensuring that the colors swirl beautifully. The tighter you roll, the better your swirls will appear when sliced.
Step 9: Second Chill
Wrap the log in plastic wrap and chill it in the refrigerator for at least 2 hours. This second chilling allows the dough to firm up adequately, making it easier to slice into perfect rounds as you prepare your Peppermint Swirl Cookies for baking.
Step 10: Preheat Oven
Preheat your oven to 375°F (190°C) and line two baking sheets with parchment paper. As the oven heats, prepare your cutting tools and ingredients for the next step, ensuring you have all that you need on hand to go from slicing to baking seamlessly.
Step 11: Slice and Prepare for Baking
Remove the chilled log from the refrigerator and use a sharp knife to slice it into ¼-inch rounds. Optionally, brush the tops with a bit of water or egg white before rolling them in coarse sugar or crushed peppermint candies. The glittering coating adds an extra festive touch to your Peppermint Swirl Cookies.
Step 12: Bake
Place the sliced cookies on the prepared baking sheets, ensuring they have some space between each for spreading. Bake in the preheated oven for 8-10 minutes, or until the edges are lightly golden and the centers are set. The aroma of peppermint will fill your kitchen as they bake!
Step 13: Cool
Allow the cookies to cool on the baking sheet for about 5 minutes before transferring them to a wire rack to cool completely. This cooling period helps them firm up, ensuring that your Peppermint Swirl Cookies maintain their delightful shape and soft texture.
Peppermint Swirl Cookies Variations
Feel free to get creative and personalize your culinary experience with these delightful twists on the classic recipe!
-
Gluten-Free: Substitute all-purpose flour with a gluten-free blend for a cookie that everyone can enjoy.
-
Mint-Free: Replace peppermint extract with almond or vanilla extract for a unique flavor that still feels festive and warm.
-
Colorful Swirls: Use different food colorings, like green or blue, to give your cookies a fun, vibrant appearance for various occasions.
-
Texture Twist: Incorporate finely chopped nuts, such as walnuts or pecans, into the dough for added crunch and a nutty flavor that pairs beautifully with mint.
-
Chocolate-Dipped: Dip half of each cookie in melted dark or white chocolate for an indulgent treat, enhancing both flavor and presentation.
-
Spicy Kick: Add a pinch of cayenne pepper or cinnamon to the dough for a surprising hint of warmth that contrasts wonderfully with the peppermint.
-
Candy Cane Crumble: Top your cookies with crushed candy cane pieces before baking to make your treats extra festively crunchy.
For more exciting recipes and variations, consider trying these White Chocolate Cookies or whip up a batch of Oatmeal Cookies Chewy to indulge in delightful flavors this holiday season!
Expert Tips for Peppermint Swirl Cookies
-
Soft Butter Matters: Ensure your unsalted butter is at room temperature for the best creaming texture; it significantly impacts your cookies' final tenderness.
-
Chill Wisely: Don’t rush the chilling process! Proper chilling prevents the dough from spreading too much during baking, helping maintain those lovely swirls.
-
Slicing Secrets: Use a sharp, non-serrated knife to slice the dough log; this will help achieve clean cuts and prevent the cookies from losing their shape.
-
Watch the Bake Time: Keep an eye on your cookies while baking. Overbaking can lead to hard cookies; they should be golden on the edges but still soft in the center for optimal taste.
-
Coating Choices: Feel free to get creative with coatings! Crushed peppermint candies add a festive touch, but granulated sugar works great for a classic look.
How to Store and Freeze Peppermint Swirl Cookies
Room Temperature: Store cookies in an airtight container at room temperature for up to 5-7 days to maintain their freshness and deliciousness.
Fridge: If you want them to last a little longer, keep them in the fridge for up to 10 days; just ensure they are covered to prevent them from drying out.
Freezer: For longer storage, freeze the baked cookies for up to 1 month. Wrap them tightly in plastic wrap and then place them in a freezer-safe bag or container.
Reheating: To enjoy your Peppermint Swirl Cookies warm, reheat in the microwave for about 10-15 seconds or in a preheated oven at 350°F (175°C) for 5-7 minutes.
Make Ahead Options
These Peppermint Swirl Cookies are perfect for busy home cooks looking to save time during the hectic holiday season! You can prepare the cookie dough up to 24 hours in advance; simply wrap the logs tightly in plastic wrap and refrigerate to prevent drying out. Alternatively, freeze the unbaked dough logs for up to 2-3 months. When you’re ready to bake, thaw the logs overnight in the refrigerator before slicing and baking as directed. This way, your cookies will be just as fresh and delicious, making them a convenient treat to whip up on short notice. With these make-ahead options, you can enjoy festive baking without the last-minute rush!
What to Serve with Bakery-Perfect Peppermint Swirl Cookies
These delicious cookies bring festive cheer to your table, making any gathering feel more special.
- Rich Hot Cocoa: A warm cup of cocoa with marshmallows enhances the cookies’ peppermint flavor, creating a comforting pairing.
- Steamed Apple Cider: The warm spices in apple cider beautifully complement the minty sweetness, making this an ideal seasonal drink.
- Creamy Vanilla Ice Cream: The smooth richness of vanilla ice cream balances the cool peppermint taste, creating a delightful dessert experience.
- Chocolate-Dipped Pretzels: Combining the salty crunch of pretzels with rich chocolate adds a playful contrast to the sweet peppermint swirls.
- Holiday Cheeseboard: Include assorted cheeses, nuts, and dried fruits to offer savory bites that perfectly contrast with the sweet cookies.
- Sugar Cookie Bars: Featuring similar flavors, these soft bars add another texture to your platter and create a festive cookie assortment.
- Peppermint Bark: A sweet, crunchy treat that mirrors the peppermint flavors and adds a delightful visual element to your dessert spread.
- Gingerbread Cookies: Their warm spices and textures pair harmoniously, providing a nostalgic taste perfect for the holiday season.
Peppermint Swirl Cookies Recipe FAQs
How do I select the best peppermint extract for the cookies?
When choosing peppermint extract, look for a pure extract with no artificial flavorings. It should have a strong, fresh aroma and a vibrant flavor that will stand out in the cookies. For an extra festive twist, you can also explore different mint extracts, like wintergreen, for a unique taste!
What is the best way to store Peppermint Swirl Cookies?
Store your cookies in an airtight container at room temperature for 5-7 days. To keep them fresh even longer, you can place a slice of bread in the container—this will help retain moisture and keep your cookies soft. Alternatively, refrigerating them can extend their shelf life to about 10 days, just make sure they are covered well to prevent drying out.
Can I freeze Peppermint Swirl Cookies?
Absolutely! You can freeze the baked cookies for up to 1 month. To do this, wrap each cookie individually in plastic wrap, then place them in a freezer-safe bag or container. If you want to freeze the dough, shape it into a log before wrapping securely in plastic wrap and then freezing it. When you’re ready to bake, simply thaw the log in the fridge overnight, slice, and bake as directed!
How do I prevent the cookies from spreading too much while baking?
To prevent spreading, make sure to chill your dough thoroughly—both after mixing and once it’s shaped into a log. Additionally, ensure your butter is at the right temperature (softened but not melted) and avoid overmixing the dough. These steps help the cookies keep their shape and maintain those beautiful swirls.
Are these cookies safe for pets?
Peppermint Swirl Cookies are not safe for pets, particularly dogs, as chocolate and certain sweeteners like xylitol can be harmful. Additionally, ingredients like butter and sugar can upset a pet’s stomach. Always keep your baked goods stored safely out of reach of your furry friends!
Can I use gluten-free flour for this recipe?
Yes! You can substitute all-purpose flour with a gluten-free all-purpose blend to make these cookies suitable for those with gluten sensitivities. Just ensure that it’s a blend designed for baking, which usually contains xanthan gum to replicate the texture that wheat flour provides. Be aware that the texture might be slightly different, but they will still be delicious!
Festive Peppermint Swirl Cookies that Melt in Your Mouth
Ingredients
Equipment
Method
- In a medium bowl, whisk together 2 cups of all-purpose flour, 1 teaspoon of baking powder, and ¼ teaspoon of salt until well combined. Set this bowl aside.
- In a large mixing bowl, cream together 1 cup of softened unsalted butter and 1 cup of granulated sugar until light and fluffy, about 3-5 minutes.
- Add 1 large egg, 1 teaspoon of vanilla extract, and 1 teaspoon of peppermint extract to the creamed mixture and mix on low speed until well combined.
- Gradually add the dry ingredients to the wet mixture, mixing on low speed until just combined.
- Carefully split the cookie dough in half. Leave one half plain and add a few drops of red gel food coloring to the other half, kneading until uniformly colored.
- Wrap each half of the dough in plastic wrap and chill in the refrigerator for at least 30 minutes.
- Roll each colored dough into rectangles, approximately 10x12 inches and ¼ inch thick.
- Stack the red dough rectangle on top of the white dough and roll tightly into a log shape.
- Wrap the log in plastic wrap and chill in the refrigerator for at least 2 hours.
- Preheat your oven to 375°F (190°C) and line two baking sheets with parchment paper.
- Remove the log from the refrigerator and slice into ¼-inch rounds. Optionally brush with water or egg white before coating.
- Bake in the preheated oven for 8-10 minutes, or until edges are golden and centers are set.
- Cool cookies on the baking sheet for about 5 minutes before transferring to a wire rack.


Leave a Reply