
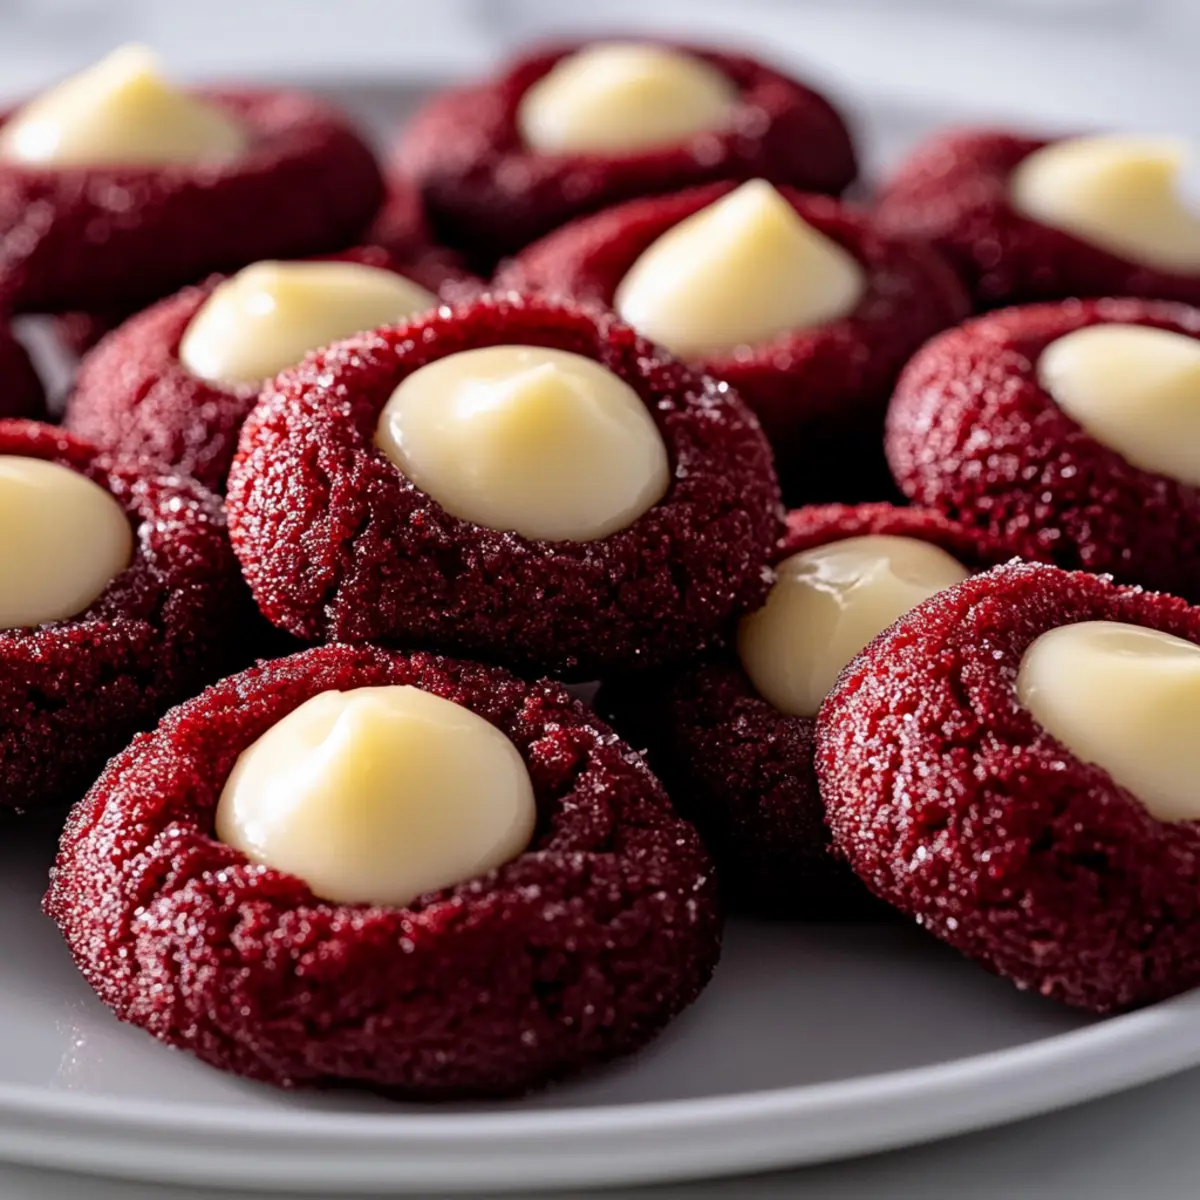
As I pulled open the oven door, a heavenly aroma wafted through my kitchen, instantly surrounding me with warmth and nostalgia. These Red Velvet Cream Cheese Thumbprint Cookies are not just any dessert; they embody the spirit of celebration with their stunning crimson hue and rich flavor profile. Whether you're gearing up for a festive gathering or simply craving a sweet treat, these cookies are the perfect balance of moist, pillowy cookie and creamy, tangy filling. They're incredibly easy to whip up, making them a delightful go-to for impressing family and friends alike. Plus, their vibrant color is sure to make any occasion feel special. Are you ready to dive into the world of delightful cookies and creative variations? Let's get started!
Why You'll Adore These Cookies?
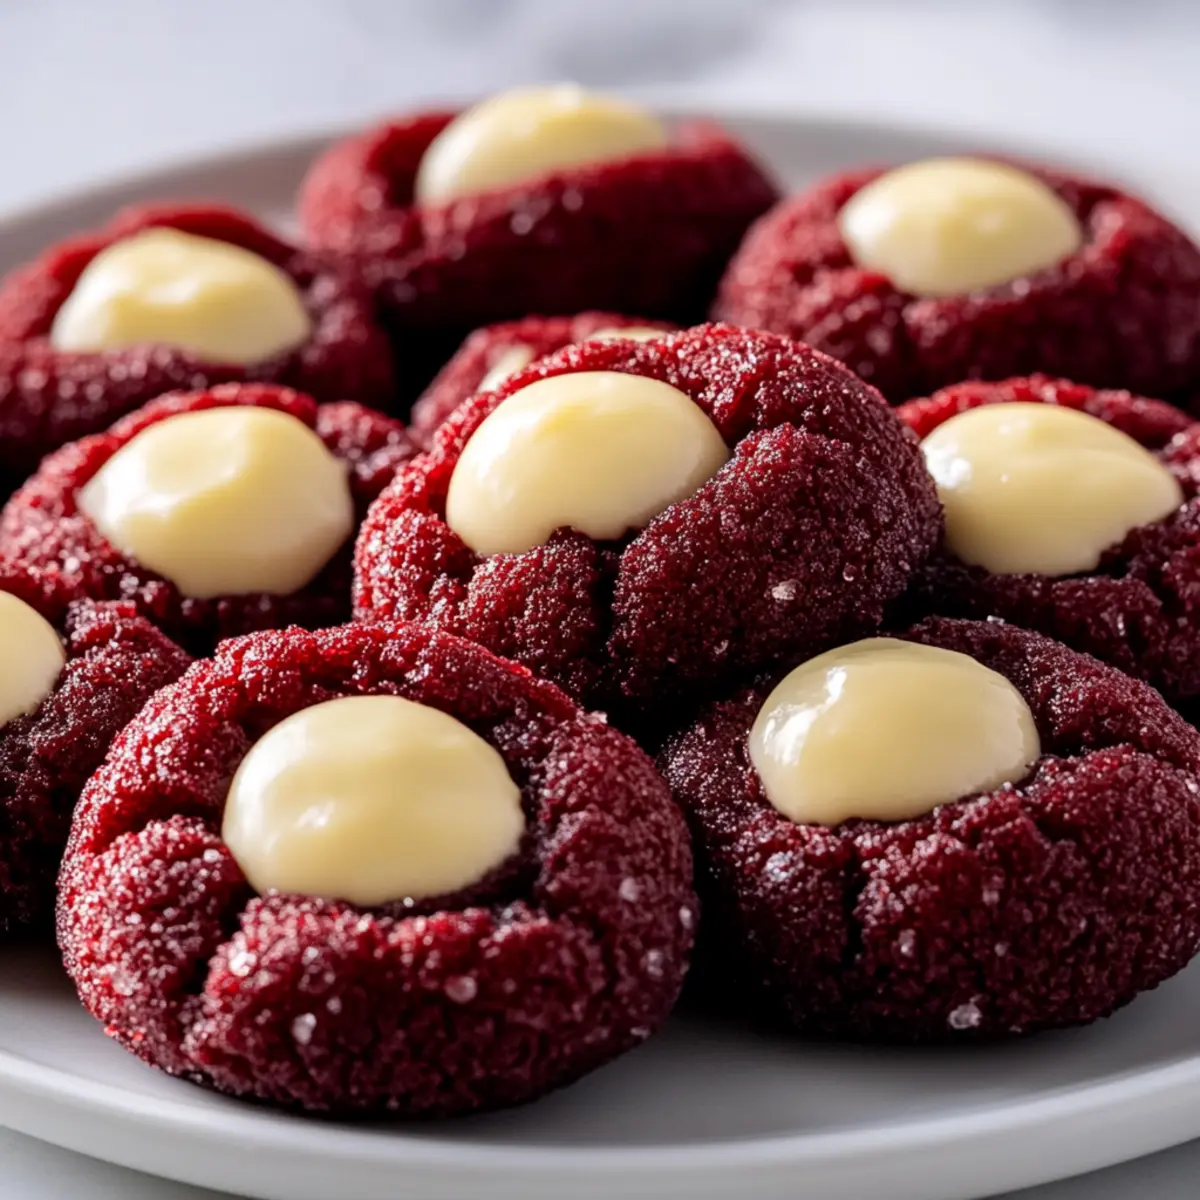
Festive Appeal: The vibrant red hue makes these cookies a stunning centerpiece for any holiday gathering.
Deliciously Unique: The luscious cream cheese filling adds a tangy twist that beautifully complements the rich cookie base.
Endless Variations: Customize your cookies with various fillings like raspberry jam or chocolate ganache for a fun, personal touch.
Quick and Easy: With simple steps and minimal prep time, you can have these delightful treats ready for your guests in no time.
Ideal for Gifting: They are perfect for gifting in decorative tins or sharing at potlucks, bringing joy to everyone who tries them.
If you’re looking for more baking inspiration, check out these irresistible Oatmeal Cookies Chewy or the festive Ham Cheese Croissant casserole!
Red Velvet Cream Cheese Thumbprint Cookies Ingredients
For the Dough
- All-purpose flour – Provides structure to the cookies; substitute with gluten-free flour for a gluten-free option.
- Unsweetened cocoa powder – Adds a subtle chocolate flavor; ensure it’s unsweetened for balanced sweetness.
- Baking soda – A leavening agent that helps cookies rise; do not substitute with baking powder as it may alter the texture.
- Salt – Enhances flavor; essential for good balance and never omit.
- Unsalted butter – Gives moisture and flavor; room temperature butter is ideal for creaming.
- Granulated sugar – Sweetens the cookie base and contributes to texture; can be replaced with coconut sugar for a healthier option.
- Large egg – Binds ingredients and helps with rise; use a flax egg for a vegan alternative.
- Vanilla extract – Adds depth of flavor; prefer pure over imitation for best results.
- White vinegar – Reacts with baking soda to enhance rise and tenderness; essential for the red velvet profile.
- Buttermilk – Provides moisture and tang; substitute with milk plus a squeeze of lemon or vinegar if unavailable.
- Red gel food coloring – Offers a vibrant color; avoid liquid dyes as they may alter the consistency.
For the Cream Cheese Filling
- Cream cheese – Provides creaminess and tang; full-fat yields the best texture.
- Unsalted butter – Adds richness to the filling; must be softened for easy blending.
- Powdered sugar – Sweetens and thickens the filling; sift to avoid lumps.
- Vanilla extract – Complements the cream cheese; same quality recommendation as above.
- Salt – Balances sweetness and enhances flavor; do not skip for the best taste.
Optional Toppings
- Powdered sugar – Dust for a lovely decorative touch, enhancing visual appeal.
- Melted white chocolate – Can drizzle on top to enhance flavor and presentation.
These Red Velvet Cream Cheese Thumbprint Cookies are sure to bring festive cheer wherever they go!
Step‑by‑Step Instructions for Red Velvet Cream Cheese Thumbprint Cookies
Step 1: Preheat the Oven and Prepare Baking Sheets
Begin by preheating your oven to 375°F (190°C). While the oven warms, line your baking sheets with parchment paper, ensuring an easy release of your cookies after baking. The scent of warm vanilla will fill your kitchen as you set the stage for creating these delightful Red Velvet Cream Cheese Thumbprint Cookies.
Step 2: Whisk the Dry Ingredients
In a medium bowl, whisk together the all-purpose flour, unsweetened cocoa powder, baking soda, and salt. This mixture serves as the foundation for your cookies. The dry ingredients should be combined until well blended, creating a uniform base that will help achieve that tender texture.
Step 3: Cream Butter and Sugar
In a stand mixer, cream the unsalted butter and granulated sugar together until the mixture becomes light and fluffy, approximately 3-4 minutes. You'll know it's ready when it appears pale and airy. This step is crucial for infusing the Red Velvet Cream Cheese Thumbprint Cookies with rich flavor and a lovely texture.
Step 4: Incorporate Egg and Flavorings
Next, mix in the large egg, vanilla extract, and white vinegar until just combined. Avoid overmixing—these ingredients should blend smoothly into the creamed butter without losing volume. The vinegar is key to the signature red velvet taste, so make sure it’s evenly incorporated.
Step 5: Add Food Coloring
Slowly add the red gel food coloring, mixing until you achieve your desired vibrant hue. Start with a small amount and gradually increase for a deeper color, producing that eye-catching red for your cookies. This step adds visual appeal, setting the stage for a festive treat.
Step 6: Combine Dry Ingredients with Buttermilk
Gradually mix the dry ingredients with the buttermilk, alternating between the two until just combined. Aim to incorporate the mixtures without overmixing to preserve the cookies' tenderness. The dough should be thick and slightly sticky, indicating it's ready for chilling.
Step 7: Chill the Dough
Wrap the dough in plastic wrap and refrigerate for at least 30 minutes. This cooling period helps the dough firm up, making it easier to work with. You’ll notice the colors and flavors meld together while the dough solidifies, enhancing the overall taste of your Red Velvet Cream Cheese Thumbprint Cookies.
Step 8: Prepare the Cream Cheese Filling
In a bowl, beat the cream cheese and softened unsalted butter until smooth and creamy. Gradually add the sifted powdered sugar, vanilla extract, and a pinch of salt. Beat until well combined and fluffy. This luscious filling will contrast perfectly with your cookies, adding richness to each bite.
Step 9: Shape the Cookies
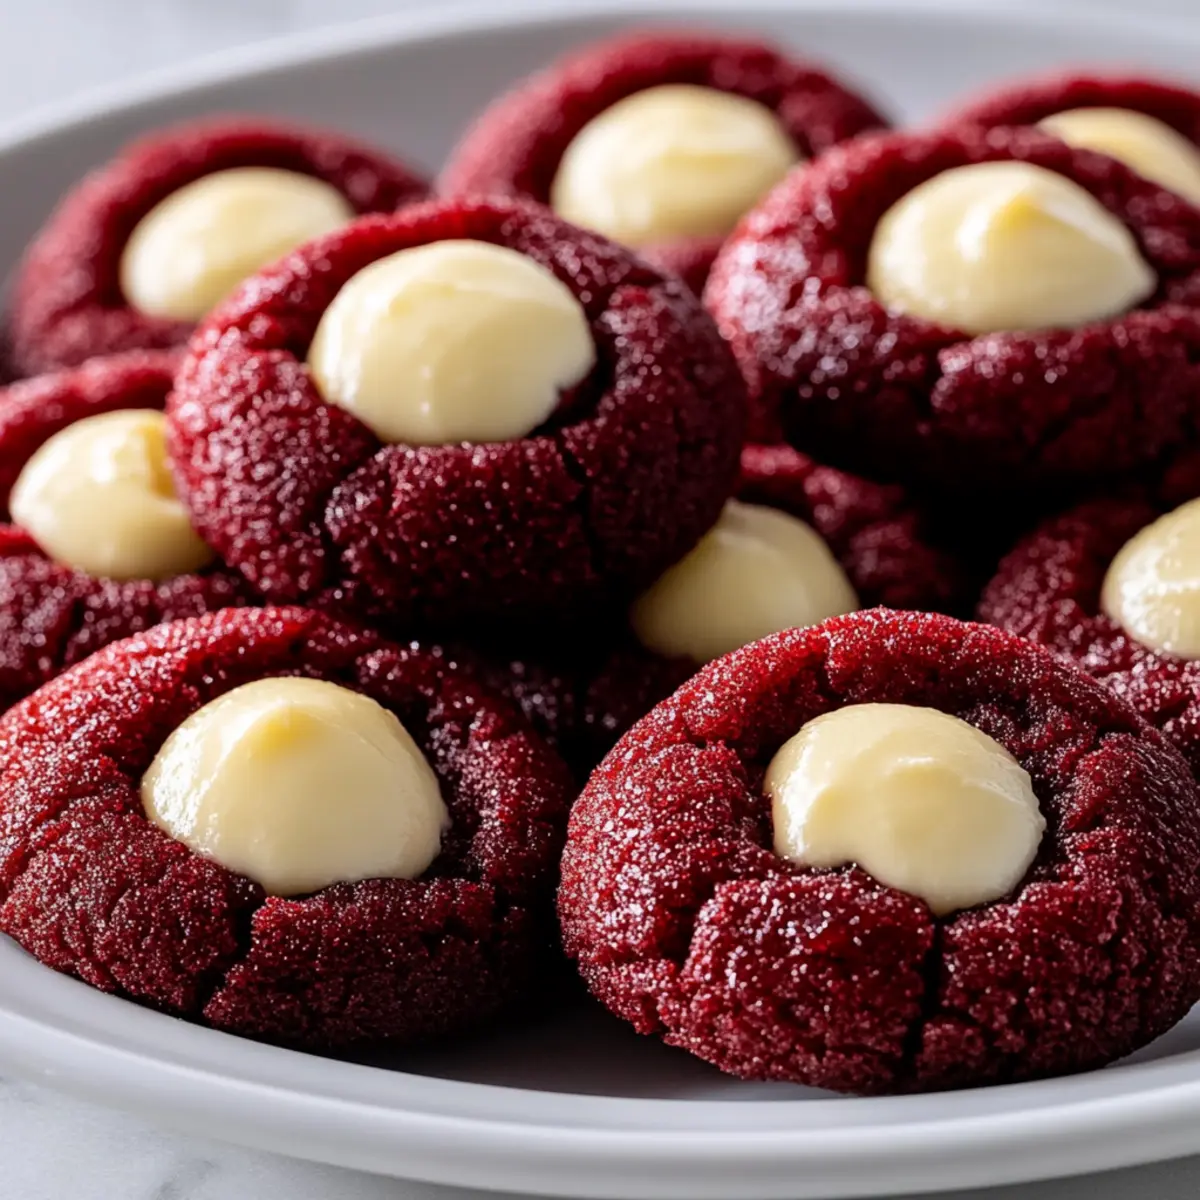
Once the dough has chilled, scoop portions into 1-inch balls and place them on the prepared baking sheets, spacing them about 2 inches apart. Use your thumb or the back of a spoon to press down the centers, creating a well for the filling. This step is essential for forming the thumbprint shape in your cookies.
Step 10: Fill the Thumbprints
Carefully spoon the cream cheese filling into each thumbprint you've created in the cookies. Aim for a generous dollop in each depression without overflowing. This step ensures each cookie is beautifully decorated and packed with flavor, enhancing the festive look of your Red Velvet Cream Cheese Thumbprint Cookies.
Step 11: Bake the Cookies
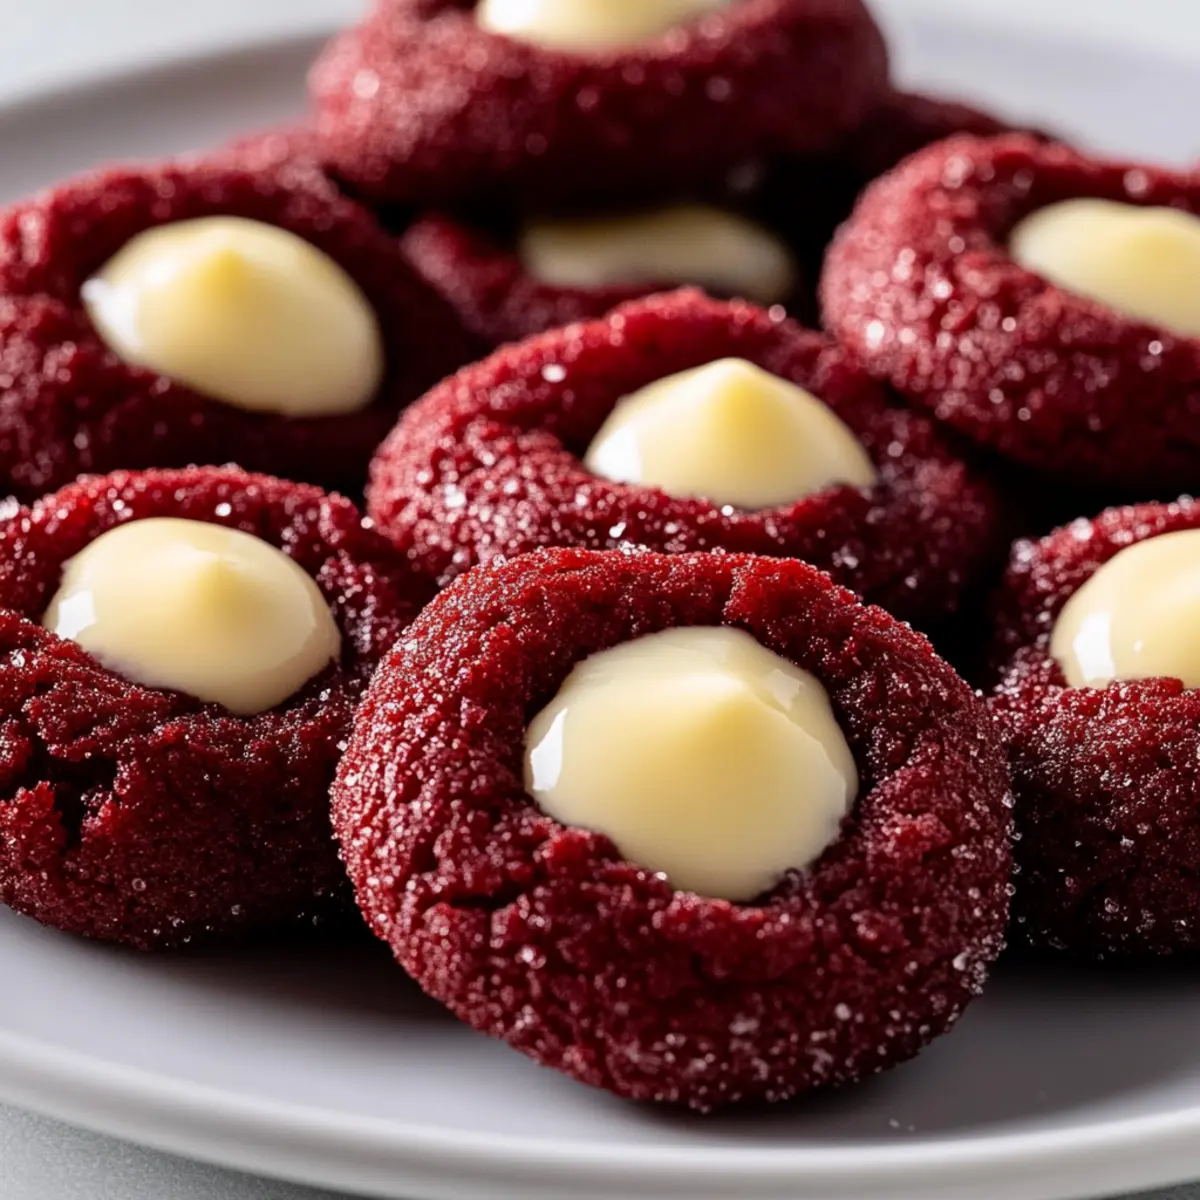
Place the baking sheets in your preheated oven and bake for 10-12 minutes. The edges should look set while the filling puffs up slightly in the center. Keep an eye on them to ensure perfect doneness, as they should remain soft and tender, just like their irresistible cookie texture promises.
Step 12: Cool and Serve
Once baked, remove the cookies and allow them to cool on the sheets for 5-7 minutes before transferring them to a wire rack to cool completely. This gentle cooling process helps the filling set and enhances the flavors. Optionally, dust with powdered sugar or drizzle with melted white chocolate before enjoying these festive treats!
What to Serve with Red Velvet Cream Cheese Thumbprint Cookies
As the aroma of freshly baked cookies lingers in the air, it’s time to elevate your dessert experience with delightful accompaniments.
- Hot Cocoa: A rich cup of creamy hot cocoa enhances the sweet creaminess of the cookies while providing a nostalgic warmth for holiday gatherings.
- Rich Coffee: Pairing with a dark roast coffee balances the sweetness and cuts through the richness, creating a perfect morning treat or after-dinner delight.
- Vanilla Ice Cream: The cold creaminess of vanilla ice cream contrasts beautifully with the warm cookies, making every bite a heavenly experience. A scoop on the side will elevate your serving to new heights.
- Fresh Berries: Tangy raspberries or strawberries add a burst of freshness and acidity that complements the richness of the cream cheese filling. Serve these on the plate for a pop of color.
- Chocolate Ganache: A drizzle of silky chocolate ganache not only enhances the decadence of each cookie but also adds an elegant touch for those special occasions.
- Nutty Biscotti: For a delightful crunch, serve with almond or hazelnut biscotti for a dip-worthy pairing, giving your guests a delightful contrast in textures.
- Sparkling Raspberry Lemonade: This refreshing drink’s tartness will cleanse the palate, highlighting the cookies' flavors while providing an enjoyable festive beverage.
- Pecans or Walnuts: Toasted nuts add a crunchy element and nuttiness that pairs wonderfully with the soft cookies and enhances the dessert’s overall flavor profile.
- Holiday Fruit Platter: A colorful assortment of fresh fruits can offer a refreshing contrast to the cookies’ richness while adding brightness and seasonal cheer to your dessert table.
Make Ahead Options
These Red Velvet Cream Cheese Thumbprint Cookies are a fantastic choice for meal prep, allowing you to streamline your baking process! You can prepare the cookie dough up to 24 hours in advance—simply wrap it tightly in plastic wrap and refrigerate. Additionally, you can make the cream cheese filling and store it in an airtight container for up to 3 days in the fridge. When you’re ready to bake, scoop the chilled dough into balls, create thumbprints, and fill each with the cream cheese mixture just before placing them in the oven. This method ensures you enjoy cookies that are just as delicious and festive with less effort on busy days, perfect for any holiday gathering!
How to Store and Freeze Red Velvet Cream Cheese Thumbprint Cookies
Fridge: Store cookies in an airtight container in the refrigerator for up to 3-5 days to maintain freshness due to the cream cheese filling.
Freezer: For longer storage, freeze the cookies in layers separated by parchment paper. They can remain frozen for up to 2-3 months without losing texture and flavor.
Thawing: To enjoy, thaw the cookies in the fridge overnight or at room temperature for a few hours before serving. This ensures they maintain their delightful softness.
Reheating: If you’d like a warmed treat, reheat in the microwave for 5-10 seconds—just enough to gently soften the cookies without overheating the cream cheese filling.
Expert Tips for Red Velvet Cream Cheese Thumbprint Cookies
-
Room Temperature Ingredients: Ensure butter and cream cheese are at room temperature for smooth, easy blending, which is crucial for a creamy filling.
-
Chill Dough: Always chill your dough for at least 30 minutes before baking. This prevents the cookies from spreading too much and maintains their beautiful shape.
-
Avoid Overmixing: When combining dry ingredients with wet, mix until just combined. Overmixing can lead to tough cookies instead of soft, tender treats.
-
Use Gel Coloring: Choose gel food coloring over liquid dyes for a vibrant hue. Liquid colors can change the dough's consistency and affect texture.
-
Perfect Thumbprint: Press down firmly but gently to create a deep well in the center of the cookies for the cream cheese filling. This ensures a deliciously stuffed thumbprint.
-
Storage Tips: Keep cookies in the refrigerator due to the cream cheese filling. For longer storage, use layers of parchment in an airtight container and freeze for up to 2-3 months.
Red Velvet Cream Cheese Thumbprint Cookies Variations
Feel free to let your creativity shine while customizing these delightful cookies for a personalized twist!
-
Gluten-Free: Substitute all-purpose flour with your favorite gluten-free blend for a dessert everyone can enjoy.
-
Flavor Burst: Add a teaspoon of almond extract or peppermint extract to the dough for an irresistible flavor twist this holiday season. The scent of almond or mint will evoke such warmth!
-
Fruit Filling: Swap the cream cheese filling with raspberry jam or lemon curd for a fruity explosion in each bite. The tartness will beautifully contrast with the sweet cookie.
-
Cocoa Kick: Mix a tablespoon of unsweetened cocoa powder into the cream cheese filling for a richer chocolate flavor. Imagine biting into that luscious creaminess with a hint of chocolate!
-
Citrus Zest: Spice things up by incorporating orange or lemon zest into the dough. This adds a refreshing brightness that balances the richness of the cookies.
-
Chocolate Drizzle: For extra indulgence, drizzle melted white or dark chocolate over the cooled cookies. This elegant touch will elevate their presentation on any dessert table.
-
Nutty Crunch: Fold in chopped pecans or walnuts into the dough for added texture and flavor. This will give a lovely crunch to complement the soft cookies.
-
Edible Glitter: Dust your cookies with edible sparkling sugar for a festive touch perfect for any celebration. It adds a touch of magic that will enchant everyone!
Whether you’re looking for a fun new flavor combination or a special presentation for your guests, these suggestions allow you to transform your Red Velvet Cream Cheese Thumbprint Cookies into something truly unique! If you’re craving more sweet treats, consider exploring our delightful Pineapple Cookies Tropical or the classic White Chocolate Cookies.
Red Velvet Cream Cheese Thumbprint Cookies Recipe FAQs
What type of food coloring should I use for the dough?
I recommend using red gel food coloring for these Red Velvet Cream Cheese Thumbprint Cookies. Gel coloring provides a vibrant hue without affecting the dough's consistency, unlike liquid dyes that can alter texture. Just start with a small amount and mix until you reach your desired color!
How can I store these cookies after baking?
To keep your Red Velvet Cream Cheese Thumbprint Cookies fresh, store them in an airtight container in the refrigerator for up to 3-5 days due to the cream cheese filling. If you're making a larger batch, you can freeze them for up to 2-3 months. Just be sure to layer them with parchment paper to prevent sticking.
Can I freeze these cookies? How?
Absolutely! You can freeze the cookies by placing them in layers separated by parchment paper in an airtight container. They will last in the freezer for up to 2-3 months. When you’re ready to enjoy them, simply thaw them in the fridge overnight or at room temperature for a couple of hours.
What if my cookie dough is too sticky?
If you find that your dough is too sticky, it's often helpful to chill it longer—that's a true game-changer! The cooling helps firm up the dough and makes it easier to shape into balls. Just wrap it tightly in plastic wrap and refrigerate for an additional 15-30 minutes before scooping.
Is this recipe suitable for people with dietary restrictions?
This recipe contains dairy and gluten, but don’t worry! For a gluten-free option, you can substitute all-purpose flour with a gluten-free blend. Additionally, to make it vegan, simply replace the egg with a flax egg by mixing 1 tablespoon of ground flaxseed with 2.5 tablespoons of water and letting it sit until gelatinous. Happy baking!
Red Velvet Cream Cheese Thumbprint Cookies for Holiday Cheer
Ingredients
Equipment
Method
- Preheat the oven to 375°F (190°C) and line baking sheets with parchment paper.
- In a medium bowl, whisk together the all-purpose flour, cocoa powder, baking soda, and salt.
- Cream butter and sugar together until light and fluffy, about 3-4 minutes.
- Mix in the egg, vanilla extract, and vinegar until just combined.
- Add the red gel food coloring, mixing until the desired color is achieved.
- Mix the dry ingredients with the buttermilk, alternating and avoiding overmixing.
- Wrap the dough in plastic wrap and refrigerate for at least 30 minutes.
- Beat cream cheese and softened butter until smooth, then add powdered sugar, vanilla extract, and salt.
- Scoop the dough into 1-inch balls and press down the centers to create a thumbprint.
- Fill the thumbprints with the cream cheese filling.
- Bake for 10-12 minutes, until edges look set and filling puffs slightly.
- Cool on sheets for 5-7 minutes before transferring to a wire rack to cool completely.


Leave a Reply