
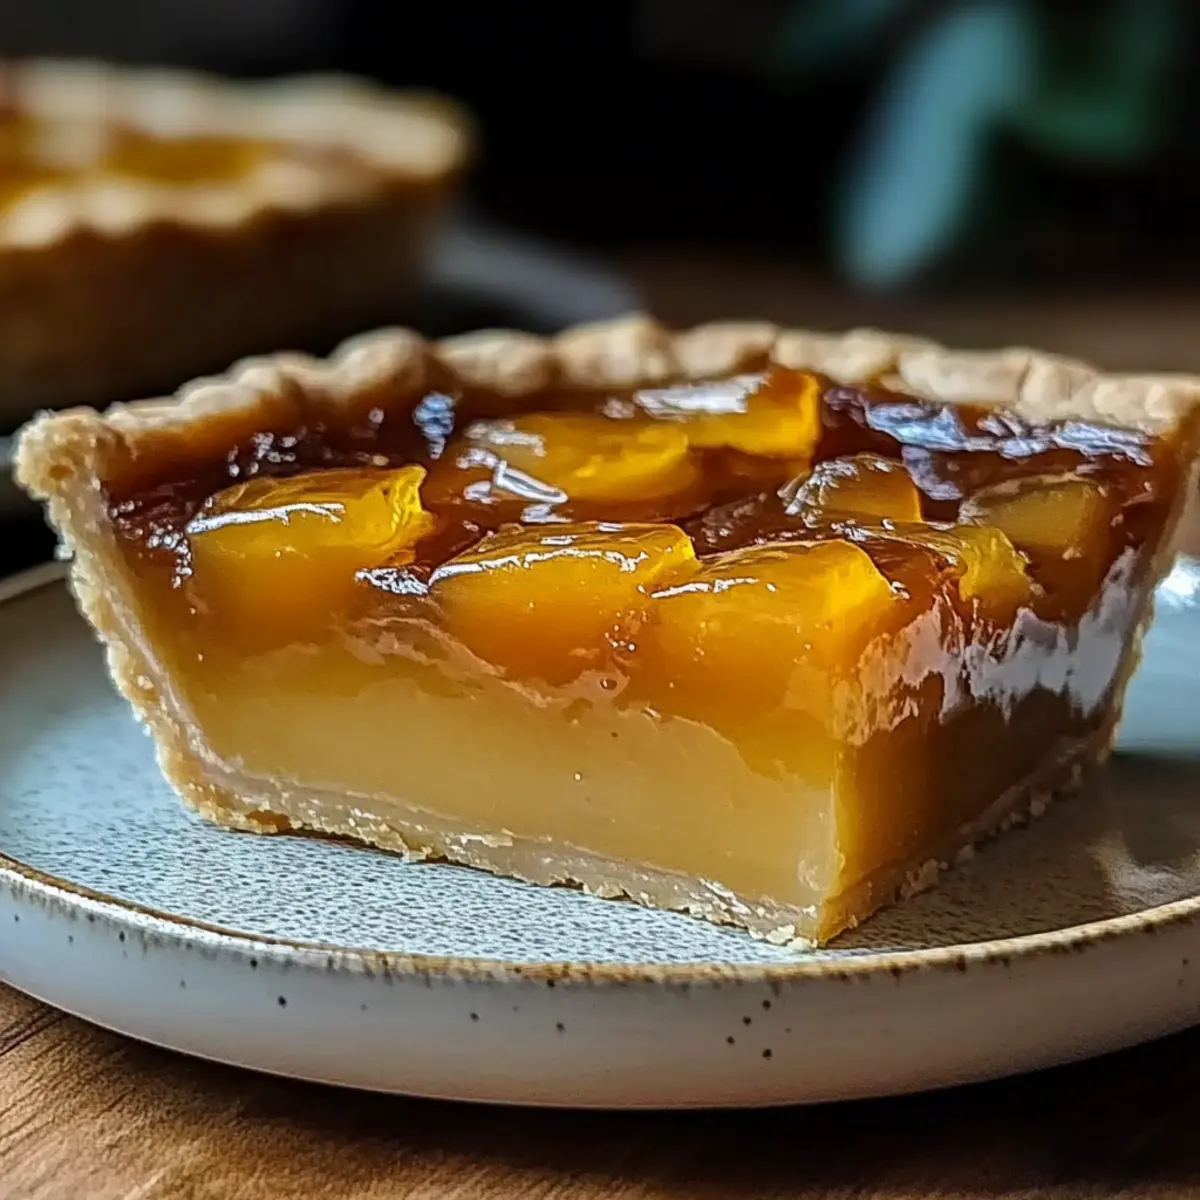
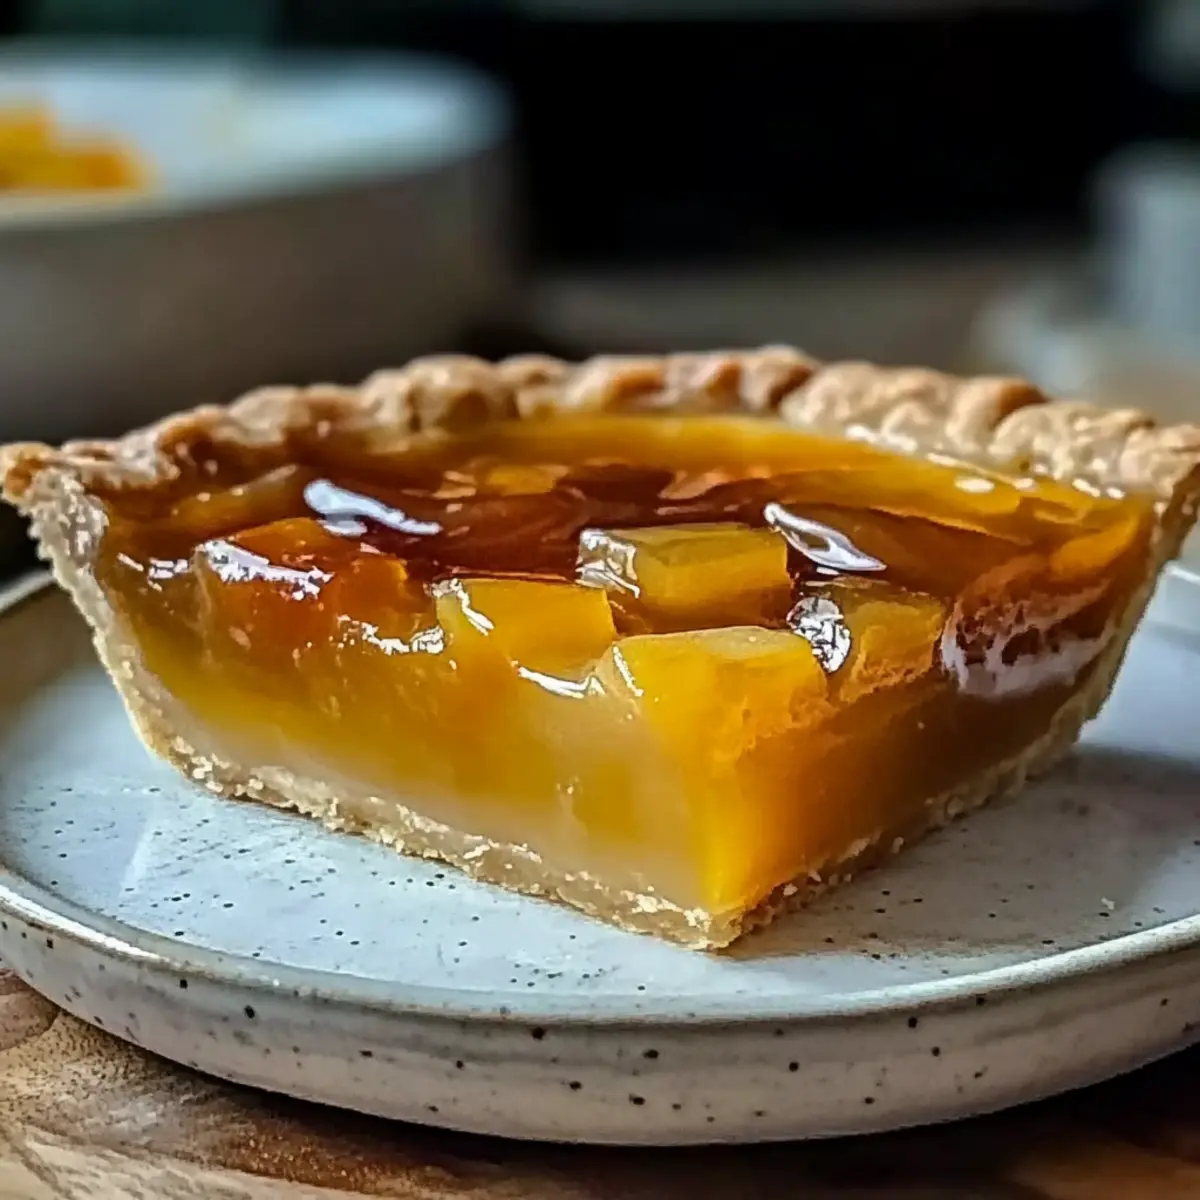
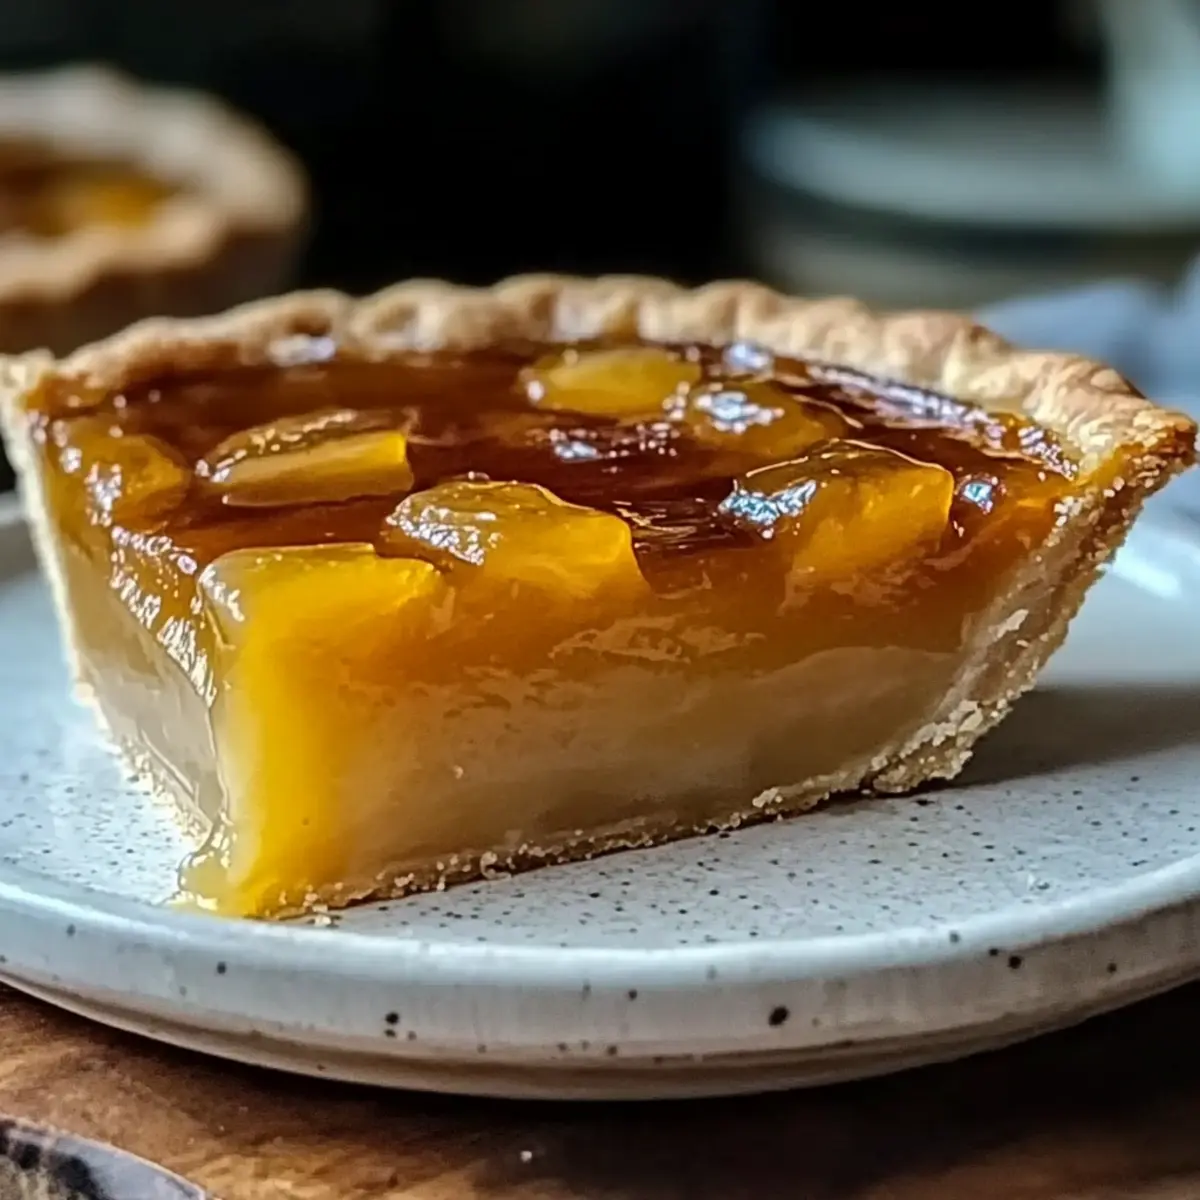
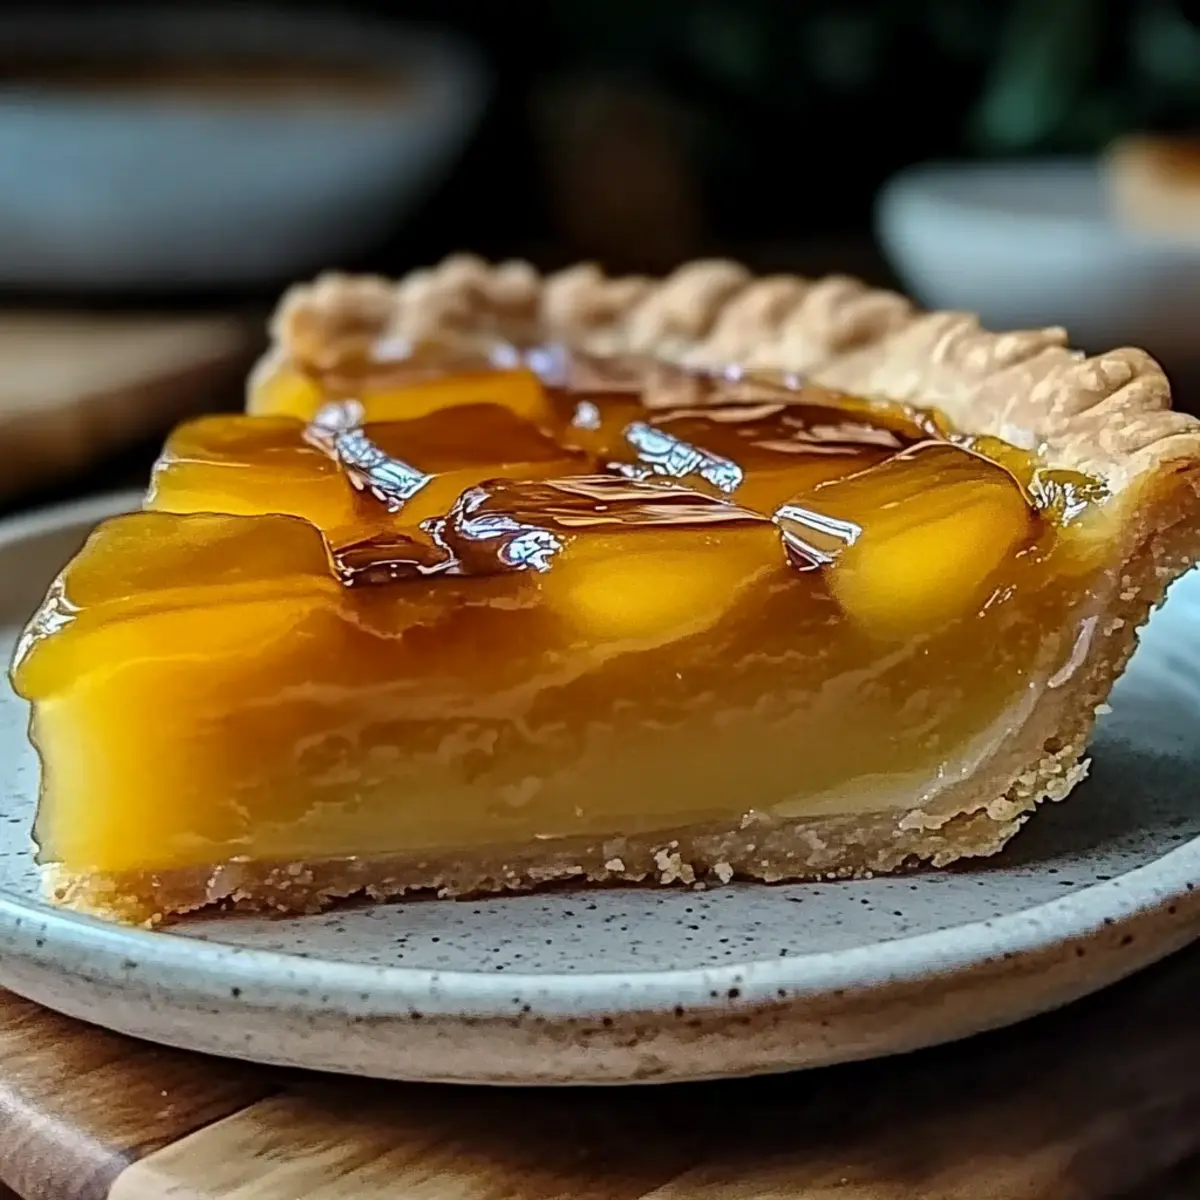
There’s something magical about the transformation that happens when honey is heated just right—becoming a deep, rich caramel that dances on your palate. That’s the secret behind my favorite indulgence: Burnt Honey Pie. This dessert not only captivates your senses but also brings a unique twist to the humble pie, featuring a silky filling that pairs perfectly with a strikingly crunchy burnt top. It's a breeze to whip up, making it the ideal crowd-pleaser for gatherings or a cozy night in. Plus, with simple substitutions for a vegan twist, everyone can enjoy this luxurious dish. Are you ready to elevate your dessert game? Let’s dive into how you can create this enchanting pie!
Why Is Burnt Honey Pie So Irresistible?
Uniqueness: This pie offers a remarkable flavor transformation, elevating ordinary honey into a decadent treat.
Versatility: Easy substitutions allow for vegan alternatives, meaning everyone can indulge without compromise.
Crowd-Pleaser: Its stunning appearance and luxurious taste make it the perfect centerpiece for any gathering—it's sure to dazzle guests!
Quick Preparation: With straightforward instructions, you’ll be enjoying this beautiful pie in no time, making it a go-to for busy bakers.
Serving Suggestions: Pair it with a scoop of vanilla ice cream or fresh berries for an extra touch of indulgence. Want a different dessert option? Check out our Burnt Basque Cheesecake for a creamy delight!
Burnt Honey Pie Ingredients
For the Filling
- Honey – This is the key ingredient, providing a unique sweetness and depth of flavor. You can also use maple syrup or agave nectar for a different taste profile.
- Heavy Cream – It creates a rich, creamy texture for the filling; opt for plant-based cream for a vegan option.
- Eggs – Essential for giving structure and stability to the pie; substitute with flax eggs for a vegan-friendly version.
- Vanilla Extract – Enhances the overall flavor of the pie, but feel free to experiment with other flavor extracts for a twist.
For the Crust
- Pie Crust – The foundation of your pie; a store-bought crust works beautifully for convenience, saving you time.
With these Burnt Honey Pie ingredients in hand, you're all set to create a dessert that truly delights!
Step‑by‑Step Instructions for Burnt Honey Pie
Step 1: Preheat Oven and Prepare Crust
Begin by preheating your oven to 350°F (175°C). If you're using a store-bought pie crust, fit it into a pie dish and prick the bottom with a fork to prevent bubbling. If you're making your own crust, roll it out, place it in the dish, and chill for 10 minutes in the freezer to help set before baking.
Step 2: Caramelize the Honey
In a medium saucepan over medium heat, add the honey and bring it to a simmer. Stir occasionally as it begins to darken, watching closely for about 5-7 minutes until it reaches a deep amber color. Remove it from heat once it starts to caramelize, letting it cool slightly to avoid burning as you mix the filling.
Step 3: Mix the Filling Ingredients
In a large mixing bowl, combine 1 cup of heavy cream, 3 eggs, and 1 teaspoon of vanilla extract. Use a whisk or an electric mixer on low speed to blend the ingredients until smooth and well combined. Take care not to over-mix; you want a creamy texture without incorporating too much air into your Burnt Honey Pie filling.
Step 4: Incorporate the Burnt Honey
Once the honey has cooled slightly, gradually pour it into the cream and egg mixture. Whisk gently as you incorporate to ensure an even mix without cooking the eggs. You'll see the mixture transform into a rich golden color, which is a sure sign that your Burnt Honey Pie filling is well on its way to perfection.
Step 5: Fill the Pie Crust
Carefully pour the honey-cream mixture into the prepared pie crust, ensuring it fills the crust evenly. If desired, lightly tap the pie dish on the counter to remove any air bubbles before placing it in the oven. This step helps achieve a smooth, creamy texture for your Burnt Honey Pie.
Step 6: Bake Until Set
Place the filled pie in the preheated oven and bake for about 40-45 minutes. It's done when the edges are set but the center retains a slight jiggle. Keep an eye on it, and if the top darkens too much, cover it loosely with foil to prevent burning while the filling sets perfectly.
Step 7: Cool and Serve
Once baked, carefully remove the pie from the oven and allow it to cool completely on a wire rack. This cooling period is crucial, as it lets the flavors meld beautifully. After about an hour, transfer the pie to the refrigerator until chilled, or serve at room temperature for the ultimate Burnt Honey Pie experience.
Burnt Honey Pie Variations to Try
Feel free to play around with this decadent dessert, letting your creativity shine through each satisfying bite!
-
Vegan Option: Use plant-based cream and flax eggs to create a delicious vegan-friendly version of this pie. It retains its delightful texture while catering to more dietary preferences.
-
Maple Twist: Substitute honey with pure maple syrup for a distinct, earthy flavor. This twist is perfect for those who prefer a different depth of sweetness in their desserts.
-
Citrus Zing: Add the zest of one lemon or orange to the cream mixture for a refreshing contrast to the richness. The bright notes will provide a delightful surprise with every forkful.
-
Almond or Bourbon Extract: Swap out vanilla for almond or bourbon extract to deepen the flavor profile. These extracts lend a warm, nutty essence that beautifully complements the burnt honey.
-
Chocolate Drizzle: Top your pie with a rich ganache or chocolate drizzle for added indulgence. The bitter-sweet chocolate brings a luxurious touch that pairs perfectly with the caramelized sweetness.
-
Salted Caramel Crunch: Sprinkle a little flaky sea salt on top before serving to enhance the flavors. This tiny addition creates a fabulous balance between sweet and savory, making every bite unforgettable.
-
Baked Fruit Layer: Layer thinly sliced apples or pears beneath the filling. Baking softens the fruit, allowing it to meld with the richness of the pie, adding moisture and a touch of festive flair.
-
Sliced Berries on Top: Fresh raspberries or strawberries provide a pop of color and fresh tartness that beautifully complements the pie's creamy sweetness. It's a vibrant and inviting presentation that’s hard to resist!
These variations can take your Burnt Honey Pie to new heights, and if you’re ever looking for another sweet treat, why not explore our Pecan Pie Dump for a delightful change of pace?
Expert Tips for the Best Burnt Honey Pie
-
Honey Monitoring: Keep a close watch on the honey while it caramelizes to avoid burning it too much—desired flavor comes from a rich amber color.
-
Egg Care: When mixing the filling, avoid over-mixing to prevent too much air incorporation, which keeps your Burnt Honey Pie filling smooth and creamy.
-
Check Doneness: The center should be slightly jiggly when you take the pie out of the oven; overcooking will yield a dense texture instead of the desired silky filling.
-
Cooling Period: Allow the pie to cool completely to let the flavors meld properly. This step ensures a perfect taste experience when served.
-
Crust Prep: If using a store-bought crust, don't forget to check the packaging for any pre-baking instructions to ensure it bakes properly.
Make Ahead Options
These Burnt Honey Pie options are perfect for meal prep! You can prepare the filling up to 24 hours in advance, allowing the flavors to meld beautifully. Simply follow the instructions to make the filling, then cover it tightly with plastic wrap and refrigerate. The pie crust can also be made up to 3 days in advance; simply chill it in the fridge to maintain its freshness and prevent it from becoming soggy. When you’re ready to serve, pour the filling into the chilled crust and bake as directed. This make-ahead approach not only saves you time on busy weekdays but ensures your pie tastes just as delicious when it’s time to enjoy!
What to Serve with Burnt Honey Pie?
There’s something truly enchanting about pairing dishes that enhance your culinary experience, and this delightful pie deserves the perfect companions.
-
Vanilla Ice Cream: A scoop of creamy vanilla ice cream adds a delightful contrast to the rich, caramelized flavors of the pie, creating a classic combination that never fails to please.
-
Fresh Berries: Ripe strawberries, blueberries, or raspberries add a burst of freshness and acidity, perfectly balancing the pie’s sweetness while bringing a pop of color to your plate.
-
Whipped Cream: Lightly sweetened whipped cream provides an airy texture that complements the rich custard filling, making every bite feel indulgent and creamy.
-
Chocolate Sauce: Drizzling a bit of rich chocolate sauce on top creates a decadent twist, enhancing the nutty flavors of the burnt honey with a luxurious chocolatey finish.
-
Espresso or Coffee: A strong cup of espresso or a smooth coffee brings out the warm flavors in the pie, making it the perfect pairing for an after-dinner treat.
-
Mint Tea: A refreshing cup of mint tea helps cleanse the palate, leaving you feeling light even after indulging in the rich flavors of the Burnt Honey Pie.
-
Salted Caramel Sauce: Adding a drizzle of salted caramel not only heightens the sweetness but introduces a new layer of flavor that contrasts beautifully with the pie’s creamy filling.
-
Tart Lemon Sorbet: This palate-cleansing sorbet provides a zesty, refreshing contrast to the pie’s richness, awakening your senses with every spoonful.
-
Toasted Nuts: A sprinkle of toasted nuts, such as almonds or hazelnuts, adds a lovely crunch and earthy flavor, enhancing the overall texture of your dessert experience.
How to Store and Freeze Burnt Honey Pie
Fridge: Store your Burnt Honey Pie in an airtight container for up to 3 days. It’s best enjoyed cold or at room temperature, allowing the flavors to shine.
Make-Ahead: This pie can be made a day in advance, covered, and stored in the refrigerator. Just ensure it's completely cooled before wrapping to keep it fresh.
Freezer: For longer storage, wrap individual slices tightly in plastic wrap and then place them in a freezer-safe container. Enjoy within 2 months for the best flavor.
Reheating: To bring back some warmth, let the pie sit at room temperature for about 30 minutes before serving, or warm slices in the microwave for a few seconds.
Burnt Honey Pie Recipe FAQs
What type of honey should I use for Burnt Honey Pie?
Absolutely! For the best flavor, opt for a high-quality, raw honey. It provides a deeper caramelized flavor compared to processed honey. However, feel free to experiment! Maple syrup or agave nectar make delightful substitutes, offering different flavor notes if you’re looking for a vegan-friendly option.
How should I store my Burnt Honey Pie?
Very easily! Store your Burnt Honey Pie in an airtight container in the refrigerator for up to 3 days. Allow it to chill completely before wrapping. This time gives the flavors a chance to meld beautifully. Serve it cold or at room temperature for the best experience.
Can I freeze Burnt Honey Pie?
Absolutely! If you've made too much pie (is that even possible?), or just want to save some for a rainy day, wrap individual slices tightly in plastic wrap and put them in a freezer-safe container. It will keep wonderful quality for up to 2 months. When you're ready to indulge, let the pie thaw in the refrigerator overnight or at room temperature for about 30 minutes before serving.
What do I do if my filling overcooks and becomes too dense?
Don’t fret! Next time, keep an eye on the baking time. The pie is done when the filling is set around the edges but still slightly jiggly in the center. If you find yourself with a dense filling this time, consider serving it with a dollop of whipped cream or vanilla ice cream—it adds a creamy contrast that balances out the texture.
Can I use a different type of crust for Burnt Honey Pie?
Very much! Feel free to get creative with your crust choice. A graham cracker crust adds a delightful sweetness and crunch, while a nut-based crust offers an earthy note. Just make sure it’s baked adequately before pouring in the filling to ensure the crust holds up.
Is Burnt Honey Pie suitable for those with allergies?
It depends! This pie contains heavy cream, eggs, and honey—so if you're catering to allergy concerns, consider substituting flax eggs for a vegan option and explore plant-based cream alternatives. Always double-check for any sweeteners you'd like to avoid, and consult with anyone who will be enjoying the pie to ensure it's safe for everyone at the table!
Burnt Honey Pie: A Sweet Twist for Dessert Lovers
Ingredients
Equipment
Method
- Preheat your oven to 350°F (175°C) and prepare the pie crust.
- In a medium saucepan, simmer the honey on medium heat, stirring occasionally until it darkens.
- In a large mixing bowl, blend the heavy cream, eggs, and vanilla extract until smooth.
- Gradually mix the cooled caramelized honey into the cream and egg mixture.
- Pour the mixture into the prepared pie crust.
- Bake for 40-45 minutes until edges are set and the center jiggles slightly.
- Allow to cool completely on a wire rack before refrigerating or serving.


Leave a Reply