
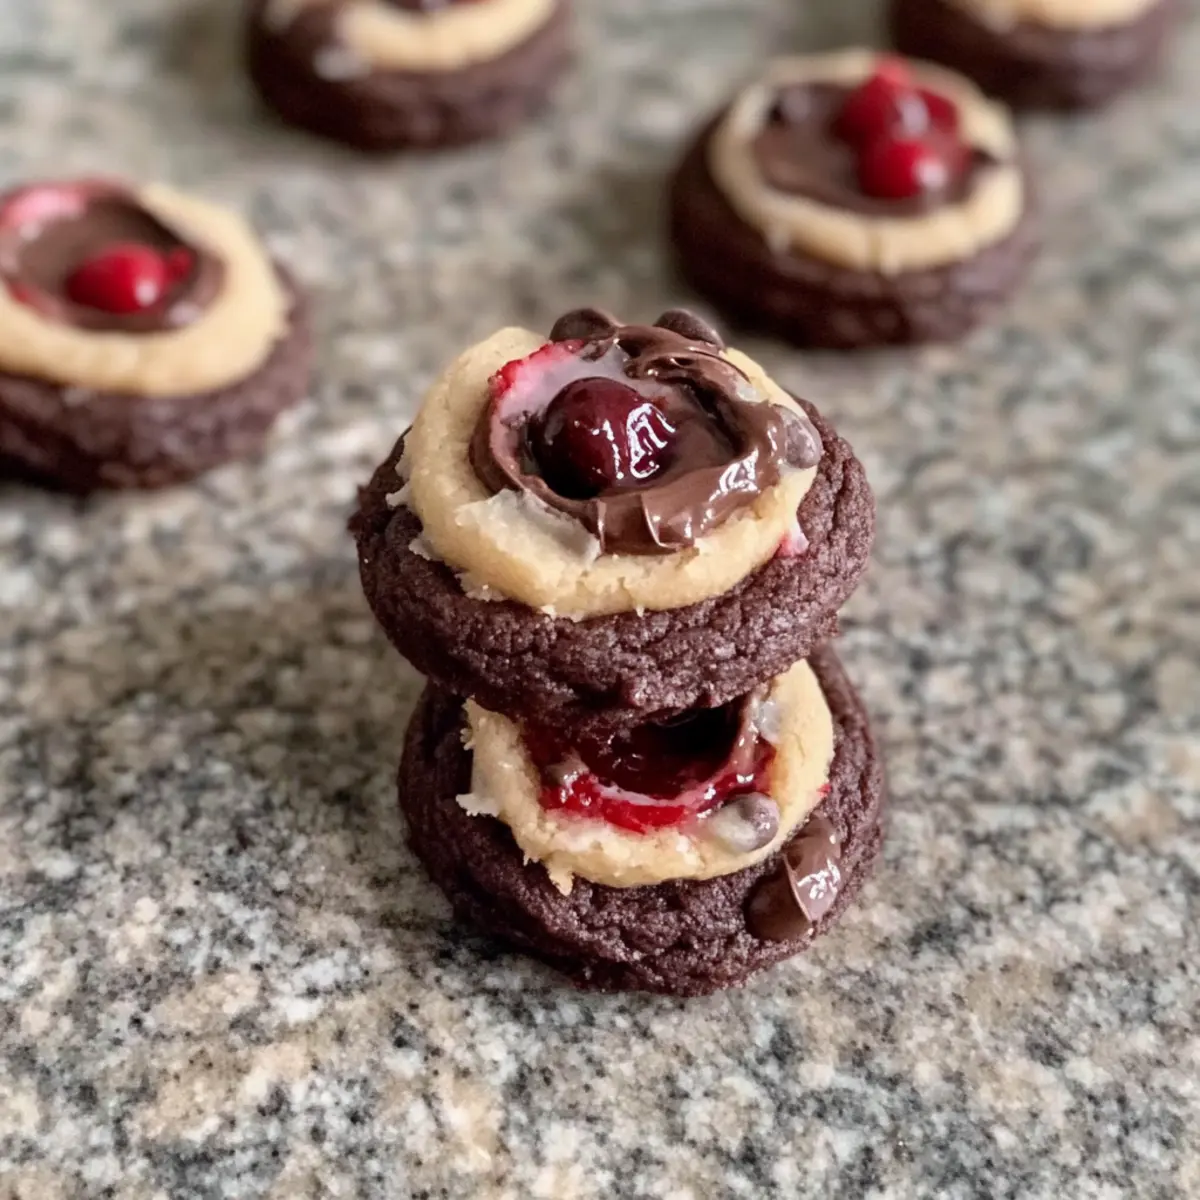
“Did you taste that?” I overheard during a recent holiday gathering as my Black Forest Cookies made their way around the room, and I couldn’t help but grin. These festive delights combine the rich flavors of chocolate, the tartness of cherries, and a subtle sweetness reminiscent of the beloved Black Forest cake. They are not only a visual showstopper for any dessert table but also a breeze to whip up—perfect for impromptu holiday gatherings or cozy nights at home. Imagine serving these blissful cookies warm with a scoop of vanilla ice cream, transforming any occasion into a warm celebration. Ready to learn how to create these indulgent treats that will leave everyone asking for more? Let’s dive into the recipe!
What Makes These Cookies Irresistible?
Decadent Flavor: Each bite of these Black Forest Cookies brings a delightful explosion of rich chocolate and tart cherries, reminiscent of the classic dessert we all adore.
Easy Process: Crafted with simple, everyday ingredients, this recipe is straightforward, making it perfect for both novice bakers and seasoned chefs.
Perfect for Sharing: These cookies are an instant crowd-pleaser at holiday gatherings, bringing joy to family and friends alike.
Versatile Variations: Feel free to experiment! Try adding dried cranberries or nuts for a unique twist, or serve them warm alongside a scoop of vanilla ice cream. You might also enjoy a side of these Creamy Pistachio White Chocolate Cookies to complete your festive dessert table.
Storage Convenience: They keep well in an airtight container for a week or can be frozen for longer enjoyment, ensuring you have these indulgent treats on hand whenever the craving strikes.
Black Forest Cookies Ingredients
For the Dough
• All-purpose flour – Provides structure and body to the cookies; can be substituted with gluten-free flour.
• Cocoa powder – Adds rich chocolate flavor; use unsweetened cocoa for best results.
• Baking soda – A leavening agent that helps cookies rise; ensure it's fresh for accurate results.
• Butter – Gives moisture and richness; for a dairy-free option, use vegan butter or coconut oil.
• Brown sugar – Contributes sweetness and a slight chewiness; white sugar can be used as a substitute, but texture may change.
• Granulated sugar – Enhances sweetness and crispiness; minor adjustments can be made based on taste preference.
• Eggs – Acts as a binder for the ingredients; can replace with a flax egg for a vegan option.
• Vanilla extract – Provides flavor depth; artificial vanilla can be substituted but may lack complexity.
For the Mix-ins
• Chopped cherries – Adds fruity flavor and moisture; dried cherries can be used for a chewier texture.
• Chocolate chips – For sweet bursts of chocolate in every bite; dark chocolate chips can be a healthier alternative.
These Black Forest Cookies are sure to delight and impress, bringing a festive touch to any gathering!
Step‑by‑Step Instructions for Black Forest Cookies
Step 1: Preheat Oven
Begin by preheating your oven to 350°F (175°C). While it's heating, line your baking sheets with parchment paper to prevent sticking and ensure even baking. This preparation is essential for achieving that perfect texture in your Black Forest Cookies.
Step 2: Mix Dry Ingredients
In a large mixing bowl, whisk together the all-purpose flour, cocoa powder, baking soda, and a pinch of salt until well combined. This dry mixture sets the foundation for the cookies, providing structure and enriching chocolate flavor. Make sure there are no lumps for a smooth cookie dough.
Step 3: Cream Butter and Sugars
In a separate bowl, use an electric mixer to cream together the softened butter, brown sugar, and granulated sugar. Beat them until the mixture is light and fluffy, usually about 3-4 minutes. This step incorporates air into the batter, giving your Black Forest Cookies a delightful tenderness.
Step 4: Add Egg and Vanilla
Once your butter and sugar are creamed, it's time to incorporate the egg and vanilla extract. Beat them into the mixture until fully combined, creating a rich and smooth texture. This addition brings a lovely depth of flavor to your cookies, enhancing the overall taste experience.
Step 5: Combine Mixtures
Gradually add the dry ingredients to the wet ingredients, mixing on low speed until just combined. Be careful not to overmix, as this could lead to tough cookies. You want a soft, slightly sticky dough that will hold together beautifully while baking.
Step 6: Fold in Cherries and Chocolate
Gently fold in the chopped cherries and chocolate chips using a spatula or wooden spoon. This step adds bursts of flavor and texture to your Black Forest Cookies, ensuring every bite is a delightful combination of chocolate and fruity goodness.
Step 7: Scoop Dough
Using a tablespoon or cookie scoop, drop heaping spoonfuls of dough onto the prepared baking sheets, spacing them about 2 inches apart. This allows room for spreading as they bake. The dough should look slightly mounded, invitingly soft and ready to bake.
Step 8: Bake
Place the baking sheets in the preheated oven and bake for 10-12 minutes. Keep an eye on the cookies; they're ready when the edges are set, but the centers still look soft. They will continue to firm up as they cool, retaining that chewy texture.
Step 9: Cool
After baking, allow the cookies to cool on the sheets for about 5 minutes. This resting period is crucial, as it helps them set without crumbling. Then transfer them to wire racks to cool completely, allowing the flavors to meld beautifully before indulging in your Black Forest Cookies.
What to Serve with Decadent Black Forest Cookies
Imagine delighting in the rich, chocolatey bliss of Black Forest Cookies while curating a complete festive meal that enchants the senses.
- Vanilla Ice Cream: An indulgent scoop brings creaminess, balancing the rich chocolate flavors with a delightful chill. Perfect for a warm dessert experience.
- Coffee or Espresso: A robust coffee complements the sweetness of the cookies, adding a warm, comforting touch for those cozy evenings. Don’t forget to savor the flavors together!
- Hot Chocolate: Pairing these cookies with a mug of steaming hot chocolate transforms snack time into a delightful treat, making it absolutely irresistible.
- Fresh Berries: A mix of tart raspberries or strawberries will brighten the dessert, adding freshness that beautifully contrasts the rich flavors of the cookies.
- Whipped Cream: Lush and light, a dollop of freshly whipped cream adds a heavenly touch, enhancing the overall indulgence with its airy texture.
- Chocolate Milk: A nostalgic pairing that evokes warm childhood memories, chocolate milk is a fun and indulgent drink that complements the dessert beautifully.
- Spiced Apple Cider: A seasonal drink choice, spiced apple cider offers warmth and cinnamon notes that harmonize wonderfully with the chocolate and cherry flavors.
- Pecan Pie Bars: For an elevated dessert table, adding these nutty bars provides different textures and flavors that your guests will adore.
With these pairings, you're sure to create an enchanting holiday feast around the irresistible charm of Black Forest Cookies!
Expert Tips for Black Forest Cookies
-
Room Temperature Butter: Make sure your butter is softened to room temperature for smoother creaming, which ensures a light cookie texture.
-
Avoid Overmixing: When combining wet and dry ingredients, mix until just combined. Overmixing can lead to tough Black Forest Cookies.
-
Check Ovens Carefully: Keep an eye on your cookies during the last few minutes of baking—they should appear soft in the center to maintain that chewy goodness.
-
Chill if Necessary: If the dough feels too soft to scoop, chill it in the refrigerator for about 30 minutes to firm up—this helps with shaping and baking properly.
-
Storage Tips: Store cookies in an airtight container at room temperature to maintain their freshness or freeze them for longer enjoyment without losing flavor.
Make Ahead Options
If you're looking to save time during the busy holiday season, these Black Forest Cookies are perfect for meal prep! You can pre-mix the dry ingredients (flour, cocoa powder, baking soda, and salt) up to 3 days in advance, storing them in an airtight container at room temperature. Additionally, the butter and sugars can be creamed together ahead of time and kept in the fridge for up to 24 hours. When you're ready to bake, simply add in the egg, vanilla, and the dry mix, fold in the cherries and chocolate chips, and follow the remaining steps. This way, you can enjoy delicious Black Forest Cookies with minimal effort on those festive nights!
Black Forest Cookies Variations
Feel free to unleash your creativity and customize these cookies to delight every palate at your holiday gatherings!
-
Gluten-Free: Substitute all-purpose flour with a 1:1 gluten-free flour blend for a tender and delicious alternative. This way, everyone can enjoy the treats without worry!
-
Vegan: Replace butter with coconut oil or vegan butter, and use a flax egg instead of a regular egg to create a compassionate version of these cookies. They’ll still taste amazing and retain their chewy goodness.
-
Dried Fruit: Instead of fresh cherries, try dried cranberries or blueberries for a tangy twist; their sweetness pairs flawlessly with chocolate!
-
Nutty Delight: Add chopped walnuts or pecans for a crunchy texture that balances the soft cookie; the added nuttiness really elevates the flavor profile.
-
Spice It Up: A teaspoon of cinnamon or nutmeg can warm the flavor and give a cozy, festive touch to your Black Forest Cookies. You’ll love the aromatic twist!
-
Minty Fresh: Incorporate a few drops of peppermint extract for a mint-chocolate flavor combo, perfect for holiday celebrations. Your guests will be pleasantly surprised by this refreshing twist!
-
Chocolate Lovers: Swap the regular chocolate chips for dark chocolate or even white chocolate chips for varying levels of sweetness. You might also sneak in a few chocolate chunks for a more decadent bite!
For even more festive fun, check out these Pineapple Cookies New or the delightful Pineapple Cookies Tropical to add to your holiday cookie spread!
Storage Tips for Black Forest Cookies
Room Temperature: Store your Black Forest Cookies in an airtight container at room temperature for up to 1 week to maintain their chewy texture and rich flavor.
Fridge: If you prefer, you can keep them in the fridge for up to 10 days, but this may change the cookie's texture, making them slightly firmer.
Freezer: Freeze cookies in a single layer in a zip-top bag or airtight container for up to 3 months. Thaw at room temperature before serving to enjoy their delightful taste.
Reheating: For a warm treat, gently reheat cookies in the microwave for a few seconds or in a preheated oven at 350°F (175°C) for about 5 minutes.
Black Forest Cookies Recipe FAQs
What should I look for when selecting cherries?
Absolutely! For the best flavor in your Black Forest Cookies, choose cherries that are firm, plump, and bright in color—ideally, fresh dark sweet cherries. Avoid any that have dark spots or are overly soft, as these may indicate overripeness. If fresh cherries are out of season, dried cherries work beautifully and provide a nice chewy texture.
How should I store my Black Forest Cookies?
To keep your cookies fresh, store them in an airtight container at room temperature for up to one week. If you want to enjoy them later, you can refrigerate them for up to 10 days, but be aware this might alter their texture slightly, making them firmer.
Can I freeze these cookies? If so, what's the best method?
Yes, you can freeze your Black Forest Cookies! First, place them in a single layer on a baking sheet and freeze for about 1 to 2 hours until firm. Then, transfer them to a zip-top bag or airtight container, ensuring you remove as much air as possible. They can be frozen for up to 3 months. When you're ready to enjoy, thaw them at room temperature or pop them in the microwave for a few seconds for that warm, fresh-baked taste.
What if my cookie dough is too sticky to scoop?
Very! If your dough is too sticky to scoop easily, try chilling it in the refrigerator for about 30 minutes. This resting period will help the fats solidify, making the dough easier to handle and giving you nicely shaped cookies that spread just right while baking.
Are these cookies suitable for people with allergies?
When it comes to dietary needs, you can easily adapt the Black Forest Cookies recipe! For a nut-free option, simply omit any nuts you wish to add. If you're making these cookies vegan, substitute the eggs with a flax egg (1 tablespoon of ground flaxseed mixed with 2.5 tablespoons of water, let it sit for 5 minutes to thicken) and use a plant-based butter alternative. Always double-check ingredients, especially store-bought items like chocolate chips, to ensure they meet your dietary needs.
How can I ensure my cookies stay chewy versus cakey?
To keep your Black Forest Cookies wonderfully chewy instead of cakey, focus on your mixing. Mix the batter just until combined, avoiding overmixing after adding the flour mixture. Also, ensure that you're baking only until the edges are set but the center is still soft; this will help maintain that delightful chewiness.
Irresistible Black Forest Cookies for Sweet Holiday Indulgence
Ingredients
Equipment
Method
- Preheat your oven to 350°F (175°C) and line your baking sheets with parchment paper.
- In a large mixing bowl, whisk together the all-purpose flour, cocoa powder, baking soda, and a pinch of salt until well combined.
- In a separate bowl, cream together the softened butter, brown sugar, and granulated sugar until light and fluffy, about 3-4 minutes.
- Add the egg and vanilla extract to the butter and sugar mixture, beating until fully combined.
- Gradually mix in the dry ingredients until just combined, ensuring not to overmix.
- Gently fold in the chopped cherries and chocolate chips.
- Drop heaping spoonfuls of dough onto the prepared baking sheets, spacing them about 2 inches apart.
- Bake for 10-12 minutes, until edges are set but centers look soft.
- Allow cookies to cool on the sheets for about 5 minutes before transferring to wire racks.


Leave a Reply