
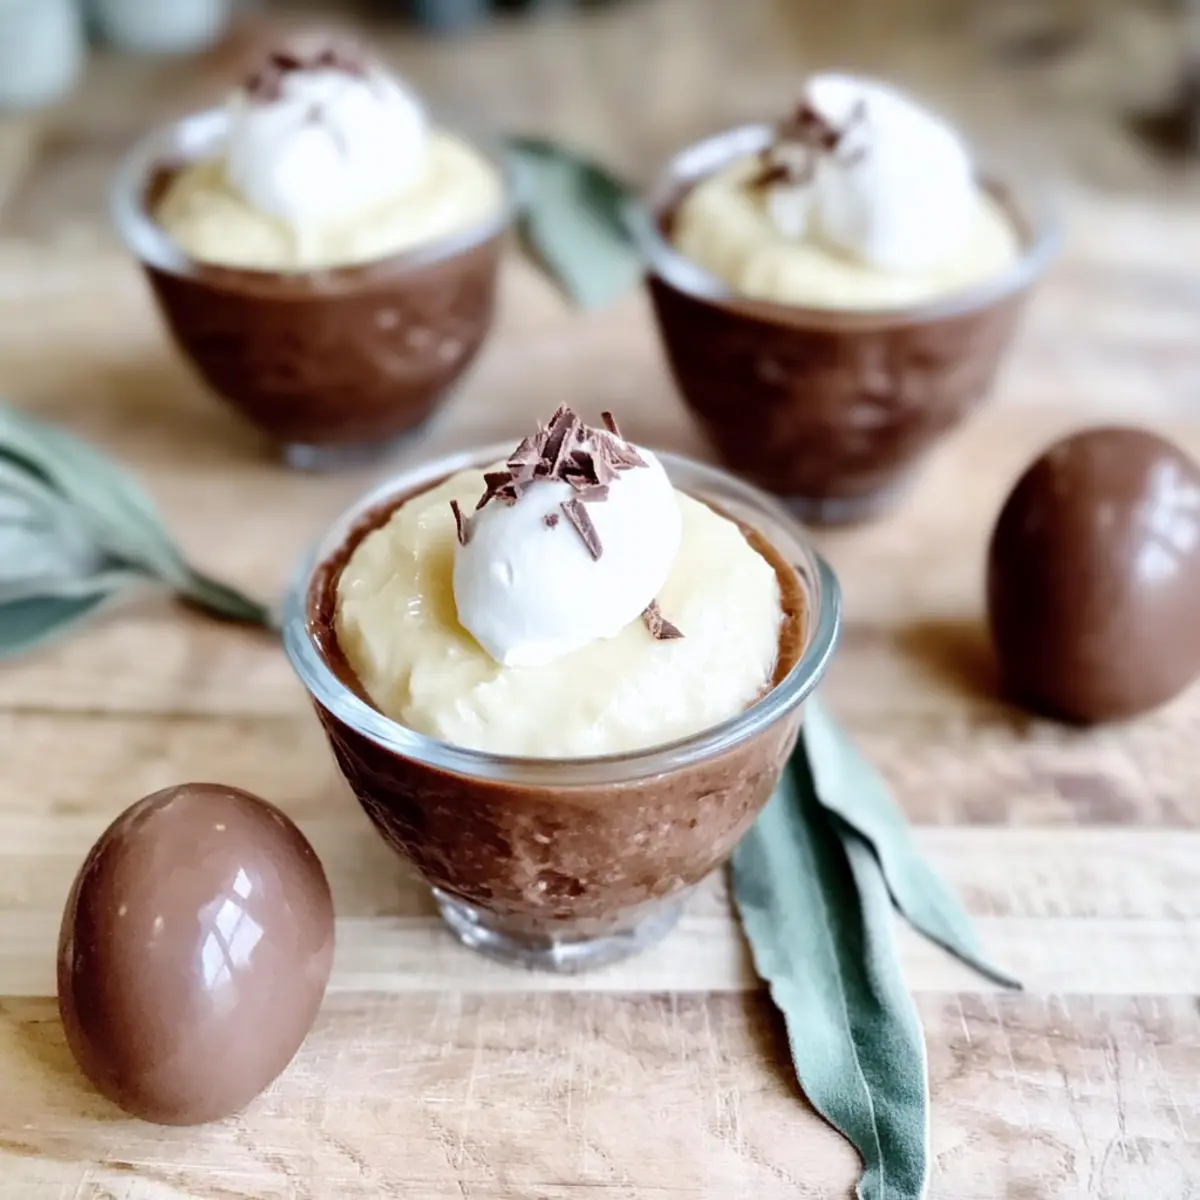
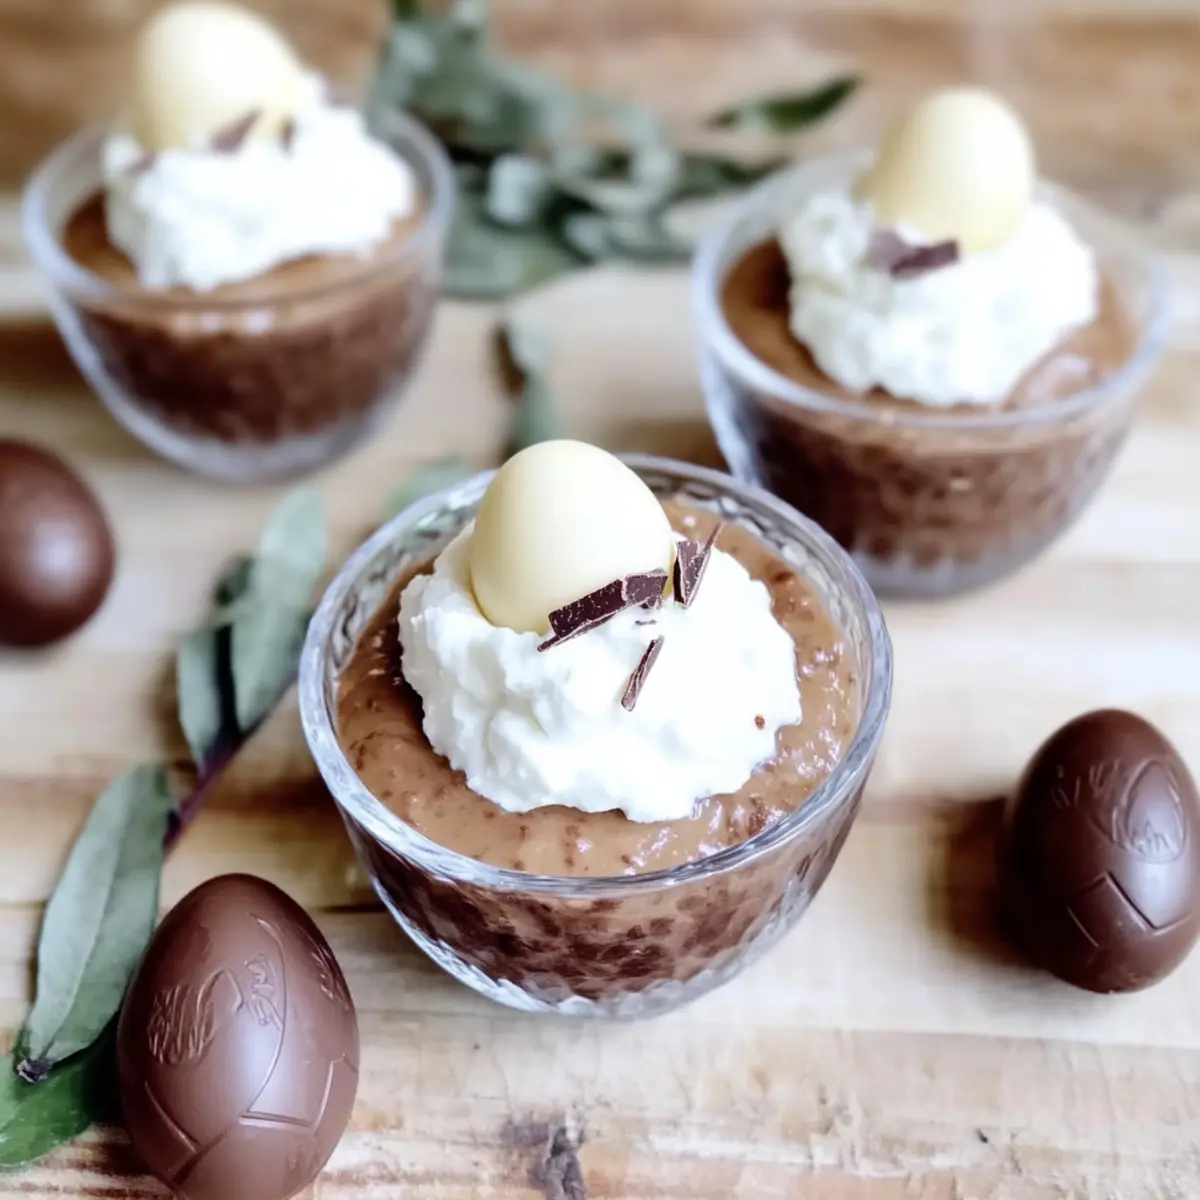
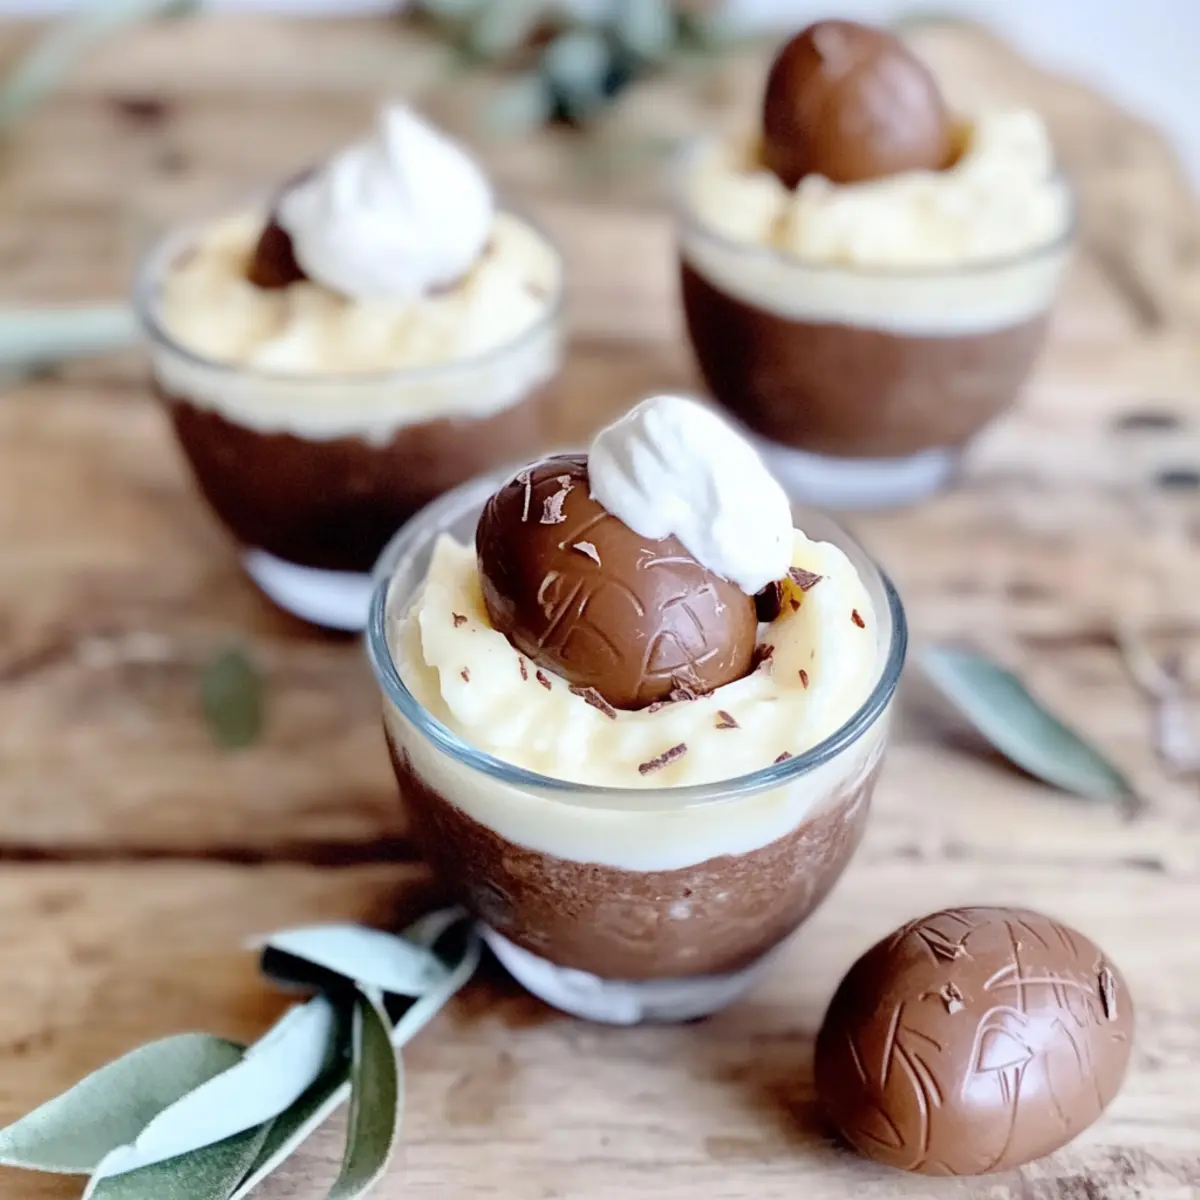
As I stood in the kitchen surrounded by a cascade of pastels—evidence of yet another Easter morning—I unveiled a delightful surprise: White Chocolate Easter Egg Pudding Cups. Each creamy bite embodies springtime cheer, making them the perfect finale for any festive gathering. These pudding cups not only look stunning on the table but also come together in a whisk! With minimal preparation, you can impress your guests and bring smiles to chocolate lovers young and old. Plus, their light, airy texture adds a whimsical touch to any celebration. Curious how to create this sweet sensation for your next gathering? Let’s dive in!

Why are these pudding cups a must-try?
Simplicity at Its Best: The preparation is quick and easy, requiring minimal skill—perfect for busy cooks!
Irresistible Creaminess: With the combination of rich white chocolate and heavy cream, each bite is a heavenly treat that melts in your mouth.
Festive Presentation: The elegant look of these pudding cups makes them a stunning centerpiece for your Easter table.
Versatile Touch: Add seasonal fruits or flavored extracts to customize them to your liking—perfect for impressing guests!
Make-Ahead Delight: Prepare these pudding cups a day in advance, allowing you to focus on other dishes while ensuring a delicious finish.
For more delightful dessert ideas, check out my Chocolate Cupcake Decadent or explore the light and fluffy Breakfast Egg Muffins for a complete menu!
White Chocolate Easter Egg Pudding Cup Ingredients
For the Pudding Base
- White Chocolate – Use high-quality chocolate for the richest flavor; white chocolate chips can also work.
- Heavy Cream – Adds luxurious creaminess; for a lighter alternative, consider whipped coconut cream.
- Milk – Whole milk is best for a smooth consistency, but feel free to substitute with non-dairy milk if desired.
- Vanilla Extract – Enhances the overall flavor; pure vanilla will give a deeper taste, but almond extract is a tasty alternative.
- Eggs – Essential for structure and richness; swapping for flax eggs may change the texture noticeably.
For the Garnish (optional)
- Whipped Cream – Provides a delightful contrast to the creamy pudding; a must for an elegant finish.
- Chocolate Shavings – Adds an extra chocolate kick and makes for a stunning visual appeal.
These white chocolate Easter egg pudding cups are not only easy to make; they’re also a showstopper at any gathering! Enjoy experimenting with different add-ins or garnishes to make them your own.
Step‑by‑Step Instructions for White Chocolate Easter Egg Pudding Cups
Step 1: Melt the Chocolate
Begin by finely chopping the high-quality white chocolate and placing it in a heatproof bowl. Set this bowl over a saucepan of simmering water, ensuring the bowl doesn't touch the water. Stir occasionally until the chocolate is completely melted, shiny, and smooth—about 5-7 minutes. Remove it from heat and let it cool slightly before combining.
Step 2: Prepare the Pudding Base
In a medium saucepan, gently heat the heavy cream and milk over low heat until just warm, about 3-4 minutes. Stir continuously to avoid scorching. Once warmed, add the sugar, whisking until it dissolves completely. This creates a creamy base that will enrich your white chocolate Easter egg pudding cups.
Step 3: Combine Chocolate and Milk Mixture
Pour the melted white chocolate into the warm milk and cream mixture. Using a whisk, stir the two together until fully combined, achieving a smooth and luscious consistency. This step is essential for ensuring the rich flavor of white chocolate fully integrates with the pudding base, laying the foundation for your decadent dessert.
Step 4: Temper the Eggs
In a separate bowl, whisk the eggs until pale and frothy. To prevent the eggs from scrambling, slowly add a small amount of the warm chocolate mixture into the whisked eggs, stirring constantly to temper them. Once mixed, pour the egg mixture back into the saucepan with the remaining chocolate mixture, ensuring everything is combined smoothly.
Step 5: Cook the Pudding Mixture
Return the saucepan to low heat. Cook the combined mixture for about 8-10 minutes, stirring continuously with a wooden spoon until it thickens. Watch for the pudding to coat the back of the spoon; it should have a creamy consistency, but avoid boiling to prevent scrambling the eggs.
Step 6: Chill and Set
Remove the pudding from the heat once it reaches the desired thickness and stir in the vanilla extract for flavor enhancement. Pour the pudding into individual serving cups—this is where your delightful white chocolate Easter egg pudding cups start to take form! Cover with plastic wrap and refrigerate for 2-3 hours, allowing them to set perfectly.
Step 7: Garnish and Serve
After chilling, retrieve your luscious pudding cups from the fridge. Optional: top them with a swirl of whipped cream and chocolate shavings for an elegant finish. Now your white chocolate Easter egg pudding cups are ready to wow your guests, bringing joy and sweetness to any festive table!
Expert Tips for White Chocolate Easter Egg Pudding Cups
- Quality Matters: Use high-quality white chocolate for the best flavor. Cheaper brands can be waxy or lack the rich sweetness you desire in your pudding cups.
- Beware of Scrambling: When adding eggs, ensure the chocolate mixture is warm but not hot to avoid scrambling. Temper the eggs slowly!
- Perfect Thickness: Stir continuously while cooking for a smooth texture. If it doesn't coat the back of a spoon, keep cooking until it thickens to the right consistency.
- Chill Properly: Allow adequate chilling time—2-3 hours is perfect for firming up your white chocolate Easter egg pudding cups. Patience is key!
- Garnish Creatively: Whipped cream and chocolate shavings can elevate your dessert, but feel free to add seasonal fruits for an exciting twist.
What to Serve with White Chocolate Easter Egg Pudding Cups
Delight your guests with a full meal that complements the creamy sweetness of this decadent dessert.
- Fresh Berries: Juicy strawberries, raspberries, or blueberries add a burst of tartness that contrasts beautifully with the sweet pudding.
- Mint-infused Whipped Cream: Fresh mint elevates the classic whipped cream, offering a refreshing twist that enhances the pudding's richness.
- Chocolate Mousse: For chocolate lovers, a light, airy chocolate mousse provides depth and indulgence, making every spoonful a delightful pairing.
- Shortbread Cookies: Crisp, buttery shortbread brings a satisfying crunch that nicely complements the creamy texture of the pudding.
- Fruit Salad: A mix of seasonal fruits adds vibrant colors and a refreshing touch, balancing the sweetness of the pudding cups perfectly.
- Iced Tea or Lemonade: Serve a chilled glass of sweetened iced tea or zesty lemonade as a refreshing beverage to cleanse the palate.
- Flaky Pastries: Croissants or puff pastries filled with cream or fruit can create a lovely contrast with the rich pudding and provide a festive touch.
Make Ahead Options
These White Chocolate Easter Egg Pudding Cups are perfect for meal prep, making them an ideal choice for busy cooks! You can prepare the pudding base up to 24 hours in advance; simply follow the recipe until the chilling step, cover the cups with plastic wrap, and refrigerate. This ensures that your dessert is ready to set while you focus on other holiday dishes. For the best quality, allow the pudding to chill in the fridge, as this helps to maintain its creamy texture. When it’s time to serve, simply garnish with whipped cream and chocolate shavings, and you’ll have a stunning dessert that’s just as delicious as if made fresh!
White Chocolate Easter Egg Pudding Cups Variations
Feel free to let your creativity shine as you customize these pudding cups with delightful twists!
- Fruit Burst: Top with fresh raspberries or strawberries to add a tart contrast to the creamy sweetness. Their bright colors make the dessert more festive!
- Minty Fresh: Swap vanilla extract for peppermint extract to impart a refreshing mint flavor. It's a delightful twist that adds seasonal cheer.
- Nutty Crunch: Add crushed pistachios or almonds as a topping for an exciting crunch. The nutty flavor pairs beautifully with the creamy pudding.
- Cookie Crumble: Sprinkle crushed Oreo cookies or graham crackers on top for a delightful texture change. You’ll get that classic cookie taste with each bite!
- Caramel Drizzle: Drizzle caramel sauce over the top for a sweet, sticky finish that perfectly contrasts the smooth pudding. It adds a wonderful depth of flavor!
- Keto-Friendly: Substitute heavy cream with full-fat coconut milk and use sugar alternatives to make a decadent keto version. It's delicious and accommodating for many diets!
- Chocolate Lovers: Mix in chocolate chips directly into the pudding for an extra chocolatey experience. Who could resist more chocolate?
- Spicy Kick: Add a pinch of cayenne pepper or chili powder for a subtly spicy twist that will surprise and delight your taste buds.
These variations can elevate your White Chocolate Easter Egg Pudding Cups, ensuring that each serving feels unique and special. If you’re looking for more dessert inspiration, check out my Chocolate Zucchini Cake for a rich yet guilt-free option!
Storage Tips for White Chocolate Easter Egg Pudding Cups
- Fridge: Store the pudding cups in the refrigerator for up to 3 days, covered with plastic wrap or in an airtight container to maintain freshness.
- Freezer: If you need to store them longer, they can be frozen for up to 1 month. However, the texture may change after thawing, so freezing is not recommended for optimal taste.
- Thawing: To enjoy frozen pudding cups, transfer them to the fridge for several hours or overnight before serving to keep them creamy and delicious.
- Reheating: These pudding cups are best served chilled. Avoid reheating, as it can alter their lovely consistency and flavor you expect from these white chocolate Easter egg pudding cups.
White Chocolate Easter Egg Pudding Cups Recipe FAQs
How do I select the best white chocolate for this recipe?
Absolutely! When choosing white chocolate, look for high-quality chocolate with cocoa butter listed among the first ingredients. Avoid brands with added wax or fillers, as these can lead to a subpar taste. If you prefer, you can also use white chocolate chips, but ensure they contain real cocoa butter for the best results.
What is the best way to store leftover pudding cups?
Very good question! Store your white chocolate Easter egg pudding cups in the refrigerator for up to 3 days. Make sure to cover them with plastic wrap or place them in an airtight container to preserve their creamy texture and prevent each cup from absorbing any other flavors in the fridge.
Can I freeze the pudding cups for later?
Sure thing! Although it's possible to freeze these pudding cups for up to 1 month, I recommend caution. The texture may change upon thawing, resulting in a grainy consistency. If you do decide to freeze them, place each cup in a freezer-safe container. Thaw them overnight in the refrigerator before serving to help regain some creaminess.
What should I do if my pudding doesn't thicken properly?
Great question! If your pudding isn’t thickening, ensure you're stirring it continuously over low heat. It typically thickens in about 8-10 minutes. If it hasn't thickened after 10 minutes, try cooking it a little longer while constantly stirring. Remember, it should coat the back of a spoon; stop heating when it reaches that point. If you're still having trouble, a little cornstarch slurry (mixing equal parts cornstarch and cold water, then adding it while cooking) can help thicken it quickly.
Are these pudding cups safe for pets or anyone with dietary restrictions?
Important to consider! These white chocolate Easter egg pudding cups contain ingredients not suitable for pets, such as chocolate and eggs, which can be harmful. For dietary restrictions, be mindful of allergies to eggs or dairy. As an alternative, you can use flax eggs for a vegan option and non-dairy milk, along with vegan white chocolate, for a lactose-free version. Always double-check ingredient labels to ensure they meet specific dietary needs!
Creamy White Chocolate Easter Egg Pudding Cups to Delight You
Ingredients
Equipment
Method
- Begin by finely chopping the high-quality white chocolate and placing it in a heatproof bowl over a saucepan of simmering water. Stir until melted and smooth, about 5-7 minutes. Remove from heat.
- In a medium saucepan, gently heat the heavy cream and milk over low heat for 3-4 minutes, stirring continuously. Add sugar and whisk until dissolved.
- Pour the melted white chocolate into the warm milk and cream mixture, whisking until fully combined for a smooth consistency.
- Whisk the eggs in a separate bowl until pale; slowly add a small amount of the warm chocolate mixture to temper them. Mix well, then pour back into the saucepan.
- Cook the combined mixture over low heat for 8-10 minutes, stirring until thickened, avoiding boiling.
- Remove from heat, stir in vanilla extract, pour into serving cups, cover, and refrigerate for 2-3 hours.
- After chilling, garnish with whipped cream and chocolate shavings before serving.


Leave a Reply