
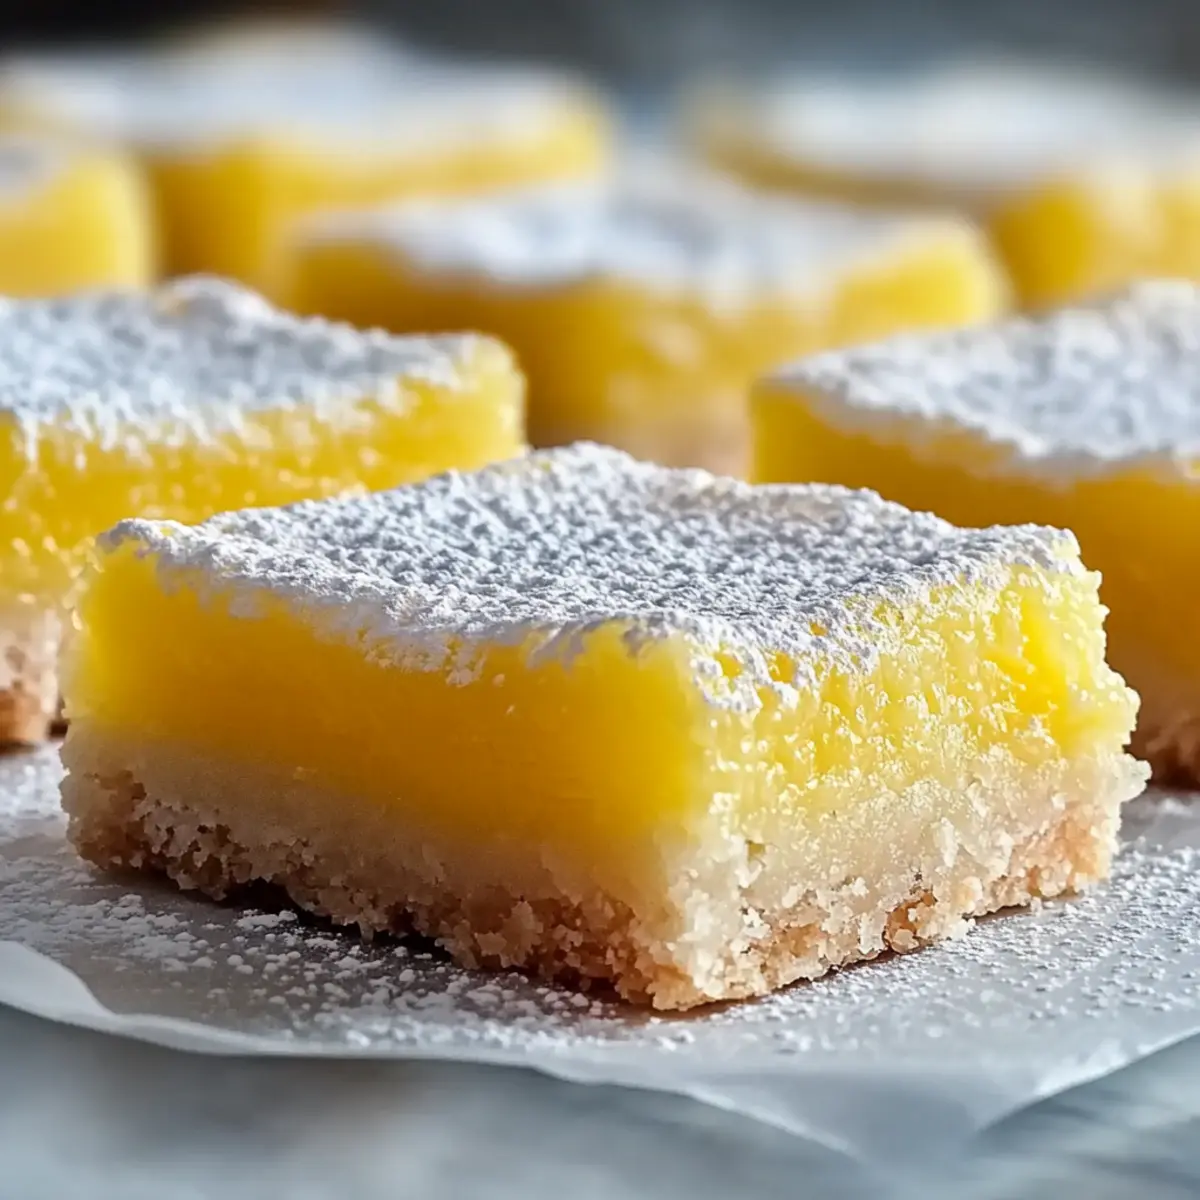
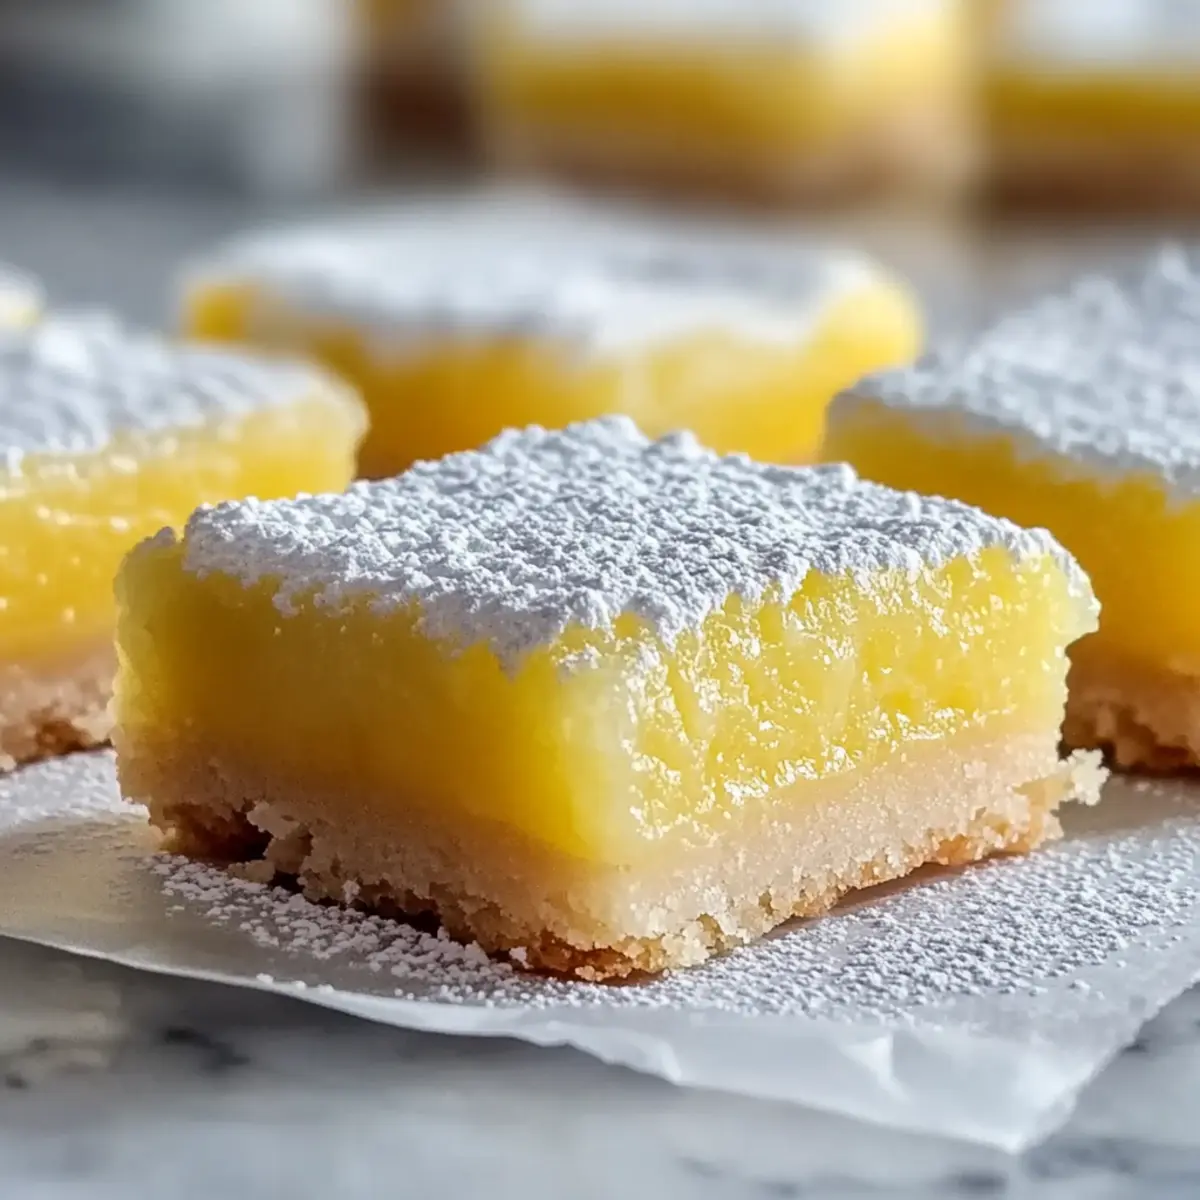
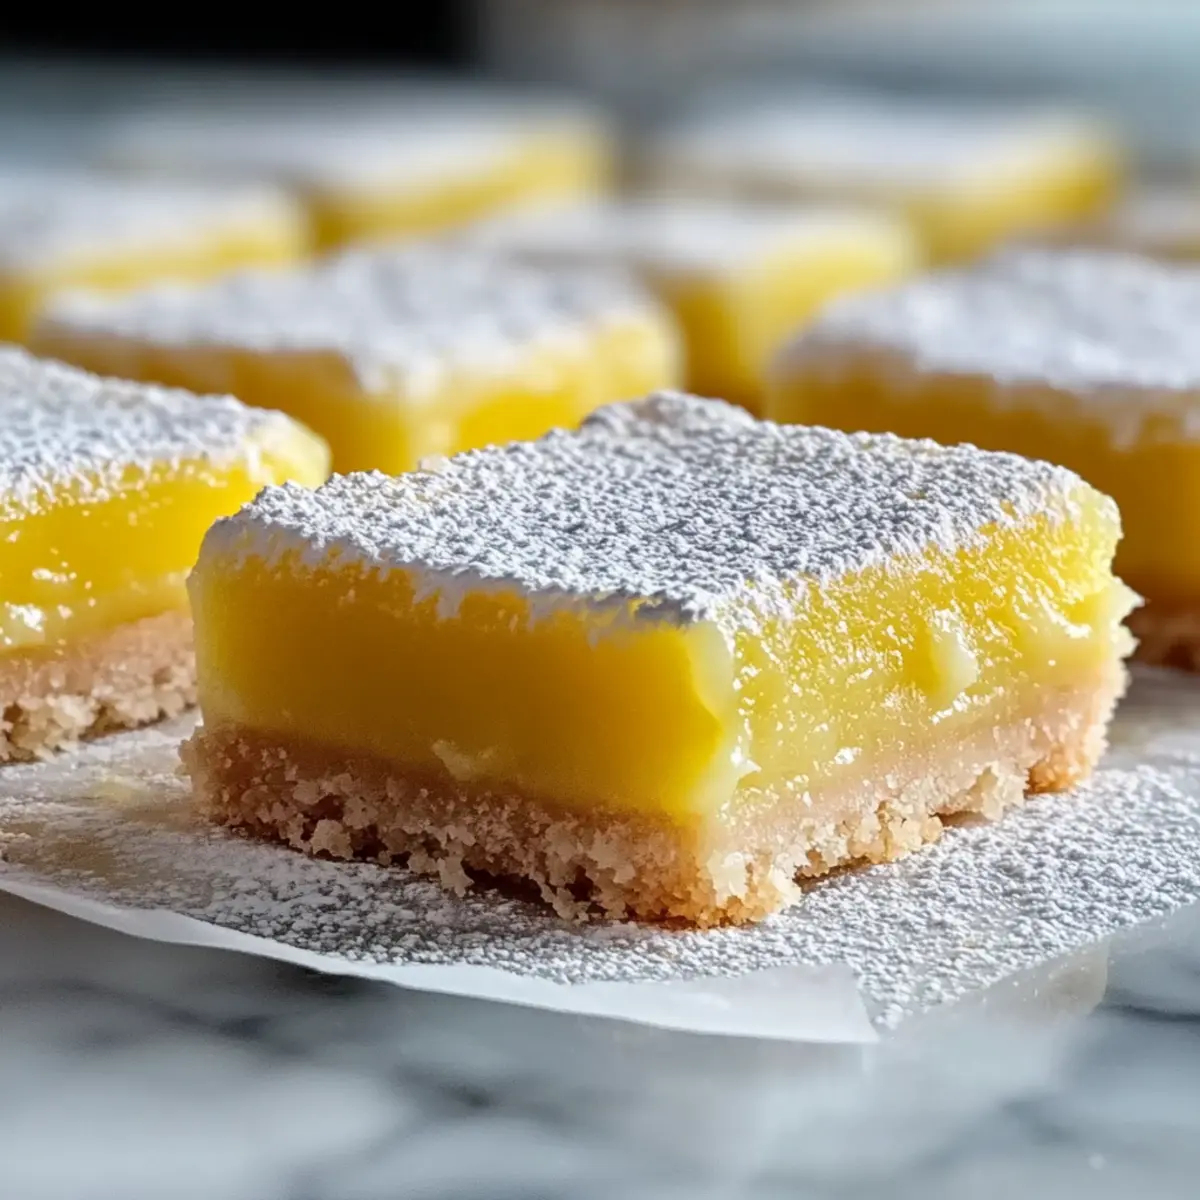
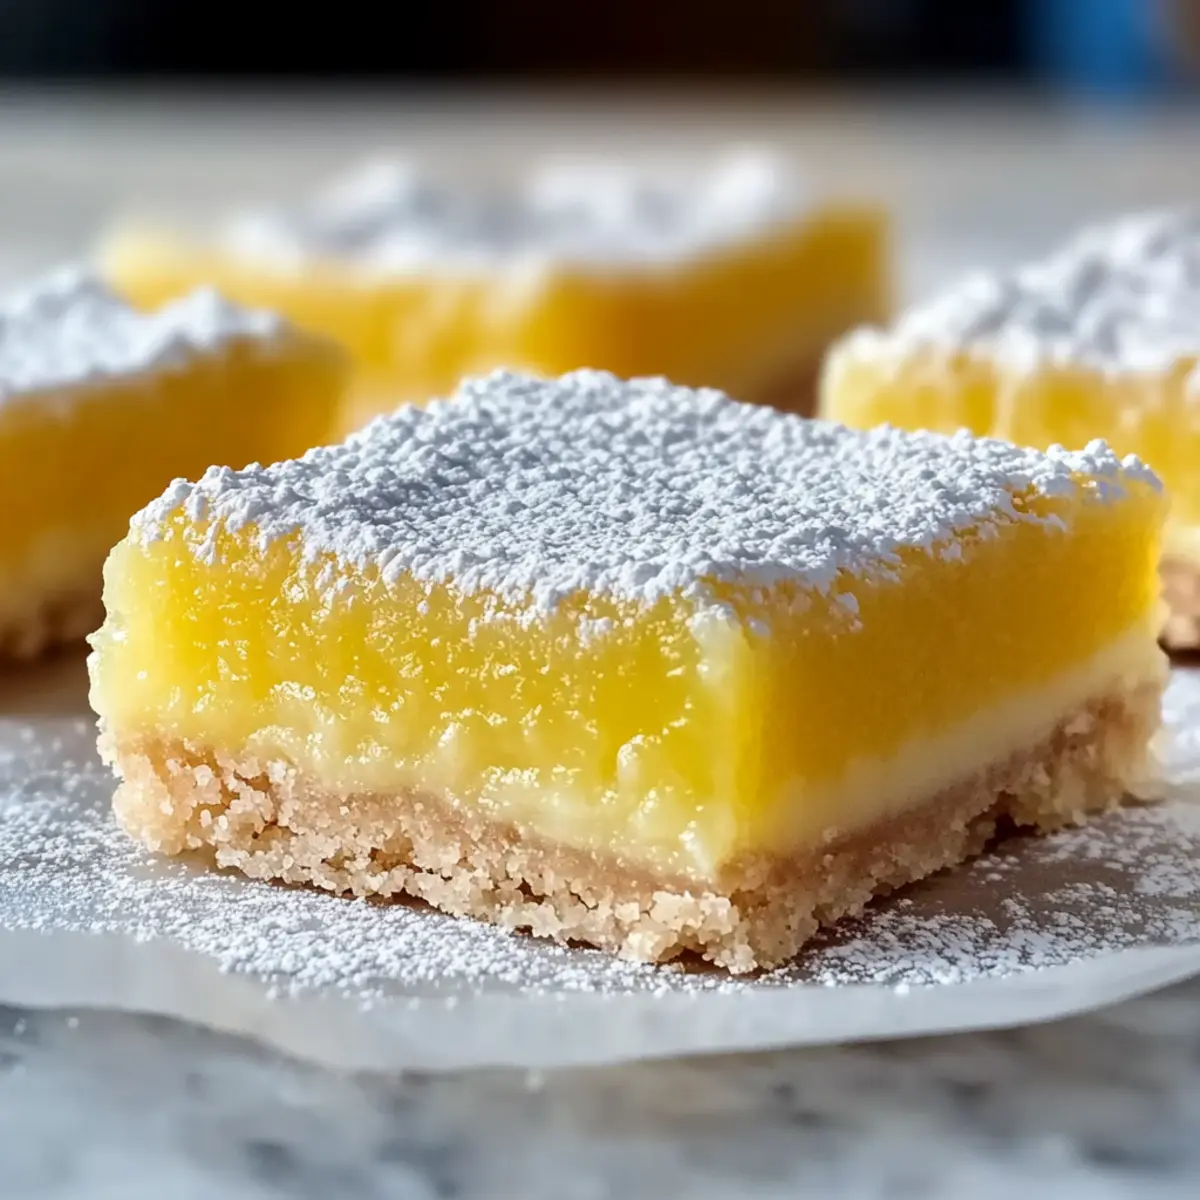
There’s nothing quite like the taste of spring encapsulated in a single bite of a classic dessert. These Delicious Lemon Bars bring together a melt-in-your-mouth buttery shortbread crust and a tangy lemon curd filling that dances on your palate. What’s fantastic about this recipe is not only how straightforward it is to whip up but also how it proves that homemade treats can be healthier and adaptable—perfect for including gluten-free, low-sugar, or dairy-free options. Whether you’re looking to impress at a gathering or simply indulge yourself, these lemon bars are sure to brighten your day. Who wouldn't want a sweet treat that’s both refreshing and customizable? Let’s dive into the zesty details of making this delightful dessert!
Why Are These Lemon Bars So Irresistible?
Bright, Tangy Flavor: The zesty lemon curd filling perfectly balances sweetness with a refreshing tang, making every bite a celebration of flavor.
Versatile Options: Easily tailor the recipe for gluten-free or low-sugar diets to suit your needs without sacrificing taste.
Easy to Prepare: With simple steps and common ingredients, these bars can be whipped up in no time, perfect for both newbies and seasoned bakers.
Crowd-Pleasing Treat: Ideal for gatherings, potlucks, or just a sweet pick-me-up at home, they’re sure to impress.
Make-Ahead Friendly: Prepare the shortbread crust in advance and save time on busy days—just add the filling when you're ready to bake!
For more delightful desserts, check out my recipes for Soft Baked Bars and Peach Crumble Bars to keep the sweetness flowing!
Delicious Lemon Bars Ingredients
• Get ready to whip up a tangy delight!
For the Crust
- All-Purpose Flour – Provides structure for a base that crumbles beautifully.
- Powdered Sugar – Adds sweetness and creates a fine texture in the crust.
- Unsalted Butter – Infuses richness into your shortbread, making it melt-in-your-mouth.
- Granulated Sugar – This extra touch sweetens the filling to balance the tartness.
For the Filling
- Eggs – Acts as a binder; opt for a flax egg for a vegan version.
- Lemon Juice – Central to that zesty flavor; fresh juice is always best!
- Lemon Zest – Enhances the flavor with essential oils; zest before juicing for maximum extraction.
- Granulated Sugar – Sweetens the lemon curd; consider monk fruit for a low-sugar option.
- All-Purpose Flour (for filling) – Thickens the curd; sift to avoid lumps.
Now you're all set to create Delicious Lemon Bars that will brighten your day!
Step‑by‑Step Instructions for Delicious Lemon Bars
Step 1: Preheat and Prepare Baking Pan
Begin by preheating your oven to 350°F (180°C). Take an 8x8-inch baking pan and line it with parchment paper, allowing some overhang for easy removal later. Lightly spray the parchment with non-stick spray. This initial preparation ensures your Delicious Lemon Bars will bake evenly and release effortlessly once set.
Step 2: Make Shortbread Crust
In a medium bowl, combine the all-purpose flour and powdered sugar. Cut in softened unsalted butter using a pastry blender or fork until the mixture resembles coarse crumbs. Press this crumbly mixture evenly into the prepared pan, creating a solid crust. Transfer to the oven and bake for 20-22 minutes, or until it's golden brown. Allow the crust to cool completely before adding the filling.
Step 3: Prepare Lemon Curd Filling
While the crust cools, whisk together lemon juice, lemon zest, eggs, granulated sugar, and sifted all-purpose flour in a medium saucepan. Cook this mixture over medium heat, stirring constantly for about 6-8 minutes, or until it thickens and is visibly bubbly. This lemon curd filling will form the tangy heart of your Delicious Lemon Bars, so keep an eye on it as it thickens.
Step 4: Combine Filling and Crust
Once your lemon curd is thickened, carefully strain it through a fine mesh sieve to remove any lumps or pieces of zest, ensuring a smooth filling. Pour the strained lemon filling directly onto the cooled shortbread crust, spreading it evenly with a spatula. This layering gives your Delicious Lemon Bars that signature creamy top, ready for the next baking step.
Step 5: Bake Again for Perfect Texture
Return the pan to the oven and bake for an additional 25-30 minutes. The filling should be set with a slight jiggle in the center when done. This jiggle indicates your lemon bars are perfectly cooked. During this final baking, your kitchen will be filled with a heavenly citrus aroma, promising delightful treats ahead.
Step 6: Cool and Chill
After baking, remove the pan from the oven and let the bars cool to room temperature. This cooling period is crucial for the filling to firm up. Once cool, refrigerate the bars for at least 2 hours, allowing flavors to meld and for neat cuts later. The chilling also enhances the bright, tangy flavor of the Delicious Lemon Bars.
Step 7: Cut and Serve
After chilling, gently lift the bars out of the pan using the parchment overhang. With a sharp knife, cut them into squares or rectangles, wiping the knife between cuts for clean edges. Optionally, dust the tops with powdered sugar for added sweetness. Serve your Delicious Lemon Bars chilled or at room temperature, and watch them disappear at every gathering!
Delicious Lemon Bars Variations
Feel free to get creative with these lemon bars and make them your own with simple swaps and exciting twists!
- Gluten-Free: Replace all-purpose flour with a 1:1 gluten-free flour blend for a perfect crust that maintains its rich flavor.
- Lower Sugar: Substitute granulated sugar with monk fruit sweetener or erythritol to cut down on sugar without sacrificing taste.
- Dairy-Free: Use coconut oil in place of butter for a delightful dairy-free crust, allowing the lemon flavor to shine through.
- More Zesty: Add freshly grated ginger to the lemon filling for a spicy kick that complements the tang of the lemons beautifully.
- Fruit Fusion: Incorporate fresh berries into the filling for a fruity twist; blueberries or raspberries mix wonderfully with lemon.
- Nutty Goodness: Enhance the texture by adding a cup of almond flour to the crust, creating a nutty flavor that adds depth.
- Coconut Delight: Stir in shredded coconut into the filling or crust for a tropical twist that makes these bars stand out!
- Creamy Vegan: Replace eggs with a flax egg (1 tablespoon flaxseed meal + 3 tablespoon water) to make these tasty bars completely vegan-friendly.
Remember to check out my recipe for Air Fryer Donut for another way to enjoy that delightful sweetness! Customize these lemon bars to suit your taste, and watch how your loved ones can’t resist going back for seconds!
Storage Tips for Delicious Lemon Bars
Fridge: Store homemade lemon bars in an airtight container in the refrigerator for up to 5 days. This keeps them fresh while the flavors meld beautifully.
Freezer: For longer storage, freeze lemon bars by wrapping them tightly in plastic wrap, then placing them in a freezer-safe container for up to 2 months. Thaw in the fridge before serving.
Layering: To prevent sticking, layer parchment paper between bars when storing them in a container. This ensures easy separation when ready to enjoy.
Reheating: If preferred, serve chilled or at room temperature. For a warm twist, microwave individual squares for about 10-15 seconds to enhance the flavors of these delicious lemon bars.
What to Serve with Classic Lemon Bars
There's nothing quite like enjoying these zesty treats paired with delightful accompaniments that enhance their bright flavors.
-
Fresh Berries: Juicy strawberries, blueberries, or raspberries bring a pop of color and freshness, balancing the tangy lemon bars perfectly.
-
Whipped Cream: A dollop of light, fluffy whipped cream adds a rich creaminess, creating an irresistible contrast to the tart curd.
-
Vanilla Ice Cream: Creamy vanilla ice cream melts into the warm bars, creating a delightful fusion of flavors that'll tantalize your taste buds.
Imagine savoring a chilled lemon bar while enjoying a vibrant fruit salad as a refreshing side. This bright combination will transport you to sunny days spent outdoors, making every bite even more inviting.
-
Iced Tea or Lemonade: Refreshing drinks like homemade iced tea or tangy lemonade complement the lemon flavor and keep things cool on a warm day.
-
Chocolate Drizzle: Consider drizzling dark chocolate over the bars for a luxurious twist that sweetens the experience while adding a velvety texture.
-
Nuts: Chopped almonds or pistachios offer a delightful crunch, enhancing both texture and flavor for a more luxurious treat.
With these pairing ideas, you’ll elevate your delicious lemon bars into a full-fledged experience that sings with flavor harmony.
Expert Tips for Delicious Lemon Bars
• Room Temperature Ingredients: Always allow your eggs and butter to reach room temperature to prevent a grainy lemon curd texture.
• Watch the Bake Time: Avoid overbaking; your lemon bars should have a slightly jiggly center when done. This means they’re perfectly set!
• Chill for Clean Cuts: Let the bars cool completely before refrigerating to ensure a firmer texture, making cuts neater and cleaner.
• Use a Sharp Knife: For serving, use a sharp knife and wipe it between cuts to maintain those beautiful edges on your delicious lemon bars.
• Zest Before Juicing: For maximum flavor, always zest lemons before juicing them; this preserves the essential oils that enhance your filling.
Make Ahead Options
These Delicious Lemon Bars are perfect for busy home cooks looking to save time during their week! You can prepare the shortbread crust up to 48 hours in advance, simply bake it, let it cool completely, then wrap it tightly in plastic wrap and refrigerate. The lemon curd filling should be made fresh for the best texture, but it can be prepped up to 24 hours before serving; just store it in an airtight container in the refrigerator to maintain its delightful tang. When you're ready to finish your bars, pour the chilled lemon curd over the crust and bake as directed. This way, you'll have refreshing, homemade lemon bars ready to impress with minimal last-minute effort!
Delicious Lemon Bars Recipe FAQs
What kind of lemons should I use for the filling?
Always opt for fresh lemons for the best flavor in your lemon bars. Meyer lemons are a fantastic substitute if you're looking for a slightly sweeter taste, as they have a unique sweetness that balances beautifully with tartness. If you can't find fresh ones, bottled lemon juice may work in a pinch, but fresh is always superior!
How should I store leftover lemon bars?
Store your delicious lemon bars in an airtight container in the refrigerator for up to 5 days. This keeps them fresh and chewy, while flavors develop nicely. If you're looking to store them longer, you can freeze them for up to 2 months—just wrap them tightly in plastic wrap and then place them in a freezer-safe container. To prevent sticking, layer parchment paper between the bars before freezing.
Can I make these lemon bars gluten-free?
Absolutely! You can easily convert this recipe to be gluten-free by using a 1:1 gluten-free flour blend. These blends usually contain a mix of rice flour, potato starch, and xanthan gum, which will provide similar structure to all-purpose flour. Just be sure to follow the instructions on the packaging for the best results!
What should I do if my lemon filling doesn’t thicken?
If your lemon curd isn’t thickening as expected, make sure you’re cooking it over medium heat while continuously stirring. Typically, it should take around 6-8 minutes to thicken properly. If it seems too runny, you can add a little more sifted flour (about 1 tablespoon at a time) while stirring until it reaches the right consistency. Remember, if it looks slightly jiggly when you take it out of the oven, it’s likely just right!
How can I make these lemon bars healthier?
Great question! For a lower sugar option, substitute granulated sugar with monk fruit sweetener or erythritol. You can also replace half of the butter with Greek yogurt for added creaminess without the extra calories. Another option is to use coconut oil instead of butter for a dairy-free version. Just keep in mind that these changes may slightly affect the flavor and texture.
What’s the best way to cut the bars for clean edges?
After your lemon bars have chilled in the refrigerator for at least 2 hours, lift them out of the pan using the parchment paper overhang. For the best cuts, use a sharp knife and wipe it clean between each slice to avoid any residual sticking. This will help you achieve those perfect, clean edges that make your delicious lemon bars look as good as they taste!
Delicious Lemon Bars that Brighten Your Day with Flavor
Ingredients
Equipment
Method
- Preheat your oven to 350°F (180°C). Line an 8x8-inch baking pan with parchment paper and lightly spray with non-stick spray.
- In a medium bowl, combine all-purpose flour and powdered sugar. Cut in softened butter until the mixture resembles coarse crumbs. Press evenly into the prepared pan and bake for 20-22 minutes or until golden brown. Allow to cool completely.
- Whisk together lemon juice, lemon zest, eggs, granulated sugar, and sifted flour in a medium saucepan. Cook over medium heat while stirring for 6-8 minutes until thickened and bubbly.
- Strain the lemon curd through a fine mesh sieve into the cooled crust. Spread evenly with a spatula.
- Return to the oven and bake for an additional 25-30 minutes until the filling is set with a slight jiggle in the center.
- Cool to room temperature, then refrigerate for at least 2 hours to allow flavors to meld and for neat cuts.
- Lift the bars out using the parchment, cut into squares or rectangles, and serve chilled or at room temperature.


Leave a Reply