
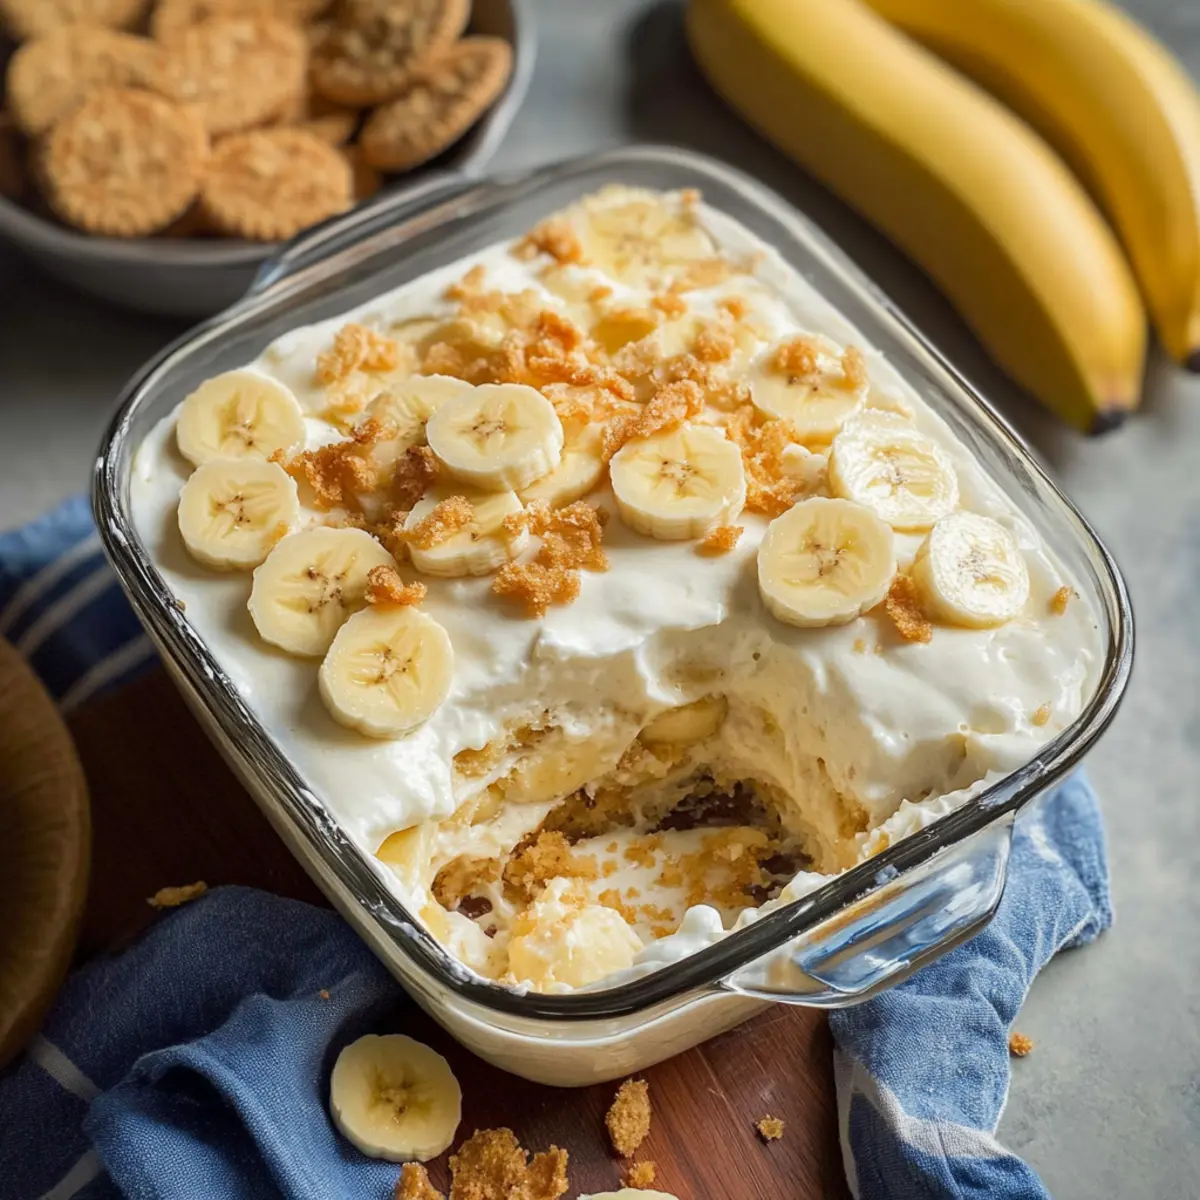
As I stirred the creamy mixture in my saucepan, a wave of nostalgia washed over me, bringing back memories of family gatherings and laughter. There’s something incredibly comforting about homemade banana pudding, especially when it’s made from scratch, like in this delightful banana pudding recipe. Each layer comes together seamlessly, with velvety vanilla pudding hugging slices of fresh bananas and the crunch of vanilla wafer cookies. This no-bake treat is not only a quick option for those busy weekdays but also a beloved dessert that never fails to impress at gatherings. If you're ready to create your own comforting scoop of this timeless classic, let's dive in and make some magic happen! What flavor variances will you try?
Why is Homemade Banana Pudding Irresistible?
Comforting Memories: This classic dessert brings back cherished moments with every creamy bite.
No-Bake Simplicity: No oven required! This easy recipe lets you whip up a delicious treat in no time.
Rich, Velvety Texture: With layers of smooth pudding, fresh bananas, and crunchy cookies, each spoonful is a delightful experience.
Versatile Variations: Feel free to get creative! Add chocolate pudding for a twist or try it with strawberries for a fresh take.
Perfect for Gatherings: It's a crowd-pleaser that impresses at parties or family dinners, just like my Crunch Swirled Banana recipe!
Make-Ahead Convenience: Prepare it a day in advance for stress-free entertaining, ensuring maximum flavor and freshness.
Banana Pudding Ingredients
• For a delightful homemade banana pudding, gather these essential ingredients!
For the Pudding
- 3 cups (710ml) Half and Half – This creamy base gives your pudding its luscious texture; substitute with whole milk if you prefer a lighter version.
- 1 Vanilla Bean or 2 teaspoon Vanilla Extract – Enhances flavor; use a vanilla bean for a touch of elegance, but extract works well too.
- ⅛ teaspoon Nutmeg – Adds a hint of warm spice; fresh nutmeg is preferred, but you can omit if needed.
- ¾ cup (150g) Granulated Sugar – Sweetens the pudding and whipped topping perfectly; feel free to swap for brown sugar for extra depth.
- ¼ cup (32g) Cornstarch – Essential for thickening your pudding; no effective substitution is recommended.
- ¼ teaspoon Salt – Balances out the sweetness, enhancing the overall flavor.
- 5 Large Egg Yolks – Yield richness and a silky texture; for a vegan alternative, use ¼ cup of egg replacer.
- 1 tablespoon Butter – Adds richness and depth; can be skipped for a dairy-free option.
For the Layers
- 1 (11 oz) pkg Vanilla Wafer Cookies – Provides nostalgic flavor and a delightful crunch; substitute with similar cookies like Goya Maria if necessary.
- 4 Medium Bananas – The star of the show! Fresh, just-ripe bananas are best; try using strawberries for a fun variation.
- 2 teaspoon Fresh Lemon Juice – Prevents the bananas from browning; feel free to omit if unavailable.
For the Whipped Topping
- 1 cup Heavy Cream – Gives a light and airy finish to your pudding; use whipped coconut cream for a dairy-free alternative.
- 2 tablespoon Granulated Sugar – Sweetens your whipped cream; adjust to taste.
- ½ teaspoon Vanilla Extract – Extra flavor for that delightful topping.
With these carefully selected ingredients, you're just steps away from mastering the art of making a delightful banana pudding that will surely impress family and friends!
Step‑by‑Step Instructions for Classic Homemade Banana Pudding
Step 1: Heat the Creamy Base
In a medium saucepan over medium heat, combine 3 cups of half and half, the seeds and pod from 1 vanilla bean, and ⅛ teaspoon of nutmeg. Bring this mixture to a gentle simmer, stirring occasionally to prevent sticking, until steam rises and small bubbles form around the edges, which should take about 5 to 7 minutes.
Step 2: Whisk the Dry Ingredients
While the half and half is heating, grab a mixing bowl and whisk together ¾ cup of granulated sugar, ¼ cup of cornstarch, ¼ teaspoon of salt, and 5 large egg yolks. Continue whisking until the mixture is pale and fluffy, about 2 to 3 minutes, creating a light, airy texture that will give your banana pudding a fantastic consistency.
Step 3: Combine the Mixtures
Once the half and half is simmering, gradually pour it into the egg mixture while continuously whisking to temper the eggs. This process should be smooth and done over the course of 1 or 2 minutes to ensure everything blends beautifully, preventing your precious pudding from curdling.
Step 4: Thicken the Pudding
Return the combined mixture to the saucepan and cook over medium heat. Stir constantly with a whisk for about 5 to 7 minutes, or until the mixture thickens significantly and large bubbles begin to form on the surface, signifying that your banana pudding is coming together beautifully.
Step 5: Add Butter and Flavor
Once thickened, remove the saucepan from heat and immediately stir in 1 tablespoon of butter until melted, creating a rich and creamy finish. If you're using vanilla extract instead of a bean, now's the time to add 2 teaspoons for extra flavor. Transfer this delightful pudding into a heatproof bowl.
Step 6: Chill the Pudding
Cover the bowl tightly with plastic wrap, pressing it directly onto the pudding's surface to prevent a skin from forming. Place it in the refrigerator to chill for at least 2 hours, allowing the flavors to meld and the pudding to set to the perfect texture for your classic homemade banana pudding.
Step 7: Layer the Ingredients
In an 8x8 inch dish, start layering by placing 30 vanilla wafer cookies at the bottom. Spoon half of the chilled pudding over the cookies, then neatly layer sliced bananas over the pudding. Follow with another layer of cookies, carefully building the layers for a delightful presentation.
Step 8: Final Layer of Pudding
Gently spread the remaining banana pudding over the cookie and banana layers. Make sure to cover everything evenly, creating a smooth, enticing layer that brings all the flavors together. Return the dish to the refrigerator for another 2 hours to allow the flavors to harmonize beautifully.
Step 9: Whip the Cream
While your banana pudding is chilling, use a mixing bowl and an electric mixer to whip 1 cup of heavy cream with 2 tablespoons of granulated sugar and ½ teaspoon of vanilla extract. Beat this mixture until stiff peaks form, which should take about 3 to 5 minutes, resulting in a fluffy, luscious topping for your dessert.
Step 10: Top and Garnish
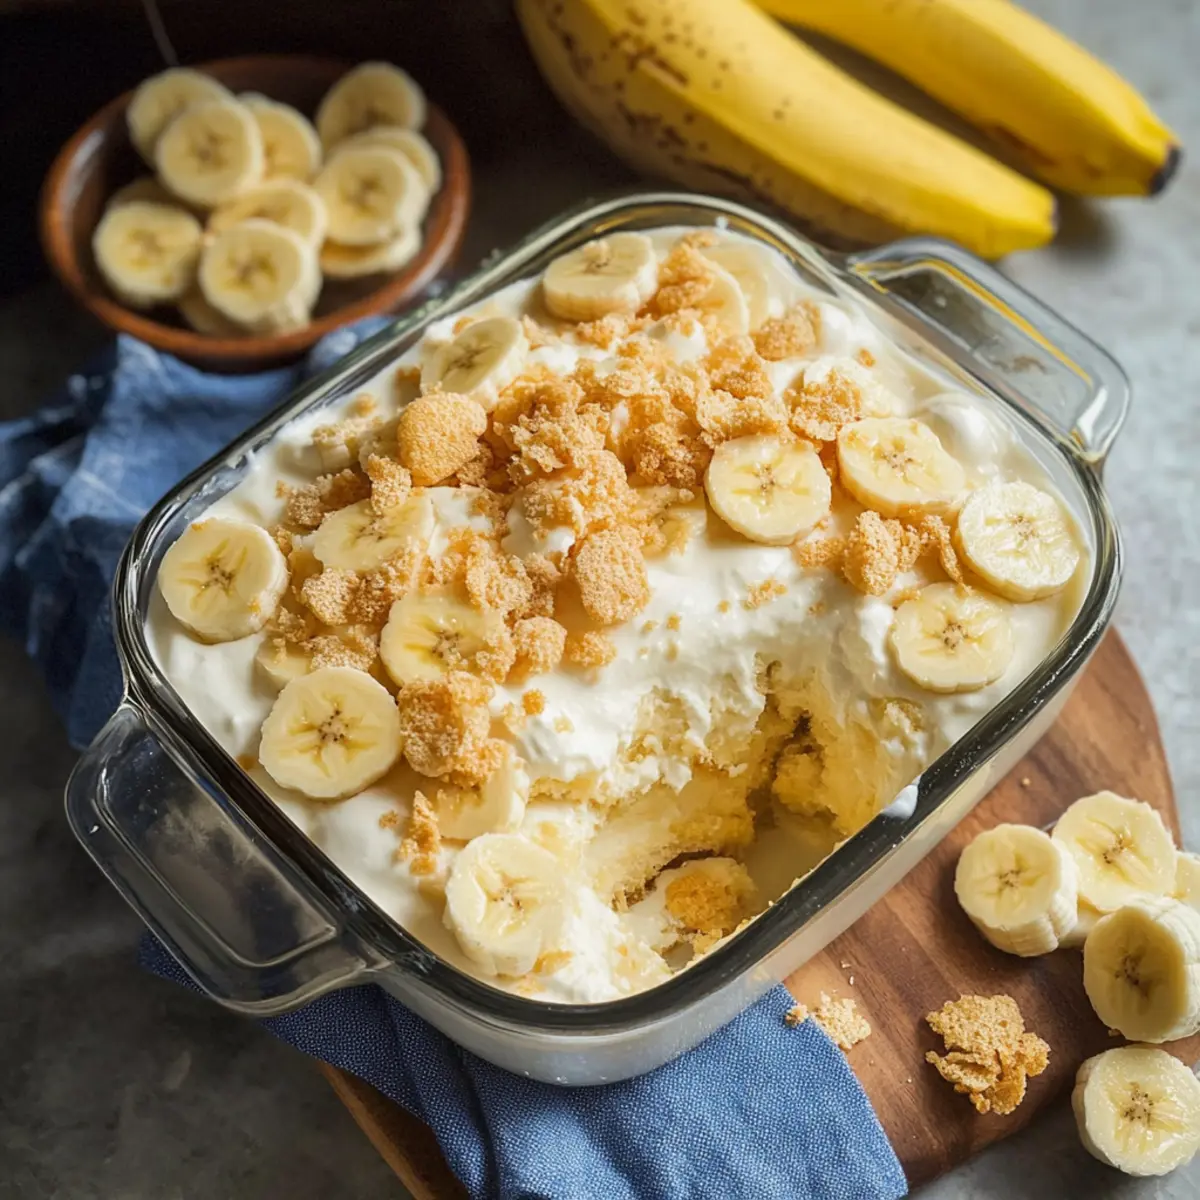
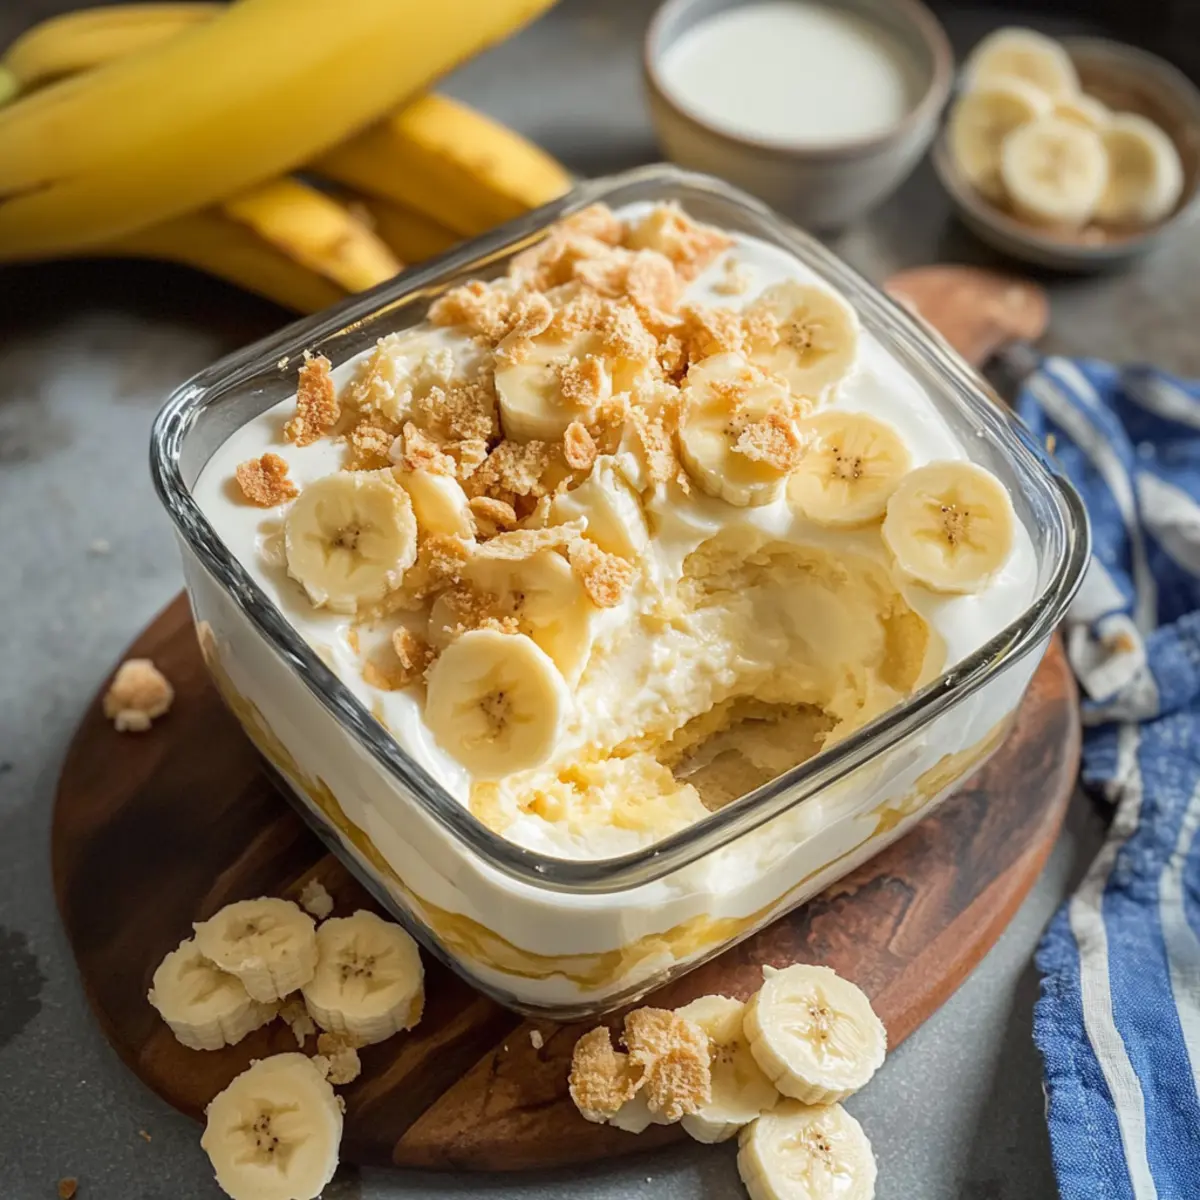
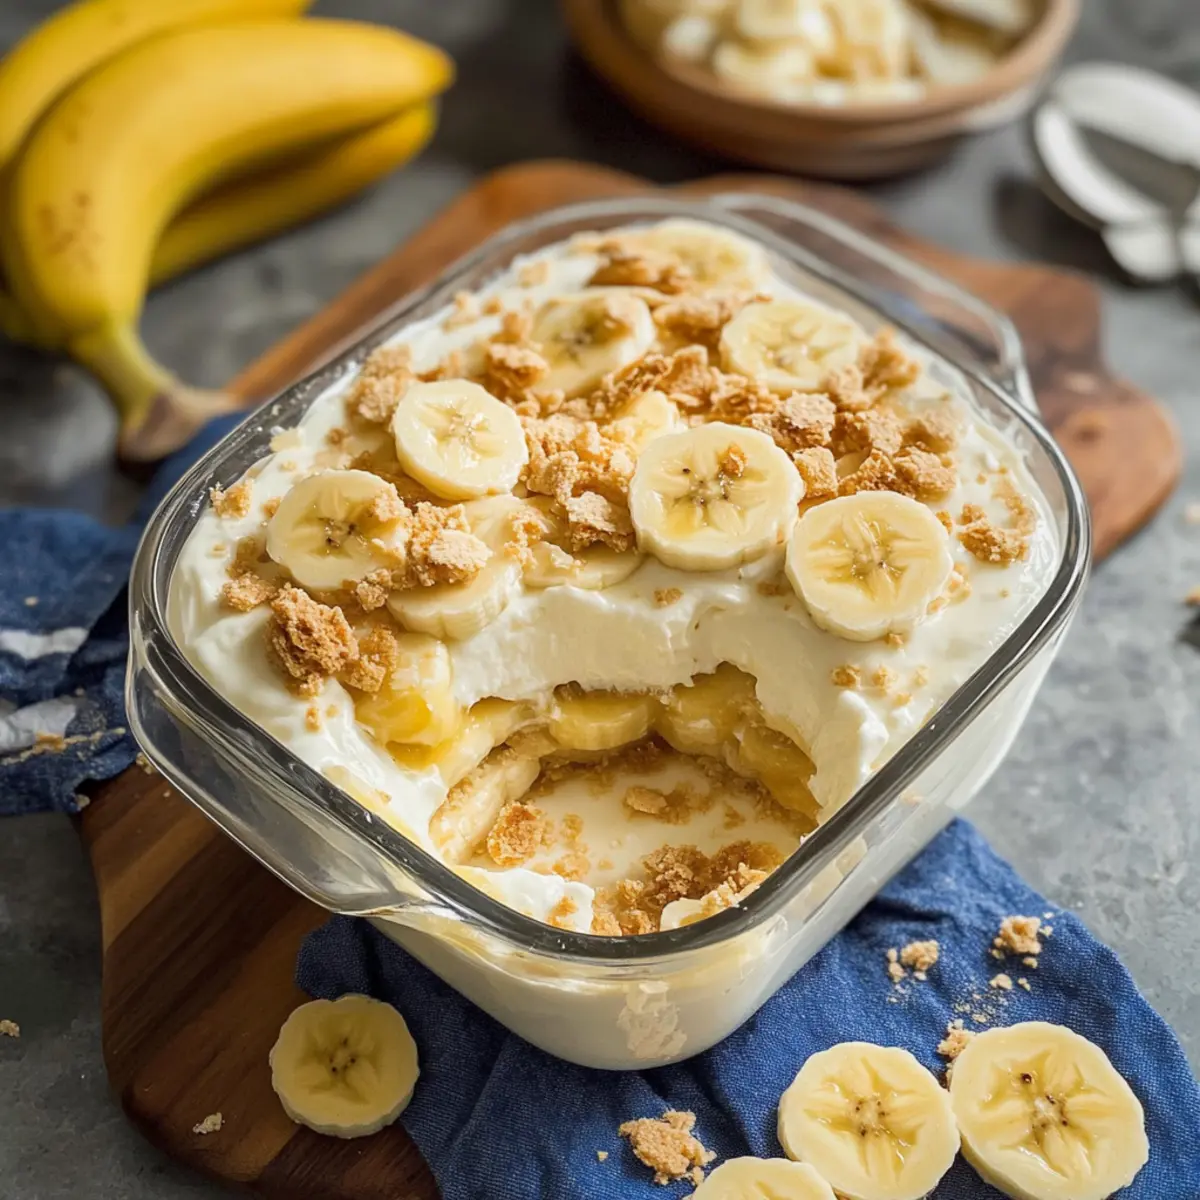
Once the pudding is fully set, generously spread the whipped cream over the top layer. For a beautiful finish, consider garnishing with additional banana slices and crushed vanilla wafer cookies to add texture and color to your classic homemade banana pudding before serving it to family and friends.
How to Store and Freeze Banana Pudding
Fridge: Store leftover banana pudding in an airtight container in the refrigerator for up to 3 days. Cover the surface with plastic wrap to prevent browning of the bananas.
Freezer: Banana pudding can be frozen, but it's best to freeze the pudding alone, without bananas and whipped cream, for up to 2 months. Thaw in the fridge before serving.
Reheating: If you’ve frozen the pudding, stir gently after thawing to restore creaminess! Avoid heating, as it may change the texture of the banana pudding.
Make-Ahead: Prepare the pudding a day in advance for optimal flavor, but keep bananas and whipped cream separate until just before serving to ensure freshness.
Banana Pudding Variations & Substitutions
Feel free to explore different flavor twists and dietary options in your banana pudding!
-
Chocolate Twist: Add a layer of chocolate pudding to elevate the dessert with rich, chocolaty goodness. Combine layers for a delightful contrast of flavors!
-
Tropical Vibes: Incorporate diced pineapple between the layers for a refreshing tropical flair that dances on your taste buds. It's sunshine in a dish!
-
Dairy-Free Delight: Substitute half and half with almond or oat milk and use coconut cream for the topping to create a creamy, dairy-free version that’s just as indulgent.
-
Nutty Crunch: Introduce a layer of crushed pecans or walnuts for an extra crunch. The nutty flavor adds delightful depth and texture to your banana pudding.
-
Flavorful Cookies: Swap vanilla wafer cookies with Goya Maria cookies or even chocolate cookies for a fun twist. Choosing flavored cookies can significantly change the dynamics of your dish!
-
Strawberry Surprise: Replace bananas with fresh, sliced strawberries for a fruity variation that brightens things up. Strawberries offer a delightful sweetness that pairs well with the creamy pudding.
-
Peanut Butter Bliss: Spread a layer of peanut butter between the pudding and cookie layers for a rich and satisfying nutty flavor. It’s a playful combination that will surprise your taste buds!
-
Spicy Kick: Add a pinch of cinnamon or a dash of cayenne pepper to your pudding mixture for a surprising warm spice! This twist offers a unique flavor profile that contrasts beautifully with the sweetness.
With these variations, your homemade banana pudding can be as unique as you are! Explore different combinations, and don’t forget to check out my Banana Pecan Caramel or Cinnamon Crunch Swirled Banana recipes for more inspiration!
Expert Tips for Banana Pudding
Whisk Continuously: To prevent the egg yolks from curdling when heating the pudding mixture, keep whisking uninterrupted while cooking.
Fresh Is Best: Use perfectly ripe bananas for the best flavor and texture, elevating your banana pudding to a whole new level.
Layer Carefully: Ensure each layer is even when assembling your banana pudding; this creates beautiful visuals and an even distribution of flavors.
Chill Properly: Allowing the pudding to chill completely before layering is crucial for achieving the right consistency in your banana pudding.
Prep Ahead: Make your banana pudding a day in advance for stress-free entertaining, but keep sliced bananas and whipped cream separate until serving to maintain freshness.
Don't Skip the Toppings: A generous layer of whipped cream and crushed vanilla wafers on top not only adds flavor but also enhances the dessert's visual appeal.
What to Serve with Homemade Banana Pudding
Bring your dining table to life with delightful sides that elevate your banana pudding experience!
-
Fresh Berries: Bright and juicy berries add a vibrant touch, balancing the richness of the pudding perfectly.
-
Classic Vanilla Ice Cream: A scoop of creamy vanilla ice cream complements the pudding’s texture and enhances its warm nostalgia.
-
Crunchy Graham Crackers: Their crisp texture contrasts beautifully with the silky pudding, making each bite a textural delight.
-
Whipped Coconut Cream: For a tropical flair, this airy option is a delicious dairy-free alternative that pairs wonderfully with bananas.
-
Coffee or Espresso: A bold cup of coffee cuts through the sweetness, elevating the overall dessert experience.
-
Lemon Sorbet: The zesty brightness of lemon sorbet adds a refreshing contrast, cleansing the palate perfectly after rich layers of pudding.
Make Ahead Options
Homemade banana pudding is a fantastic dessert to prepare ahead of time, making it a lifesaver for busy weeknights and gatherings. You can make the pudding itself and refrigerate it for up to 24 hours before layering it with bananas and cookies. Simply ensure you cover the pudding tightly with plastic wrap to prevent it from forming a skin. The bananas can be sliced just before assembling to maintain their freshness and prevent browning; a sprinkle of lemon juice helps in keeping them vibrant. Once ready to serve, layer the pudding, cookies, and bananas in your dish, then finish with whipped cream for a delicious treat that tastes just as good as when freshly made!
Classic Homemade Banana Pudding Recipe FAQs
What type of bananas should I use for the best banana pudding?
Absolutely! I recommend using just-ripe bananas, as they provide the perfect sweetness and texture. Look for bananas that are slightly speckled but not overly brown or mushy. Overripe bananas could change the taste and texture of your dessert.
How should I store leftover banana pudding?
For optimal freshness, store any leftover banana pudding in an airtight container in the refrigerator. It will keep well for up to 3 days. To prevent the bananas from browning, I suggest covering the surface with plastic wrap directly against the pudding.
Can I freeze banana pudding?
Very! You can freeze banana pudding, but it's best to freeze the pudding alone without the bananas and whipped cream. Just pour it into an airtight container or a freezer-safe bag and it will last for up to 2 months. When you're ready to enjoy it, simply thaw it in the fridge overnight and stir gently before serving to restore the creamy texture.
What should I do if my pudding doesn’t thicken properly?
If your pudding isn’t thickening, it may need more time on the heat. Return it to medium heat and continue to whisk constantly until large bubbles form, which indicates it’s thickening. If it’s still thin after several minutes, you can mix an additional tablespoon of cornstarch with a tiny bit of cold water to create a slurry and gradually whisk it into the pudding until it thickens.
Is homemade banana pudding a good option for people with allergies?
If you’re considering dietary restrictions, this banana pudding is rich in dairy and eggs, which are common allergens. For a vegan variant, substitute the egg yolks with a commercial egg replacer and use coconut cream instead of heavy cream. Always check for sensitivities if you're serving it to friends or family to ensure everyone can indulge!
Irresistible Banana Pudding That's Creamy and Oh-So-Delicious
Ingredients
Equipment
Method
- In a medium saucepan over medium heat, combine 3 cups of half and half, the seeds and pod from 1 vanilla bean, and ⅛ teaspoon of nutmeg. Bring to a simmer.
- Whisk together ¾ cup of granulated sugar, ¼ cup of cornstarch, ¼ teaspoon of salt, and 5 large egg yolks until pale and fluffy.
- Gradually pour the simmering half and half into the egg mixture while continuously whisking.
- Return the mixture to the saucepan and cook over medium heat, stirring constantly until thickened.
- Remove from heat and stir in 1 tablespoon of butter until melted, then transfer to a heatproof bowl.
- Cover with plastic wrap directly on the pudding's surface and chill for at least 2 hours.
- Layer 30 vanilla wafer cookies in an 8x8 inch dish, followed by half of the pudding, sliced bananas, and another layer of cookies.
- Spread the remaining pudding over the top layer evenly and return to the refrigerator for another 2 hours.
- Whip 1 cup of heavy cream with 2 tablespoons of granulated sugar and ½ teaspoon of vanilla extract until stiff peaks form.
- Spread whipped cream over the top layer and garnish with banana slices and crushed vanilla wafers before serving.


Leave a Reply