
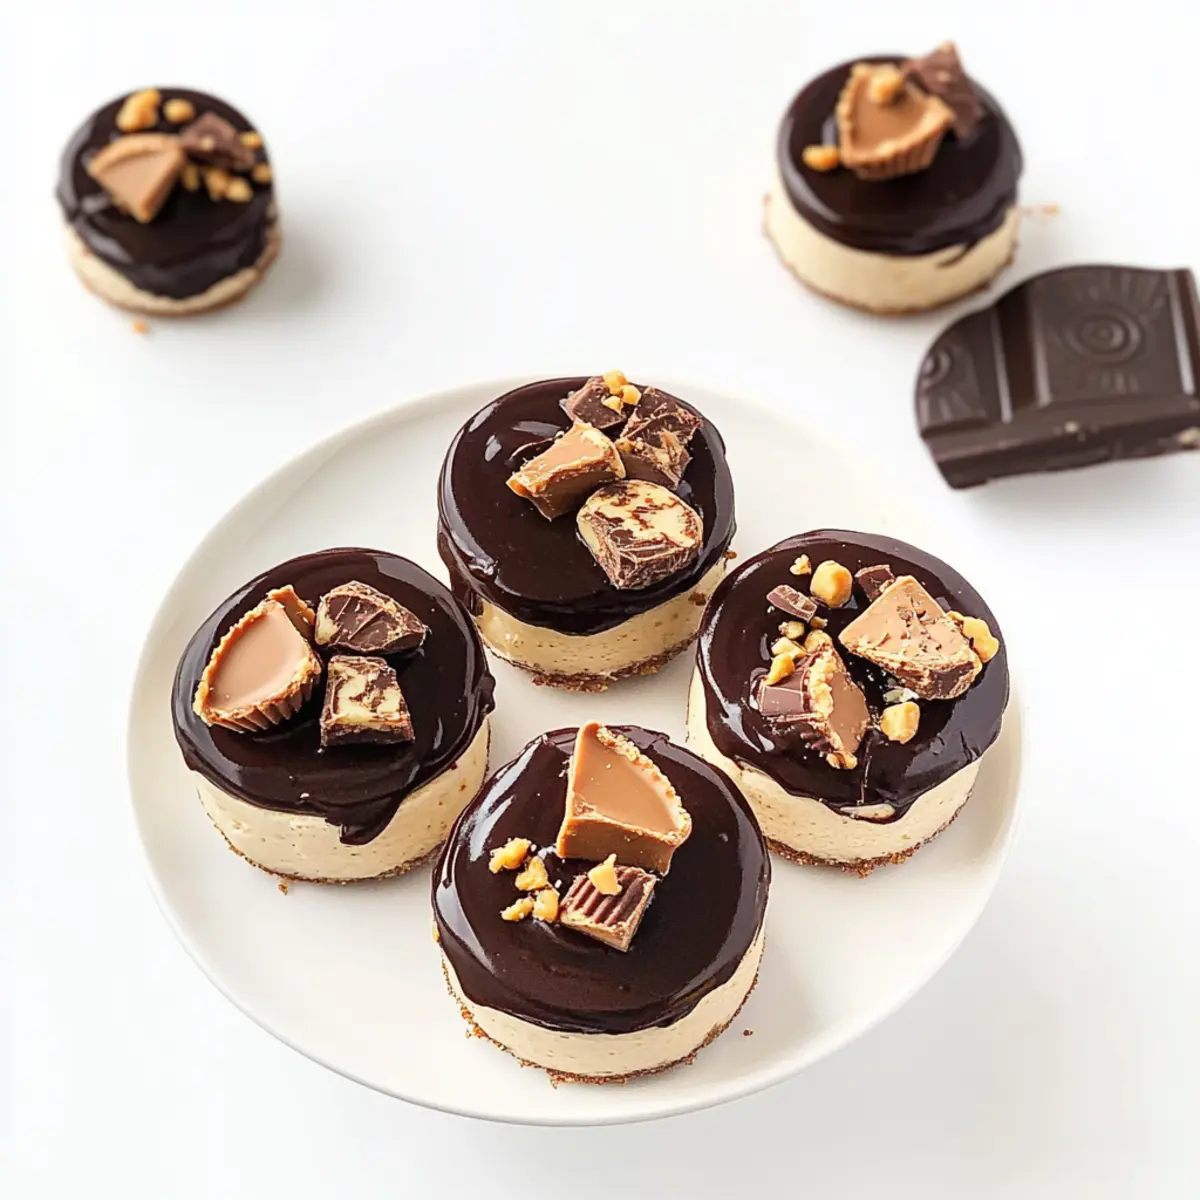
You won't believe how easy it is to create a dessert that feels like a luxurious treat while being incredibly simple to prepare! These No-Bake Peanut Butter Cup Cheesecakes combine the rich flavors of creamy peanut butter and luscious chocolate on a crunchy Oreo crust—perfect for satisfying those sweet cravings without the fuss! The best part? They're not only vegan-friendly and gluten-free, but you can whip them up in just 30 minutes using minimal ingredients. Imagine serving these delightful mini cheesecakes at your next gathering and watching everyone go back for seconds. Are you ready to dive into this indulgent and guilt-free experience? Let's make these cheesecakes together!
Why Are These Cheesecakes So Irresistible?
Quick Preparation: You’ll love that these No-Bake Peanut Butter Cup Cheesecakes come together in just 30 minutes, making them a perfect choice for last-minute gatherings.
Vegan and Gluten-Free: These delightful treats cater to a variety of dietary preferences, ensuring everyone can indulge without worry.
Minimal Ingredients: With just a handful of simple ingredients, you can create an exceptional dessert that feels gourmet without breaking a sweat.
Crowd-Pleasing Flavor: Creamy peanut butter combined with rich chocolate guarantees a flavor explosion that will leave your guests asking for the recipe—perfect for parties or cozy nights in! Pair them with a warm bowl of Butternut Squash Soup for a delicious meal ending.
Unique Texture: Enjoy the fabulous contrast of the creamy filling against the crunchy Oreo crust—every bite is heaven!
Say goodbye to fast food and treat yourself to these little joys that are sure to impress!
Peanut Butter Cup Cheesecakes Ingredients
For the Crust
- Crushed Oreo Cookies – Provides the crust foundation; for a gluten-free version, opt for gluten-free Oreos.
- Coconut Oil – Adds moisture and helps bind the crust and filling; melted vegan butter can be used as a substitute.
For the Filling
- Raw Cashews – The base for the creamy filling; soaking for 4-6 hours ensures a smooth texture.
- Lemon Juice – Contributes acidity for flavor balance; juice from 1 large lemon (about ¼ cup) works best.
- Coconut Milk – Ensures a creamy consistency; full-fat coconut milk adds richness, but you can substitute with another non-dairy milk.
- Maple Syrup (or Agave Nectar) – Naturally sweetens the filling; if not strictly vegan, honey makes a great alternative.
- Salted Natural Peanut Butter – Delivers the signature peanut butter flavor; you can choose creamy or crunchy based on your preference.
For the Topping (Optional)
- Dairy-Free Semisweet Chocolate Chips – Perfect for an optional ganache swirl; just ensure they are dairy-free for a vegan version.
- Mini Dark Chocolate PB Cups – Adds an extra layer of peanut butter flavor as a topping; make sure to select vegan-friendly varieties.
With these ingredients at your fingertips, you're just moments away from creating your very own delightful Peanut Butter Cup Cheesecakes!
Step‑by‑Step Instructions for Peanut Butter Cup Cheesecakes
Step 1: Prepare the Crust
Preheat your oven to 350°F (176°C). In a food processor, blend the crushed Oreo cookies until fine. Transfer the crumbs into a mixing bowl and stir in melted coconut oil until well combined. This mixture will create a deliciously crunchy crust for your Peanut Butter Cup Cheesecakes. Line a 12-slot muffin tin with parchment strips or liners for easy removal.
Step 2: Bake the Crust
Press the cookie mixture firmly into the bottom of each muffin slot, ensuring an even layer. Bake the crust in the oven for 5 minutes, just until set, then remove and let it cool completely. The cooling process is essential, as it will provide a sturdy base for the creamy filling that follows.
Step 3: Blend the Filling
While the crust cools, prepare the filling. Drain the soaked cashews and place them in a blender along with lemon juice, melted coconut oil, coconut milk, maple syrup, and peanut butter. Blend on high for about 1-2 minutes until the mixture is smooth and creamy with no lumps. This heavenly peanut butter filling is the heart of your cheesecakes!
Step 4: Assemble the Cheesecakes
Pour the cashew filling evenly into the cooled crusts, smoothing the tops with a spatula. Gently tap the muffin tin on the counter to remove any air bubbles for a delectable texture. This is where your Peanut Butter Cup Cheesecakes begin to take shape, ready for their sweet toppings.
Step 5: Create the Ganache (Optional)
For an optional ganache swirl, heat ¼ cup of coconut milk in a saucepan until warm. Remove from heat and add the dairy-free semisweet chocolate chips, letting them sit for a minute before stirring gently until smooth. Drizzle this luscious chocolate ganache over the cheesecakes for an extra layer of indulgence.
Step 6: Add the Topping and Freeze
Sprinkle the chopped mini dark chocolate peanut butter cups over the ganache layer and gently press them in. Cover the cheesecake-filled muffin tin with plastic wrap and place it in the freezer. Allow them to freeze until firm, which should take at least 3 hours—this step is crucial for achieving that perfect cheesecake texture.
Step 7: Serve and Enjoy
When you're ready to serve your delightful No-Bake Peanut Butter Cup Cheesecakes, carefully release them from the muffin tin. You can enjoy them frozen or let them sit for 10-15 minutes at room temperature for a softer texture. Either way, these cheesecakes are sure to be a crowd-pleaser!
What to Serve with No-Bake Peanut Butter Cup Cheesecakes
Imagine indulging in a heavenly dessert that can be perfectly paired with delightful sides and drinks to elevate your dining experience.
-
Fresh Fruit Salad: Bright, juicy fruits provide a refreshing contrast to the rich cheesecakes, adding a burst of flavor and color to your plate. A mix of berries, melons, and citrus can also cleanse the palate beautifully.
-
Chocolate Almond Milk: This smooth and creamy drink complements the chocolate and peanut butter flavors. The subtle nutty taste harmonizes perfectly, turning your dessert into a blissful treat.
-
Coconut Whipped Cream: Light and airy, this fluffy topping enhances the cheesecakes' rich texture while adding a hint of sweetness. It brings in a tropical flair that dances beautifully with every bite.
-
Nutty Granola Parfait: Layering the cheesecakes with granola and yogurt creates a delightful crunch and adds a healthful element, balancing indulgence with nutritious goodness.
-
Espresso or Coffee: The deep, bold flavors of a freshly brewed cup perfectly accentuate the sweet and creamy notes of the cheesecakes. It’s a match made in heaven for coffee lovers looking to enhance their dessert experience.
-
Mint Chocolate Chip Ice Cream: For an extra special treat, serving these cheesecakes alongside a scoop of refreshing mint chocolate chip ice cream creates an exciting flavor contrast. The freshness of mint lifts the sweet and creamy richness.
-
Sparkling Water with Lemon: Keep things light and zesty with a glass of sparkling water. A splash of fresh lemon adds brightness, making it an ideal palate cleanser between bites of the luscious cheesecakes.
Choose any of these pairings to turn your No-Bake Peanut Butter Cup Cheesecakes into an unforgettable meal experience!
Peanut Butter Cup Cheesecakes Variations
Feel free to play around and make these cheesecakes your own—each variation opens up a world of delicious possibilities!
- Nut-Free: Substitute peanut butter with sunbutter or tahini to enjoy a delicious nut-free option for everyone.
- Crust Variation: Swap Oreo cookies for almond flour or gluten-free graham crackers for a different textured crust.
- Flavor Twist: Add a hint of cinnamon or a teaspoon of vanilla extract to the filling for a warm, inviting flavor.
- Lower Sugar: Reduce the amount of maple syrup by half, or use a sugar substitute like stevia for a lower-sugar version.
- Chocolate Lovers: Enhance the filling with cocoa powder for a richer chocolate-peanut butter experience.
- Fruity Topping: Top with fresh raspberries or sliced strawberries for a burst of freshness that contrasts beautifully with the creamy filling.
- Extra Creamy: Blend in some silken tofu for added creaminess and a protein boost that complements the cashews.
- Spicy Kick: Mix in a pinch of cayenne pepper or chili powder to the filling for a surprising and delightful heat that pairs with the sweet flavors.
By trying out these variations, you can adapt each cheesecake to suit your family's tastes or dietary needs. For a comforting meal leading up to dessert, serve with a hearty bowl of Garlic Butter Steak or start off with a warm bowl of Butternut Squash Soup to round out a beautiful dinner experience. Embrace the creativity and enjoy every bite!
Expert Tips for Peanut Butter Cup Cheesecakes
- Soak Cashews Thoroughly: Make sure to soak the cashews for 4-6 hours to ensure your filling is smooth and creamy, enhancing the peanut butter flavor.
- Use Quality Ingredients: Opt for high-quality peanut butter and dark chocolate to boost the overall taste of your cheesecakes. Brands without added sugars or oils are best!
- Be Mindful of Freezing: Keep the cheesecakes frozen until just before serving to maintain their shape and texture. Allow them to thaw for optimal texture.
- Mix and Match Flavors: Feel free to experiment by replacing peanut butter with almond or sunbutter for a unique twist. Your Peanut Butter Cup Cheesecakes will surprise everyone!
- Check for Allergies: Always verify dietary restrictions of your guests, especially regarding ingredients like nuts and gluten, ensuring everyone can savor these delicious cheesecakes.
Make Ahead Options
These No-Bake Peanut Butter Cup Cheesecakes are perfect for busy home cooks looking to save time without sacrificing flavor! You can prepare the crust and filling up to 24 hours in advance. To do this, simply follow steps 1 and 3, then refrigerate the crust and filling separately. Once you're ready to assemble, pour the filling into the cooled crusts and freeze until firm, which should take at least 3 hours. For the best quality, cover your cheesecakes tightly in the freezer. When it's time to serve, just release them from the muffin tin and enjoy them frozen or let them soften for 10-15 minutes before serving—no one will believe you made these ahead of time!
Storage Tips for Peanut Butter Cup Cheesecakes
Freezer: Keep your cheesecakes in the freezer for up to 1 month. Use an airtight container to prevent freezer burn and maintain freshness.
Thawing: When ready to serve, let the cheesecakes thaw for 10-15 minutes at room temperature for the best texture, or enjoy them frozen for a delightful treat.
Wrap: For optimal storage, wrap each cheesecake individually in plastic wrap to preserve their shape and flavor, ensuring they remain delicious until you're ready to indulge.
Leftovers: If you have leftovers, store them back in the freezer promptly to maintain their irresistible flavor and prevent any melting or loss of structure.
Peanut Butter Cup Cheesecakes Recipe FAQs
How do I choose ripe cashews for soaking?
Absolutely! Choose raw cashews that are firm to the touch with no dark spots or blemishes. Look for packages that are still sealed for freshness. Soaking in water for 4-6 hours will help ensure they blend completely smooth, creating a luscious filling for your cheesecakes.
What’s the best way to store leftover cheesecakes?
Very good question! Store your Peanut Butter Cup Cheesecakes in an airtight container in the freezer for up to 1 month. This method keeps them fresh and prevents any unwanted freezer burn. If you have already begun to thaw them, consume within 24 hours for the best flavor.
Can I freeze the Peanut Butter Cup Cheesecakes?
Absolutely! Once they have set in the freezer for at least 3 hours, you can keep them in the freezer for up to 3 months. Just wrap each cheesecake in plastic wrap and place them in an airtight container. When you're ready to enjoy, simply let them thaw for 10-15 minutes first, or dive right in frozen for a unique treat!
What should I do if my filling is not creamy?
If you find your filling isn’t blending smoothly, it might be due to the cashews not being soaked long enough. Try soaking them in boiling water for about 1 hour instead of the regular 4-6 hours. If they still seem grainy, adding a bit more coconut milk can help to achieve that desired creamy texture.
Are these cheesecakes safe for people with nut allergies?
It’s important to check dietary restrictions closely! Since the filling contains cashews and peanut butter, they are not suitable for individuals with nut allergies. However, you can always experiment with sunflower seed butter and seeds to create a nut-free version. Just make sure to adjust your ingredients accordingly!
How long do the cheesecakes last once thawed?
Once thawed, enjoy your Peanut Butter Cup Cheesecakes within 24 hours for the best flavor and texture. If you won't finish them in that timeframe, keep them refrozen again to avoid any spoilage.
Vegan Peanut Butter Cup Cheesecakes
Ingredients
Equipment
Method
- Preheat your oven to 350°F (176°C). Blend the crushed Oreo cookies in a food processor until fine. Mix with melted coconut oil in a bowl.
- Press the mixture into the bottom of the muffin slots. Bake for 5 minutes until set, then let it cool completely.
- While the crust cools, drain the cashews and blend them with lemon juice, melted coconut oil, coconut milk, maple syrup, and peanut butter until smooth.
- Pour the cashew filling into the cooled crusts, smoothing the tops. Tap the muffin tin to remove air bubbles.
- For the optional ganache, heat ¼ cup of coconut milk until warm, then stir in the chocolate chips until smooth. Drizzle over the cheesecakes.
- Sprinkle chopped mini dark chocolate peanut butter cups over the ganache and press down gently. Cover with plastic wrap and freeze for at least 3 hours.
- When ready, release from the muffin tin. Serve frozen or let sit for 10-15 minutes for a softer texture.


Leave a Reply