
In the heart of summer, when fresh cucumbers overflow at the local market, there’s nothing like the satisfying crunch of homemade pickles to preserve those sunny days. This Crunchy Dill Pickle Recipe is your trusty companion for canning, transforming simple ingredients into vibrant jars of flavor. With just under an hour of your time, you’ll have crisp pickles ready to elevate any meal or serve as the perfect snack. Plus, the satisfaction of canning your own pickles means you can customize them to your taste, making them both a fun project and an impressive addition to your pantry. Curious about the magic behind those irresistible pickles? Let’s get started!
Why Are Homemade Pickles the Best?
Freshness at Your Fingertips: Experience the joy of using garden-fresh cucumbers to create your pickles, ensuring unbeatable flavor and crunch.
Customize to Perfection: Tailor your recipe with unique spices or herbs to make every jar reflect your taste.
Simple Process: With just a few easy steps, anyone can master the art of canning, making it suitable for both beginners and seasoned chefs alike.
Family-Friendly Fun: Involve kids or friends in the process for a memorable culinary experience—who doesn’t love packing jars together?
Sustainable Snacking: Say goodbye to store-bought options packed with preservatives and embrace health-conscious munching with these delightful homemade treats.
Long-Lasting Enjoyment: These vibrant pickles stay fresh for up to a year, providing a taste of summer all year round. If you're curious for other canning ideas, check out our Spicy Pickle Brine Essentials for inspiration!
Crunchy Dill Pickle Ingredients
• Here’s what you need for the perfect Crunchy Dill Pickle Recipe.
For the Pickles
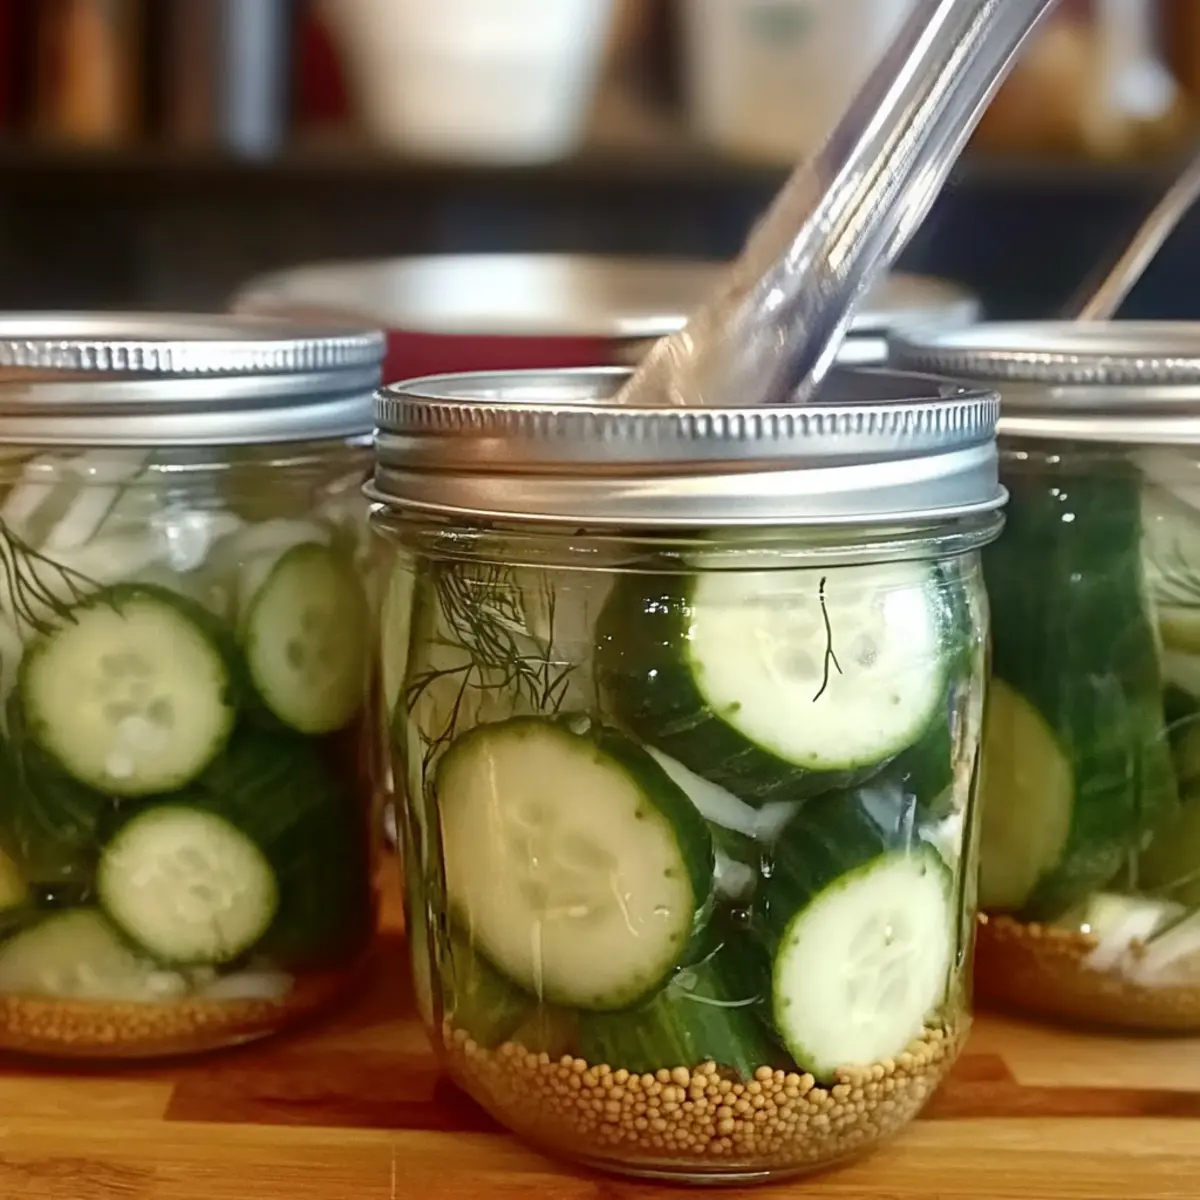
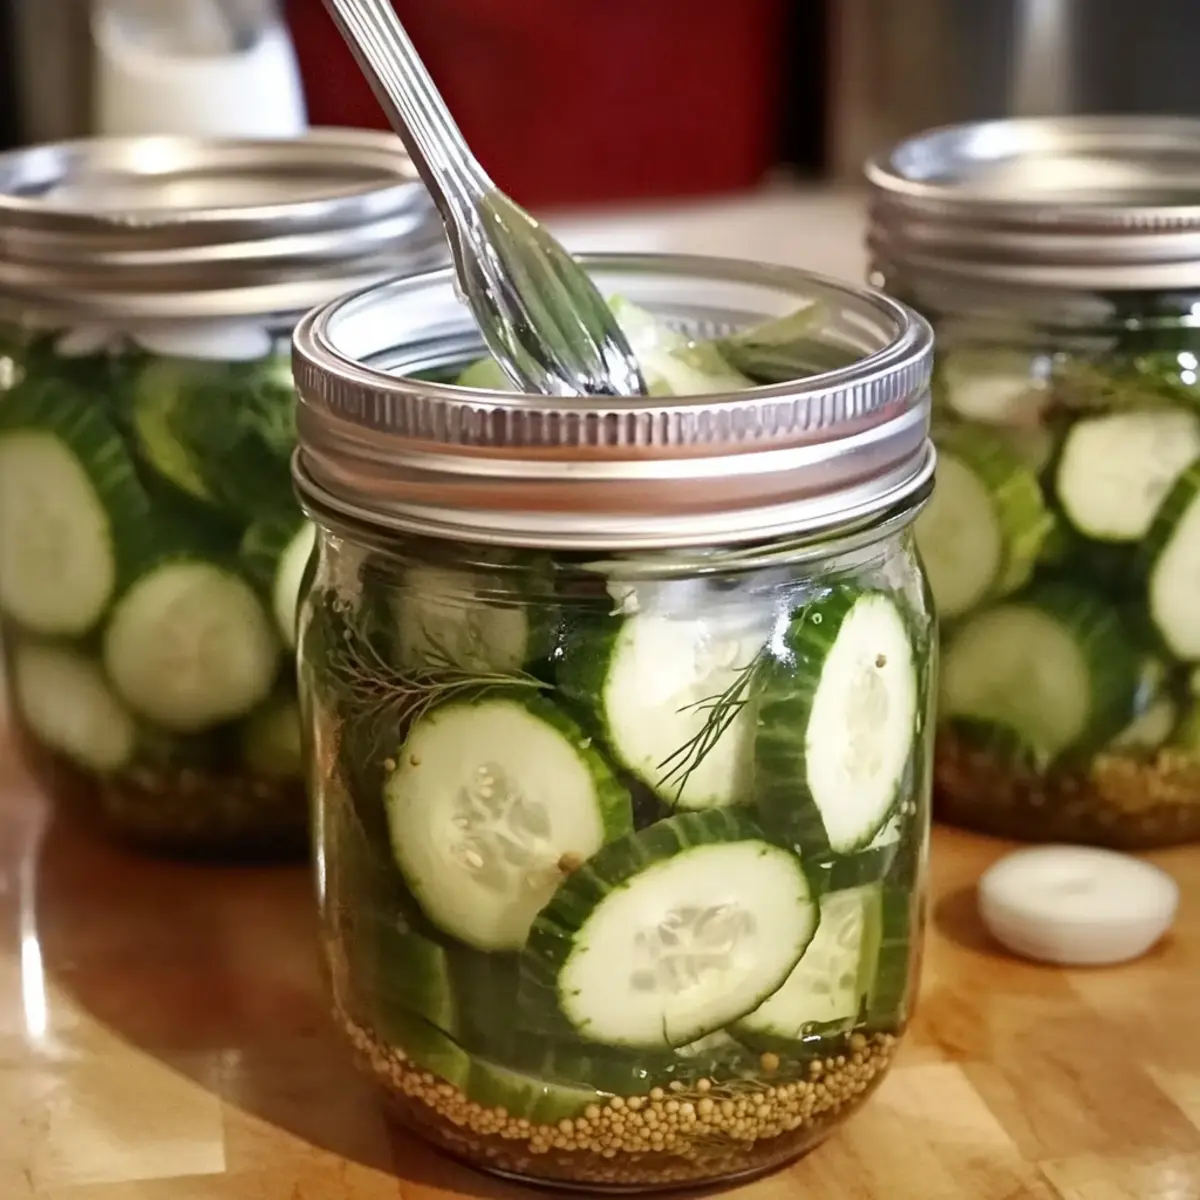
- Cucumbers – Use small, fresh pickling cucumbers for optimal crunch; avoid larger varieties that may turn mushy.
- Onion – Adds mild sweetness; sweet, yellow, or red varieties enhance flavor and texture.
For the Brine
- White Vinegar (4 cups, 5% acidity) – Essential for preserving; consider using apple cider vinegar for a unique twist.
- Water (4 cups) – Helps dilute the vinegar for a perfect brine balance.
- Salt (¼ cup) – Opt for canning salt to keep your pickles clear and crunchy; seas or kosher salt work too.
For Flavor
- Garlic (7 cloves) – Optional but enriches the taste with aromatic warmth.
- Mustard Seed (3 ½ tsp) – Provides a distinct flavor in every bite; don't skip it for that authentic pickle taste.
- Coriander Seed (3 ½ tsp) – This spice adds a lovely warmth and depth; feel free to omit if you prefer a simpler flavor.
- Whole Black Peppercorns (3 ½ tsp) – Introduces a subtle spiciness; enhances the overall flavor profile.
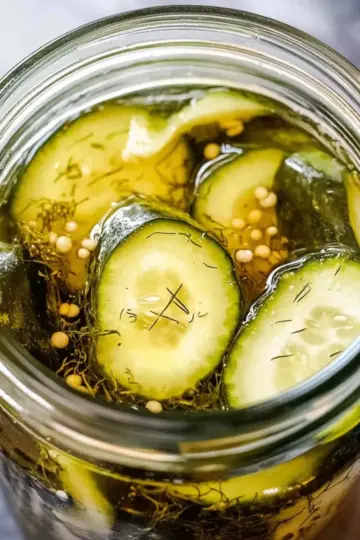
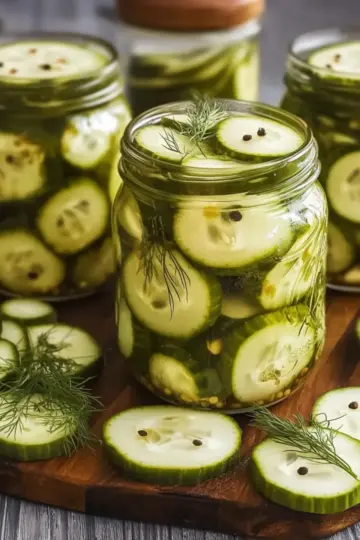
- Fresh Dill Weed (7 tbsp) – The star herb of your pickles; fresh dill adds vibrant flavor and beautiful aesthetics.
- Pickle Crisp or Grape Leaves (optional) – For that satisfying crunch; a great alternative to traditional pickling lime.
Step‑by‑Step Instructions for Crunchy Dill Pickle Recipe
Step 1: Prepare Canning Supplies
Begin by washing your canning jars, lids, and bands in hot, soapy water to ensure cleanliness. Fill a large canner with water, about two-thirds full, and place it over medium heat to bring it to a simmer while you prepare the other ingredients.
Step 2: Prepare the Brine
In a large pot, combine white vinegar, water, and salt. Heat the mixture over medium-high heat until it reaches a simmer, stirring occasionally until the salt fully dissolves. Once dissolved, allow the brine to boil for around 5 minutes, releasing a tangy aroma—this is crucial for your Crunchy Dill Pickle Recipe!
Step 3: Prepare Cucumbers and Onions
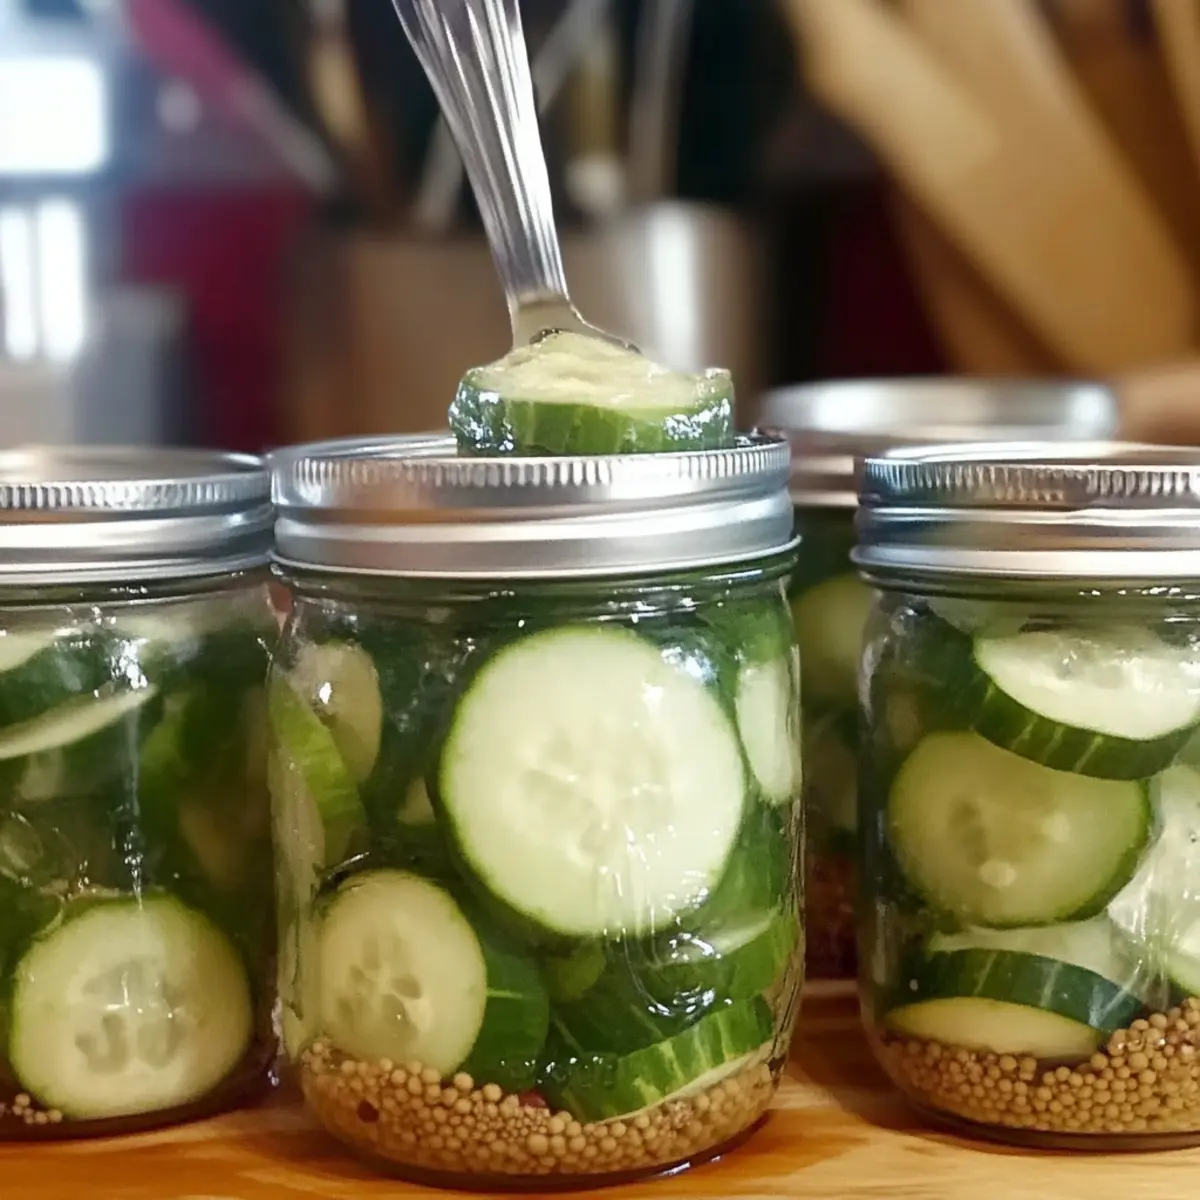
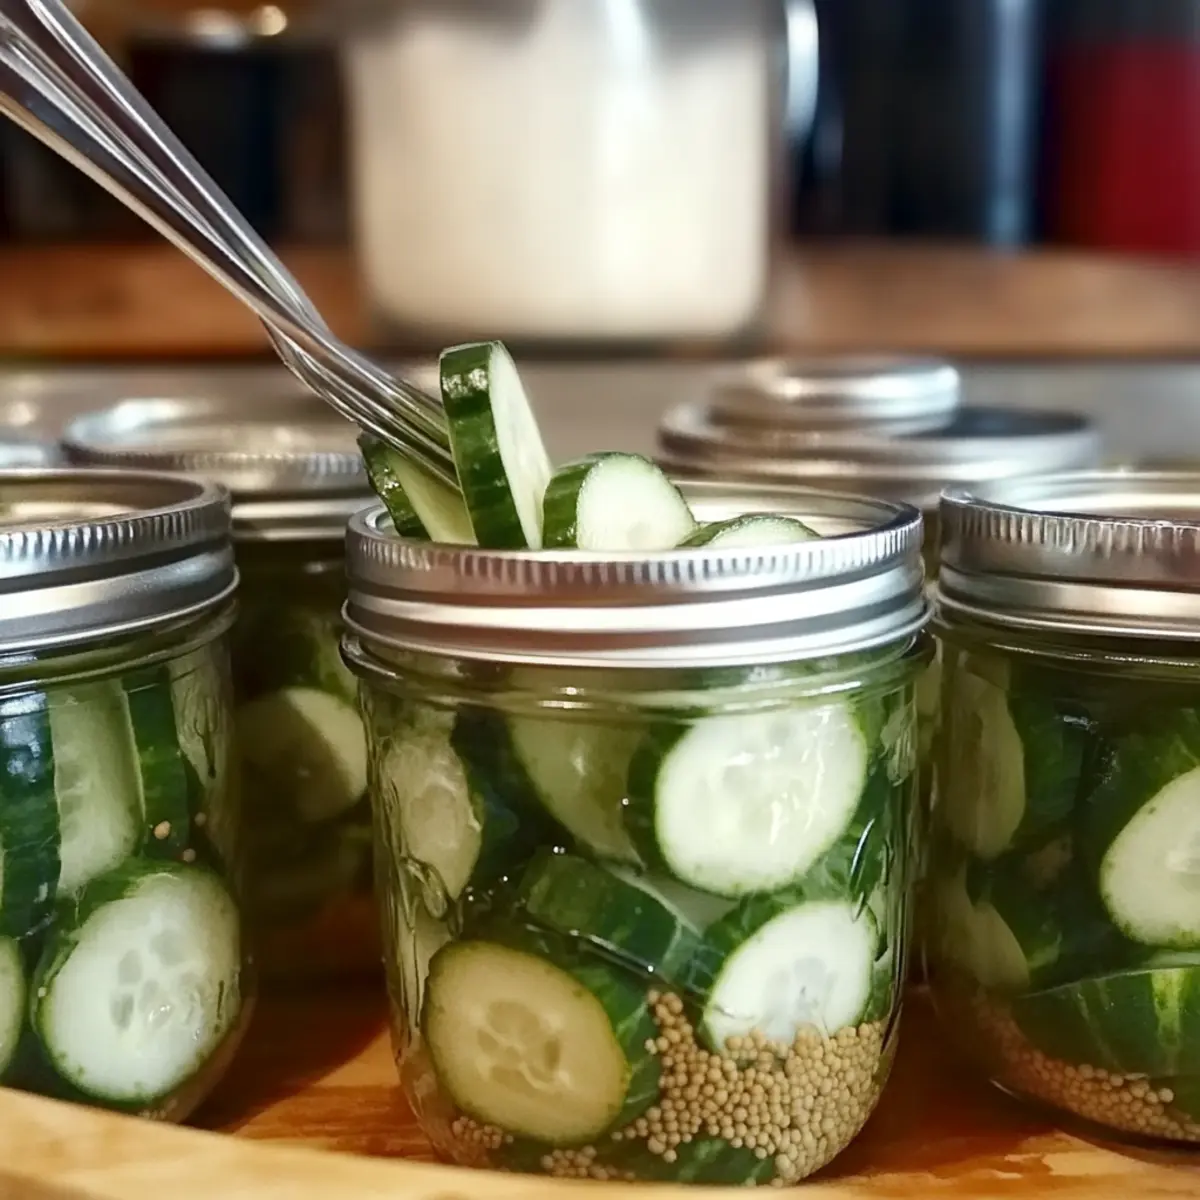
While the brine is simmering, wash your small pickling cucumbers thoroughly. Trim off the blossom ends to prevent softening during canning, then slice the cucumbers into ¼-inch rounds. Simultaneously, slice your onion into ¼-inch pieces to add a touch of sweetness to the pickles.
Step 4: Fill the Jars
Begin packing the prepared cucumbers firmly into the clean jars, layering onion slices on top for added texture and taste. Ensure you maintain at least a ½-inch headspace at the top of each jar. For flavor, add garlic, mustard seed, coriander seed, black peppercorns, and fresh dill weed evenly among the jars.
Step 5: Add Brine
Carefully ladle the hot brine into each jar, ensuring that the brine covers the cucumbers and filling to maintain ½-inch headspace. Use a non-metallic utensil to remove any air bubbles trapped in the jars. Finally, wipe the rims of the jars with a clean, damp cloth to ensure a proper seal.
Step 6: Process in Water Bath
Using jar tongs, carefully place the filled jars into the canner, ensuring they are submerged and that water covers them by at least 1 inch. Bring the water to a full rolling boil and process the pint jars for 10 minutes. This step helps to preserve the bright, crunchy goodness of your dill pickles.
Step 7: Cooling and Storing
Once processed, remove the jars from the canner and place them on a clean towel to cool overnight. After they’ve cooled, check that each jar has sealed properly by pressing down on the centers of the lids. Label your jars, then store them in a cool, dark place for optimal flavor development, allowing the pickles to sit for 2–4 weeks before enjoying.
Make Ahead Options
These Crunchy Dill Pickles are perfect for meal prep enthusiasts! You can prepare the brine (vinegar, water, and salt) up to 24 hours in advance by mixing and refrigerating it, which will save you time on canning day. Additionally, wash and slice the cucumbers and onions a day ahead and store them in the refrigerator covered with a damp cloth to keep them fresh and crisp. When you're ready to can, simply pack the cucumbers into jars, add the spices, and pour in the prepared brine before processing in the water bath. This efficient approach ensures you can enjoy homemade pickles without the hassle, allowing you to savor the freshness just as much as if you made them in one go!
Expert Tips for Crunchy Dill Pickles
• Choose the Right Cucumbers: Small pickling cucumbers yield the best crunch; avoid large, slicing cucumbers that can become mushy.
• Trim Blossom Ends: Always cut off the blossom end to prevent the pickles from softening during the pickling process.
• Adjust for Altitude: Processing times may vary based on your location; make necessary adjustments to ensure safe and effective canning.
• Bring on the Crunch: Consider adding pickle crisp, calcium chloride, or grape leaves to maintain the desired crunch in your Crunchy Dill Pickle Recipe.
• Seal Check: After cooling, press down the center of each lid; if it pops back, be sure to reprocess or refrigerate those jars.
What to Serve with Crunchy Dill Pickles?
Indulge in a delightful meal experience as you incorporate these vibrant, crunchy bites into your everyday dining.
- Creamy Potato Salad: A classic side dish that balances the tanginess of pickles with rich, creamy flavors, perfect for summer gatherings.
- Smoky BBQ Ribs: The bold, robust flavors of barbecue pair beautifully with the acidity of dill pickles, enhancing every bite with delightful contrast.
- Fresh Garden Salad: Crisp greens and seasonal vegetables complement the crunch of pickles, offering a refreshing contrast of textures and flavors.
- Charcuterie Board: Pair these pickles with cured meats and cheeses for a savory platter that encourages sharing and mingling, perfect for entertaining.
- Tangy Coleslaw: The zing of coleslaw beautifully harmonizes with crispy pickles, providing a delightful crunch and a burst of flavor on your plate.
- Classic Cheeseburgers: Add slices of these crunchy dill pickles to your burgers for a deliciously zesty bite that takes the entire meal to the next level.
- Chilled Gazpacho: This refreshing soup enhances the pickles' brightness, uniting the flavors of summer in each spoonful.
- Savory Biscuits: Serve warm, fluffy biscuits alongside a jar of pickles for a comforting touch that adds a delightful snap to the meal.
- Iced Tea: A cool, refreshing glass of iced tea complements the pickles' tang, making it the perfect drink to wash it all down.
- Chocolate Chip Cookies: For dessert, the sweetness of cookies provides a lovely contrast to the tangy crunch of your pickles, creating a playful flavor balance.
Crunchy Dill Pickle Recipe Variations
Feel free to unleash your creativity and customize this delightful recipe to suit your taste buds!
- Spicy Kick: Add 1-2 teaspoons of chili flakes for a warm, spicy twist that will awaken your palate.
- Sweet and Zesty: Swap out half the vinegar for apple cider vinegar. This will introduce a delightful sweetness paired with tanginess.
- Garlic Goodness: Replace the standard garlic with roasted garlic for a rich, mellow flavor that brings depth to your pickles.
- Herb Delight: Introduce new herbs like tarragon or oregano along with the dill; it adds a unique flavor that complements the pickles beautifully.
- Onion Variations: Use shallots instead of regular onions for a subtle sweetness that enhances taste without overpowering the dill.
- Jalapeño Jive: For an added crunch, pack some sliced jalapeños with the cucumbers. They’ll give you that perfect blend of heat and flavor in every bite!
- Coriander Swap: If you’re not a fan of coriander, consider using fennel seeds instead; they provide a delicate anise flavor that works surprisingly well.
- Herbal Infusion: Throw in a sprig or two of fresh thyme in each jar for earthy notes alongside your dill; this will create a beautifully aromatic pickle.
Explore the possibilities and make this Crunchy Dill Pickle Recipe uniquely yours! And if you're feeling adventurous, check out our other canning inspirations like Spicy Pickle Brine Essentials and add variety to your pantry!
How to Store and Freeze Crunchy Dill Pickles
Fridge: Store unopened jars in the fridge for up to 1 year for the best flavor. Once opened, consume within 2–4 weeks for optimal taste.
Cool, Dark Place: Properly sealed jars should be stored in a cool, dark place to maintain flavor and crunch, lasting for up to a year.
Avoid Freezing: Freezing is not recommended for crunchy dill pickles, as it affects their texture and crispness.
Reheating: There’s no need to reheat pickles; enjoy them straight from the jar for a refreshing snack or side dish.
Crunchy Dill Pickles Recipe FAQs
What kind of cucumbers should I use for the crunchiest pickles?
Absolutely! For the best crunchy dill pickles, always opt for small pickling cucumbers. These varieties have a higher water content and a firmer texture, ensuring that your finished pickles remain crisp. Larger cucumbers tend to turn mushy during the pickling process and are better suited for salads or slicing.
How should I store my canned pickles after making them?
Once your jars have cooled and you've checked that they are sealed, store them in a cool, dark place, like a pantry or cupboard. Properly sealed jars can last up to a year without losing flavor. Just remember to label them with the date so you can keep track of freshness!
Can I freeze my crunchy dill pickles?
No, it's best to avoid freezing crunchy dill pickles. Freezing can compromise the crisp texture and flavor that you worked hard to achieve. Instead, enjoy your pickles straight from the jar! If you ever have leftover slices, consider tossing them into salads or sandwiches.
What should I do if my pickles turn out soft?
If your pickles end up soft, check that you trimmed the blossom ends before canning—this helps prevent mushiness. You may also consider adding pickle crisp, calcium chloride, or grape leaves in future batches to help maintain that satisfying crunch. Remember, canning times can vary with altitude, so adjust processing times accordingly.
Can my kids help with this recipe?
Very much! This recipe is family-friendly and engaging, allowing kids to help with washing cucumbers, packing jars, or even adding spices. Not only does it provide a great opportunity to bond over cooking, but it also teaches them valuable kitchen skills. Just make sure to take care while handling boiling water and hot jars!
Are there any dietary restrictions I should consider when making crunchy dill pickles?
When making your crunchy dill pickles, be aware of any allergies related to the spices used. For instance, some individuals might be allergic to garlic or certain seeds. Always use fresh ingredients and check labels on pre-packaged items like vinegar and spice blends to ensure they fit the dietary needs of your family and friends.
Crisp and Zesty: Your Ultimate Crunchy Dill Pickle Recipe
Ingredients
Equipment
Method
- Wash canning jars, lids, and bands in hot, soapy water. Fill a large canner with water and place over medium heat.
- In a large pot, combine white vinegar, water, and salt. Heat until simmering and stir until the salt dissolves. Boil for 5 minutes.
- Wash cucumbers and slice into ¼-inch rounds. Slice onion into ¼-inch pieces.
- Pack cucumbers into jars, layering onion slices on top. Maintain at least ½-inch headspace and add spices.
- Ladle hot brine into jars, covering cucumbers and maintaining headspace. Remove air bubbles and wipe rims.
- Place jars in canner, submerging them. Bring to a boil and process pint jars for 10 minutes.
- After processing, cool jars overnight on a towel. Check seals and store in a cool, dark place.

Leave a Reply