
As I stood by the kitchen counter, a vibrant pile of summer cucumbers awaited their transformation into something truly special. With the crispness of a crunchy dill pickle recipe in mind, I realized this was the perfect opportunity to preserve the season’s bounty. This easy canning method not only produces pickles that far exceed anything you'll find on store shelves, but they’re also ready in under an hour! Imagine popping open a jar filled with bright green, tangy, crunchy goodness—perfect for jazzing up meals or enjoyed straight from the jar. If you're ready to elevate your homemade food game and add a burst of zesty flavor to your pantry staples, stick around for this delightful recipe. What surprising ways will you enjoy your pickles?
Why Are Homemade Dill Pickles Amazing?
Homemade dill pickles are a game changer: once you make them, you’ll never go back to store-bought! Flavor Explosion: Customizing the spice blend gives you a unique taste tailored to your preference. Crunch Factor: Our recipe ensures each pickle maintains that satisfying crunch, perfect for snacking. Plus, easy to make in under an hour, you'll find this simple canning method fits perfectly into your busy day. Versatile and delicious, enjoy them on burgers, in salads, or straight from the jar. Interested in expanding your canning repertoire? Check out our delightful Spicy Pickle Brine for a zesty twist!
Crunchy Dill Pickle Recipe Ingredients
Get ready to make your own crunchy dill pickles with these simple ingredients!
For the Pickling Brine
- White Vinegar (4 cups, 5% acidity) – Essential for preserving; you can swap for apple cider vinegar for a different flavor.
- Water (4 cups) – Balances the brine; ensures pickles are nicely flavored.
- Salt (¼ cup) – Canning salt is ideal for clarity; avoid table salt to ensure crispness.
For the Pickles
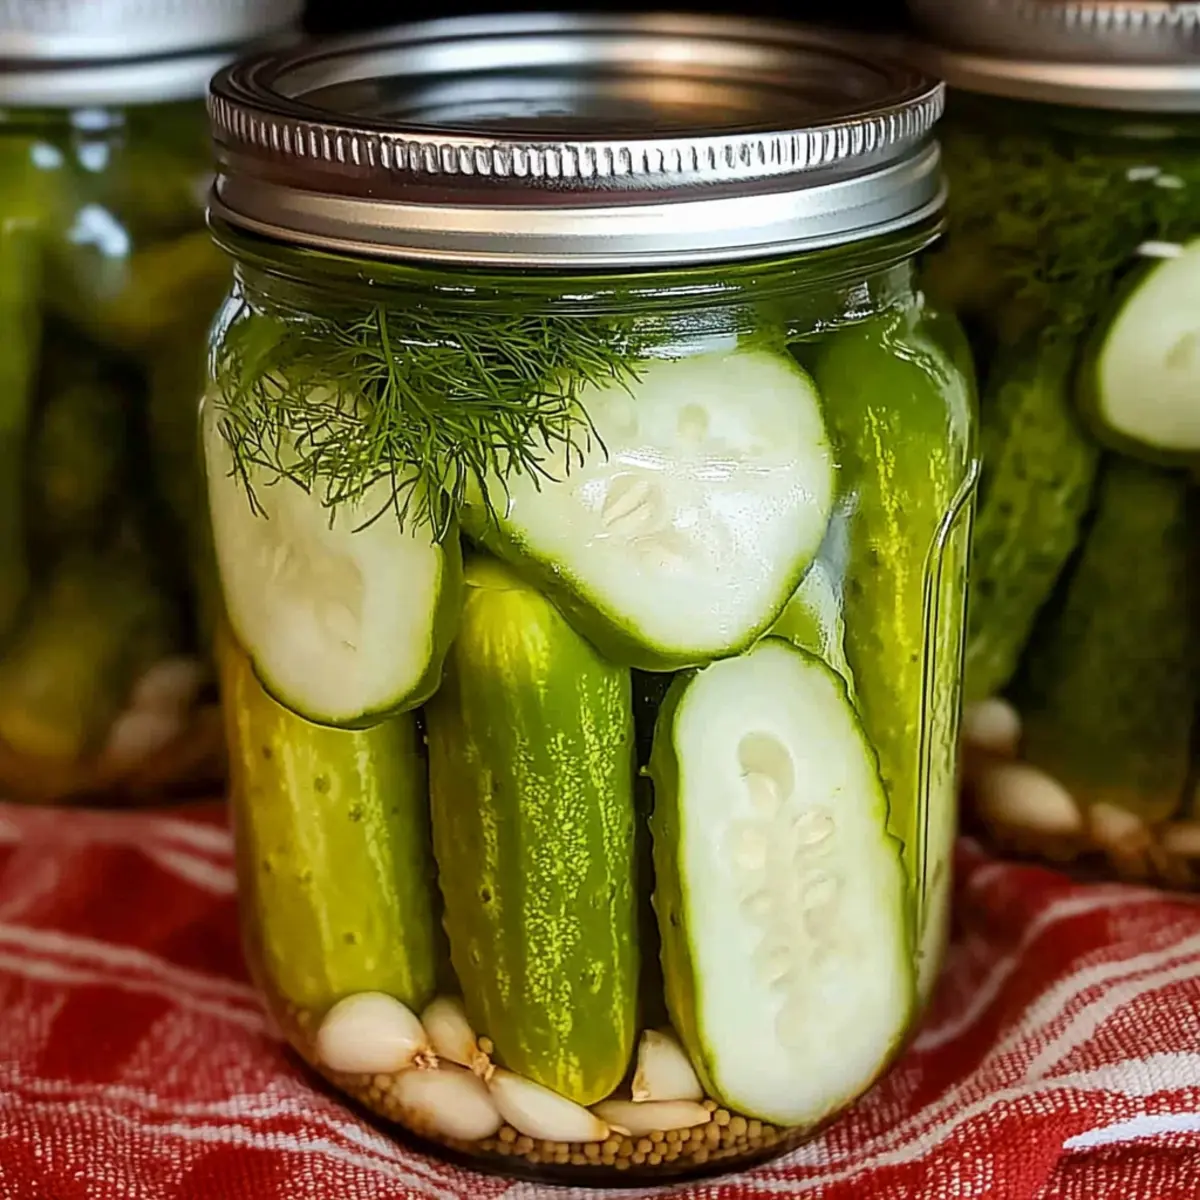
- Cucumbers – Small, fresh pickling cucumbers are best for that delightful crunch; larger cucumbers may turn mushy.
- Onion – Adds a touch of sweetness; use yellow, white, or red onions based on your preference.
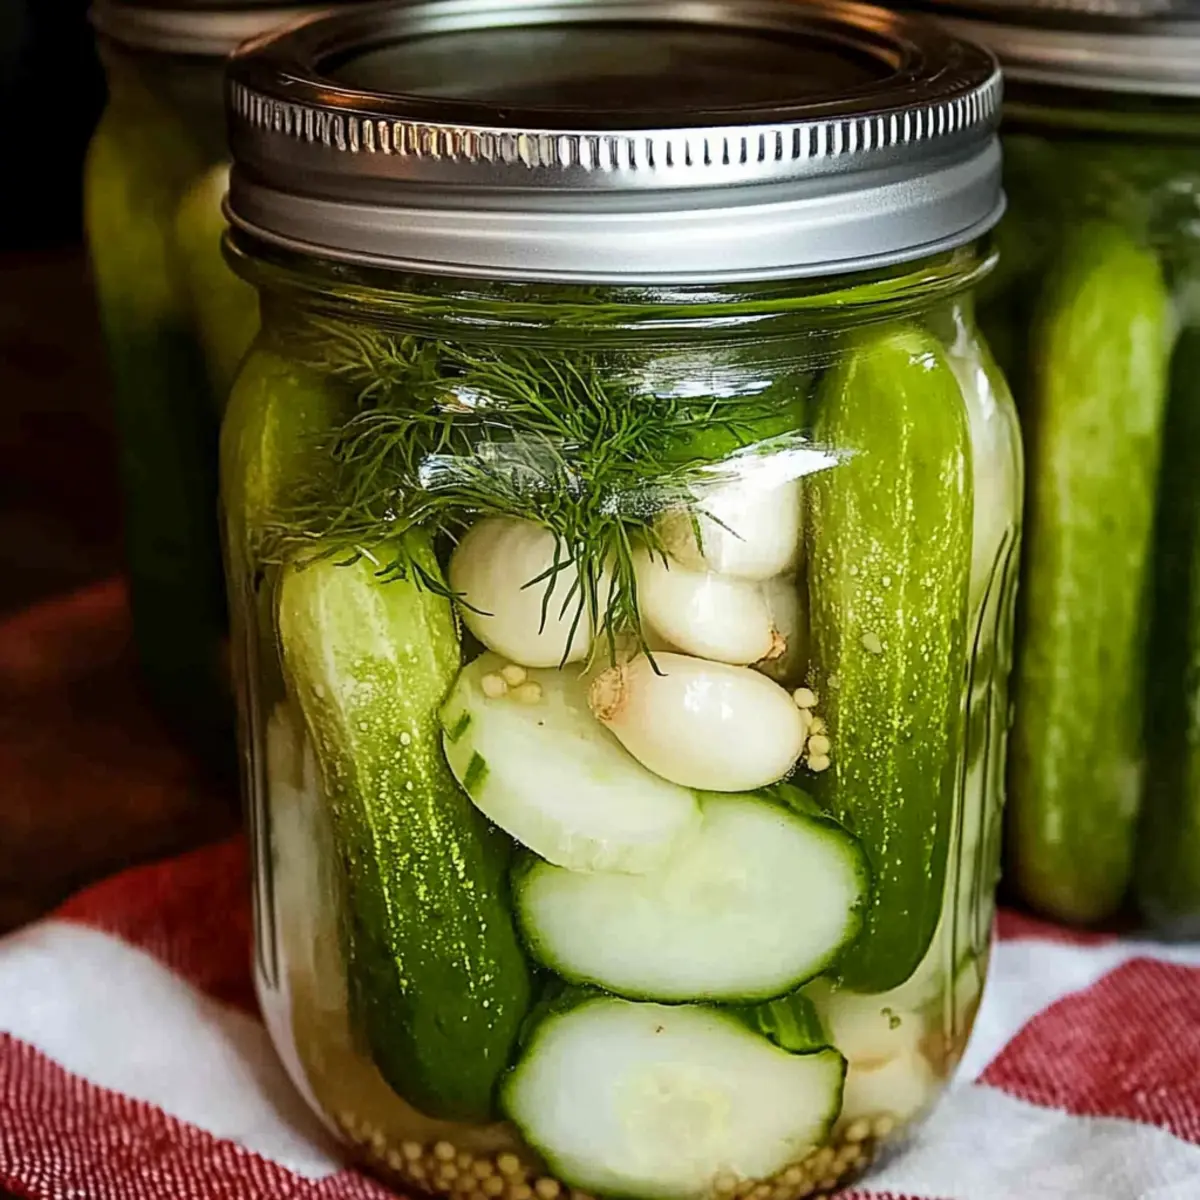
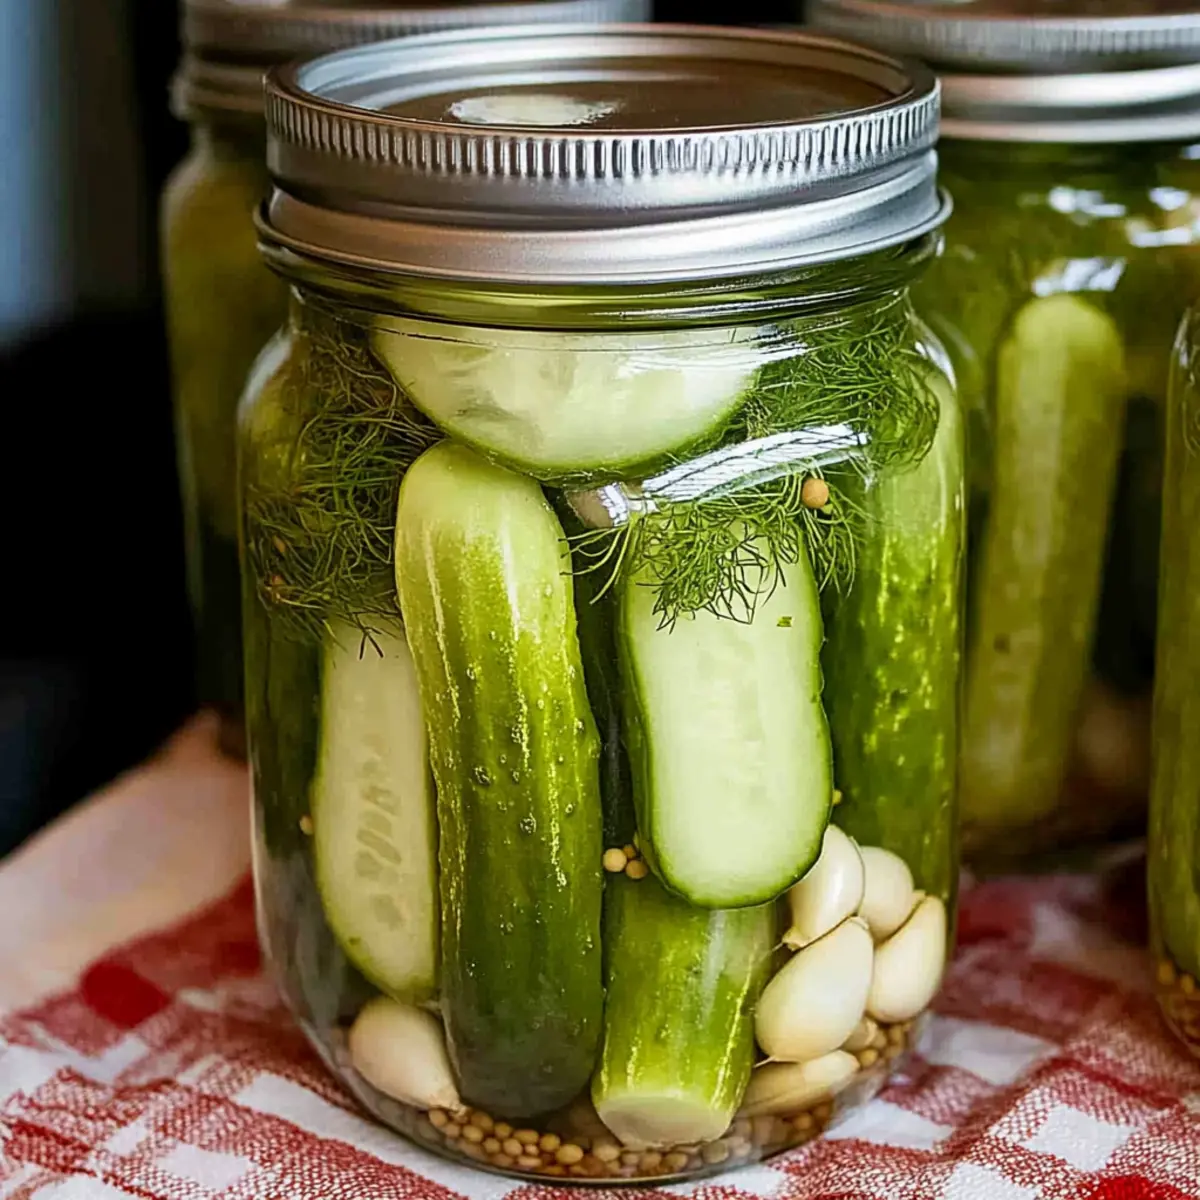
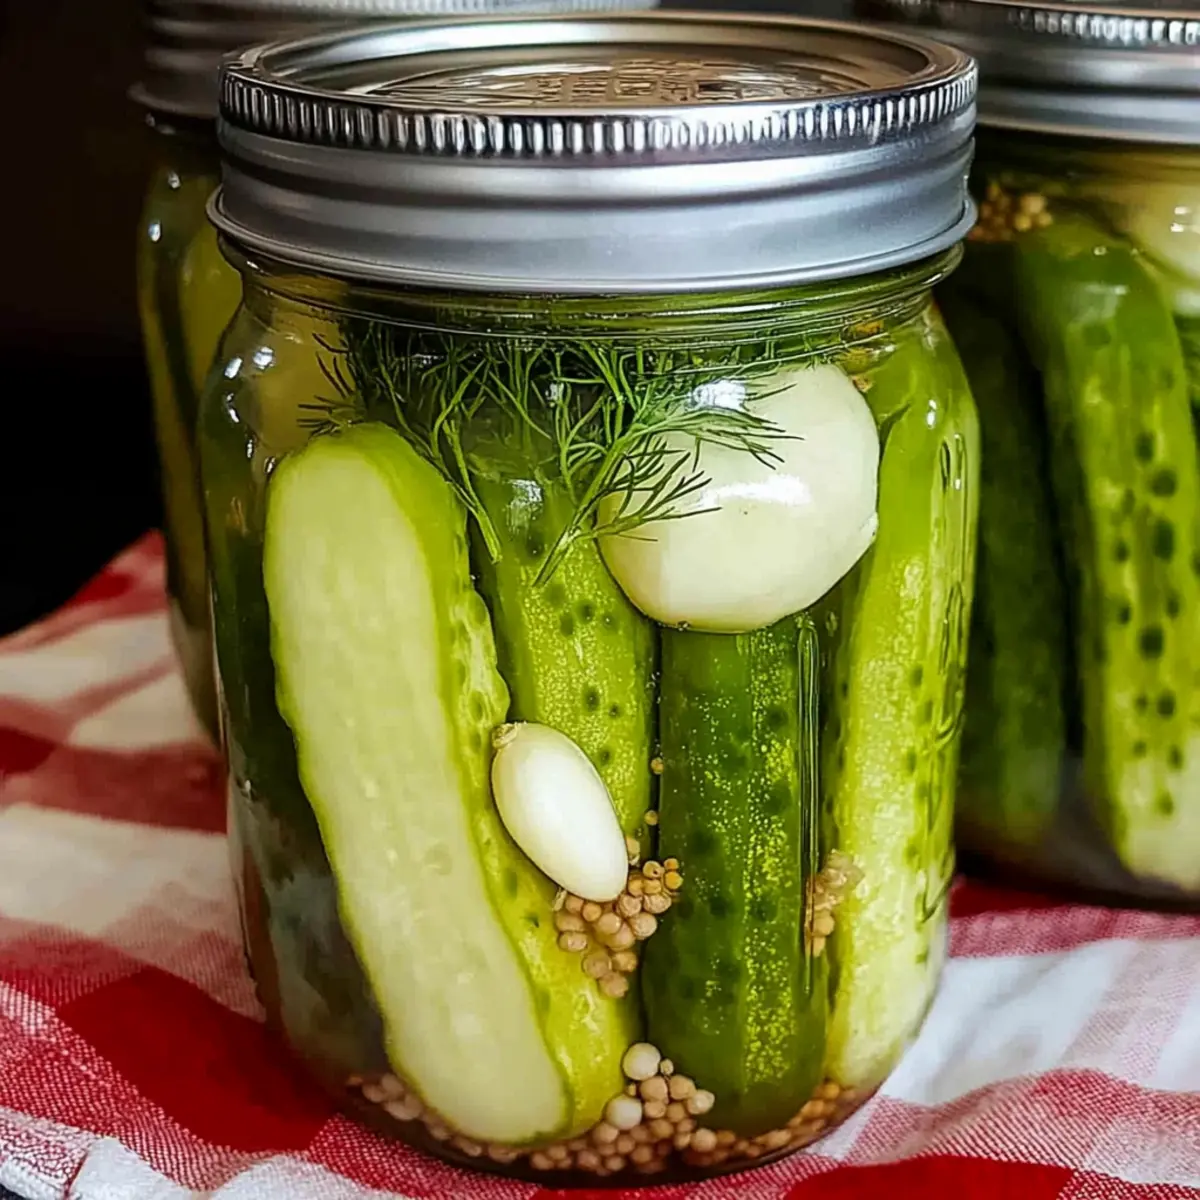
- Garlic (7 cloves) – Optional but brings a robust aroma and flavor; fresh garlic enhances the taste!
- Fresh Dill Weed (7 tbsp) – The star herb for your pickles—essential for the classic dill flavor.
- Mustard Seed (3 ½ tsp) – Adds tangy depth to your crunchy dill pickle recipe!
- Coriander Seed (3 ½ tsp) – Offers a hint of spice; completely optional but enriches flavor complexity.
- Whole Black Peppercorns (3 ½ tsp) – Brings warmth and depth; essential for seasoning.
- Pickle Crisp or Grape Leaves (optional) – Use to ensure extra crunchiness in your pickles without the hassle of pickling lime.
Consider yourself ready to dive into an amazing canning adventure, creating delicious, crunchy dill pickles in no time!
Step‑by‑Step Instructions for Crunchy Dill Pickle Recipe
Step 1: Prepare Canning Supplies
Begin by washing your canning jars, lids, and bands in hot, soapy water, ensuring they are clean and sanitized. As you do this, fill your canner with water, aiming to fill it two-thirds full, and place it on medium heat to warm up while you prepare your pickling ingredients.
Step 2: Prepare the Brine
In a large pot, combine 4 cups of white vinegar, 4 cups of water, and ¼ cup of salt. Bring the mixture to a simmer, stirring occasionally until the salt fully dissolves. Once dissolved, raise the heat to bring the brine to a rolling boil for about 1 minute, which will help infuse the flavors.
Step 3: Prepare Cucumbers and Onions
While the brine is heating, trim the blossom ends off the cucumbers to prevent softening. Cut the cucumbers into ¼-inch rounds and slice the onions into ¼-inch pieces for a nice texture. Set these aside for easy access as you'll add them to the jars shortly.
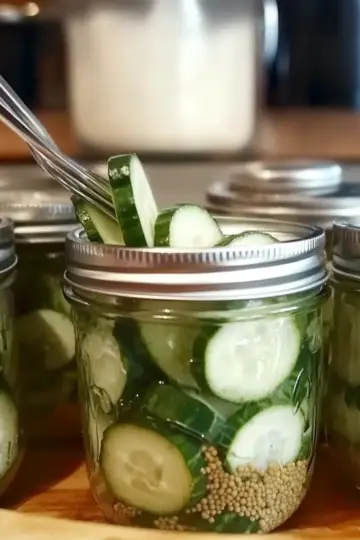
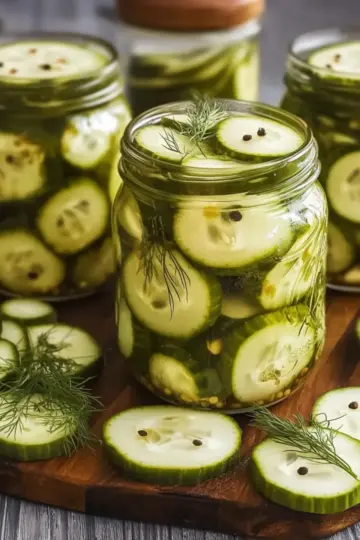
Step 4: Fill the Jars
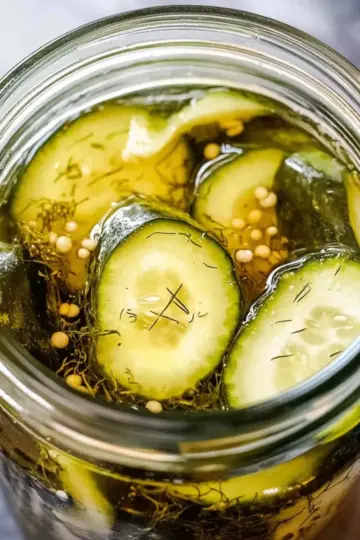
Start packing the cucumbers into your clean jars, placing them upright and adding onion slices on top. Aim for a ½-inch headspace at the top of each jar. To each jar, add 1 clove of garlic, ½ teaspoon of mustard seeds, ½ teaspoon of coriander seeds, ½ teaspoon of black peppercorns, and 1 tablespoon of fresh dill to infuse flavor.
Step 5: Add Brine
Ladle the boiling brine into each jar, filling to maintain that same ½-inch headspace. Make sure to remove any air bubbles by gently tapping the jars or using a non-metal utensil. Wipe the rims of the jars clean to ensure a good seal before placing the sterilized lids on top.
Step 6: Process in Water Bath
Carefully place the filled jars into your prepared canner, ensuring that the water covers them by at least 1 inch. Bring the water back to a boil, then start a timer to process the pint jars for 10 minutes to properly preserve your crunchy dill pickles.
Step 7: Cooling and Storing
Once processed, use tongs to carefully remove the jars from the canner and place them on a clean kitchen towel or cooling rack. Allow them to cool overnight without touching the lids; check that seals are secure by pressing down in the center. Label the jars and store them in a cool, dark place, allowing the flavors to develop for 2-4 weeks before enjoying!
Crunchy Dill Pickle Recipe Variations
Unlock the fun of canning by exploring exciting twists on the classic crunchy dill pickle recipe!
-
Spicy Kick: Add sliced jalapeños or a teaspoon of chili flakes for a zesty heat that complements the tanginess of the pickles. The perfect choice for those who love a little kick in their snacks!
-
Herbal Infusion: Substitute fresh dill with other herbs like tarragon or oregano for a distinct flavor profile. This makes your pickles wildly unique and delicious!
-
Sweet and Savory: Balance the tang with a touch of sugar. Simply add a few tablespoons of sugar to the brine for a delightful sweet and tangy pickle experience.
-
Garlic Lovers: Boost the garlic flavor by adding extra cloves or even roasted garlic for a more mellow, sweet taste. Your pickles will become a staple for garlic fans!
-
Vinegar Variation: Swap the white vinegar for apple cider vinegar for a slightly sweeter and fruitier flavor that whispers of sunny afternoons. This twist is sure to elevate your pickle game!
-
Grape Leaf Crunch: Incorporate grape leaves into your jars to maintain incredible crunch without the hassle of pickling lime. Just a couple of leaves make a big difference in texture.
-
Pickle Chips: Instead of rounds, slice the cucumbers into spears or chips for a fun twist. They’re perfect for snacking or adding to sandwiches!
-
Include Carrots: Add some julienned carrots to the jars for a colorful, crunchy addition that adds a sweet flavor and vibrant appearance. They make excellent snacks too!
Now that you've got some delightful variations in mind, don’t hesitate to experiment and discover your perfect pickle! If you’re looking for a spicy twist, consider our Spicy Pickle Brine as a fun alternative. Happy canning!
What to Serve with Crunchy Dill Pickles?
Indulging in the satisfying crunch of these homemade pickles opens up a world of delightful pairings that can elevate any meal.
-
Classic Cheeseburgers: The tangy crunch of pickles complements the juicy, savory flavors of burgers, adding a beloved crunch and acidity.
-
Potato Salad: Tossing in crunchy dill pickles enhances traditional potato salad with bursts of flavor and texture, making each bite a refreshing surprise.
-
Charcuterie Boards: Include pickles on your charcuterie board for a bright, zesty contrast to meats and cheeses; they add an irresistible crunch that guests will love.
-
Tuna Salad Sandwiches: Incorporating diced pickles into tuna salad brings a punch of flavor and a satisfying crunch, perfect for a light lunch or picnic.
-
Deviled Eggs: Garnish deviled eggs with small pickle slices for a refreshing bite that offsets the creamy filling, offering a delightful visual and textural contrast.
-
Homemade Veggie Wraps: Layer crunchy dill pickles in veggie wraps to add flavor while providing a nice, fresh crunch—ideal for a healthy lunch or snack.
-
Spicy Bloody Marys: A garnish of dill pickles adds an unexpected twist to this classic brunch cocktail, enhancing its savory spice and refreshing quality.
-
Coleslaw: Stirring in some diced pickles into coleslaw adds a unique twist, enhancing the crunch factor while providing an intriguing flavor depth.
-
Apple Crisp: For dessert, serve crunchy dill pickles alongside a scoop of vanilla ice cream on warm apple crisp for a surprisingly delightful contrast of sweet and tangy.
How to Store and Freeze Crunchy Dill Pickles
Fridge: Store your sealed jars of crunchy dill pickles in the refrigerator once opened. They’ll stay crisp and flavorful for up to 3 months after opening.
Cool, Dark Place: Unopened jars can be stored in a cool, dark place for optimal flavor retention. They remain perfectly preserved for up to one year.
Avoid Freezing: Freezing is not recommended for pickles, as it alters the texture and crunchiness that you love. For best results, enjoy fresh from the jar!
Reheating: If you're using pickles in warm dishes, there’s no need to reheat. Simply add them to your meal for a delightful crunch and tang.
Make Ahead Options
These crunchy dill pickles are perfect for meal prep enthusiasts! You can wash and prepare the canning jars and lids up to 24 hours in advance, allowing you to save time on canning day. Additionally, slice your cucumbers and onions, and store them in an airtight container in the refrigerator for up to 2 days before pickling. This ensures they stay fresh and crisp. When you're ready to make the pickles, simply follow the original steps by heating the brine and filling your jars with the prepped ingredients, ensuring to maintain that delightful crunch of your crunchy dill pickle recipe. Enjoy homemade goodness with minimal fuss!
Expert Tips for Crunchy Dill Pickles
-
Choose the Right Cucumbers: Use small, fresh pickling cucumbers for the ultimate crunch; larger cucumbers can lead to mushy pickles.
-
Trim Blossom Ends: Always cut off the blossom ends of cucumbers before pickling to avoid enzyme-related softening, ensuring that your crunchy dill pickle recipe stays crisp.
-
Ensure Proper Seal: After filling and sealing jars, make sure the lids are tight and allow for a sufficient cooling time to achieve seals that keep your pickles fresh longer.
-
Adjust for Altitude: Remember that processing times may vary with altitude; adjust according to your local guidelines for the best preservation results.
-
Consider Flavor Variations: Experiment with spices like chili flakes or additional herbs for unique twists to your crunchy dill pickles, making them truly your own!
Crunchy Dill Pickle Recipe FAQs
What type of cucumbers should I use for the best results?
For the perfect crunch in your crunchy dill pickle recipe, it's best to use small, fresh pickling cucumbers. These varieties maintain a firmer texture than larger slicing cucumbers, which can turn mushy during the pickling process. Look for cucumbers that are firm, with vibrant green skin and no dark spots.
How should I store my crunchy dill pickles?
Once your crunchy dill pickles are sealed, store them in a cool, dark place for optimal flavor retention. Properly sealed jars can last for up to one year. After opening, keep them in the refrigerator, where they’ll maintain their delightful crunch and flavor for about 3 months.
Can I freeze crunchy dill pickles?
Freezing is not recommended for crunchy dill pickles, as it compromises their signature texture and crunchiness. If you want to preserve them, stick to canning. Enjoy your pickles fresh from the jar for the best experience!
What should I do if my pickles are soggy?
If you end up with soggy pickles, it’s often due to using larger cucumbers or not trimming the blossom end. Always trim the blossom end before pickling, as it contains enzymes that can soften the pickles. For future batches, ensure you're using the right-sized pickling cucumbers for that satisfying crunch.
Are there any dietary considerations with this recipe?
Absolutely! If you or your loved ones have specific dietary restrictions, I recommend double-checking your ingredient labels. For instance, ensure that the vinegar and salt you use don't contain any additives that might trigger allergies. It's a safe bet to use fresh ingredients, particularly the dill and spices, to avoid preservatives commonly found in store-bought varieties.
Crunchy Dill Pickle Recipe: Your Must-Try Summer Snack!
Ingredients
Equipment
Method
- Prepare Canning Supplies: Wash jars, lids, and bands in hot, soapy water; fill canner with water and heat.
- Prepare the Brine: Combine vinegar, water, and salt in a pot, simmer and then boil for 1 minute.
- Prepare Cucumbers and Onions: Trim cucumber ends, cut into ¼-inch rounds, and slice onions.
- Fill the Jars: Pack cucumbers in jars, add onion, garlic, mustard seeds, coriander seeds, black peppercorns, and dill.
- Add Brine: Ladle boiling brine into jars, leave ½-inch headspace, and clean rims before sealing.
- Process in Water Bath: Place jars in canner, cover with water, boil and process pint jars for 10 minutes.
- Cooling and Storing: Remove jars and cool overnight, check seals, label, and store in a cool dark place.
Leave a Reply