
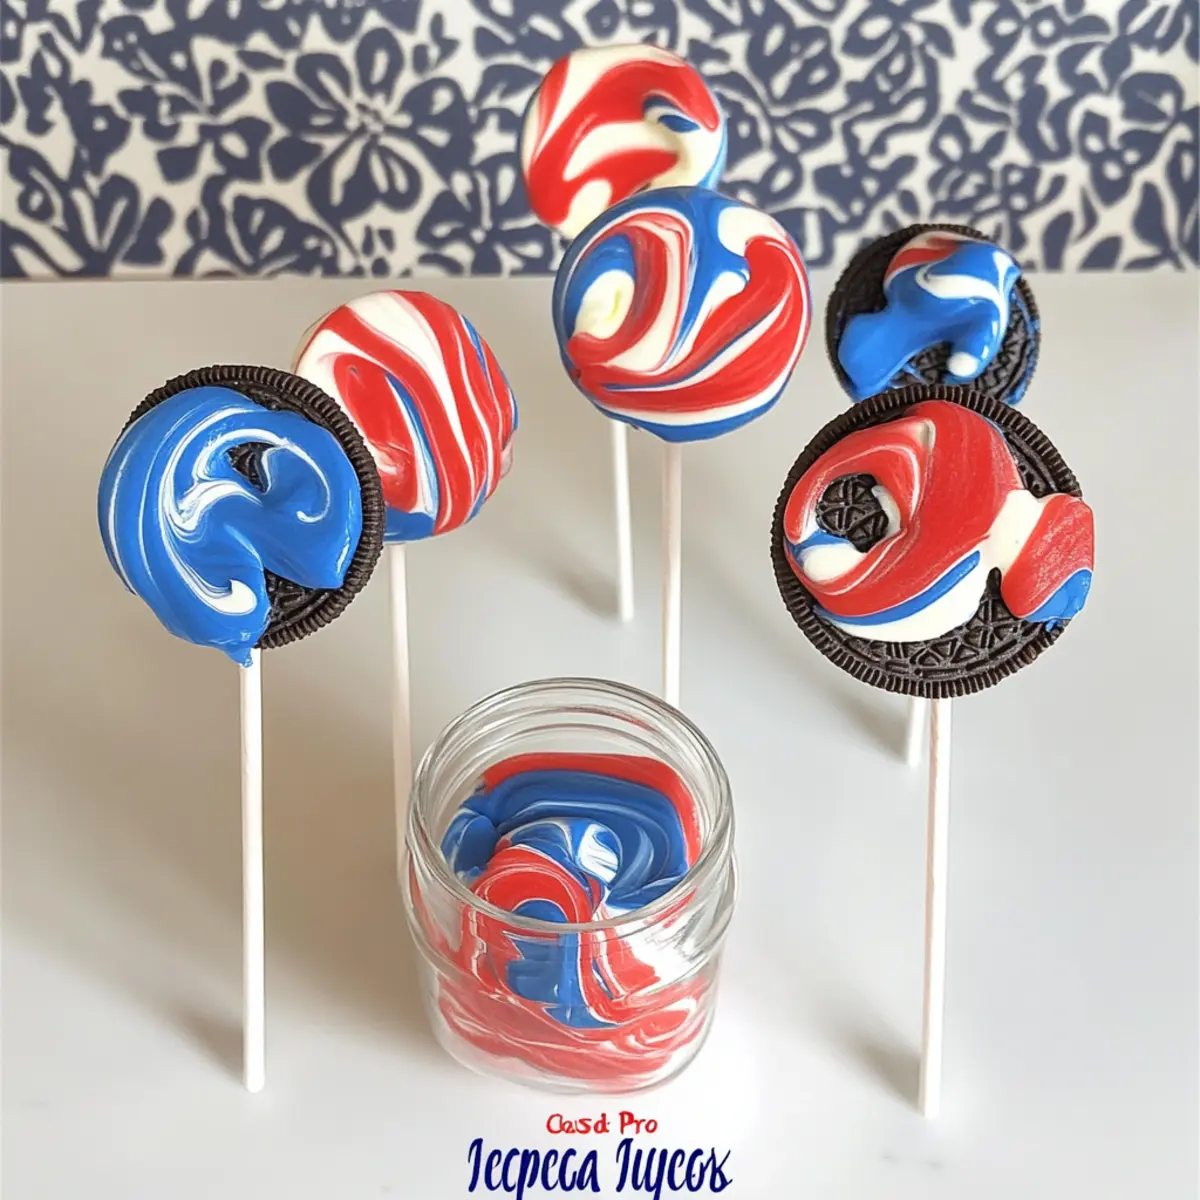
As the sun sets on a hot summer day, I find myself daydreaming about the exciting gatherings and barbecues that make this season magical. This year, I’m all set to impress my friends and family with my Easy Red, White, and Blue Oreo Pops! These vibrant treats don’t just catch the eye with their festive colors; they’re a breeze to whip up, making them perfect for both novice and experienced bakers alike. Not only do they offer a fun no-bake option that kids will absolutely love, but they also bring a sweet, creamy indulgence that's impossible to resist. Whether you're serving them at a Fourth of July picnic or simply craving a burst of summer sweetness, these pops will surely steal the show. Who’s ready to dive into this delightful treat and make some colorful memories?
Why are Oreo Pops a must-try?
Effortless Creation: These Red, White, and Blue Oreo Pops are incredibly simple to make, requiring minimal baking skills and just a few ingredients.
Kid-Friendly Fun: With their vibrant colors and easy assembly, kids will love helping out in the kitchen, making it a perfect family project.
Festive Appeal: Ideal for Fourth of July celebrations, their dazzling appearance will surely impress your guests and elevate any summer gathering.
Versatile Options: Customize your pops with various Oreos and toppings, or try using sprinkles for an extra touch of festivity. For more fun, check out these Starbucks Copycat Pops!
Great for Make-Ahead: These treats are perfect for prepping in advance, allowing you to save time while still offering a beautiful dessert to your guests. Enjoy the creamy, crunchy delight that is sure to be a hit!
Red, White, and Blue Oreo Pops Ingredients
These delightful Oreo pops are easy to make and require just a few ingredients!
For the Pops
- Red, White, and Blue Candy Melts – Essential for coating the pops; you can swap with any color candy melts for customization.
- Oreos – The backbone of our pops; opt for Double Stuffed Oreos for an extra creamy filling and better sticking power.
- Sucker Sticks – To hold your pops; wooden ice cream sticks are a great alternative if you don’t have sucker sticks on hand.
For Decoration
- Sprinkles – Add a festive touch; these can complement the vibrant colors of your red, white, and blue Oreo pops.
- Toothpick – Perfect for swirling colors on the pops; use it gently to maintain the fun design without losing color contrast.
With these ingredients, you’re just a few steps away from creating the perfect red, white, and blue Oreo pops that will dazzle at any summer celebration!
Step‑by‑Step Instructions for red, white, and blue Oreo pops
Step 1: Melt the Candy Melts
Begin by melting the red, white, and blue candy melts according to the instructions on the package, typically in a microwave-safe bowl. Heat in 30-second intervals, stirring between each until smooth and fully melted. This will ensure a silky coating for your red, white, and blue Oreo pops. Set aside the melted candy to slightly cool for easy dipping.
Step 2: Prepare the Oreos
Carefully open each Oreo cookie by twisting them apart, ensuring that the cream filling stays on one side. Dip a sucker stick into the melted white candy, then insert it into the cream-filled side of each Oreo. This step helps the stick adhere better while creating a solid foundation for your pops.
Step 3: Freeze the Assembled Pops
Once your Oreo cookies are assembled with the sticks, place them in the freezer for about 5 minutes. This chilling step helps the sticking candy set slightly, making the next dipping phase easier and ensuring that your pops hold their shape when coated.
Step 4: Dip in White Candy Melts
Remove the frozen Oreo pops from the freezer and dip them into the melted white candy melts. Swirl the pops gently to coat completely but shake off any excess candy. This process creates a smooth, even layer that will serve as the base for your vibrant decorations on these red, white, and blue Oreo pops.
Step 5: Set the Pops to Dry
Place the dipped Oreo pops on a sheet of wax paper, ensuring they don't touch each other. Allow them to set at room temperature for about 5-10 minutes until the coating hardens slightly. This step will give you a nice, firm base to work with for decorating.
Step 6: Drizzle with Red and Blue Candy Melts
Once the white layer is set, take the melted red and blue candy melts and drizzle them over the Oreo pops. Use a toothpick to gently swirl the colors together, creating fun designs, but be careful not to over-mix to maintain the vibrant red, white, and blue contrast.
Step 7: Final Set Time
After decorating, let the pops cool and harden fully at room temperature for 15-20 minutes. This final setting ensures that your red, white, and blue Oreo pops are not only visually stunning but also ready for serving at your festive gatherings.
Red, White, and Blue Oreo Pops Variations
Feel free to get creative and make these pops your own with a few charming alterations!
- Flavor Twist: Use different Oreo flavors like mint or peanut butter to add a unique taste to your pops.
- Chocolate Bark: Swap candy melts for white chocolate bark, coloring it yourself for a creamy coating.
- Sprinkle Heaven: Top with festive sprinkles or edible glitter for a dazzling party presentation on your pops!
- Nutty Crunch: Add crushed nuts or toffee bits on top before the drizzle sets for an added crunch.
For those who love a sweet surprise, consider a mini-paragraph variation like adding chopped fruits. Diced strawberries or blueberries can give a refreshing twist and bring a burst of real fruit flavor. They also add a fun, confetti-like surprise inside the pops that kids will adore.
- Fruit-Flavored Drizzle: Combine melted white chocolate with fruit extracts for an aromatic twist to the topping.
- Heated Up: Add a pinch of cayenne pepper or chili powder to the melted chocolate for an unexpected spicy kick.
These splendid variations ensure that your treats are not only festive but tailored to different taste preferences. For even more fun dessert ideas, check out these delicious Oreo Balls Decadent or our signature Chicken Waffle Casserole that your family will surely enjoy!
Make Ahead Options
These festive red, white, and blue Oreo pops are perfect for meal prep, allowing you to save time and enjoy the celebration stress-free! You can assemble the pops (without the candy coating) up to 24 hours in advance; just keep them covered in the refrigerator to maintain their freshness. For best results, freeze the dipped Oreo pops after they’ve been coated in white candy melts, then allow them to cool for about 15-20 minutes at room temperature before storing them. When it's time to serve, simply drizzle with the red and blue melts and allow them to harden for an additional 10 minutes—you'll have deliciously vibrant pops ready to impress your guests with minimal last-minute effort!
What to Serve with Easy Red, White, and Blue Oreo Pops
As you whip up these vibrant treats, think about creating a delightful spread that’ll make your summer gathering unforgettable.
- Grilled Corn on the Cob: Sweet and smoky, this classic summer side brings a satisfying crunch that pairs beautifully with the creaminess of the pops.
- Fruit Salad: Light and refreshing, a mix of seasonal fruits adds a burst of flavor and color, balancing the sweetness of the Oreo pops.
- Classic BBQ Chicken: Juicy and savory, this dish offers a hearty contrast to the sugary pops, creating a well-rounded meal experience.
- Potato Salad: Creamy and tangy, potato salad gives a hint of comfort that complements the festive and fun nature of the pops.
- Lemonade Spritzer: This tart and fizzy drink refreshes the palate, making it the perfect pairing with your indulgent dessert.
- Chocolate Chip Cookies: For an extra sweet treat, classic cookies can be fun for all ages. They bring a warm, homemade feeling to your dessert table.
Imagine the joy of watching friends and family devour these fun creations while enjoying delightful bites all around!
Expert Tips for Red, White, and Blue Oreo Pops
- Stick Stability: Ensure the sucker sticks are inserted deep into the cream filling for better adherence, preventing pops from falling apart during dipping.
- Temperature Control: Keep your melted candy melts at a warm but not hot temperature. Too hot can cause Oreos to lose their shape when dipped.
- Swirling Technique: Work quickly and gently when swirling colors on the pops, as over-mixing will turn the vibrant red and blue into a dull purple hue.
- Chill Time: Don’t skip the freezing step; it helps the stick adhere better and prevents the pops from becoming too soft or messy while coating.
- Decorate Wisely: Add sprinkles right after drizzling the candy melts, as they stick better to a wet surface. This will enhance the visual appeal of your red, white, and blue Oreo pops!
Storage Tips for Red, White, and Blue Oreo Pops
Room Temperature: Leave the Oreo pops at room temperature for up to 2 hours if serving; however, keeping them in a cool place prevents melting.
Fridge: Store leftover pops in an airtight container in the refrigerator for up to 1 week. This keeps them fresh while providing a slightly firmer texture.
Freezer: For longer storage, place the Oreo pops in a single layer in a freezer-safe container. They can be stored for up to 3 months. Allow them to defrost in the fridge before enjoying.
Reheating: Avoid reheating the pops; they are best enjoyed chilled or at room temperature.
Red, White, and Blue Oreo Pops Recipe FAQs
What is the best way to select ripe ingredients?
Absolutely! When selecting your Red, White, and Blue Candy Melts, look for packaging that is intact and avoid any that have visible dark spots or damage. Freshly made Oreos can sometimes have a more satisfying crunch, so check the expiration date to ensure you’re using the freshest cookies possible for your pops.
How should I store Red, White, and Blue Oreo Pops?
You can keep your Oreo pops in an airtight container in the refrigerator for up to one week. This method preserves their freshness and ensures that they maintain that delicious creamy texture. If you're serving them after a few days, let them sit for about 10 minutes at room temperature for the best flavor experience!
Can I freeze Red, White, and Blue Oreo Pops?
Yes, absolutely! To freeze your pops, arrange them in a single layer in a freezer-safe container, ensuring they’re not touching to avoid sticking together. They can be stored for up to 3 months. When ready to enjoy, simply transfer them to the fridge and allow them to thaw slowly for a few hours before serving. This method keeps them intact while ensuring they’re still deliciously enjoyable!
What should I do if my coating is too hot?
When your candy melts are overheated, they can become too liquefied, causing your Oreos to lose their shape. If this happens, let the melted candy cool for a few minutes until it’s warm but not hot to the touch—around 90°F is ideal. This cooling period helps the Oreos maintain their structural integrity while getting a beautiful, even coating.
Can I use different flavors of Oreos?
The more the merrier! Absolutely! Feel free to experiment with various Oreo flavors such as mint, peanut butter, or even seasonal options like pumpkin spice for a unique twist on these festive pops. This adds a special touch that your guests will love. Just keep in mind that some flavors may alter the overall sweetness, so adjust toppings accordingly!
Are these Oreo Pops safe for pets or individuals with allergies?
It’s important to note that Oreos contain ingredients that are not safe for pets, particularly chocolate and sugar. If you have guests with allergies, always check the ingredient list on your candy melts and Oreos for potential allergens such as dairy or gluten, and consider offering an alternative treat that meets their dietary needs.
Festive Red, White, and Blue Oreo Pops for Sweet Summer Fun
Ingredients
Equipment
Method
- Begin by melting the red, white, and blue candy melts according to the instructions on the package, typically in a microwave-safe bowl. Heat in 30-second intervals, stirring between each until smooth and fully melted.
- Carefully open each Oreo cookie by twisting them apart, ensuring that the cream filling stays on one side. Dip a sucker stick into the melted white candy, then insert it into the cream-filled side of each Oreo.
- Once your Oreo cookies are assembled with the sticks, place them in the freezer for about 5 minutes.
- Remove the frozen Oreo pops from the freezer and dip them into the melted white candy melts. Swirl the pops gently to coat completely but shake off any excess candy.
- Place the dipped Oreo pops on a sheet of wax paper, ensuring they don't touch each other. Allow them to set at room temperature for about 5-10 minutes.
- Once the white layer is set, take the melted red and blue candy melts and drizzle them over the Oreo pops. Use a toothpick to gently swirl the colors together.
- After decorating, let the pops cool and harden fully at room temperature for 15-20 minutes.
Leave a Reply