
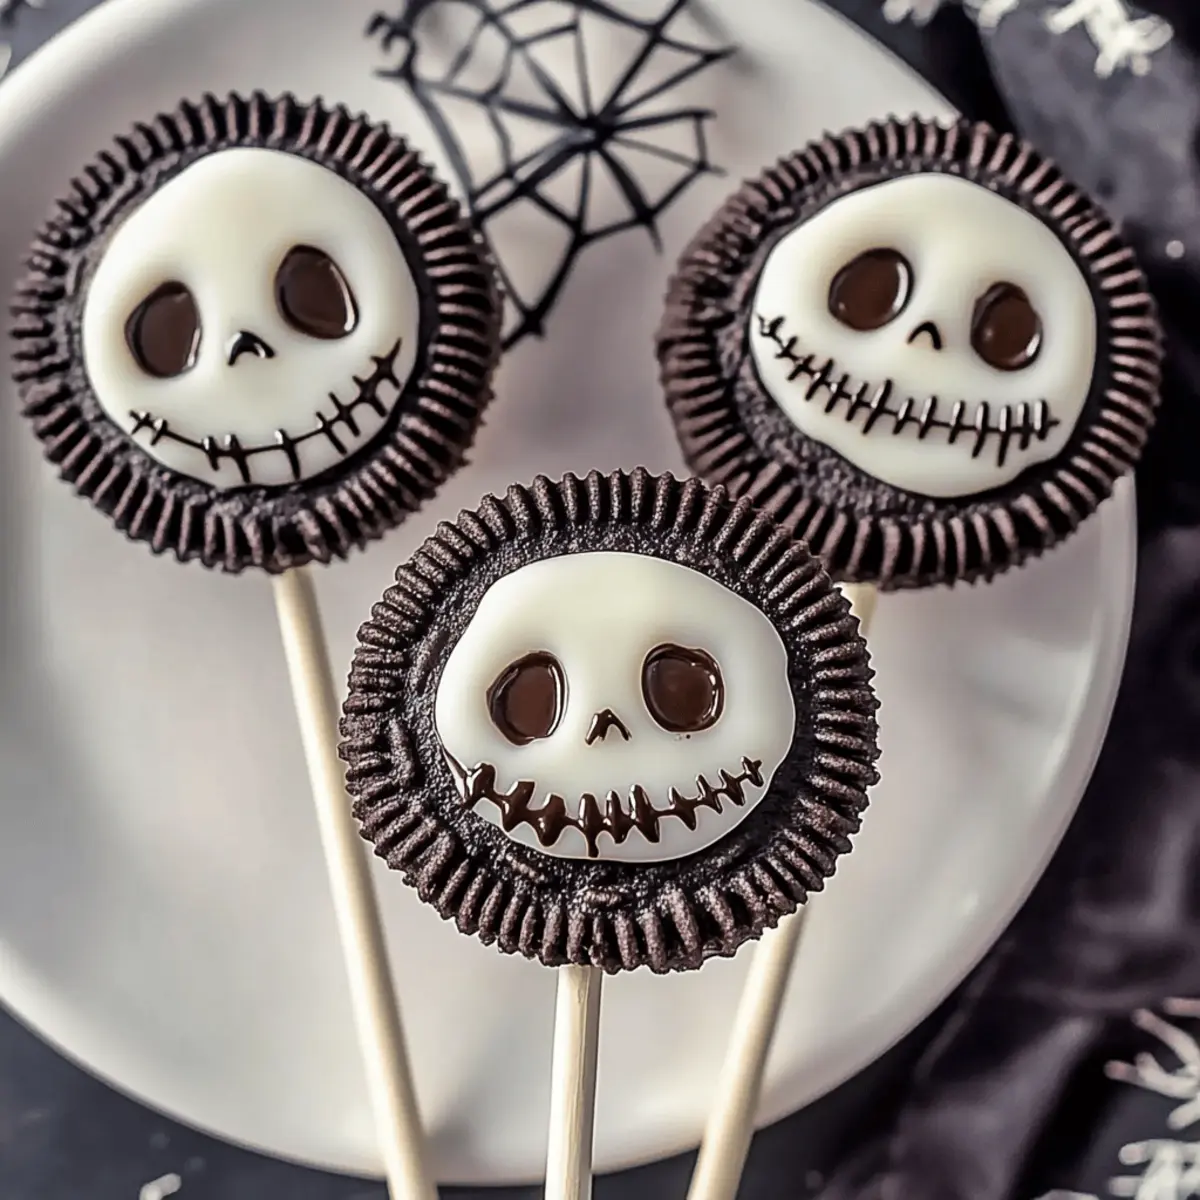
As I stood in my kitchen, surrounded by a flurry of Halloween decorations, a little spark of inspiration struck. This year, I couldn’t resist creating something whimsical yet delicious: Delightful Jack Skellington Oreo Pops for Halloween Fun! These no-bake treats effortlessly transform ordinary Oreos into magical bites, coated in rich chocolate and adorned with playful features. Not only are they a breeze to whip up, but they also bring smiles to both kids and adults alike, making them a crowd-pleaser at any spooky gathering. With the freedom to customize toppings and coatings, you can add your own creative twist while enjoying the process. So, are you ready to enchant your guests with a Halloween treat that offers delightful sweetness and a hint of nostalgia? Let’s dive into this fun recipe!
Why Are These Oreo Pops So Magical?
Whimsical Shapes: Each Jack Skellington Oreo Pop is not only delicious but transforms ordinary treats into playful characters that captivate everyone.
No-Bake Convenience: Forget complicated baking steps! This recipe is quick and hassle-free, making it perfect for busy schedules.
Endless Customization: Create unique pops using colorful coatings and festive sprinkles that reflect your personal style.
Crowd-Pleasing Delight: With a creamy inside and chocolatey outside, these pops are sure to be the highlight of any Halloween gathering or party. If you love these, you’ll also enjoy Oreo Balls Decadent or Starbucks Copycat Pops for more fun ideas!
Make-Ahead Friendly: Prep in advance and store them for a week, ensuring you always have a treat ready for spontaneous celebrations!
Delightful Jack Skellington Oreo Pops Ingredients
For the Pops
- Oreo cookies – The foundation of these tasty pops, providing a rich and creamy flavor. You can substitute with gluten-free Oreos if needed.
- Cream cheese – Binds the Oreo crumbs together for a smooth texture; feel free to swap it with frosting for an even sweeter treat.
- Black chocolate melts – This coating adds a deliciously rich flavor; try dark chocolate or colorful candy melts for a creative twist.
- White chocolate melts – Perfect for creating Jack’s whimsical face; colorful candy melts may also be used for a fun variety.
- Popsicle sticks – Essential for easy handling and presentation; no substitutes necessary here!
- Halloween-themed decorative sprinkles – These add a festive touch and visual appeal; use edible glitter or themed toppings to enhance the spookiness.
For Additional Customization
- Flavored extracts – A splash of peppermint or vanilla can elevate the cream cheese mixture for an extra flavor boost.
- Colorful toppings – Personalize with separate themed sprinkles in colors like orange and purple for a Halloween vibe.
Step‑by‑Step Instructions for Delightful Jack Skellington Oreo Pops for Halloween Fun
Step 1: Crush Oreos
Begin by crushing the Oreo cookies into fine crumbs. You can achieve this by using a food processor for a quick and thorough blend, or place the cookies in a zip-top bag and crush them with a rolling pin. Ensure the crumbs are uniform, as this will create a smooth mixture when combined with cream cheese.
Step 2: Mix with Cream Cheese
In a large mixing bowl, combine the Oreo crumbs with softened cream cheese. Use a spatula or your hands to blend the mixture until it reaches a smooth and moldable consistency. This step is crucial, as it binds the crumbs together and sets the foundation for your Delightful Jack Skellington Oreo Pops.
Step 3: Form Balls
Roll the mixture into 1-inch balls and arrange them on a parchment-lined baking sheet. Make sure they are evenly spaced to avoid sticking together. Once formed, place the baking sheet in the freezer for about 30 minutes to firm up the balls, making them easier to dip later.
Step 4: Melt Chocolate
While the pops are chilling, melt the black chocolate melts in a microwave-safe bowl. Heat them in 30-second intervals, stirring in between, until smooth and fully melted. This should take about 1-2 minutes. Ensure the chocolate is not too hot to prevent it from melting the pops when you dip them.
Step 5: Dip Pops
Take the chilled Oreo balls out of the freezer and insert a popsicle stick into each one. Carefully dip each ball into the melted chocolate, ensuring a complete coating. Allow any excess chocolate to drip off, then return them to the parchment-lined sheet, keeping them ready for decorating.
Step 6: Decorate
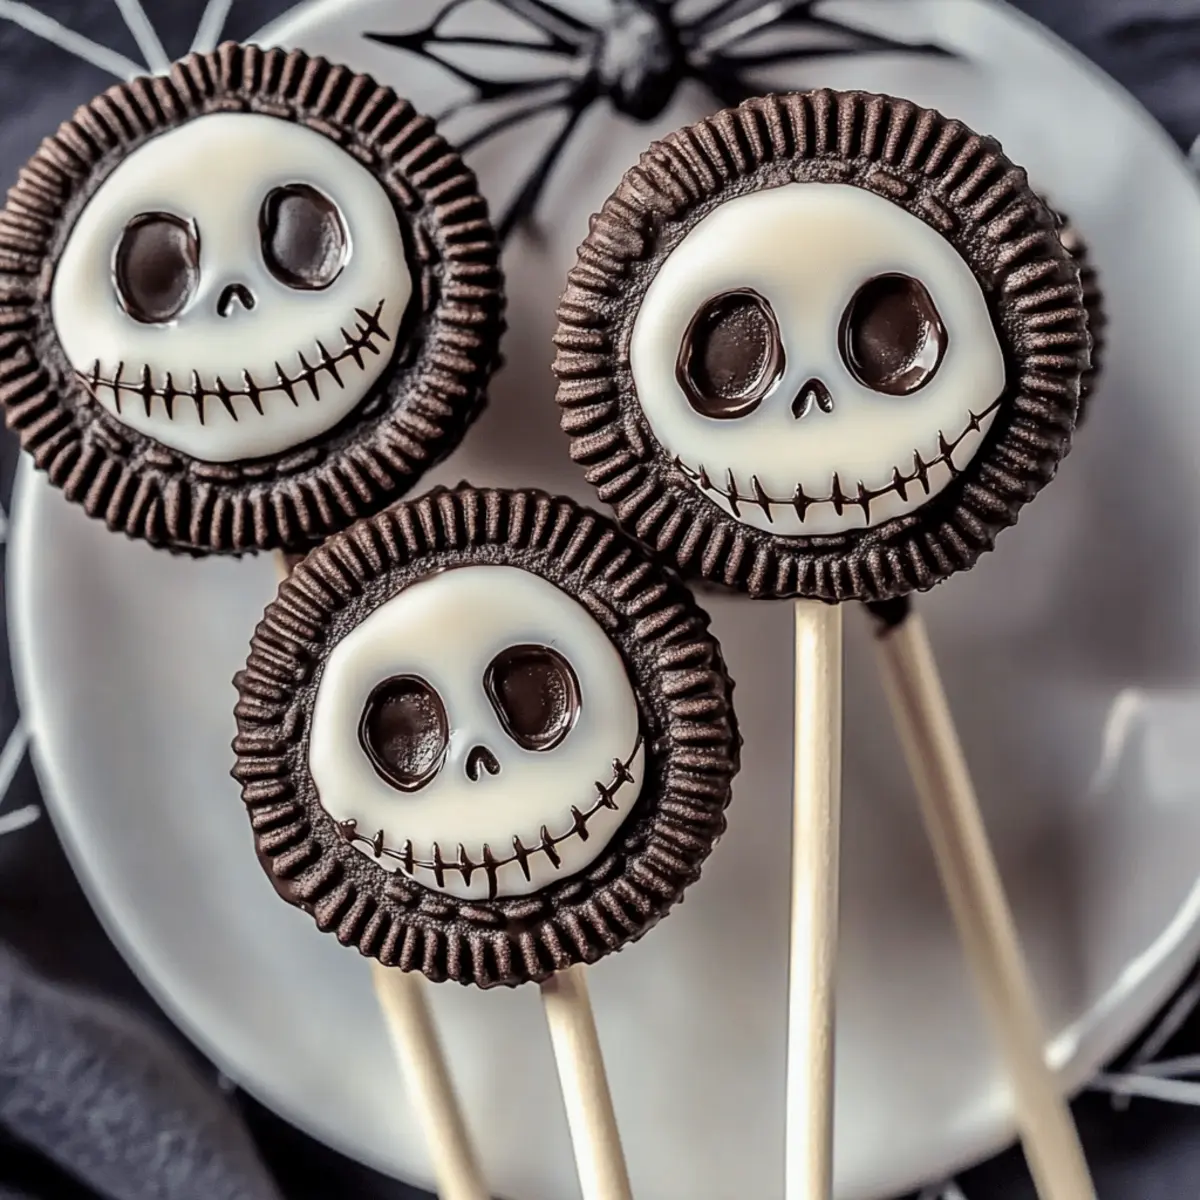
Before the chocolate coating sets, get creative! Sprinkle Halloween-themed decorative sprinkles on top or melt white chocolate to pipe Jack’s facial features onto the pops. Be quick, as the chocolate should be tacky enough for the decorations to adhere. Let the pops sit until the chocolate has completely hardened and set, which may take about 15-20 minutes.
Delightful Jack Skellington Oreo Pops Variations
Invite your creativity to shine by customizing these pops to suit your taste and style!
- Gluten-Free: Swap regular Oreos for gluten-free versions to make these treats accessible for everyone.
- Dairy-Free: Use vegan cream cheese and dairy-free chocolate melts for a scrumptious dairy-free delight.
- Minty Fresh: Add a few drops of peppermint extract to the cream cheese mixture for a refreshing twist.
- Colorful Coating: Use bright and fun candy melts instead of black chocolate for a vibrant look that kids will adore.
- Flavor Boost: Experiment with flavored extracts, such as almond or orange, to elevate the overall flavor profile.
- Festive Toppings: Decorate with assorted sprinkles or edible glitter to bring an extra touch of festivity to your creations.
- Crunchy Texture: Incorporate crushed nuts or toffee bits in the Oreo mixture for an unexpected crunch in every bite.
- Spicy Kick: For those who enjoy a bit of heat, add a tiny dash of cayenne pepper to the chocolate melt mixture for a surprising flavor combination.
If you're looking for more fun and delicious ideas, consider trying Brussels Sprouts Muffins for a savory twist or why not create some delightful Starbucks Copycat Pops for your next get-together? The possibilities are endless!
What to Serve with Jack Skellington Oreo Pops?
Elevate your Halloween gathering with complementary dishes that match the playful spirit of these delightful treats!
- Spooky Fruit Platter: Fresh fruit like strawberries and bananas adds a refreshing touch, perfect for balancing the rich flavors of the Oreo pops.
- Ghostly Marshmallow Treats: Create simple marshmallow pops dipped in white chocolate; their fluffy sweetness pairs beautifully with the pops.
- Crispy Pumpkin Chips: The crunchy texture and subtle sweetness bring a delightful contrast, while the pumpkin theme enhances the festive atmosphere.
- Witch’s Brew Punch: A fruity, fizzy beverage adds excitement—garnish with gummy worms to keep the Halloween vibe going strong!
- Chocolate-Covered Pretzels: Sweet and salty come together in these treats, enhancing the rich chocolate of the pops while offering a satisfying crunch.
- Themed Cupcakes: Decorate cupcakes with spooky designs—like bats or ghosts—to add variety and sugary indulgence to your Halloween dessert table.
- Apple Cider: Warm apple cider invokes cozy autumn feelings and highlights the festive elements of your gathering. Paired with the pops, it creates a cozy depth of flavor.
- Halloween Charcuterie Board: Include assorted cheeses, crackers, and themed treats for a fun grazing experience that invites social interaction.
How to Store and Freeze Delightful Jack Skellington Oreo Pops
Fridge: Keep your Oreo pops in an airtight container in the fridge for up to 1 week. This helps maintain their freshness and prevents them from drying out.
Freezer: For longer storage, these pops freeze beautifully! Place them in a single layer in a freezer-safe container for up to 3 months. Just ensure they are well-wrapped or sealed to prevent freezer burn.
Thawing: To enjoy right from the freezer, let the Delightful Jack Skellington Oreo Pops thaw in the fridge for a few hours before serving. Avoid microwaving as it can ruin their texture.
Serving: Prepare them ahead of time, and when it's party time, simply take out as many as you need for a delightful treat everyone will love!
Make Ahead Options
These delightful Jack Skellington Oreo Pops are perfect for meal prep, making your Halloween celebrations stress-free! You can crush the Oreos and mix them with cream cheese up to 24 hours in advance. Simply shape the mixture into balls, then refrigerate them until you’re ready to dip. This helps maintain their creamy texture while keeping them ready for dipping. When you’re ready to serve, just melt the chocolate and coat the chilled pops. Finish with sprinkles or decorations and allow them to set. This way, you can enjoy fresh, delicious Oreo pops that are just as delightful without the last-minute rush!
Expert Tips for Delightful Jack Skellington Oreo Pops
- Temperature Control: Ensure the melted chocolate isn't too hot to prevent melting the pops while dipping. A cooler temperature makes for easier handling.
- Chill Thoroughly: Keep the pops frozen until you're ready to dip them in chocolate; this helps maintain their shape and makes coating simpler.
- Choose Quality Chocolate: Use high-quality chocolate melts for a richer taste. Experiment with different types to discover your favorite flavor combinations.
- Sprinkle Quickly: Add sprinkles or white chocolate features before the chocolate hardens to ensure they stick well to your Delightful Jack Skellington Oreo Pops.
- Work in Batches: If making a large quantity, work in smaller batches. This keeps the pops easy to manage without them getting too warm or sticky.
Jack Skellington Oreo Pops Recipe FAQs
How do I know if my Oreos are fresh enough to use?
Absolutely! Look for Oreos with no visible damage or dark spots all over. If they’re sealed properly and not past their expiration date, they should work perfectly for your pops. If you’re unsure, a quick taste test can also help!
What’s the best way to store these Delightful Jack Skellington Oreo Pops?
To keep them fresh, store your Oreo pops in an airtight container in the fridge for up to one week. This ensures they maintain their delightful taste and texture. If you have extras, consider placing them in the freezer for up to 3 months, wrapped securely to prevent freezer burn.
Can I freeze my Jack Skellington Oreo Pops? If so, how?
Very! To freeze your pops, arrange them in a single layer in a freezer-safe container after they’ve been coated and decorated. Make sure to separate layers with parchment paper if you stack them. They can last in the freezer for up to three months. When you’re ready to enjoy, simply move them to the fridge to thaw for a few hours.
What should I do if the chocolate coating is too thick or doesn’t stick properly?
No worries! If your chocolate is too thick, you can add a small amount of vegetable oil to thin it out, allowing for a smoother dipping experience. If the chocolate isn’t adhering well to the pops, try dipping them directly from the fridge; the chill helps the chocolate stick better. Also, make sure to sprinkle any toppings immediately after dipping while the chocolate is still warm!
Are there any dietary concerns I should consider when making these pops?
Absolutely, it’s essential to be aware of allergies! The main ingredients include Oreos (which contain gluten), cream cheese, and chocolate. If you’re preparing these for someone with dietary restrictions, consider using gluten-free Oreos, or swapping cream cheese with dairy-free alternatives. Always check labels for any potential allergens, especially with chocolate coatings.
Can I customize the flavors or decorations of these Oreo pops?
Yes indeed! The customization options are endless! You can add flavored extracts like peppermint or vanilla to the cream cheese mix for a fun twist. Plus, feel free to use colored candy melts or different sprinkles to create a personalized festive look! Have fun with it!
Delightful Jack Skellington Oreo Pops for Spooky Fun
Ingredients
Equipment
Method
- Begin by crushing the Oreo cookies into fine crumbs using a food processor or a rolling pin in a zip-top bag.
- In a large mixing bowl, combine the Oreo crumbs with softened cream cheese and blend until smooth.
- Roll the mixture into 1-inch balls and arrange them on a parchment-lined baking sheet. Freeze for 30 minutes.
- Melt the black chocolate melts in a microwave-safe bowl in 30-second intervals until smooth.
- Insert popsicle sticks into the chilled Oreo balls and dip each ball into the melted chocolate, allowing excess to drip off.
- Before the chocolate coating sets, sprinkle with Halloween-themed sprinkles or pipe white chocolate for Jack's facial features.


Leave a Reply