
As I wandered through the vibrant aisles of my local grocery store, the Halloween decorations sparked a whirl of creativity in my mind. This year, I decided to bring the festive spirit to the table with these delightful Halloween Mini Pizzas. Perfect for family gatherings or a playful gathering, these handheld treats are as much fun to make as they are to eat. With just a quick assembly and a bake in the oven, you can create a spooky sensation that will impress both kids and adults alike. Not only are these mini pizzas highly customizable—easily catering to vegetarian and gluten-free diets—but they also make for a fantastic way to sneak in some extra veggies. Ready to turn your kitchen into a mini pizzeria with a festive twist? Let’s get started!
Why are Halloween Mini Pizzas a Must-Try?
Family-Friendly Fun: These mini pizzas are perfect for involving the whole family in the kitchen, making cooking a delightful experience.
Customizable Toppings: With endless topping combinations, you can please picky eaters and cater to various dietary preferences, from vegetarian to gluten-free.
Quick Assembly: You'll have these festive treats ready in no time, making them an excellent choice for busy weeknights or last-minute gatherings.
Deliciously Spooky: The playful designs will bring a smile to everyone’s face, making them a hit at Halloween parties and beyond.
Healthy Option: Sneak in extra veggies by loading up on toppings, giving you a lighter alternative to traditional takeout pizza. For a more protein-packed option, check out these Protein Pancake Sausage mini muffins as a fun side!
Halloween Mini Pizza Ingredients
For the Crust
• Mini Pizza Crusts – Use 8–10 personal-size crusts; gluten-free pita rounds or cauliflower bases work well as alternatives.
For the Sauce
• Pizza Sauce – Adds moisture and flavor; substitute with homemade sauce for a fresher taste.
For the Cheese
• Mozzarella Cheese – Provides creaminess and stretch; shredded cheese is preferred, but other melting cheeses can be used.
• Part-Skim String Cheese – Create mummy faces when pulled apart; regular mozzarella can be substituted.
For the Toppings
• Black Olives – Used for decoration (as spiders); can substitute with sliced green olives or omit if not preferred.
• Mini Pepperoni – Optional topping for added flavor; use diced bell peppers as a vegetarian alternative.
• Orange & Green Bell Peppers – Create jack-o’-lantern designs; alternate colors can be used for visual variety.
• Fresh Basil – Chiffonade for garnish; omit or use dried basil if fresh is unavailable.
For Baking
• Olive Oil Spray – Prevents sticking on the baking sheet; can use parchment paper as an alternative.
Step‑by‑Step Instructions for Halloween Mini Pizzas
Step 1: Preheat the Oven
Begin by preheating your oven to 425°F (220°C). While the oven warms up, take out a baking sheet and lightly mist it with olive oil spray to prevent sticking. This preparation sets the stage for your delightful Halloween mini pizzas, ensuring they will bake evenly and achieve a perfect crispy texture.
Step 2: Sauce It Up
Once your oven is ready, grab your mini pizza crusts and spread 1-2 tablespoons of pizza sauce on each one. Make sure to leave a small border around the edges to create a delicious, crusty frame. This step will add moisture and flavor to each mini pizza while keeping the assembly neat and enjoyable.
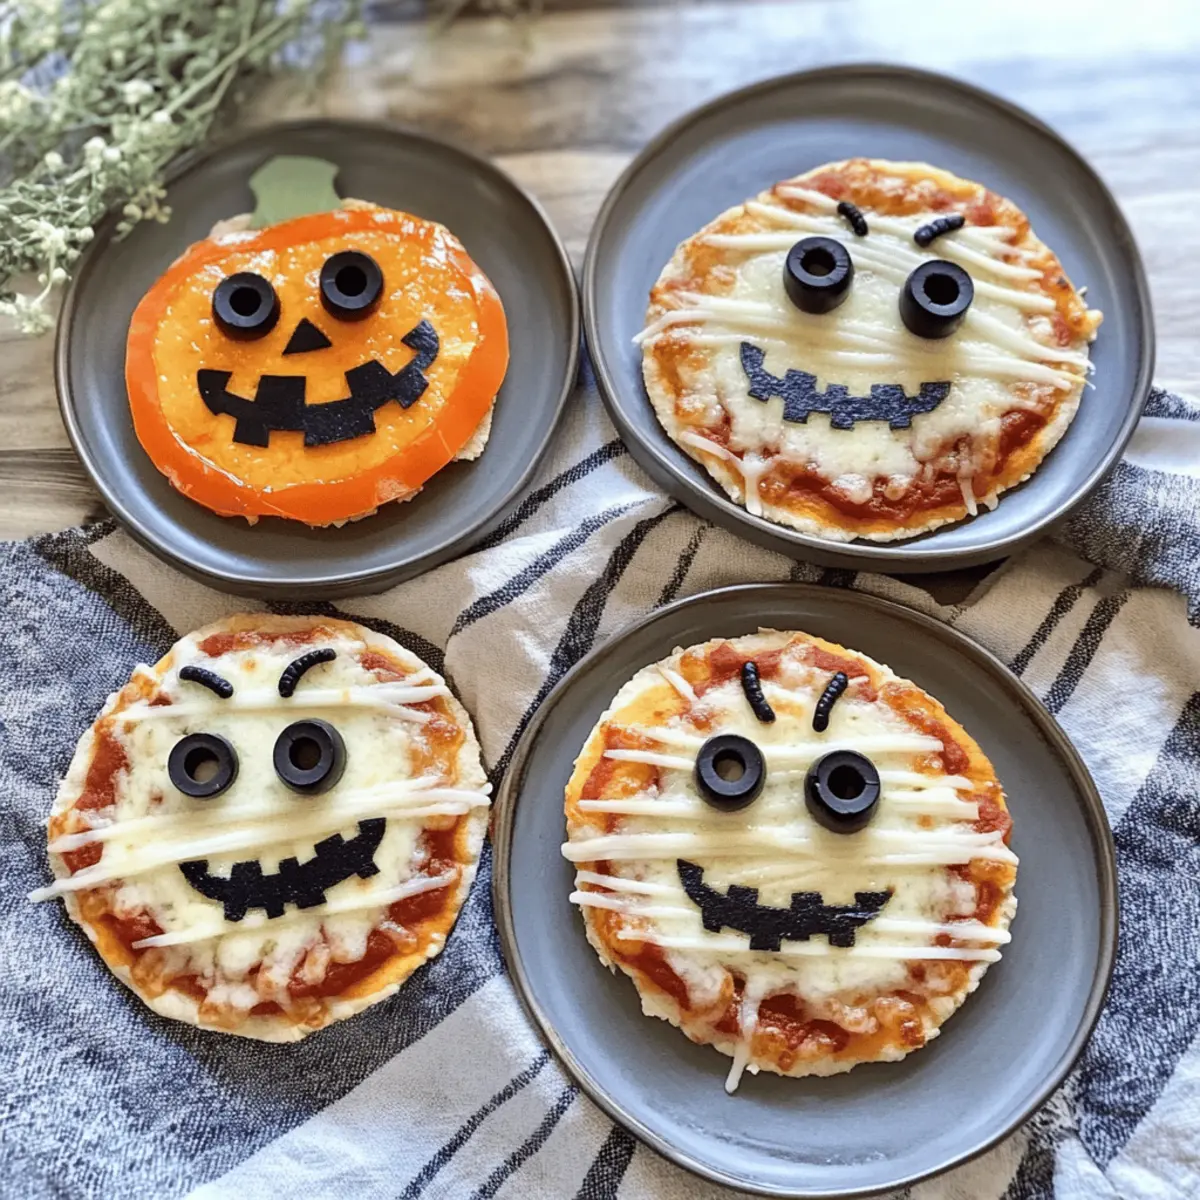
Step 3: Cheese Layering
Now it's time to sprinkle the shredded mozzarella over half of the mini pizzas, generous enough to create a gooey, melty experience. For the other half, take the part-skim string cheese and pull it apart in strips, arranging them beautifully to create mummy faces. This fun design adds a whimsical touch, perfect for your Halloween mini pizzas.
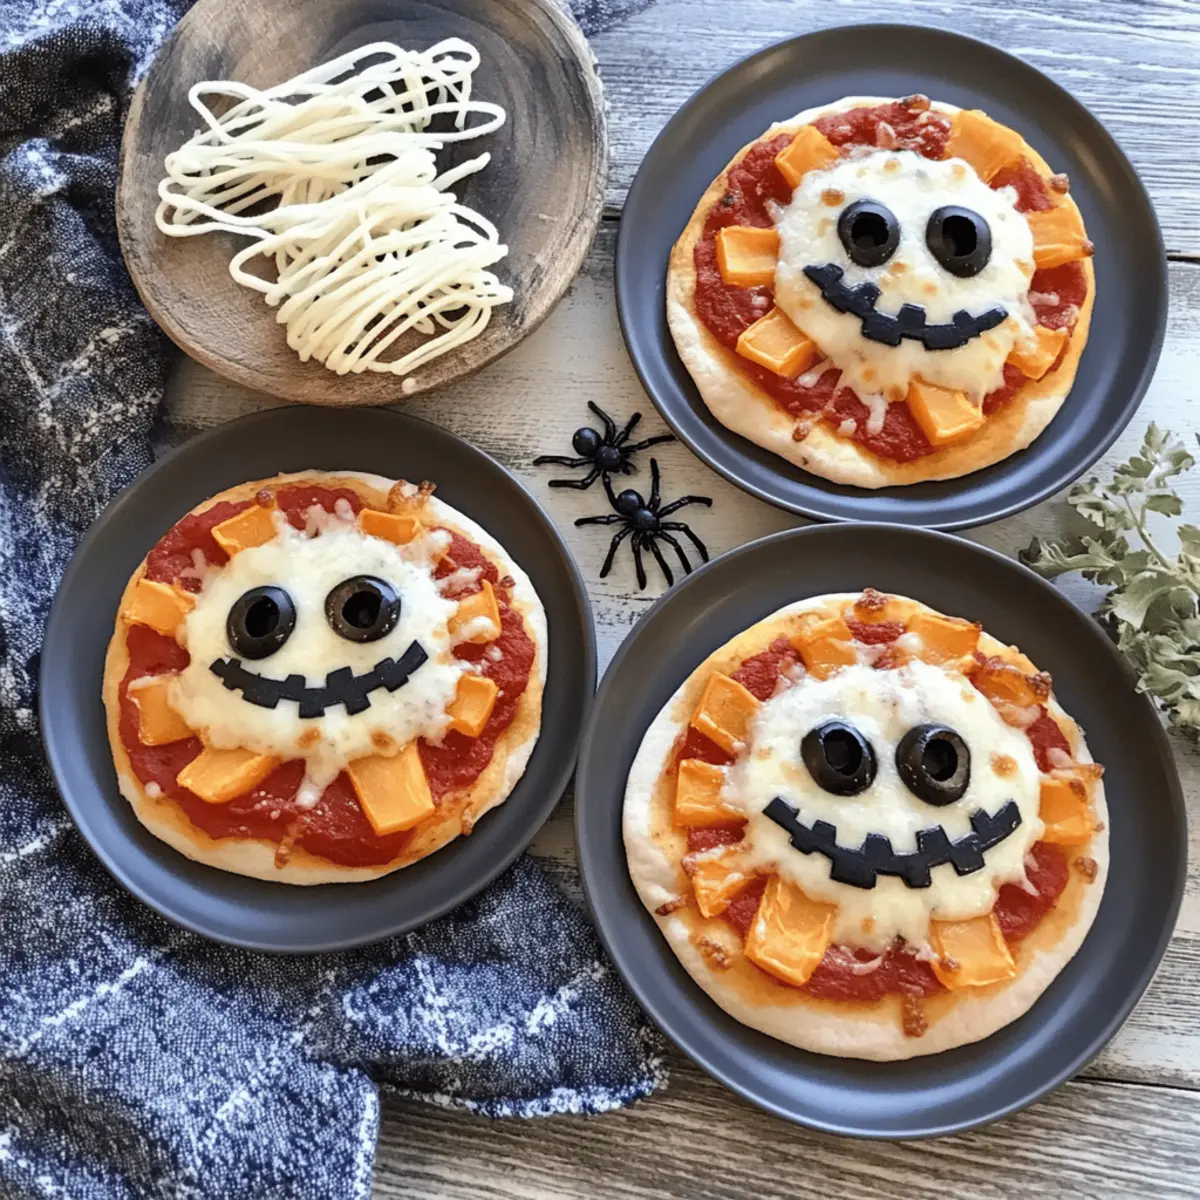
Step 4: Decorative Toppings
Get creative with your toppings! Use sliced black olives to doodle little spiders on some pizzas, and cut bell pepper strips into fun jack-o’-lantern mouths. If you want to amp up the flavor, you can also sprinkle mini pepperoni on select pizzas. This step allows you to personalize each mini pizza, making them as visually appealing as they are delicious.
Step 5: Bake to Perfection
Carefully place your decorated mini pizzas in the preheated oven and bake them for 10-12 minutes. Keep an eye on them, looking for that golden-brown crust and bubbly, melted cheese. Rotate the baking pan halfway through to ensure even browning, making the pizzas irresistibly inviting and festive.
Step 6: Cool and Garnish
After baking, remove your Halloween mini pizzas from the oven and let them cool for about 2 minutes on the baking sheet. This slight cooldown prevents any hot cheese burns while allowing your pizzas to settle. Finally, garnish with fresh basil chiffonade to add a lovely pop of color and herbaceous flavor before serving!
What to Serve with Halloween Mini Pizzas?
When you gather around the table for your festive feast, consider these delightful pairings that will make your Halloween celebration even spookier.
- Crispy Garlic Bread: Serve alongside for that perfect crunch; it's a delicious way to scoop up extra sauce.
- Fresh Veggie Platter: Crisp, colorful veggies add a refreshing contrast to your mini pizzas while providing healthy munching options.
- Pumpkin Soup: A warm, velvety soup lends a cozy fall vibe and offers a hearty balance to the playful pizzas.
Combine with a bright mix of sweet; pair these with a zesty homemade ranch dipping sauce for a flavorful twist.
- Apple Cider: Warm or chilled, the sweet and tart notes of cider perfectly match the savory flavors of your mini pizzas.
- Spooky Fruit Skewers: Create festive fruit snacks with mellon balls or mandarin oranges that bring a spooky touch to your table.
- Chocolate-Covered Pretzels: These sweet and salty bites add a touch of indulgence—perfect for ending your meal on a playful note.
- Homemade Pumpkin Brownies: Capture the essence of fall with these fudgy treats, ensuring your dessert is as festive as your Halloween mini pizzas.
Storage Tips for Halloween Mini Pizzas
Fridge: Store leftovers in an airtight container for up to 3 days. Allow pizzas to cool completely before sealing to maintain freshness.
Freezer: For longer storage, freeze fully assembled or par-baked pizzas in a single layer, wrapping them tightly in plastic wrap, then in foil, for up to 2 months.
Reheating: To enjoy crispy leftover Halloween mini pizzas, reheat them in an air fryer at 375°F for about 5 minutes or in a conventional oven for 10-12 minutes. Avoid using a microwave, as it may soften the crust.
Helpful Tricks for Halloween Mini Pizzas
-
Cheese Choice: Use shredded mozzarella for the best melt, but feel free to mix in other cheeses for variety. Avoid using too much cheese to prevent sogginess.
-
Crust Alternatives: If going gluten-free, opt for gluten-free pita rounds or cauliflower crusts, which provide great flavor and texture without the gluten.
-
Vegetable Fun: Embrace the spooky theme by experimenting with different veggie shapes for toppings. Cut bell peppers and olives into fun designs to elevate your Halloween mini pizzas.
-
Even Baking: Always rotate your baking pan halfway through to ensure an even bake and crispy crust. This helps prevent any soggy sides, especially when using sauce.
-
Storing Leftovers: Allow any leftover mini pizzas to cool completely before storing them in an airtight container, where they can be kept fresh for up to 3 days.
Halloween Mini Pizzas Variations & Substitutions
Get ready to unleash your culinary creativity and make these Halloween mini pizzas your own with delightful twists and substitutions.
-
Gluten-Free: Use gluten-free pita rounds or cauliflower bases for a tasty alternative that everyone can enjoy. Not only do they hold up well, but they also give a unique taste twist.
-
Veggie-Packed: Load up with your favorite vegetables! Consider using mushrooms, zucchini, or even artichoke hearts for a delicious and nutritious variation that makes these pizzas even more colorful.
-
Spicy Kick: Add a dash of crushed red pepper flakes or diced jalapeños to bring some heat to your mini pizzas. Just the right amount will elevate the flavors and delight spicy food lovers.
-
Cheese Swap: Feel free to experiment with different melting cheeses, like provolone or gouda, for a richer taste. Combining different cheese types can add depth and an exciting flavor profile.
-
Saucy Variation: Switch out traditional pizza sauce for pesto or barbecue sauce for an unexpected but delicious flavor twist. Each sauce elevates the flavor and makes these pizzas uniquely tasty.
-
Alternative Proteins: Instead of mini pepperoni, try using cooked sausage crumbles or diced grilled chicken. These options add heartiness and flavor, making them perfect for any palate.
-
Fruity Fun: For a sweet and savory combination, top some with slices of pineapple or fig. This sweet twist can be surprising and delightful, making them memorable guests at any Halloween gathering.
-
Make-Ahead Freezing: Assemble your mini pizzas and freeze them before baking. They’ll be perfect for a quick and festive snack later. When the craving strikes, just toss them in the oven for a fast treat!
With these variations, your Halloween mini pizzas can be both festive and incredibly customizable. For more deliciously protein-packed snack ideas, don't forget to check out these Protein Pancake Sausage mini muffins!
Make Ahead Options
These Halloween Mini Pizzas are perfect for busy home cooks looking to save time! You can prepare the mini pizza crusts topped with sauce and cheese up to 24 hours in advance. Simply assemble them on a baking sheet, cover tightly with plastic wrap, and refrigerate. For added convenience, you could even freeze fully assembled pizzas for up to 3 months; just ensure they are well-wrapped to prevent freezer burn. When you're ready to serve, bake them straight from the refrigerator for 10-12 minutes or from frozen for about 15-20 minutes, until the cheese is melted and the crust is golden. This way, you can enjoy festive, homemade goodness without the last-minute scramble!
Halloween Mini Pizzas Recipe FAQs
What type of crust should I use for Halloween mini pizzas?
Absolutely! You can use mini pizza crusts or opt for gluten-free pita rounds or cauliflower bases for a healthier alternative. Always look for crusts that are about 6 inches in diameter for easy handling!
How should I store leftover Halloween mini pizzas?
Store any leftover mini pizzas in an airtight container in the refrigerator for up to 3 days. To maintain their deliciousness, allow pizzas to cool completely before sealing the container—this helps keep the crust from getting soggy.
Can I freeze Halloween mini pizzas?
Yes, you can freeze them! For best results, freeze either fully baked or par-baked pizzas in a single layer, tightly wrapped in plastic wrap and then in foil. They’ll stay fresh for up to 2 months. When you’re ready to enjoy them, just bake from frozen at 425°F (220°C) for about 15-20 minutes, ensuring they’re heated through.
What can I do if the cheese isn’t melting properly?
If you find the cheese isn’t melting well, check the type of cheese you’re using; fresh shredded mozzarella works best! Make sure not to overload the pizzas with toppings, as too many can prevent proper melting. If your cheese looks like it’s clumping, just sprinkle a bit more evenly over the surface and give it another few minutes in the oven.
Are there any dietary considerations for Halloween mini pizzas?
Very! These mini pizzas are super flexible. They can easily accommodate vegetarian diets, simply by using diced bell peppers instead of mini pepperoni. If you need gluten-free options, gluten-free pizza crusts or cauliflower bases are fantastic substitutes. Always check the labels of sauces and toppings for potential allergens as well.
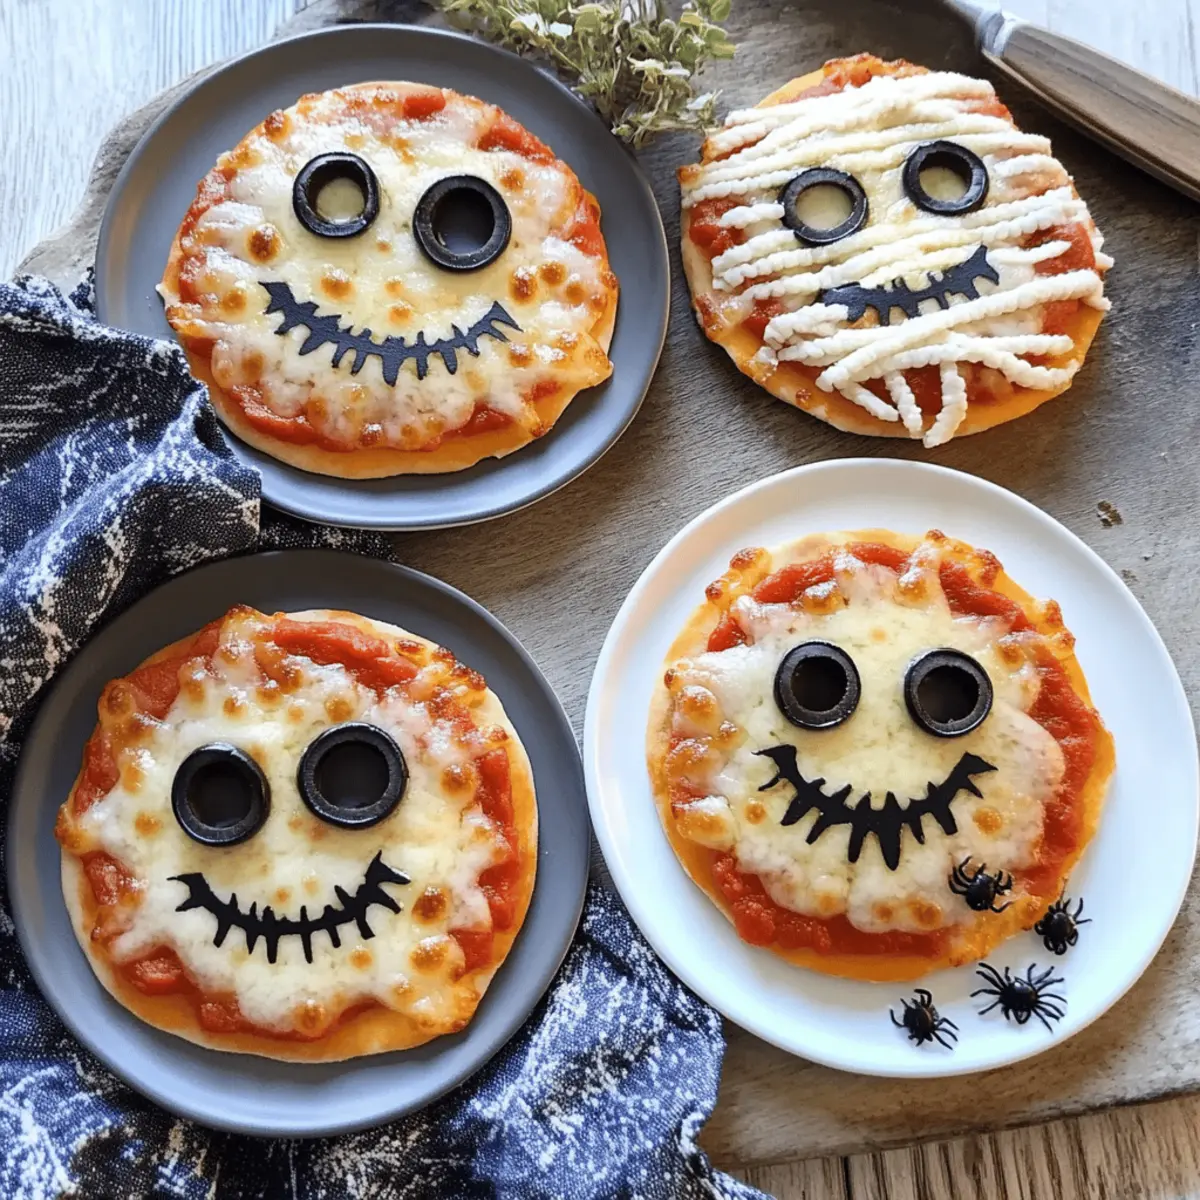
How do I create fun designs with toppings?
To create spooky designs, use sliced black olives for spider bodies and string cheese to form mummy faces. For jack-o'-lanterns, cut bell peppers into fun shapes. Simply outline the designs on each mini pizza with the toppings as you go! This could turn cooking into a creative family activity.
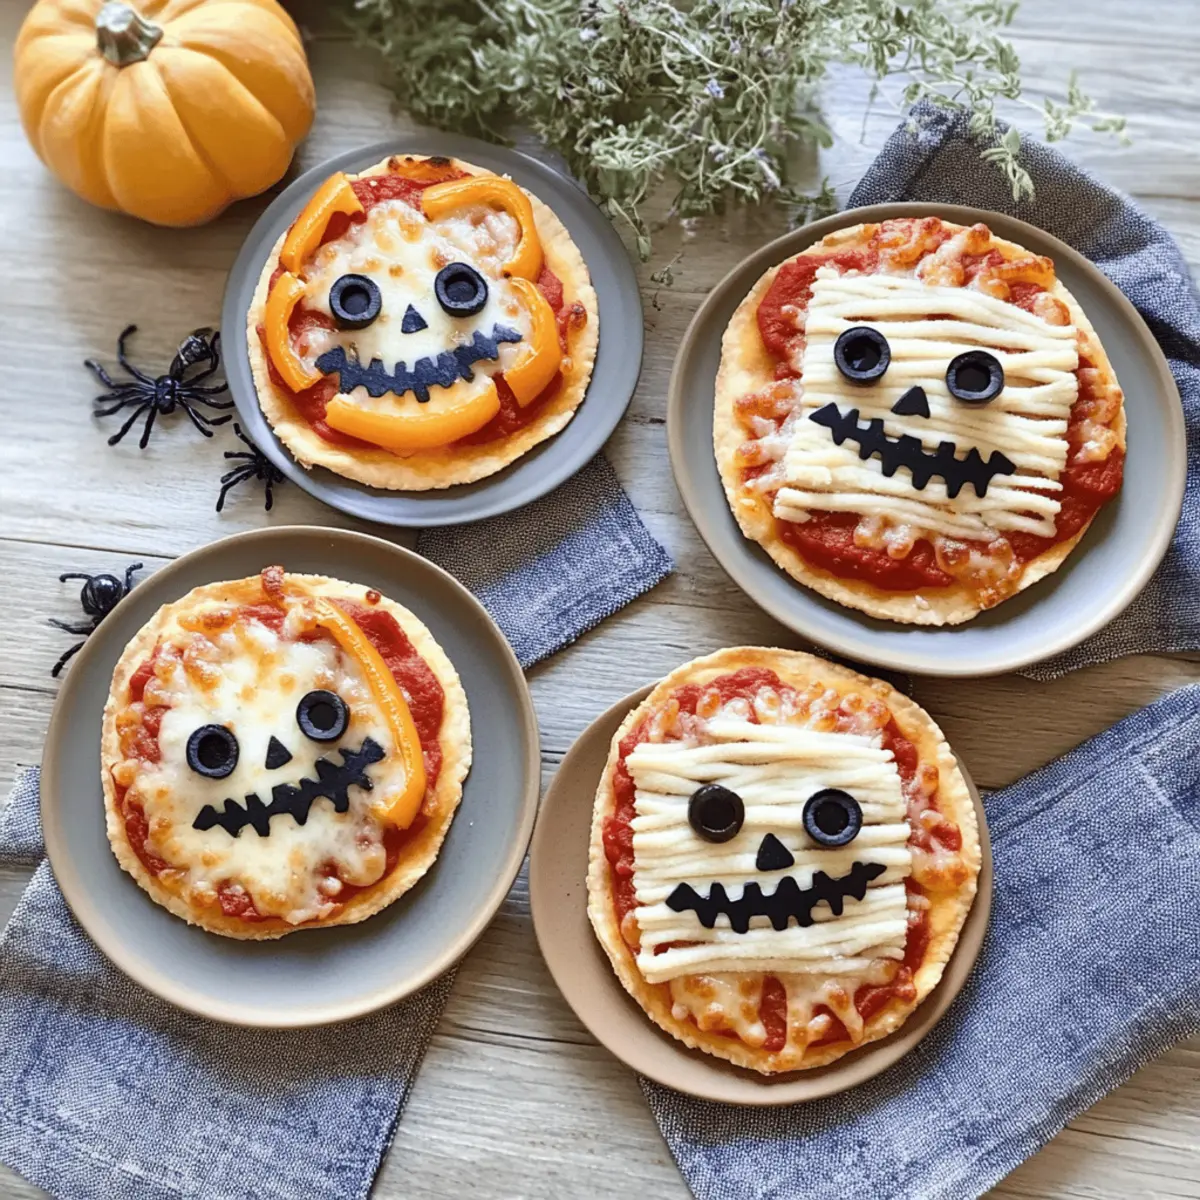
Halloween Mini Pizzas: Creepy Goodness for Festive Fun
Ingredients
Equipment
Method
- Preheat your oven to 425°F (220°C) and lightly mist a baking sheet with olive oil spray.
- Spread 1-2 tablespoons of pizza sauce on each mini pizza crust, leaving a small border around the edges.
- Sprinkle shredded mozzarella over half of the mini pizzas and use part-skim string cheese to create mummy faces on the other half.
- Decorate with sliced black olives and cut bell pepper strips into fun designs, including mini pepperoni for added flavor.
- Bake for 10-12 minutes, monitoring for a golden-brown crust and bubbly cheese. Rotate the baking pan halfway through for even baking.
- Let the pizzas cool for about 2 minutes before garnishing with fresh basil chiffonade and serving.


Leave a Reply