
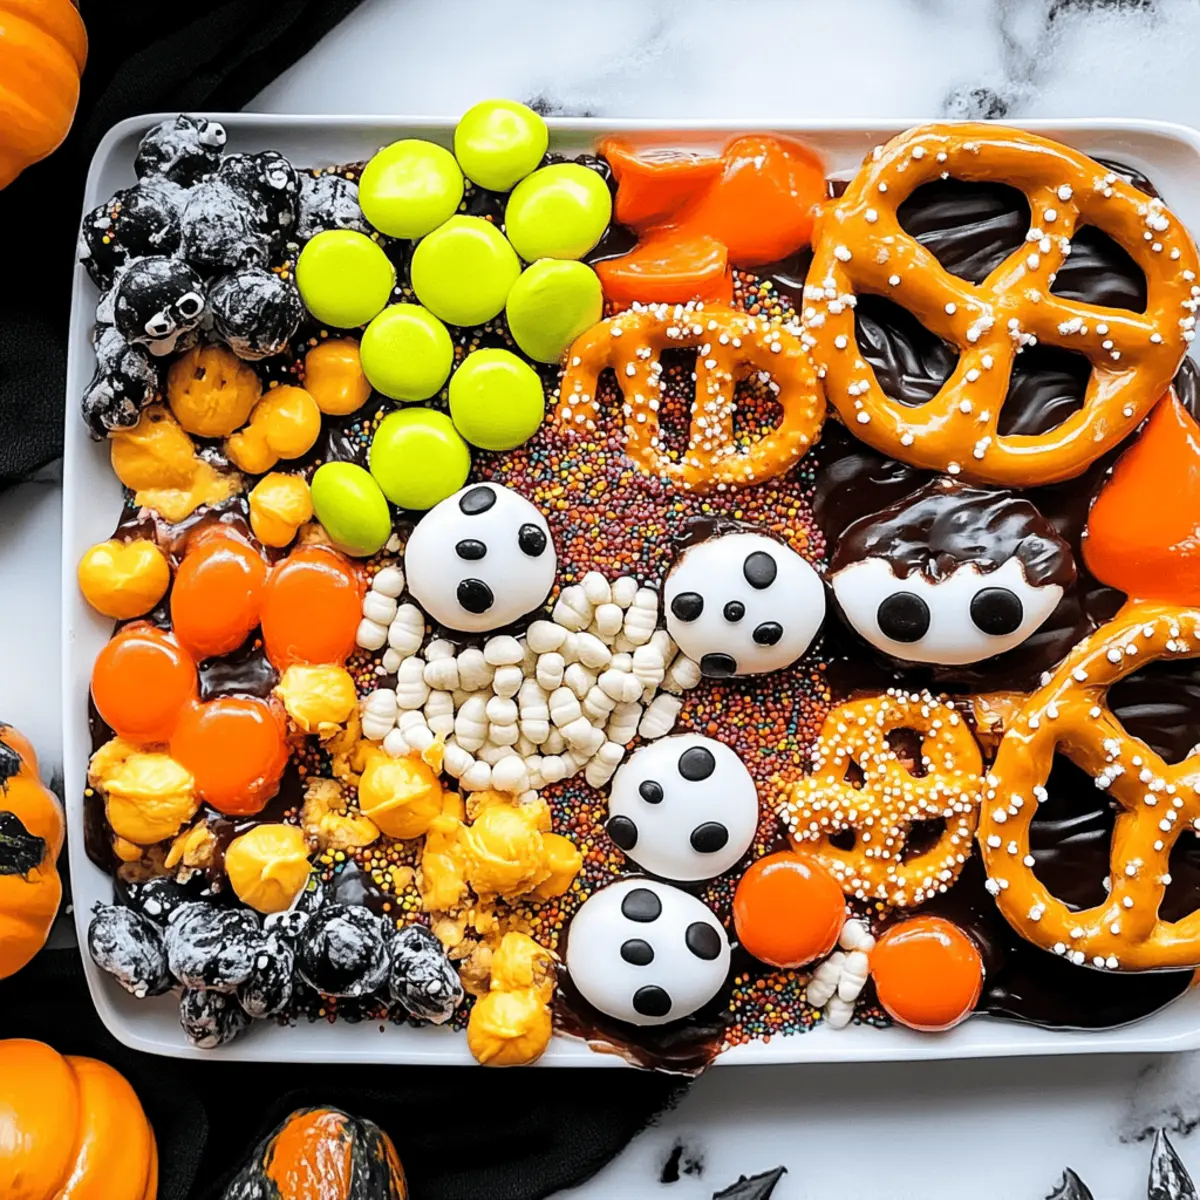
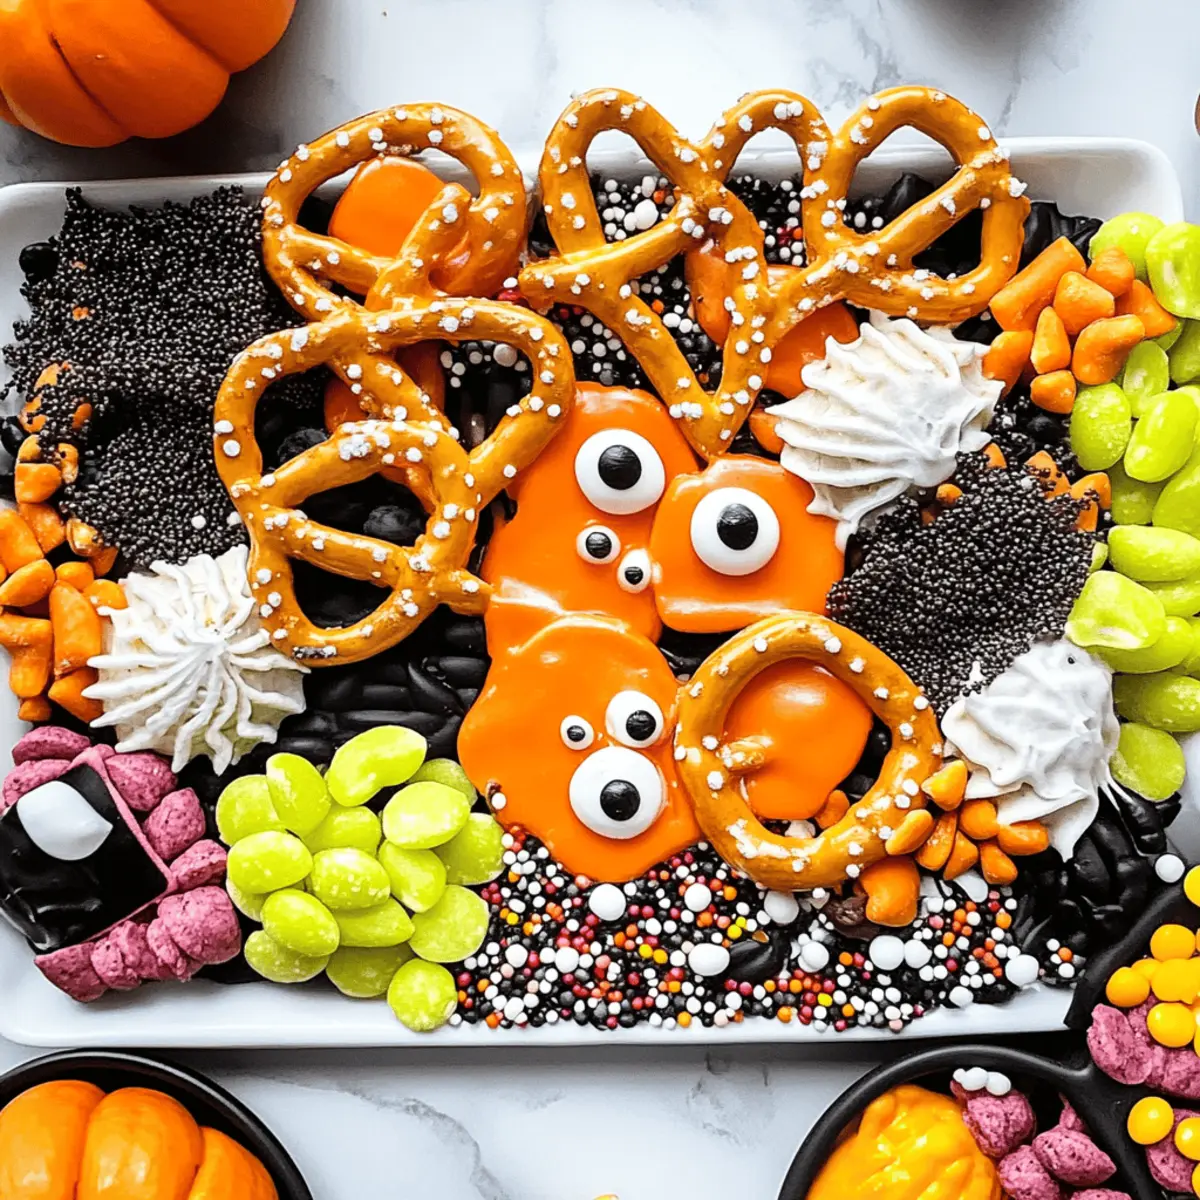
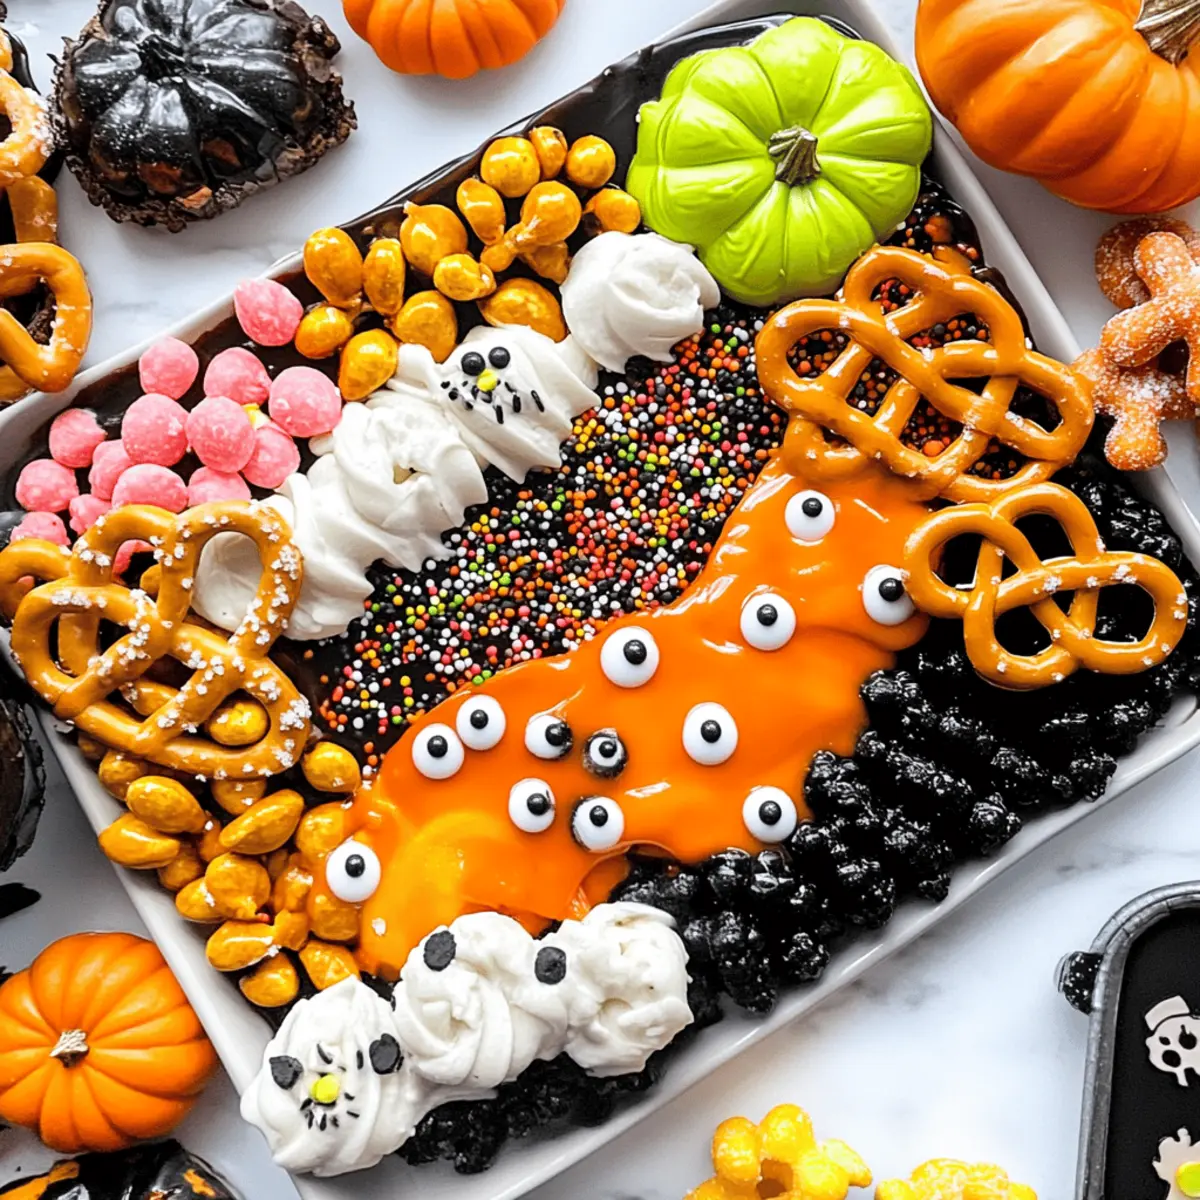
As the leaves turn and the air gets crisp, I find myself excitedly plotting my next culinary creation: Halloween Pretzels! These playful treats blend the salty crunch of mini pretzels with the sweet joy of candy melts, making them a truly spooktacular addition to any Halloween gathering. What makes them even better? They’re no-bake and ready in just 20 minutes—perfect for those of us juggling a busy schedule! Plus, they’re completely customizable, so you can let your imagination run wild with toppings and colors. Whether you’re planning a haunted soirée or just looking for a fun family activity, these Halloween Pretzels will delight both kids and adults alike. Curious to find out how to bring this festive fun to your kitchen? Keep reading!
Why Are Halloween Pretzels So Special?
Simplicity: These Halloween Pretzels are incredibly easy to whip up in just 20 minutes, even if you're short on time!
Creations for Everyone: With a range of toppings and colors, they can be customized to fit any theme or palate—perfect for picky eaters!
Fun for Families: Engaging kids in the decorating process makes this a memorable activity, reinforcing family bonds during the festive season.
Health-Conscious Options: With gluten-free pretzel substitutes, you can cater to various dietary needs without compromising on fun or flavor.
Crowd-Pleasing Treat: Whether for parties or school events, these eye-catching treats are sure to impress guests and keep everyone smiling!
With their delightful blend of sweet and salty goodness, these Halloween Pretzels are a must-try this spooky season!
Halloween Pretzels Ingredients
• Get ready to treat your taste buds!
For the Pretzels
- Mini Pretzels – The crunchy base that supports your creative toppings; choose twists or rods for fun variety.
For the Candy Coating
- Candy Melts (white, orange, black) – These melts add vibrant colors and sweetness; you can use melted chocolate chips and coconut oil as a shiny alternative.
For the Decorations
- Halloween Sprinkles – Perfect for adding festive flair; customize with shapes and colors that speak to your spooky spirit.
- Candy Eyes – These playful details make your pretzels extra spooky; optional but highly recommended for a fun effect.
- Crushed Oreos (optional) – Sprinkle on top for an extra layer of flavor and texture; not essential, but a delightful bonus!
Embrace the creativity in making these Halloween Pretzels and let your imagination shine!
Step‑by‑Step Instructions for Halloween Pretzels
Step 1: Prepare Baking Sheet
Begin by lining a large baking sheet with parchment paper to prevent any sticky mishaps while making your Halloween Pretzels. Ensure the parchment is smooth and flat, giving you a clean surface to work on. This step is crucial for easy removal of the pretzels once they’ve cooled and hardened.
Step 2: Melt Candy Melts
In a microwave-safe bowl, combine your desired colors of candy melts—such as white, orange, and black. Microwave in 30-second intervals, stirring gently in between, until the melts are completely smooth and glossy, which should take about 1.5 to 2 minutes. Make sure there are no lumps for an even coating on your pretzels.
Step 3: Dip or Drizzle
Once your candy melts are ready, it's time to dunk those pretzels! Using a fork, submerge each mini pretzel into the melted candy, ensuring it's fully coated. Alternatively, you can drizzle the melted candy over the pretzels for a decorative touch. Place the coated pretzels back onto the parchment paper, and work swiftly to coat as many as you can before the candy starts to set.
Step 4: Add Toppings
While the candy coating is still melted, sprinkle a generous amount of Halloween-themed sprinkles over each pretzel to create a festive vibe. Feel free to add candy eyes at this stage, pressing them gently into the candy for a spooky effect. The vibrant colors and fun textures will elevate your Halloween Pretzels to a new level of delight.
Step 5: Set
Allow your decorated Halloween Pretzels to sit at room temperature for about 15 minutes, or until the candy coating has completely hardened. You can speed up this process by placing them in the refrigerator for a few minutes. They should be firm to the touch and beautifully glossy, ready for indulging or gifting.
Step 6: Store
Once your Halloween Pretzels have fully set, carefully transfer them to an airtight container for storage. Keep them at room temperature to maintain that satisfying crunch and festive appearance. These delightful treats can last up to a week, so you can make them ahead of time for parties or gatherings—if they last that long!
Halloween Pretzels Variations & Substitutions
Get as creative as your spooky spirit allows with these fun twists on Halloween Pretzels!
-
Gluten-Free: Swap mini pretzels for gluten-free pretzel alternatives to accommodate dietary needs without sacrificing taste.
-
Nutty Delight: Top with chopped nuts for an unexpected crunch and depth of flavor that complements the sweetness beautifully.
-
Choco-Covered Twist: Use dark or milk chocolate melts instead of candy melts for a richer taste that chocolate lovers will adore.
-
Salty-Sweet Fusion: Drizzle with a light touch of caramel sauce prior to adding sprinkles for a deliciously sweet and salty combination. It’s a game changer!
-
Spicy Kick: Incorporate a dash of cayenne pepper or chili powder into the candy melts for a fun and fiery surprise that will energize your taste buds.
-
Non-Dairy Option: Choose dairy-free chocolate alternatives for the melts and sprinkles to make these treats suitable for vegan diets, allowing everyone to join in the fun!
-
Theme Toppings: Get festive with Halloween-themed toppings like crushed candy corn, sprigs of edible glitter, or even gummy worms for a truly whimsical appeal.
-
Seasonal Fruits: For a refreshing twist, sprinkle diced dried fruits like apricots or cranberries on top. This will add a surprising zing alongside the traditional flavors!
Let your imagination take over as you serve up these delightful seasonal bites. Curious for some more creative ideas? Check out my tips for engaging kids in cooking or explore ways to make these treats as fun as Halloween itself!
Make Ahead Options
These Halloween Pretzels are a fantastic option for meal prep, allowing you to save time while still bringing festive joy to your gatherings! You can prepare the mini pretzels and coat them in candy melts up to 24 hours in advance. Simply dip or drizzle the pretzels and allow them to set, then store them in an airtight container at room temperature to maintain their crunch. When it's time to serve, just add your colorful Halloween sprinkles and candy eyes for that final touch. This way, you'll have delightful treats ready to impress without the last-minute rush!
What to Serve with Halloween Pretzels
As you embark on a delightful Halloween feast, these sweet and salty treats need a little something to round out the meal.
-
Crispy Apple Slices: Fresh, crunchy, and slightly tart; they provide a refreshing contrast to the sweet pretzels. The combination of flavors celebrates autumn beautifully.
-
Pumpkin Spice Hot Chocolate: Rich and creamy, this seasonal drink perfectly complements the festive spirit of Halloween. The warmth and subtle spice elevate the overall treat experience.
-
Cheese Platter: A variety of cheeses with crackers can balance the sweetness of the pretzels. The savory elements create a delightful snack table for guests to enjoy.
-
Caramel Dipped Marshmallows: These sweet treats echo the fun of Halloween Pretzels while adding an indulgent layer. Their gooey texture contrasts wonderfully with the crunchy pretzels.
-
Spooky Fruit Skewers: Assemble colorful fruit skewers with grapes, oranges, and strawberries for a refreshing option. They add brightness to your spread while keeping it healthy.
-
Halloween-Themed Popcorn: Lightly coated with chocolate and sprinkled with festive candies, this whimsical snack is great for snacking. The buttery crunch pairs beautifully with the pretzel's texture.
-
Spiced Apple Cider: Serve warm for a cozy touch alongside your treats. This drink brings a comforting aroma and flavor profile that harmonizes with the Halloween ambiance.
Tips for the Best Halloween Pretzels
• Fresh Ingredients: Use fresh candy melts and festive sprinkles for the best flavors and vibrant colors; stale ingredients can lead to dull results.
• Avoid Overheating: When melting candy melts, do it slowly in intervals to prevent overheating, which can cause clumping and a gritty texture; smoothness is key for coating Halloween Pretzels.
• Personal Touch: Encourage kids to express their creativity with toppings beyond sprinkles; unique additions like nuts or candy corn can add personal flair and make the treats even more exciting!
• Storage Know-How: To keep your Halloween Pretzels perfectly crunchy, always store them in an airtight container; they'll last up to 7 days, but they rarely stick around that long!
• Testing for Set: If unsure about the coating’s hardness, gently touch the pretzels after 15 minutes; they should feel firm and dry before transferring them for storage.
How to Store and Freeze Halloween Pretzels
Room Temperature: Keep your Halloween Pretzels in an airtight container at room temperature for up to 7 days to maintain their delightful crunch.
Fridge: If you prefer storing them in the fridge, place them in a sealed container to avoid moisture. They can last up to 10 days but may lose some crunchiness.
Freezer: For longer storage, freeze your Halloween Pretzels in a single layer on a baking sheet, then transfer to an airtight freezer bag. They can last up to 1 month.
Reheating: If you’ve frozen them, allow your pretzels to thaw at room temperature before enjoying. For a quick drizzle of melted chocolate, gently reheat in the microwave at low power.
Halloween Pretzels Recipe FAQs
How do I choose the right pretzels for this recipe?
Absolutely! For Halloween Pretzels, mini pretzels work best, providing a delightful crunch and base for your sweet toppings. You can choose between twists or rods, depending on your aesthetic vision! If gluten-free is a priority, look for gluten-free mini pretzels available at most grocery stores.
What is the best way to store Halloween Pretzels?
To keep your Halloween Pretzels fresh, store them in an airtight container at room temperature for up to 7 days. This prevents them from becoming soggy while maintaining their satisfying crunch. If they last that long! If you decide to refrigerate them, they can last about 10 days, but they might lose some of their delicious crispness.
Can I freeze Halloween Pretzels, and how do I do it?
Yes, you can definitely freeze your Halloween Pretzels! To do this, place them in a single layer on a baking sheet and freeze until solid—about 2 hours. After they are fully frozen, transfer them to an airtight freezer bag to prevent freezer burn. They’ll keep well for up to a month. When ready to enjoy, thaw them at room temperature to retain their crunchy texture.
What should I do if my candy melts become too thick?
Very good question! If your candy melts become too thick while melting, don’t fret. You can rejuvenate them by adding a teaspoon of coconut oil or vegetable shortening. Heat it in the microwave for an extra 15-20 seconds, stirring until smooth. This will help achieve that perfect, pourable consistency, making it easier to coat your Halloween Pretzels beautifully.
Are Halloween Pretzels safe for kids with allergies?
It's essential to check the ingredient labels, as allergy concerns can vary. Many candy melts may contain allergens like dairy or gluten. Thankfully, there are plenty of allergy-friendly options available, so you can easily find dairy-free or gluten-free candy melts. Always double-check packaging to ensure the toppings are also safe for your little ghouls and goblins!
Halloween Pretzels: Fun, Festive, and Easy to Make
Ingredients
Equipment
Method
- Prepare Baking Sheet: Line a large baking sheet with parchment paper.
- Melt Candy Melts: Combine candy melts in a bowl, microwave in intervals until smooth.
- Dip or Drizzle: Coat mini pretzels in melts, place back on parchment.
- Add Toppings: While coating is melted, add sprinkles and candy eyes.
- Set: Let sit for 15 minutes at room temperature to harden.
- Store: Place in an airtight container at room temperature.
Leave a Reply