
As I set out my ingredients, I couldn’t help but smile at the thought of hosting a spooky movie night with friends. This Hocus Pocus Snack Board captures the magic of Halloween while allowing for creativity and a personal touch. It’s a delightful combination of sweet, salty, and crunchy elements, making it a crowd-pleaser for all ages. Plus, this appetizer is wonderfully easy to assemble, so you can spend more time enjoying the festivities rather than being stuck in the kitchen. With its whimsical presentation inspired by the iconic Sanderson Sisters, it's sure to impress your guests. Are you ready to conjure up a spellbinding treat that everyone will love? Let’s get started!
Why is the Hocus Pocus Snack Board a Must?
Creativity Unleashed: This Hocus Pocus Snack Board allows you to channel your inner artist, customizing it with your favorite treats and designs. Perfect for Gatherings: Impress your guests with a stunning centerpiece that invites everyone to dive in and enjoy. Quick Assembly: With simple ingredients, you’ll spend mere minutes preparing this festive delight, leaving you more time to enjoy the party. Visually Captivating: The colorful, whimsical presentation makes it an Instagram-worthy treat that’s fun for all ages. A Flavorful Mix: Sweet, salty, and crunchy elements combine for a delightful snacking experience. For a fun twist, check out these Zucchini Tots or Pepperoni Pizza Roll ideas to complement your Halloween spread!
Hocus Pocus Snack Board Ingredients
This festive board is full of fun flavors and spooky surprises!
For the Base
- Brie Cheese Wheels – These provide a creamy canvas for the Sanderson sisters' faces; substitute with any light-colored cheese for the best effect.
- Crackers or Chips – A crunchy complement that invites guests to indulge in the spread.
For the Hair
- Popcorn – Adds a delightful crunch to one sister's hairstyle; choose your favorite flavor for an extra kick.
- Pepperoni – Rolled and speared on toothpicks, this adds curls to another sister’s hair; salami can work as a tasty substitute.
For the Faces
- Black Olives – Sliced to create expressive eyes; their savory flavor balances the sweetness of other ingredients.
- Twizzlers Pull and Peel Licorice – Perfect for creating the sisters’ lips; feel free to swap with other gummy candies if you please.
For Decoration
- Fresh Fruits (Green Grapes, Raspberries, Small Oranges, Blackberries) – Add decorative flair representing clothing with a juicy twist.
- Cookie Cutter – Optional tool for creating fun-shaped cheese accents like bats and broomsticks.
For Assembly
- Toothpicks – Essential for elevating elements like pepperoni curls and assembling the fun elements.
This Hocus Pocus Snack Board is customizable, so feel free to also incorporate your favorite treats!
Step‑by‑Step Instructions for Hocus Pocus Snack Board
Step 1: Prepare the Base
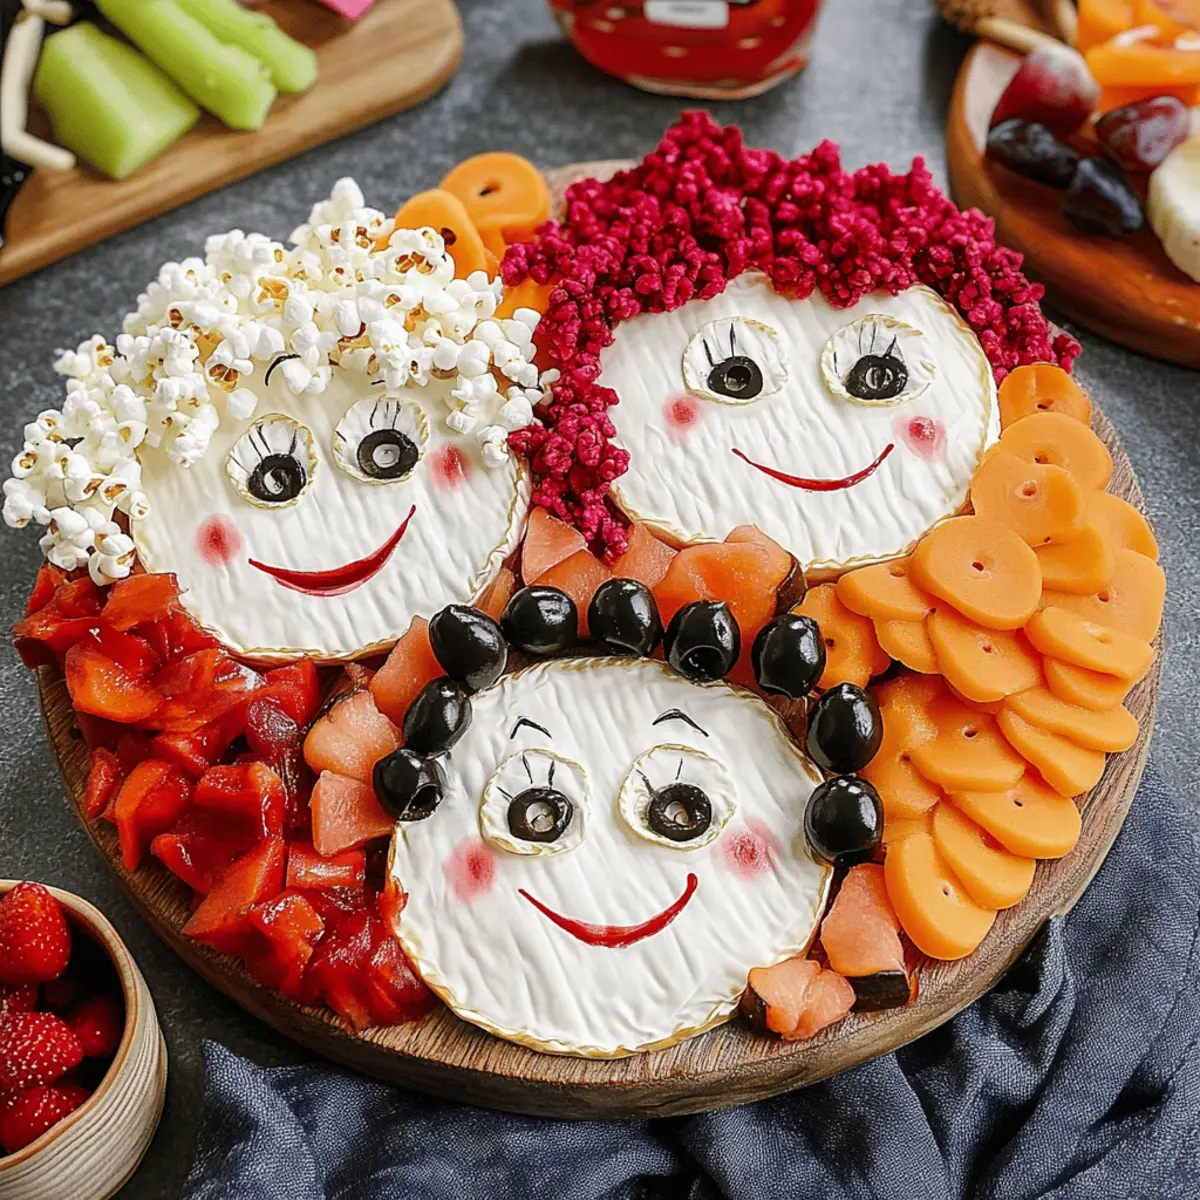
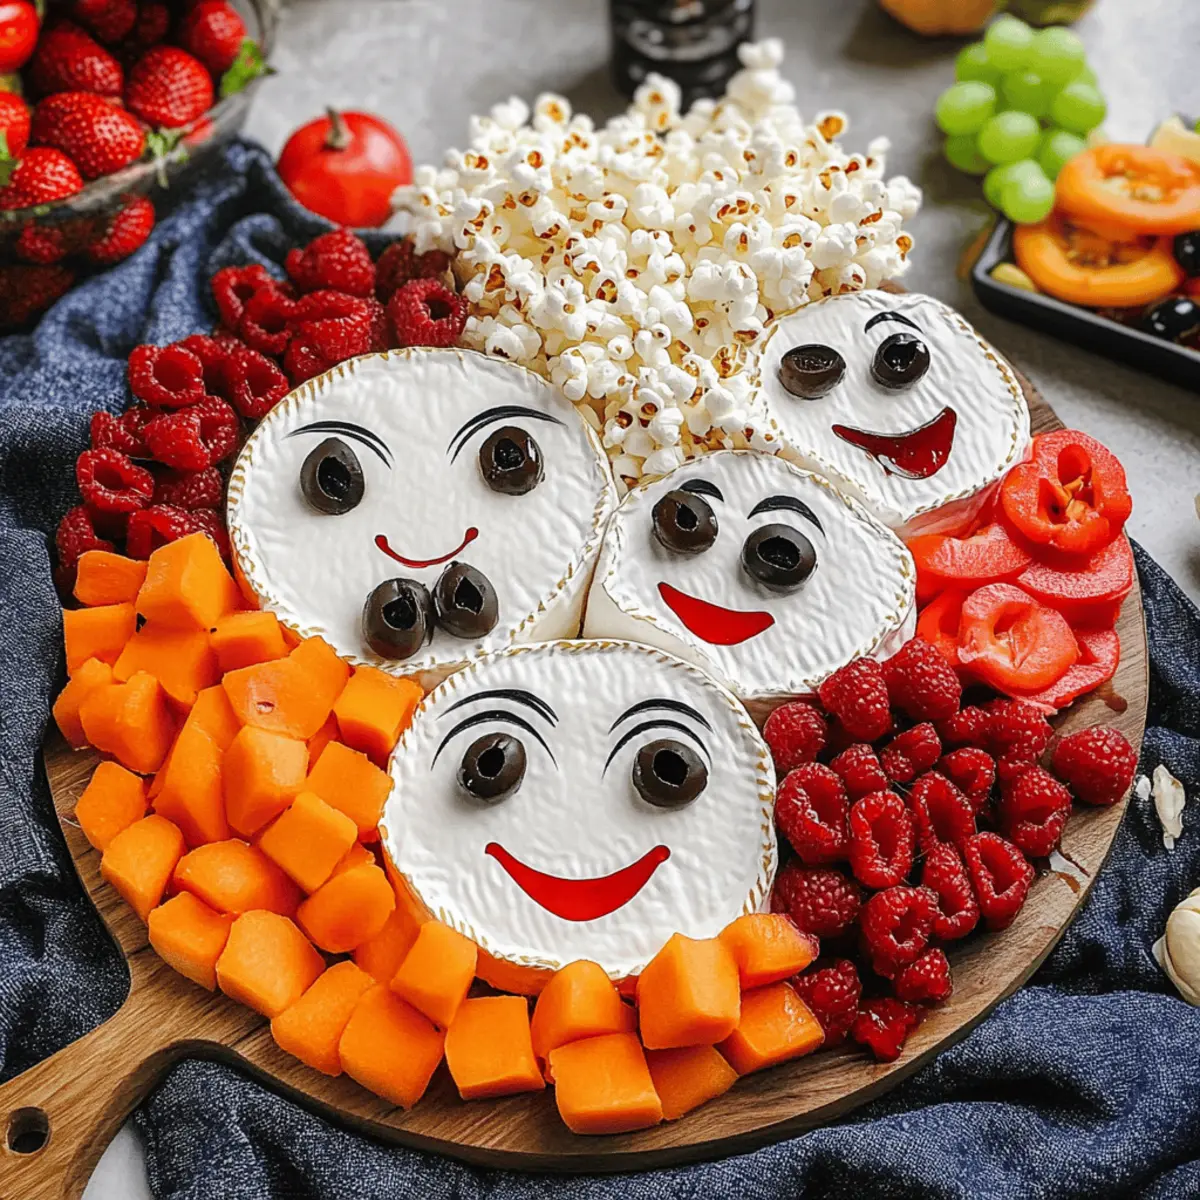
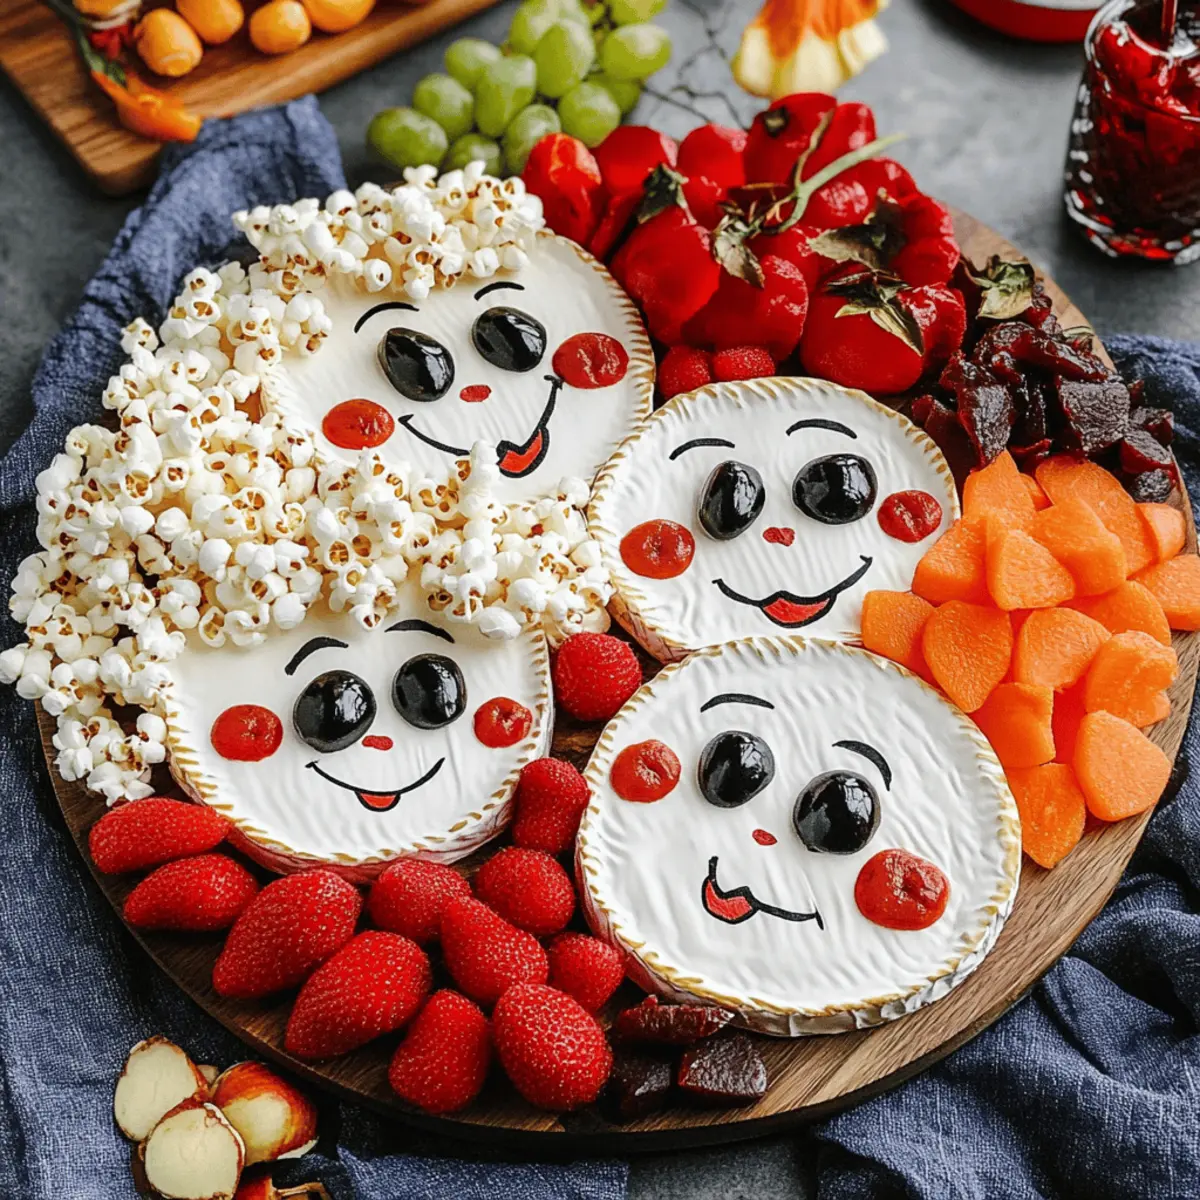
Begin by selecting a large, visually appealing board or platter as the foundation for your Hocus Pocus Snack Board. Place three brie cheese wheels in a row, positioning them to represent the Sanderson sisters. This arrangement creates a charming canvas for your Halloween-themed charcuterie. Ensure the wheels are in good condition, with a smooth, creamy surface to mimic the faces of the characters.
Step 2: Create the Lips
With your Twizzlers Pull and Peel Licorice, cut and pull strips to form the lips of each cheese wheel. Choose vibrant sections to make the faces pop! Gently press the licorice onto the brie, using your fingers for a playful and whimsical look. This step is essential to capture the iconic features of the Sanderson sisters, giving your charcuterie board a fun twist.
Step 3: Slice the Eyes
Next, take your black olives and slice them in half to create expressive eyes for each sister. Carefully place two olive halves on each cheese wheel, ensuring they are evenly spaced for a balanced appearance. The glossy black color of the olives provides a lovely contrast against the creamy brie, completing the playful character faces on your Hocus Pocus Snack Board.
Step 4: Form the Hair
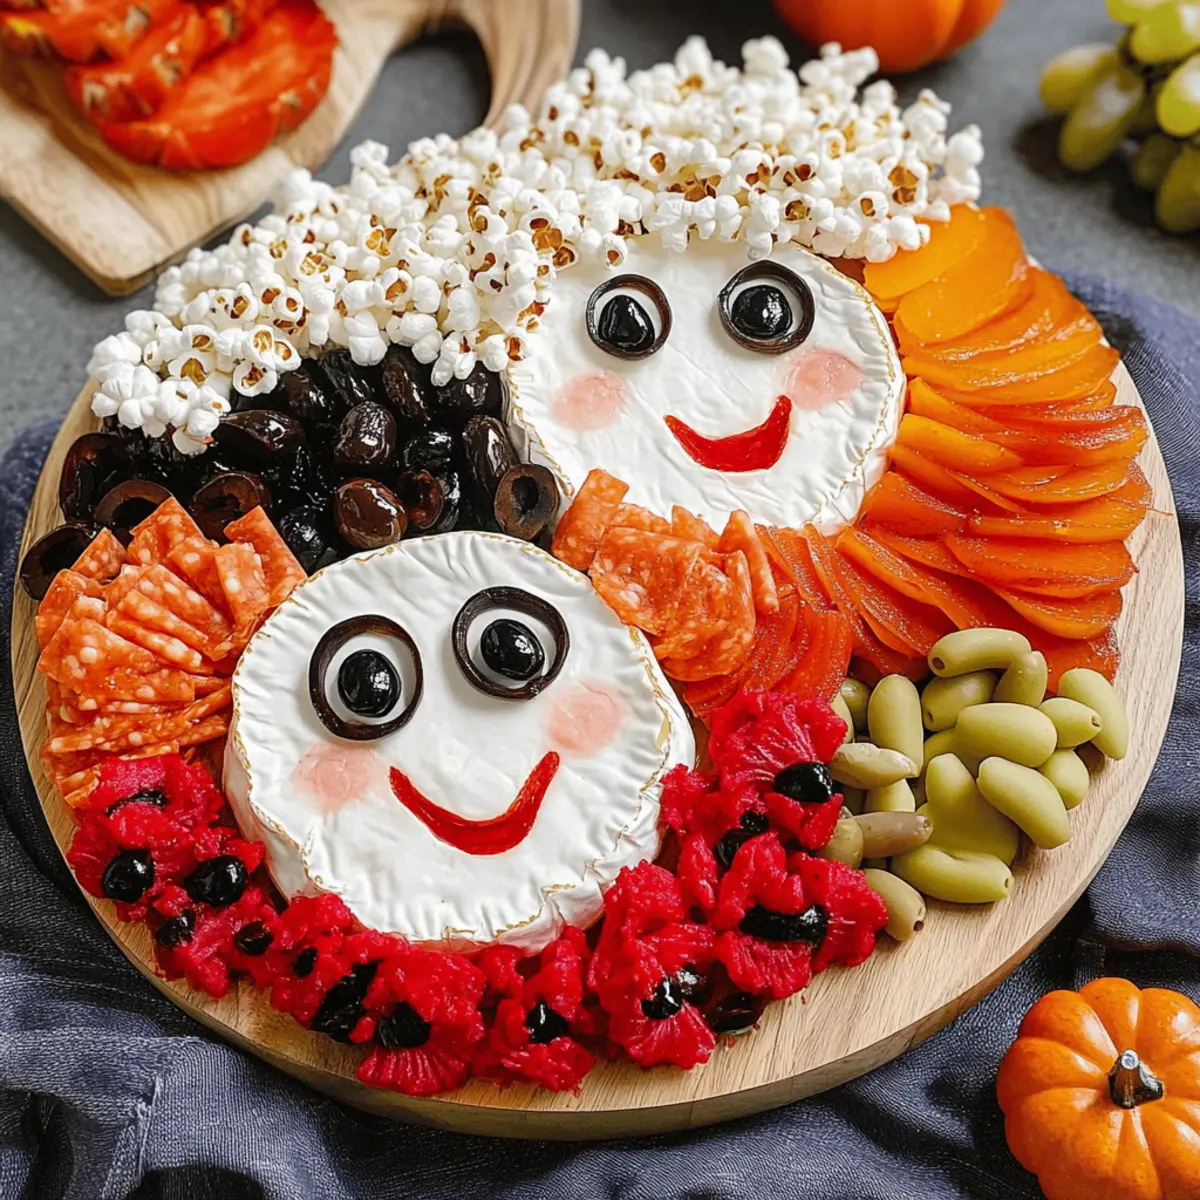
Now it’s time to have some fun with hair! Use the popcorn to create a wild and crunchy hairstyle for one of the sisters. Simply pile it on top of the brie, letting it cascade for a whimsical effect. For another sister, roll pepperoni slices tightly and insert them onto toothpicks to form charming curls, adding both height and texture to your snack board.
Step 5: Assemble the Final Hair
To finalize the hairstyles, take a handful of blackberries and mound them atop the last brie wheel to create a fuller hair look for the third sister. The juicy blackberries not only add depth but also enhance the colorful presentation of your Hocus Pocus Snack Board. Be sure to arrange them playfully for a vibrant visual effect.
Step 6: Arrange Decorative Fruits
Gather fresh fruits like raspberries, green grapes, and small oranges to represent the sisters' dresses. Artfully scatter these colorful fruits around the cheese wheels, ensuring contrast and variety in the layout. This step adds a refreshing pop of color while completing the whimsical theme of your Halloween charcuterie board.
Step 7: Create Fun-Shaped Cheese Accents
If you have a cookie cutter, use it to cut additional pieces of cheese into fun Halloween shapes like bats and broomsticks. Place these charming cheese accents around the board to fill in any gaps and enhance the playful spirit of your Hocus Pocus Snack Board. The shapes will offer an inviting, imaginative touch that entices guests to dig in.
Step 8: Fill Empty Spaces
Look over your board for any empty spaces and fill them with more fruits or snacks like crackers and chips. These crunchy additions provide balance to the board while also enhancing the variety of flavors. Aim for an eye-catching arrangement that invites everyone to enjoy this delightful and festive spread.
Step 9: Serve Immediately
Once your Hocus Pocus Snack Board is beautifully arranged, serve it immediately to showcase its fresh and colorful presentation. This ensures that the fruits and cheeses maintain their optimal flavor and texture. Gather your friends, prepare to enjoy a magical movie night, and relish in the fun of this unique Halloween snack board!
Make Ahead Options
These Hocus Pocus Snack Boards are perfect for busy home cooks looking to save time! You can prep most of the elements up to 24 hours ahead of time. Slice the olives and make the Twizzler lips, then store them in airtight containers to maintain their freshness. You can also arrange the cheeses and place the popcorn and pepperoni curls on toothpicks, covering it with plastic wrap to keep them fresh. However, it's best to add the fresh fruits just before serving to prevent them from wilting or bruising. When you're ready to impress your guests, simply assemble the prepped components and add fruits, and you’ll have a magical and whimsical centerpiece with minimal effort!
What to Serve with Hocus Pocus Charcuterie Board
As the playful colors and textures of your Hocus Pocus Snack Board come alive, consider these delightful pairings to elevate your Halloween gathering.
-
Crispy Potato Skins: These savory bites add a crunchy contrast to the creamy cheeses, making them a hearty addition to your spread.
-
Pumpkin Soup: Serve this warm, velvety delight for a cozy touch that complements the festive flavors of the board while keeping the spooky spirit alive.
-
Spooky Fruit Cups: A mix of fresh fruits arranged in Halloween-themed cups enhances the sweetness and adds a fun, seasonal element balanced with your charcuterie.
-
Themed Cocktails: Create a Hocus Pocus Margarita with vibrant colors and flavors that will enchant your guests and provide a refreshing sip alongside the snacks.
-
Chocolate-Covered Pretzels: These sweet and salty treats add caramelized crunch and a festive twist, perfect for snacking between bites of cheese and fruits.
-
Ghostly Cheese Sticks: Mozzarella sticks decorated as ghosts are a fun addition that kids will love, beautifully contrasting the sophisticated elements of your Hocus Pocus Snack Board.
Consider these pairings to ensure your Halloween festivities are as enchanting and delicious as the iconic movie itself!
Expert Tips for the Hocus Pocus Snack Board
-
Choose the Right Board: Select a large and visually appealing platter to create an enticing height and colorful display for your Hocus Pocus Snack Board.
-
Mix Textures: Combine various cheeses, meats, and snacks to create a harmonious balance of flavors and textures. This will delight your guests and enhance the overall experience.
-
Keep It Fresh: Assemble your board no more than 24 hours in advance. This keeps the fruits fresh and ensures your Hocus Pocus Snack Board looks its best at serving time.
-
Customize Creatively: Don’t hesitate to swap in your favorite ingredients. From nuts to different candies, personalizing your board can add unique touches that resonate with your taste.
-
Accessorize Wisely: When using cookie cutters for fun cheese shapes, choose smaller cutters. This helps to seamlessly fill gaps and maintain the whimsical presentation of your Halloween board.
Hocus Pocus Snack Board Variations
Feel free to get creative and customize your Hocus Pocus Snack Board for an even more spooktacular experience!
-
Cheese Swap: Try using cheddar or gouda for a sharper flavor that complements the other ingredients well. The vivid colors will also make the presentation pop!
-
Crunchy Additions: Incorporate fun snacks like pretzels or nuts to add an extra layer of texture and flavor to your board.
-
Gummy Treats: Swap in gummy worms or spooky-themed candies instead of licorice for a fun, sweet twist that kids will adore.
-
Herbal Garnish: Add fresh herbs like rosemary or thyme, which not only look great but also enhance the flavors when paired with cheese.
-
Hot & Spicy: Introduce jalapeño slices or spicy pepperoni for an added kick, appealing to those who enjoy a little heat in their snacks.
-
Fruity Swap: Dried fruits like apricots or figs can replace fresh fruits, providing a chewy texture and lasting flavor without sacrificing the Halloween vibe.
-
Vegetable Medley: Include colorful veggie chips or even roasted pumpkin seeds for an extra healthy touch that pairs beautifully with the creaminess of the brie.
For a delightful snacking experience, feel free to complement your charcuterie board with Zucchini Tots or a batch of Pepperoni Pizza Roll appetizers that will surely delight your guests!
Storage Tips for Hocus Pocus Snack Board
Fridge: Store leftover components in airtight containers in the refrigerator for up to 3–4 days to maintain freshness and taste.
Separate Ingredients: Keep cheeses, fruits, and snacks in separate containers to avoid mixing flavors and textures; they'll last longer this way.
Pre-Assembled Board: If you’ve assembled the board partially, it’s best to consume it within 24 hours for a vibrant presentation and to prevent fruits from wilting.
Reheating: If any components require reheating (like crackers), briefly warm them in a low oven before serving for added crunch, though most items are best enjoyed cold.
Hocus Pocus Snack Board Recipe FAQs
How do I choose the best Brie cheese for my Hocus Pocus Snack Board?
Absolutely! When selecting Brie cheese, look for wheels with a smooth, even surface and no dark spots. The cheese should be soft to the touch but not overly squishy, indicating it’s at the right ripeness for flavor. Typically, Brie that’s been aged around 4 to 6 weeks will provide a rich, creamy taste that perfectly complements the visual appeal of your snack board.
What’s the best way to store leftovers from the Hocus Pocus Snack Board?
Leftover components should be stored in airtight containers in the refrigerator for up to 3–4 days. Keep different ingredients—like cheese, fruits, and crackers—in separate containers to maintain freshness and prevent any mixing of flavors. This way, you can enjoy the pieces on their own, keeping all their delightful textures intact!
Can I freeze some of the ingredients for my charcuterie board?
It’s best not to freeze the assembled Hocus Pocus Snack Board or most of its fresh ingredients. However, if you find yourself with leftover sliced cheeses or crackers, you can freeze them separately. Wrap the cheese tightly in plastic wrap and then in foil, labeling with the date. It can last up to 3 months in the freezer. Thaw in the fridge when ready to enjoy!
What if I can’t find Twizzlers Pull and Peel Licorice?
Very! If Twizzlers are unavailable, try gummy or marshmallow candy strips for the lips, or even thinly sliced strawberries for a fresh alternative. The key is to maintain that colorful playfulness, so feel free to get creative with similar-textured sweets that appeal to your taste buds.
Are there any dietary considerations for pets related to the ingredients in this board?
Yes! It’s vital to keep your furry friends safe. Many ingredients like chocolate, garlic (from some meats), and grapes can be harmful to pets. Be sure to keep any leftover snacks well out of their reach, and check with your vet if you're unsure about any specific ingredient. Remember, a safe pet is a happy pet!
Can I make the Hocus Pocus Snack Board ahead of time?
Certainly! You can assemble many parts of your Hocus Pocus Snack Board up to 24 hours in advance. However, I suggest waiting to add the fresh fruits until just before serving to prevent wilting. To maximize freshness, keep everything covered in the fridge, and arrange the board quickly before your guests arrive to maintain its delightful appeal.
Hocus Pocus Snack Board: A Spooktacular Treat for Halloween
Ingredients
Equipment
Method
- Prepare the Base: Select a large, visually appealing board or platter. Place three brie cheese wheels in a row to represent the Sanderson sisters.
- Create the Lips: Use Twizzlers to cut and form lips for each cheese wheel. Press the licorice onto the brie.
- Slice the Eyes: Slice black olives in half and place on each cheese wheel to create expressive eyes.
- Form the Hair: Use popcorn to create a hairstyle for one sister and roll pepperoni slices for another.
- Assemble the Final Hair: Top the last brie wheel with blackberries for a fuller hair look.
- Arrange Decorative Fruits: Scatter fresh fruits around the cheese wheels to represent the sisters' dresses.
- Create Fun-Shaped Cheese Accents: Use a cookie cutter to cut cheese into Halloween shapes.
- Fill Empty Spaces: Look over your board and fill any gaps with more fruits or snacks like crackers and chips.
- Serve Immediately: Once arranged, serve to showcase the fresh, colorful presentation.
Leave a Reply