
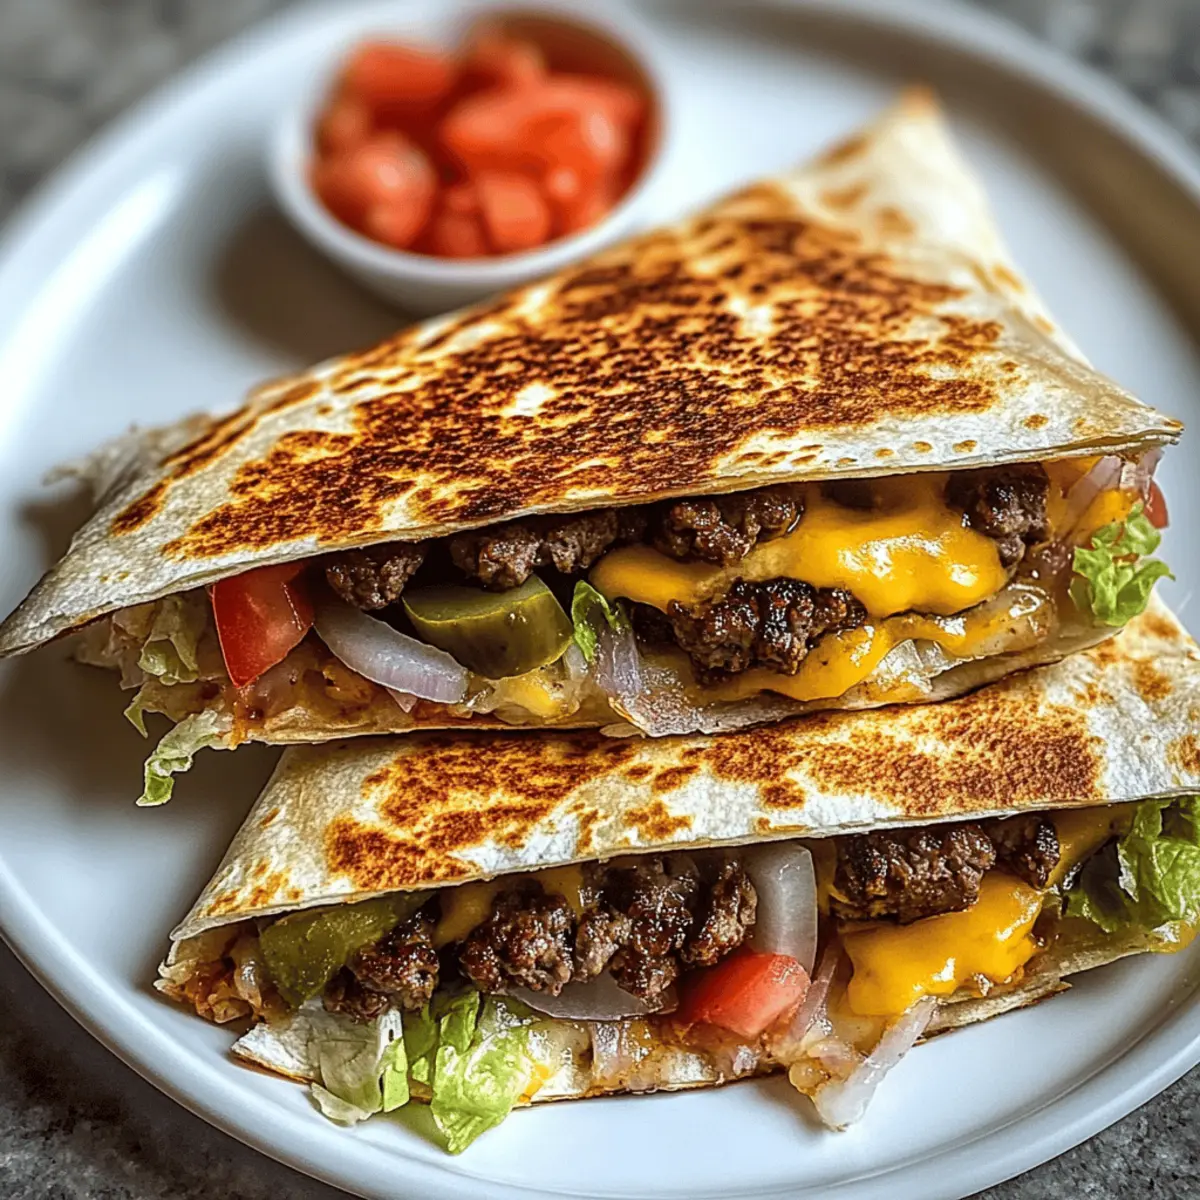
The sizzle of beef hitting a hot grill is like music to my ears, and these Juicy Grilled Smashburger Quesadillas take that sound to a whole new level! Combining the best of a smashburger with gooey cheese and vibrant veggies, this recipe is not just comfort food; it’s a culinary experience. What I love most is how quick they are to whip up—perfect for those evenings when you need a satisfying meal without the fuss. Plus, they’re a hit at gatherings, offering a delightful crunch in every bite! Ready to bring some cheesy goodness into your kitchen? Let’s dive in!

Why are Smashburger Quesadillas a Must-Try?
Irresistible Flavor: The savory blend of grilled beef and oozy cheese creates an unforgettable taste that’s simply addictive.
Quick to Make: Whipping up these quesadillas takes under an hour, making them perfect for busy weeknights or last-minute gatherings.
Crowd-Pleasing Delight: Their crispy exterior and hearty filling make these quesadillas a hit with family and friends, guaranteed to impress everyone at your next dinner party!
Easy Customization: Feel free to adjust the fillings to suit your taste—switch up the cheeses or add some spicy jalapeños for an extra kick!
Satisfying and Filling: Each bite is packed with juicy goodness, ensuring a fulfilling dining experience that leaves you craving more.
Get ready to indulge in these flavorful Smashburger Quesadillas!
Smashburger Quesadillas Ingredients
-
For the Beef Filling
• Ground Beef (80/20 blend) – Provides juiciness and flavor; you can substitute with turkey, chicken, or pork, but adjust cooking times and seasonings accordingly.
• Worcestershire Sauce – Adds savory umami depth and helps bind the meat.
• Garlic Powder – Offers consistent garlic flavor without the risk of burning.
• Onion Powder – Contributes a sweet and savory note that enhances the beef taste.
• Salt and Pepper – Essential for seasoning, enhancing the overall flavor. -
For the Quesadilla Assembly
• Large Flour Tortillas – Serves as the ideal vessel for fillings and crisps up nicely when grilled.
• Shredded Cheddar Cheese – Offers bold flavor and excellent meltability for a gooey experience.
• Shredded Monterey Jack Cheese – Adds creaminess, beautifully balancing the sharper cheddar.
• Diced Onions – Provides crunch and a mild flavor that contrasts the richness of the beef.
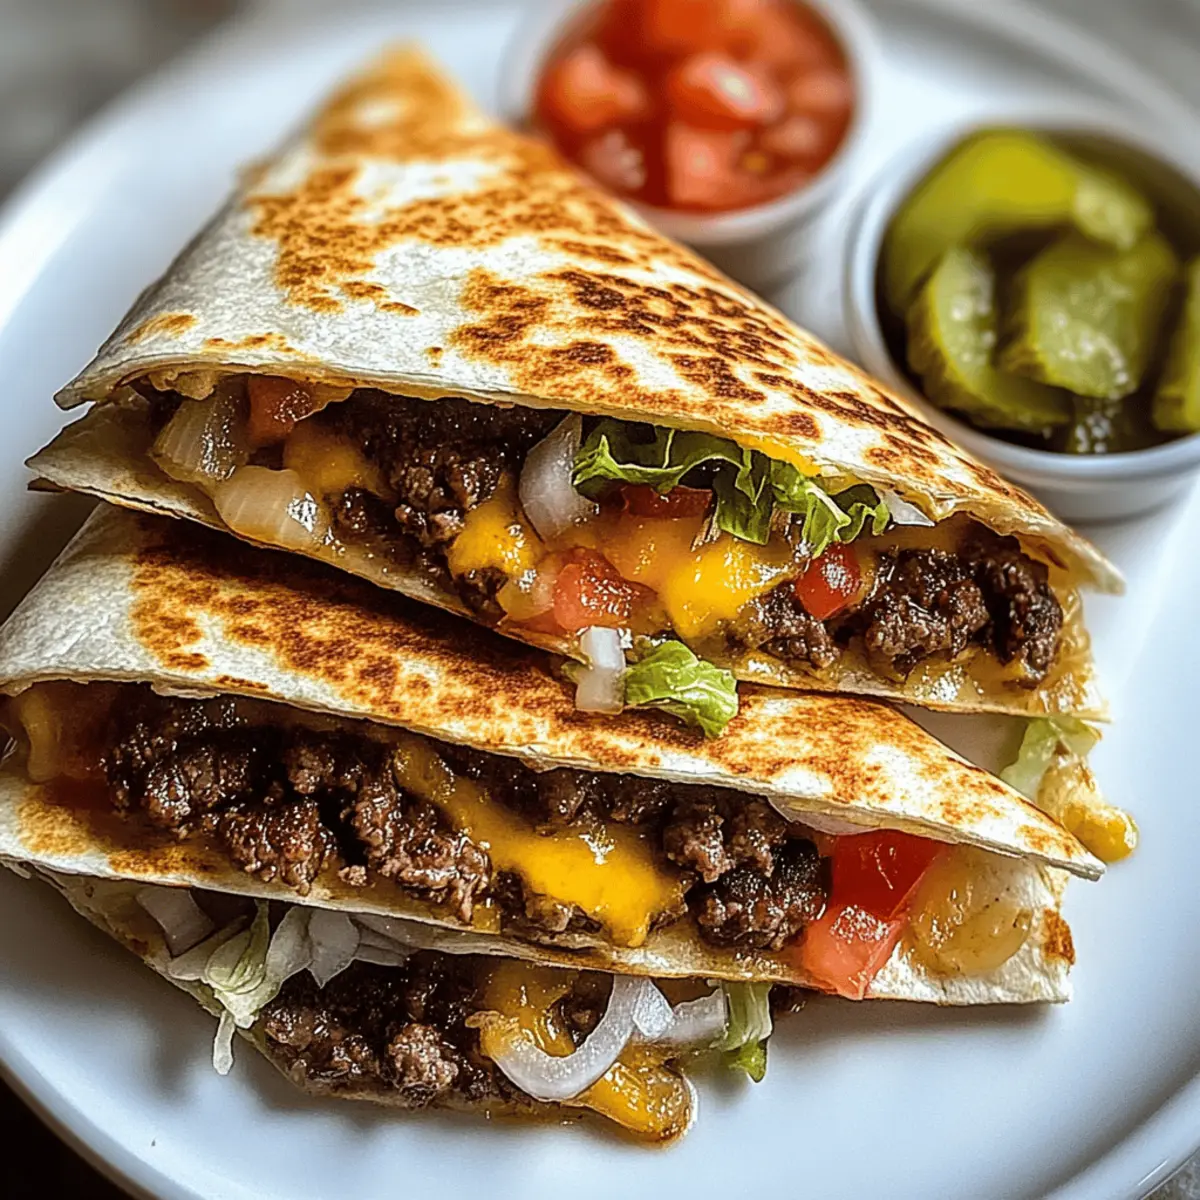
• Sliced Pickles – Introduces a refreshing tang in every bite, enhancing the overall flavor.
• Diced Tomatoes – Adds sweetness and vibrant color, boosting the quesadilla's appeal. -
For Cooking
• Unsalted Butter (melted) – Creates a crispy, golden crust on the tortillas.
• Olive Oil – Used for greasing and preventing sticking while grilling. -
Optional Garnish and Condiments
• Lettuce Leaves – An optional garnish that adds a fresh crunch.
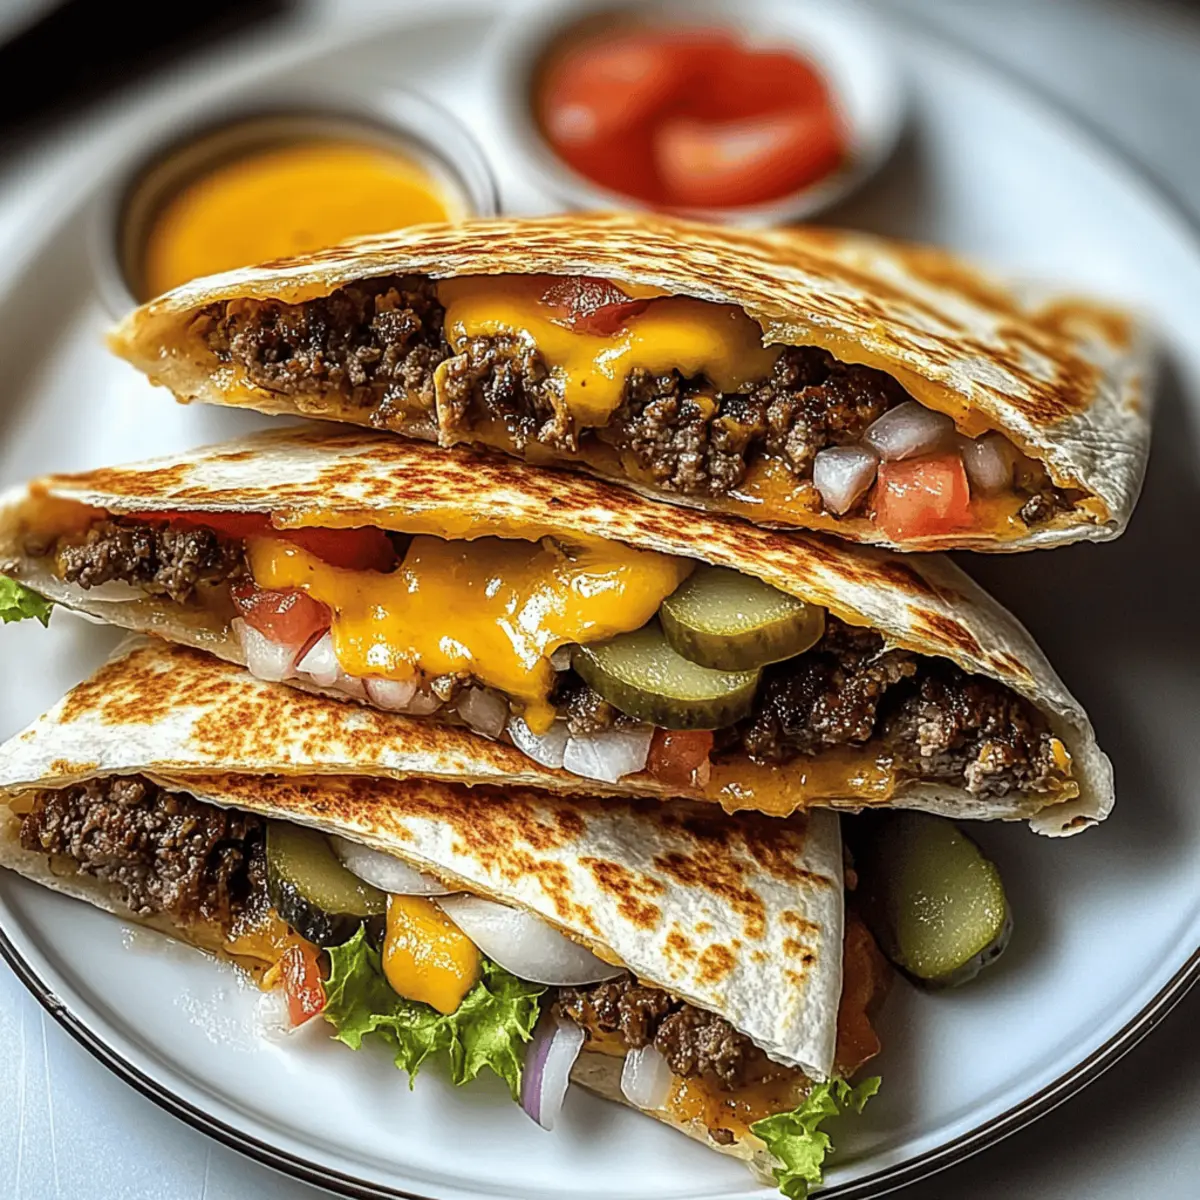
• Ketchup and Mustard – Classic condiment pairings to serve alongside.
Are you ready to dive into these scrumptious Smashburger Quesadillas? Let’s get cooking!
Step‑by‑Step Instructions for Smashburger Quesadillas
Step 1: Mix the Flavorful Filling
In a mixing bowl, combine the ground beef with Worcestershire sauce, garlic powder, onion powder, salt, and pepper. Using your hands, gently mix the ingredients until just combined to preserve tenderness. The blend should be thoroughly integrated without overworking the meat, ensuring each bite of your smashburger quesadillas bursts with juicy flavor.
Step 2: Heat the Grill or Skillet
Preheat your grill or a large skillet over medium-high heat, allowing it to reach the proper temperature for searing the beef. This should take about 5 minutes. A hot grill creates that irresistible crust on the patties. While the grill heats up, prepare to create perfectly-sized meatballs for even cooking.
Step 3: Shape the Patties
Divide the beef mixture into eight equal portions and roll them into balls. This ensures consistency in size for even cooking in your smashburger quesadillas. Once rolled, position them near the grill or skillet so they’re ready to transform into delicious patties in just a moment!
Step 4: Grill the Patties
Brush the grill or skillet lightly with olive oil to prevent sticking. Place the beef balls on the surface and press down gently with a spatula to flatten them into thin patties. Cook for about 2-3 minutes until the edges are crispy and the bottom is nicely browned. You’ll know they're ready to flip when brown juices emerge on the uncooked side.
Step 5: Finish Cooking the Patties
Flip the patties and continue cooking for an additional 2-3 minutes until they reach your desired doneness. Set the cooked patties aside on a plate to rest while you prepare the tortillas for the smashburger quesadillas. The resting allows the juices to redistribute, making them even more flavorful.
Step 6: Prepare the Tortillas
Reduce the heat to medium and brush one side of each large flour tortilla with melted butter. This will create a golden, crispy crust when grilled. As you work, have your fillings close by to create a smooth assembly line for your smashburger quesadillas.
Step 7: Assemble the Quesadillas
Place a buttered tortilla on the hot grill or skillet with the butter side down. Layer half of the tortilla with shredded cheddar cheese, then add two patties, diced onions, pickles, and tomatoes. Top with more cheese for that gooey goodness. This layering ensures every bite is packed with flavor!
Step 8: Grill the Quesadillas
Fold the tortilla in half to seal the fillings inside and press gently. Grill for about 2-3 minutes per side until the tortilla is golden brown and the cheese melts beautifully. Keep an eye on the quesadilla to avoid burning while the satisfying aroma fills your kitchen.
Step 9: Repeat for Remaining Quesadillas
Repeat the assembly and grilling process for the remaining tortillas and fillings. This method allows you to enjoy fresh, hot smashburger quesadillas every time. Each quesadilla builds on the last, delivering cheesy goodness and grilled delight consistently at your dinner table.
Step 10: Serve and Delight
Once cooked, slice the quesadillas into wedges using a sharp knife. Serve them warm, optional garnished with fresh lettuce leaves, alongside ketchup and mustard for dipping. The crispy exterior and cheesy, juicy filling of your smashburger quesadillas will have everyone coming back for seconds!
Smashburger Quesadillas: Flavorful Twists Await
Feel free to spice up your quesadilla adventure with delightful variations that cater to your taste buds!
- Beef Swap: Try ground turkey, chicken, or pork for a lighter twist that still delivers delicious flavor.
- Spicy Kick: Add jalapeños or sliced serrano peppers for those who crave heat in their smashburger quesadillas.
- Veggie Delight: Go meatless by stuffing your quesadillas with grilled bell peppers, mushrooms, or zucchini alongside those melty cheeses; a perfect way to incorporate more veggies!
- Cheese Mix: Use pepper jack for a zesty bite, or combine smoked gouda for an extra smoky flavor that transforms each quesadilla experience.
- Herb Infusion: Incorporate fresh herbs like cilantro or parsley in the filling for a bright, fresh punch.
- Crunch Factor: Toss in some crispy bacon bits for a savory crunch that elevates the texture of your quesadillas.
- Dip Variation: Serve with guacamole or a spicy salsa on the side for added layers of flavor—check out this homemade guacamole recipe.
- Savory Flour Tortillas: Switch to whole wheat or spinach tortillas for a healthier alternative without sacrificing flavor.
Your smashburger quesadillas can be as unique as you want! With these variations, feel free to create a personalized dish that'll keep everyone coming back for more.
Make Ahead Options
These Juicy Grilled Smashburger Quesadillas are perfect for meal prep enthusiasts! You can prepare the beef mixture up to 24 hours in advance by combining the ground beef with Worcestershire sauce, garlic powder, onion powder, salt, and pepper, then store it in an airtight container in the refrigerator to maintain freshness. Assemble the quesadillas by layering the ingredients right before grilling to prevent sogginess. For extra convenience, you can grill the patties and refrigerate them for up to 3 days. When you're ready to serve, just reheat the patties, assemble the quesadillas, and grill until crispy. This makes dinner time a breeze while still delivering just as delicious results!
What to Serve with Juicy Grilled Smashburger Quesadillas
Elevate your meal with delightful sides and drinks that enhance the flavors of your delicious quesadillas.
- Creamy Guacamole: This rich and buttery dipping option adds a smooth texture and freshness, balancing the savory quesadillas perfectly.
- Zesty Coleslaw: A crunchy slaw brings a refreshing crunch and tangy flavor that contrasts beautifully with the warm, cheesy filling.
- Classic Potato Wedges: Crispy wedges are the perfect hearty companion, providing additional texture and flavor to round out your meal.
- Fresh Garden Salad: A light salad can introduce a burst of color and freshness, complementing the rich quesadillas with crisp greens and bright veggies.
- Roasted Corn on the Cob: The sweetness of the corn enhances the smoky, grilled flavors of the quesadilla, creating a delightful combination worth savoring.
- Refreshing Lemonade: A cool, tangy drink helps cleanse the palate between bites, making every mouthful of quesadilla even more enjoyable.
- Spicy Salsa: Add a kick to your meal with a zesty salsa that brings heat and vibrant flavor alternative to the traditional ketchup and mustard pairings.
- Crispy Tortilla Chips: Serve alongside your quesadilla for a satisfying crunch, perfect for dipping into guacamole or salsa.
- Brownie Bites: End the meal on a sweet note with fudgy brownies, perfectly balancing the savory quesadillas with rich chocolate decadence.
Expert Tips for Smashburger Quesadillas
-
Don’t Overmix Beef: Gently combine the beef mixture to keep the patties tender and juicy, ensuring the flavor shines through in your smashburger quesadillas.
-
Preheat Properly: Make sure your grill or skillet is hot enough before adding the patties. A sizzling surface creates a perfect sear and enhances flavor.
-
Avoid Too Much Filling: Overloading the tortillas can lead to sogginess. Be mindful of the amount of cheese and toppings you add for a crispy bite.
-
Rest Before Slicing: Allow the quesadillas to rest a few minutes before cutting. This helps the filling stay intact and prevents spills when serving.
-
Adjust to Taste: Feel free to customize with different cheeses or add toppings like jalapeños for extra spice in your smashburger quesadillas!
How to Store and Freeze Smashburger Quesadillas
- Room Temperature: Allow quesadillas to cool slightly before serving; they can sit out for up to 2 hours before needing refrigeration.
- Fridge: Store leftover smashburger quesadillas in an airtight container for up to 3 days. This helps maintain their texture and flavor.
- Freezer: To freeze, wrap cooled quesadillas in plastic wrap followed by aluminum foil or place in a freezer-safe bag. They can be frozen for up to 2 months.
- Reheating: For best results, reheat quesadillas in a skillet over medium heat. This keeps them crispy, allowing the cheese to melt perfectly while warming through.
Smashburger Quesadillas Recipe FAQs
How do I choose the right ground beef for my quesadillas?
Absolutely! For the best results, look for an 80/20 blend, which strikes the perfect balance between fat and lean meat, resulting in juicy patties. If you're considering alternatives, you can opt for ground turkey or chicken, but be aware that these leaner meats may require slight adjustments in cooking time and seasonings to ensure they maintain their moisture and flavor.
How should I store leftover smashburger quesadillas?
Very easy! Once cooled slightly, store your leftover quesadillas in an airtight container for up to 3 days in the refrigerator. This keeps them fresh and delicious. If you’d like to preserve them for longer, consider freezing them.
Can I freeze smashburger quesadillas?
Yes, you can! To freeze, wrap the cooled quesadillas tightly in plastic wrap, then place them in an airtight freezer bag or container. They’ll stay good for up to 2 months. When you’re ready to enjoy them, simply reheat in a skillet over medium heat to regain that delightful crispiness!
What should I do if my quesadillas are soggy?
No worries at all! If your quesadillas turn out soggy, it could be due to overloading them with toppings or not letting them rest before cutting. For the future, try to limit the amount of filling and allow the cooked quesadillas to rest a few minutes before slicing to get those fillings to set!
Are smashburger quesadillas suitable for people with dietary restrictions?
Certainly! You can easily adapt this recipe for various dietary needs. For a gluten-free option, use corn tortillas instead of flour. If you're catering to dairy intolerances, try plant-based cheeses or skip the cheese entirely without sacrificing flavor by adding more spices or fresh vegetables. Just be mindful of any allergies when selecting garnish and condiments!
How do I enhance the flavor of my smashburger quesadillas?
Great question! For an extra burst of flavor, consider adding some diced jalapeños for heat, or swapping out the cheddar for pepper jack cheese. I often throw in some fresh herbs like cilantro or green onions right before serving for an aromatic touch that takes these quesadillas to the next level!
Smashburger Quesadillas: Crispy, Cheesy Bliss Awaiting You
Ingredients
Equipment
Method
- In a mixing bowl, combine ground beef with Worcestershire sauce, garlic powder, onion powder, salt, and pepper.
- Preheat your grill or a large skillet over medium-high heat.
- Divide the beef mixture into eight equal portions and roll them into balls.
- Brush the grill or skillet lightly with olive oil and place the beef balls, pressing them down gently.
- Flip the patties after 2-3 minutes and continue cooking until desired doneness.
- Brush one side of each tortilla with melted butter.
- Assemble by placing the buttered side down and layer cheese, patties, onions, pickles, and tomatoes.
- Fold the tortilla over and grill until golden brown and cheese is melted.
- Repeat for remaining tortillas and fillings.
- Slice the quesadillas into wedges and serve warm.
Leave a Reply