
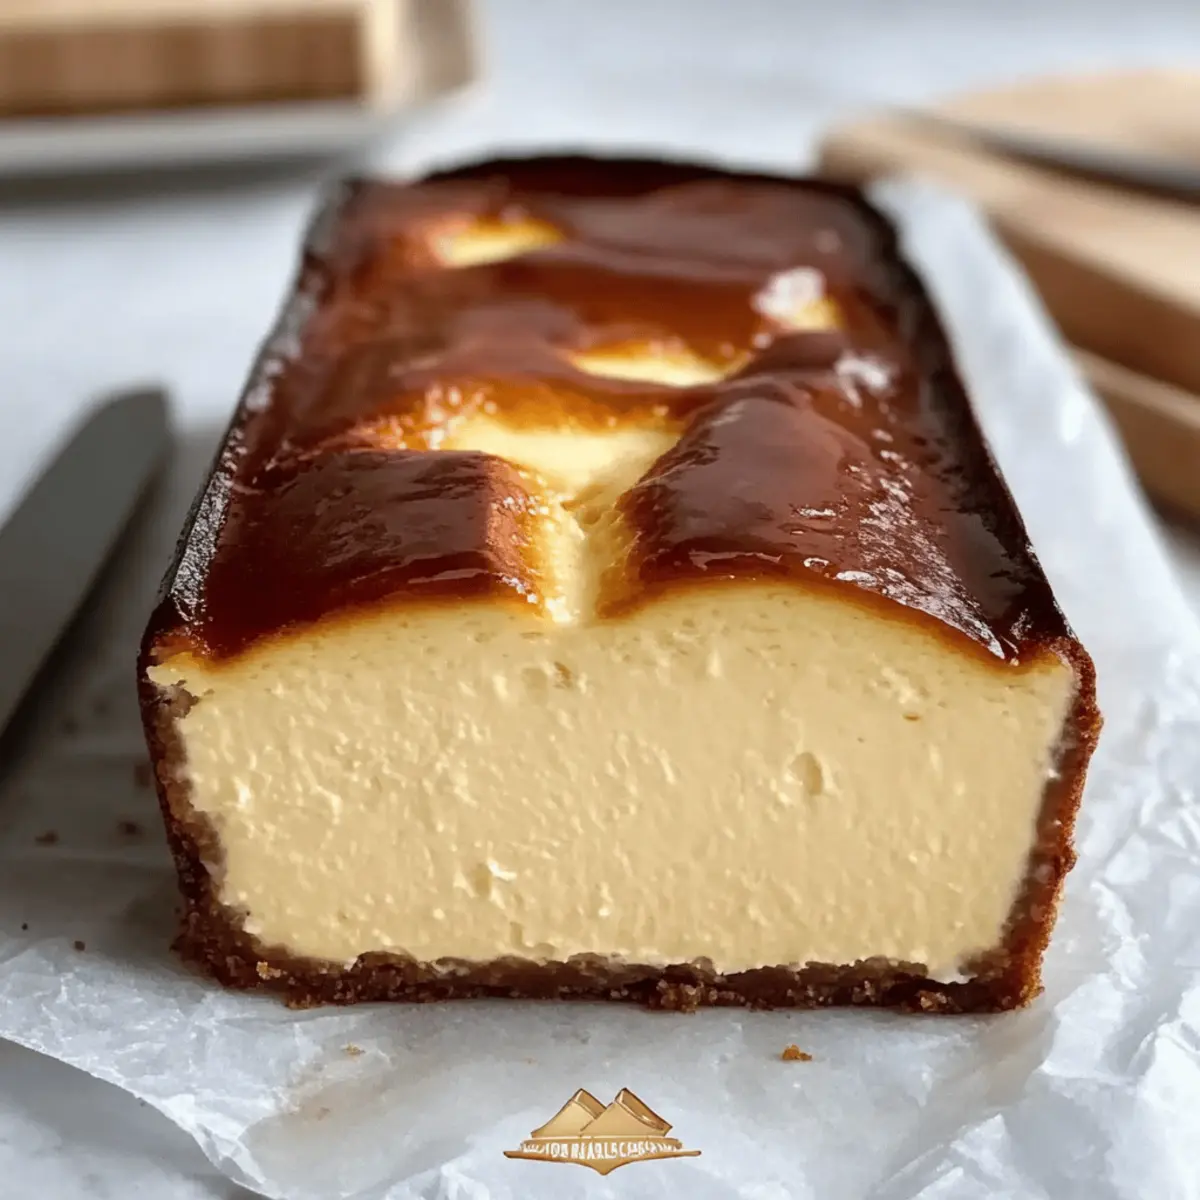
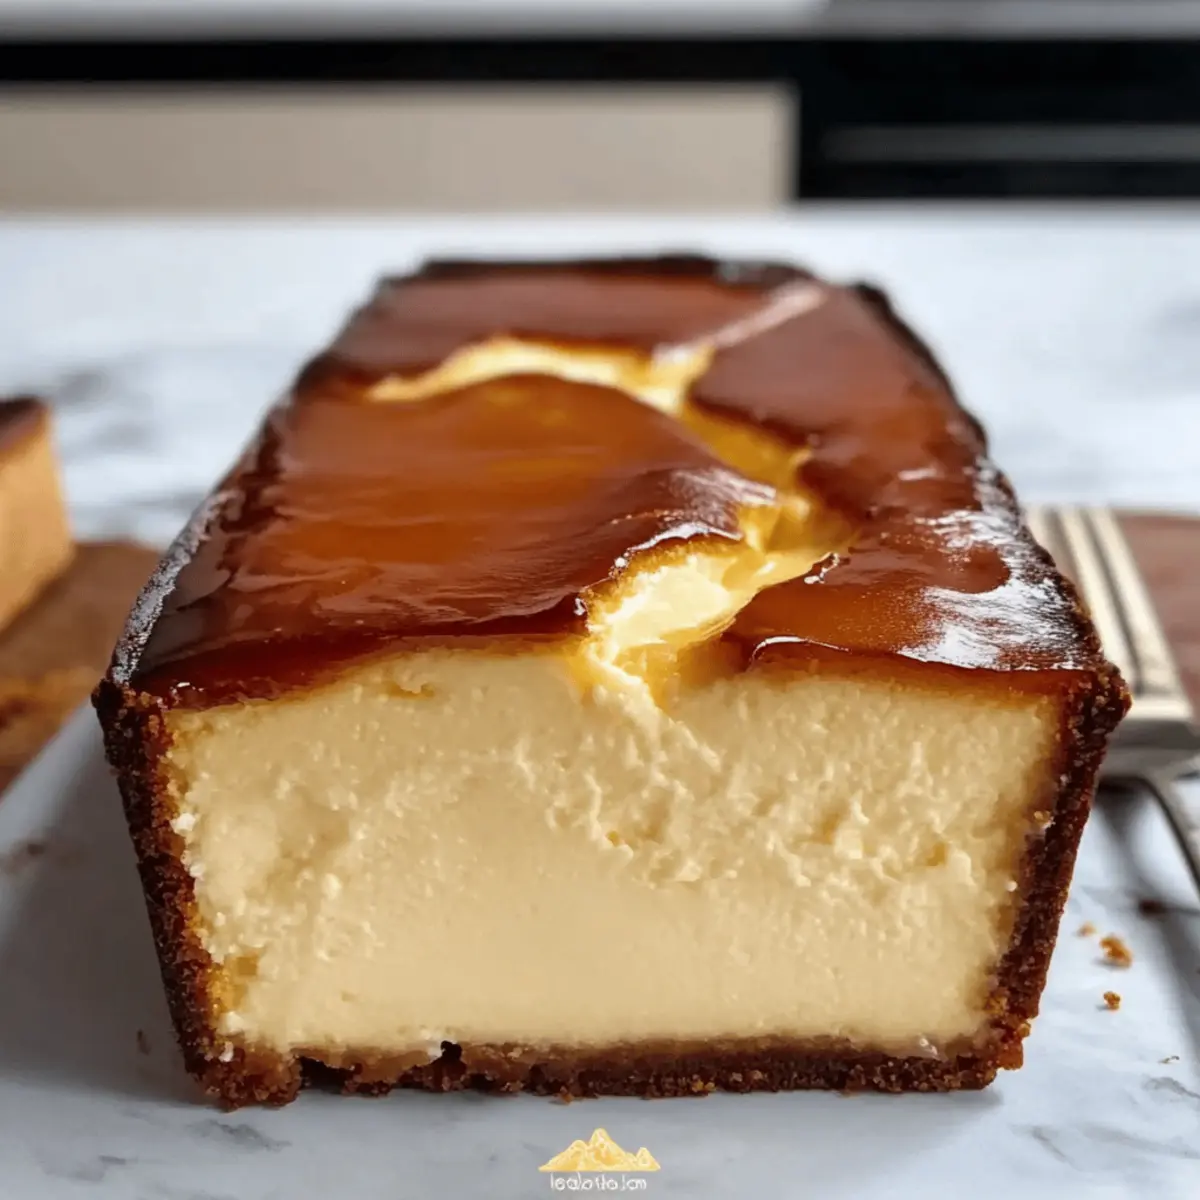
Just the other day, I found myself craving something sweet yet simple, a little indulgence that wouldn’t leave me with a mountain of leftovers. That’s when I decided to whip up a Burnt Basque Cheesecake in a loaf pan. This delightful small-batch dessert isn’t just easy to prepare with minimal ingredients; it also lends itself beautifully to intimate gatherings or cozy nights in. Picture that beautifully caramelized top, giving way to a creamy, custard-like center with a hint of bitterness that heightens the sweetness. It's a crustless marvel that’s perfect for those who want a touch of gourmet without the fuss—plus, you can easily opt for a gluten-free version! Are you ready to dive into the world of creamy desserts that feel like a warm hug? Let’s get baking!
Why is This Cheesecake So Special?
Simplicity at Its Core: This Burnt Basque Cheesecake is incredibly straightforward to prepare, requiring minimal ingredients and featuring a fuss-free method.
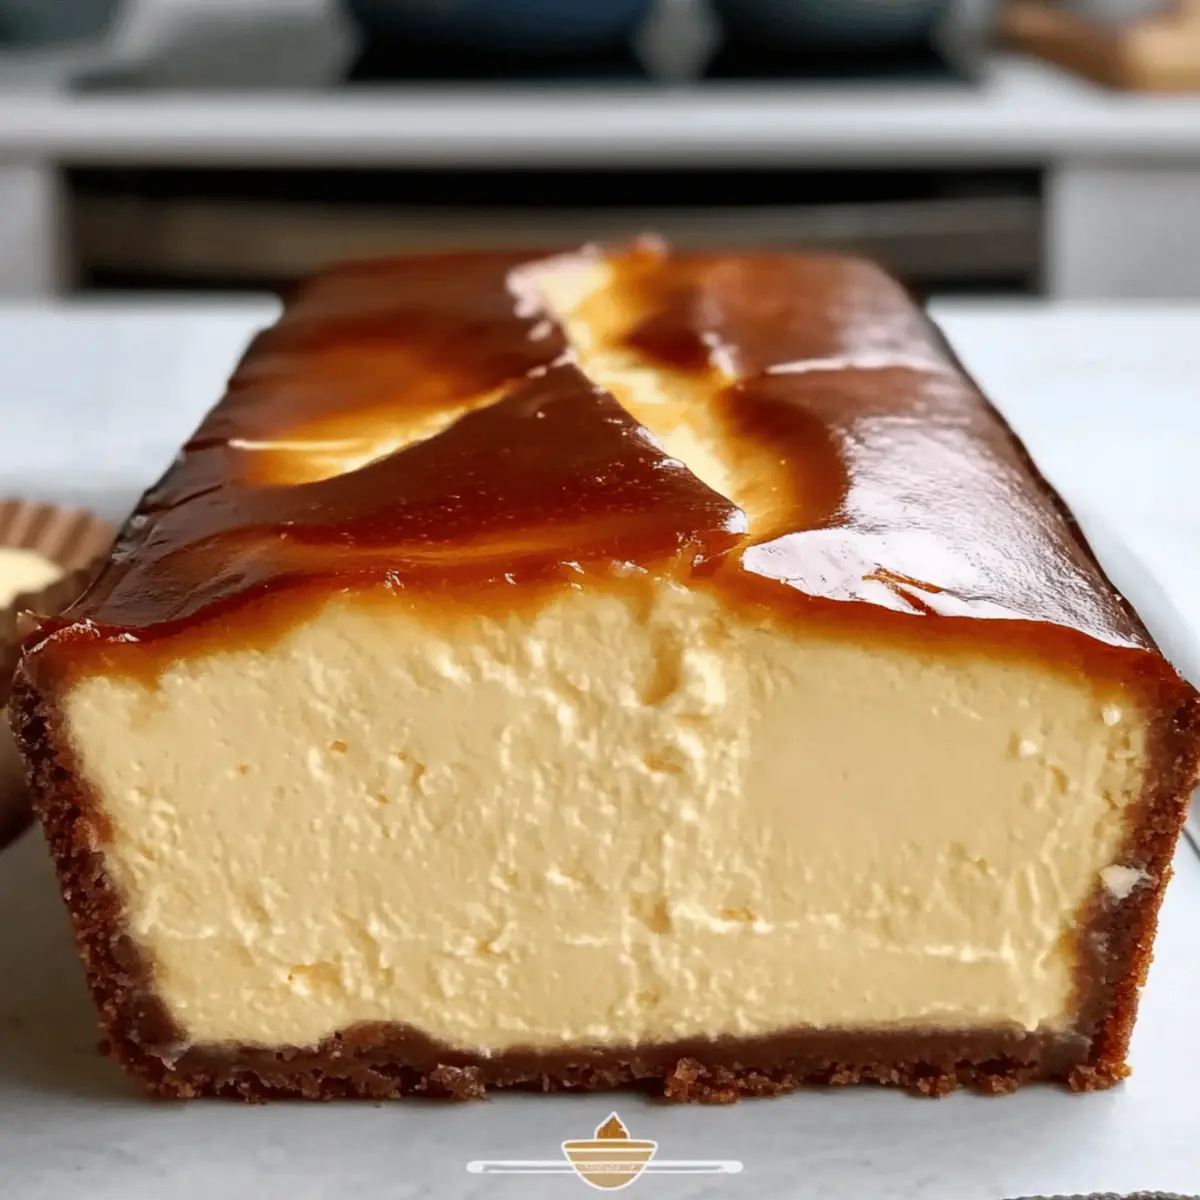
Unique Flavor Profile: The combination of caramelization and creamy texture creates a delightful contrast, tantalizing your taste buds with layers of rich flavor.
Perfect for Smaller Gatherings: Ideal for a small batch, it’s the perfect treat for those intimate dinners or cozy nights at home.
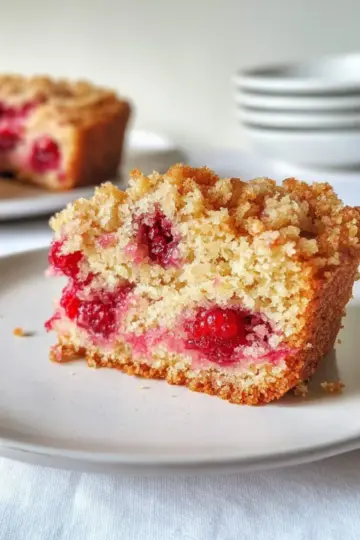
Versatile Substitutions: Whether you need a gluten-free option or want to adapt it with various toppings, this cheesecake is incredibly versatile. Try it plain, or dress it up like in our Velvet Strawberry Cheesecake for a fresh twist!
Time-Saving Delight: With just 45 minutes in the oven, it’s a quick dessert solution that doesn’t skimp on gourmet flair!
Get ready to impress your friends and family with a dessert that's not just delicious but also has the potential to become a staple in your kitchen.
Burnt Basque Cheesecake Ingredients
For the Cheesecake
- Cream Cheese – Provides richness and creaminess; use full-fat for the best texture.
- Granulated Sugar – Sweetens the cheesecake; alternative sweeteners can be adjusted for taste.
- Eggs – Binds the ingredients and creates a custard-like texture; ensure eggs are at room temperature for even mixing.
- Heavy Cream – Adds richness and smoothness; substitute with coconut cream for a dairy-free version.
- Flour – Stabilizes the cheesecake; can be swapped with a gluten-free flour blend or omitted for a gluten-free dessert.
- Salt – Enhances flavor; always use a fine grain for even distribution.
This Burnt Basque Cheesecake is a small-batch dessert that's simple yet indulgently delicious—perfect for those cozy nights!
Step‑by‑Step Instructions for Burnt Basque Cheesecake
Step 1: Preheat Your Oven
Start by preheating your oven to a high temperature of 400°F (200°C). This is essential for achieving the signature caramelized top of your Burnt Basque Cheesecake. While the oven warms up, gather your ingredients and prepare your loaf pan, which should be ready for the batter shortly.
Step 2: Prepare the Loaf Pan
Next, take a 9x5 inch loaf pan and generously butter the interior to prevent sticking. Then, line the bottom and sides with parchment paper, allowing excess paper to hang over the edges. This ensures easy removal of your cheesecake later on and contributes to that beautiful caramelized finish.
Step 3: Mix the Cream Cheese and Sugar
In a large mixing bowl, add softened cream cheese and granulated sugar. Using a hand mixer or a stand mixer, beat the mixture on medium speed until it’s smooth and creamy, approximately 2-3 minutes. Scrape down the sides of the bowl as needed to ensure even mixing, resulting in a dreamy blend that forms the base of your Burnt Basque Cheesecake.
Step 4: Incorporate the Eggs
Once your cream cheese mixture is smooth, add the eggs one at a time. Beat well after each addition until fully incorporated, which should take around 30 seconds for each egg. This step is crucial for achieving that luscious custard-like texture, so make sure each egg blends in completely before adding the next.
Step 5: Add Wet Ingredients and Dry Mix
Gently fold in the heavy cream, flour, and salt into the egg mixture using a spatula. Be careful to mix just until combined, as over-mixing can deflate the batter. You should see a silky, cohesive batter that’s ready to be transformed into your small-batch Burnt Basque Cheesecake, striking the right balance between airy and rich.
Step 6: Pour the Batter
Pour the cheesecake batter into the prepared loaf pan, ensuring the top is even and smooth. Give the pan a gentle shake to eliminate any air bubbles and create a uniform surface. This is where the magic begins, as your mixture transforms in the oven into the beautifully custardy cheesecake you’ve been dreaming about.
Step 7: Bake to Perfection
Place the loaf pan in the preheated oven and bake for around 45 minutes. Keep an eye on the cheesecake, as it should develop a deep golden color with a slightly burnt appearance on top. The center will remain jiggly, which is perfect for that luxurious texture we’re aiming for in the Burnt Basque Cheesecake.
Step 8: Cool Gradually
Once baking is complete, turn off the oven and crack the door open slightly. Allow the cheesecake to cool in the oven for about 30 minutes, which helps prevent sinking. This gradual cooling is essential for retaining that creamy center that defines a classic Burnt Basque Cheesecake.
Step 9: Chill Before Serving
After your cheesecake has cooled, transfer it to the refrigerator. Allow it to chill for at least 4 hours, or ideally overnight. Chilling enhances the flavors and provides that perfect texture, making it easier to slice when you’re ready to serve this delectable dessert to friends or family.
Step 10: Serve and Enjoy
When you’re ready to enjoy your Burnt Basque Cheesecake, remove it from the fridge. Use the parchment paper to lift it out of the pan for easy serving. Slice it chilled or let it sit at room temperature for about 30 minutes to enhance its creamy texture. Serve plain or with a topping of whipped cream or fresh berries for a delightful touch!
Burnt Basque Cheesecake Variations
Get ready to explore delightful twists on the classic Burnt Basque Cheesecake that will stir your creativity in the kitchen!
- Dairy-Free: Substitute cream cheese and heavy cream with blended silken tofu and coconut cream for a creamy, vegan-friendly version.
- Gluten-Free: Omit the flour or use a gluten-free blend; it won’t compromise the cheesecake’s luscious texture. It’s a gluten-free dream!
- Citrus Zest: Add lemon or orange zest to the batter for a bright flavor that complements the cheesecake’s richness perfectly.
- Spiced Twist: Incorporate a dash of cinnamon or nutmeg into the batter for a warm, spiced note that enlivens each bite. Think cozy desserts!
- Chocolate Lovers: Fold in melted dark chocolate or cocoa powder to the batter for an indulgent chocolate version, reminiscent of a decadent truffle.
- Top It Off: Garnish with a medley of fresh berries or a drizzle of caramel sauce for a visually stunning and flavorful finish. Get inspired with seasonal fruits!
- Nutty Addition: Blend in finely ground nuts like almonds or hazelnuts for added texture and a hint of nuttiness that elevates the dessert.
- For a Showstopper: Use a layer of fruit compote as the base prior to pouring in the cheesecake batter, adding freshness and vibrancy to each slice.
With these variations, the Burnt Basque Cheesecake becomes a canvas for your culinary artistry. Whether trying a new topping or swapping out key ingredients, each twist offers a unique experience. You might even find inspiration for your next dessert creation, like our Velvet Strawberry Cheesecake, perfect for an elegant finish. Happy baking!
How to Store and Freeze Burnt Basque Cheesecake
Fridge: Store your Burnt Basque Cheesecake in an airtight container in the refrigerator for up to 5 days. It will retain its creamy texture and flavor, making it a delightful treat for days to come.
Freezer: While freezing is not recommended for this cheesecake due to its custard-like texture, leftovers can be stored in the freezer for up to 1 month if wrapped tightly. However, be aware that quality may suffer upon thawing.
Reheating: If you prefer to serve it warm, gently reheat slices in the oven at a low temperature (around 300°F/150°C) for about 10 minutes. This method helps to restore some of the creaminess.
Serving Tip: For the best taste, allow the cheesecake to come to room temperature after refrigerating. This enhances the rich flavors and creates that luscious, melt-in-your-mouth experience.
What to Serve with Burnt Basque Cheesecake
Imagine savoring a slice of this delightful cheesecake while enjoying the perfect accompaniments that elevate each bite and create a memorable dining experience.
- Fresh Berries: Juicy strawberries, blueberries, or raspberries provide a tart contrast to the rich cheesecake, brightening your dessert plate.
- Whipped Cream Delight: A dollop of freshly whipped cream adds a fluffy, airy element that complements the dense, creamy texture of the cheesecake beautifully.
- Chocolate Drizzle: A warm, rich chocolate sauce drizzled on top introduces deep, luscious flavors, enhancing the dessert’s indulgence without overwhelming it.
- Citrus Zest: A sprinkle of lemon or orange zest adds a refreshing brightness, cutting through the richness of the cheesecake and invigorating your palate.
- Scented Coffee: Serving this cheesecake alongside a cup of brewed coffee enhances the experience, with its bitter notes balancing the sweetness of the cheesecake.
- Buttery Shortbread Cookies: A few buttery shortbread cookies on the side offer a delightful crunch and melt-in-your-mouth texture that contrasts nicely with the creminess of the cheesecake.
- Ice Cream Scoop: A scoop of vanilla or salted caramel ice cream brings an extra layer of creaminess and temperature contrast, making for an decadent delight.
- Nutty Brittle: A sprinkle of homemade nut brittle provides a satisfying crunch and a sweet, slightly salty flavor, rounding out the dessert in a unique way.
Make Ahead Options
These Burnt Basque Cheesecake treats are perfect for busy home cooks looking to save time during the week! You can prepare the cheesecake batter and refrigerate it for up to 24 hours before baking. To do this, mix the cream cheese, sugar, eggs, heavy cream, flour, and salt, then cover the bowl tightly with plastic wrap to keep it fresh. When you're ready to bake, simply pour the chilled batter into your prepared loaf pan and proceed with the baking instructions. Allowing the cheesecake to chill overnight not only saves you time but enhances the flavors, resulting in a dessert that’s just as delicious when ready to serve. Enjoy a stress-free dessert experience!
Expert Tips for Burnt Basque Cheesecake
-
Room Temperature Eggs: Make sure your eggs are at room temperature. This helps them blend more easily into the batter, creating that smooth, custard-like texture.
-
Gentle Folding: When adding in the heavy cream and flour, fold gently. Over-mixing can deflate the batter and result in a less airy cheesecake, so keep it delicate!
-
Perfect Bake: Watch for a deep golden top while baking; the center should still jiggle slightly. This ensures you achieve that signature creamy consistency of the Burnt Basque Cheesecake.
-
Cool Gradually: Cool the cheesecake in the oven with the door ajar to prevent it from sinking. This step is vital for achieving a perfectly fluffy interior.
-
Make-Ahead Delight: This cheesecake actually improves overnight in the fridge. Preparing it a day in advance ensures better flavor and texture when you serve it!
Burnt Basque Cheesecake Recipe FAQs
What kind of cream cheese should I use for the cheesecake?
I recommend using full-fat cream cheese for the best results! It provides that rich and creamy texture we all love. If you're looking for a healthier option, low-fat cream cheese can be substituted, but keep in mind that it may slightly alter the cheesecake's final mouthfeel.
How should I store the Burnt Basque Cheesecake?
Store your cheesecake in an airtight container in the refrigerator. It will stay fresh for up to 5 days! This way, you can savor each delicious slice without worrying about it going bad too quickly.
Can the Burnt Basque Cheesecake be frozen?
Freezing isn’t the best option for this cheesecake because of its custard-like texture, which may suffer upon thawing. However, if you have leftovers, you can wrap them tightly and freeze for up to 1 month. To enjoy, thaw in the fridge overnight before serving.
The cheesecake center seems too jiggly; is that okay?
Absolutely! A slightly jiggly center is what you want to achieve for that classic Burnt Basque Cheesecake texture. Just ensure the top is deep golden brown, which indicates you’ve baked it long enough for that creamy, custardy goodness.
Can I make this cheesecake gluten-free?
Yes! To make your Burnt Basque Cheesecake gluten-free, simply swap the all-purpose flour with a gluten-free flour blend. Alternatively, you can omit the flour altogether, but this may slightly affect the firmness of the cheesecake. Either way, you’ll still get a deliciously rich dessert!
What are some allergy considerations with this recipe?
If you’re cooking for someone with egg allergies, unfortunately, this recipe won't work since eggs are vital for binding and achieving that custard-like texture. However, you may be able to find egg substitutes, like flaxseed or aquafaba, but this will require some experimenting!

Creamy Burnt Basque Cheesecake: Irresistible Small-Batch Delight
Ingredients
Equipment
Method
- Preheat your oven to 400°F (200°C) to achieve the signature caramelized top of the cheesecake.
- Prepare the loaf pan by buttering the interior and lining it with parchment paper.
- Mix softened cream cheese and granulated sugar in a bowl until smooth and creamy, about 2-3 minutes.
- Incorporate the eggs one at a time, beating well after each addition until fully blended.
- Gently fold in the heavy cream, flour, and salt until just combined.
- Pour the cheesecake batter into the prepared loaf pan and smooth the top.
- Bake in the preheated oven for around 45 minutes, until the top is golden.
- Cool the cheesecake in the oven for about 30 minutes with the door ajar.
- Transfer the cheesecake to the refrigerator and chill for at least 4 hours, preferably overnight.
- Remove from the fridge, lift out using parchment, and slice to serve.


Leave a Reply