
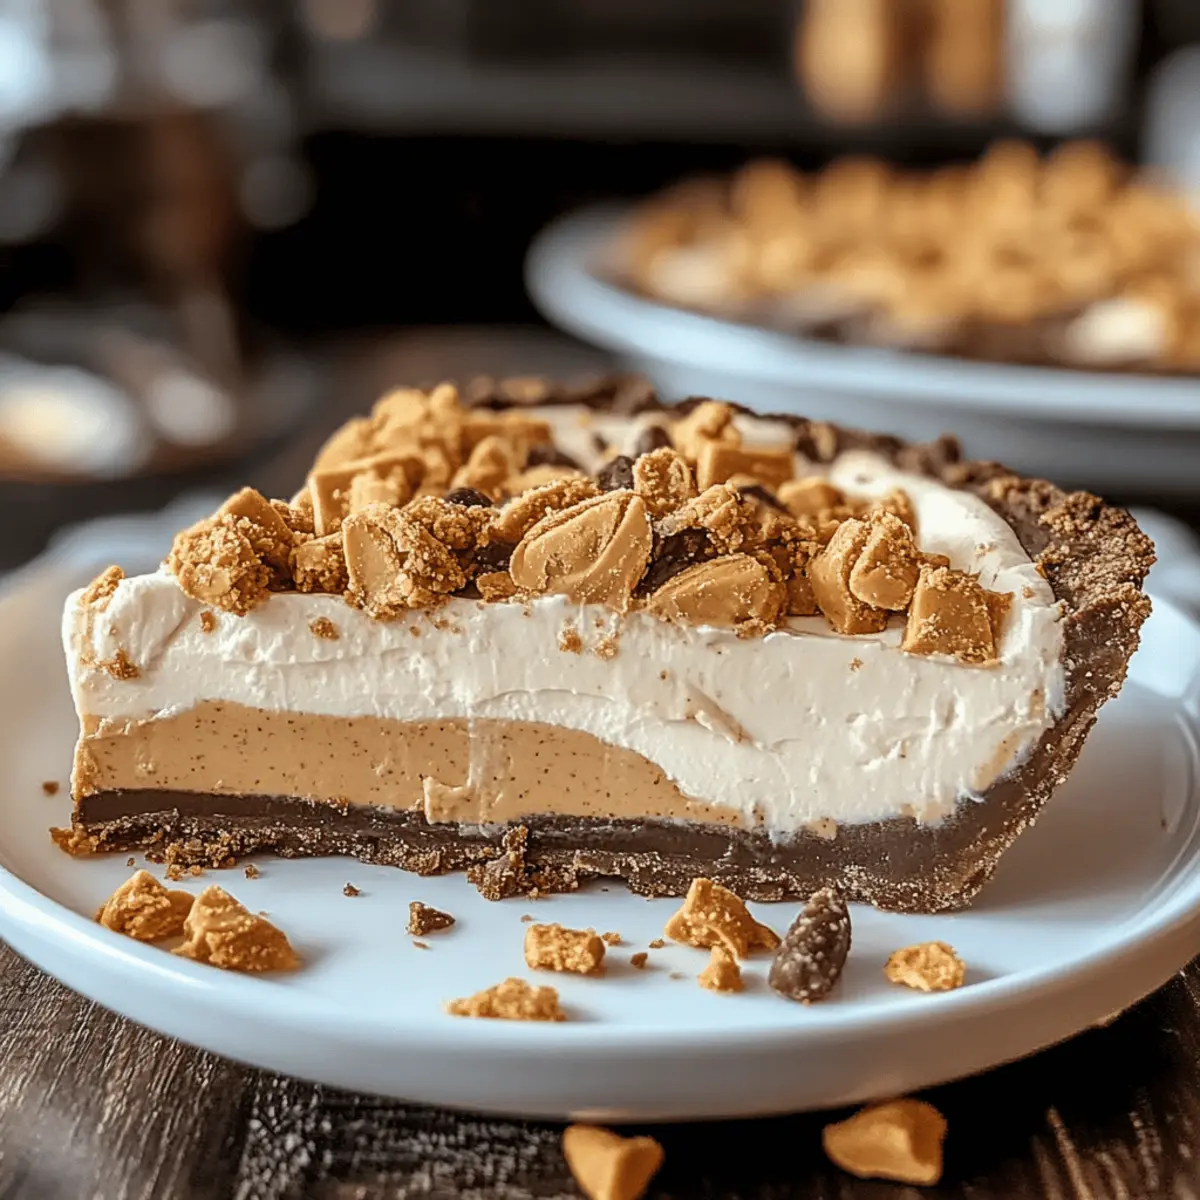
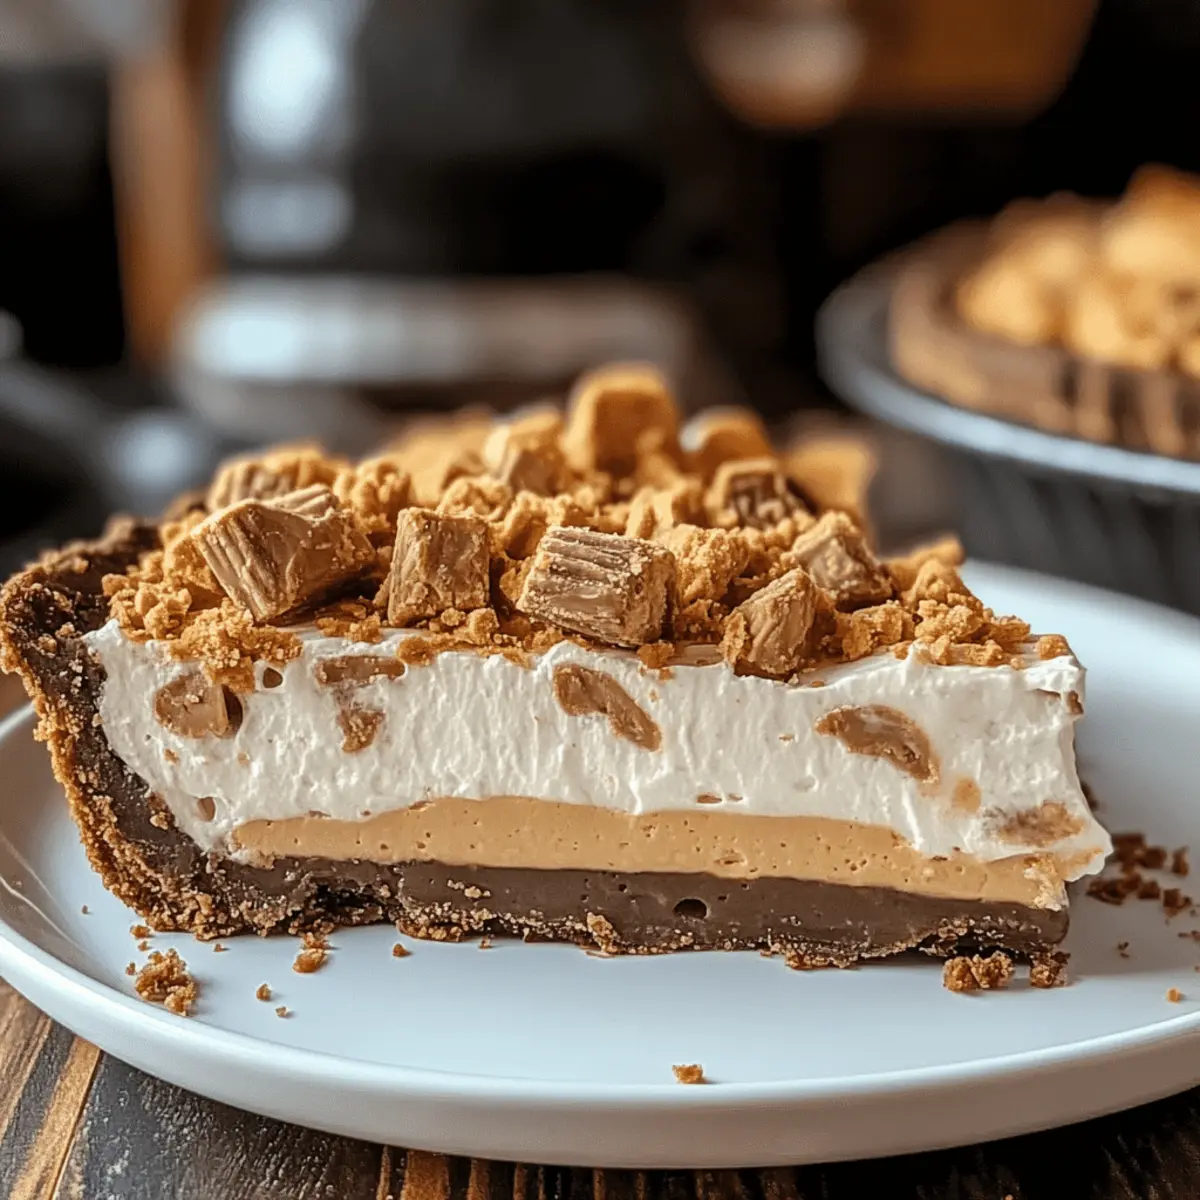
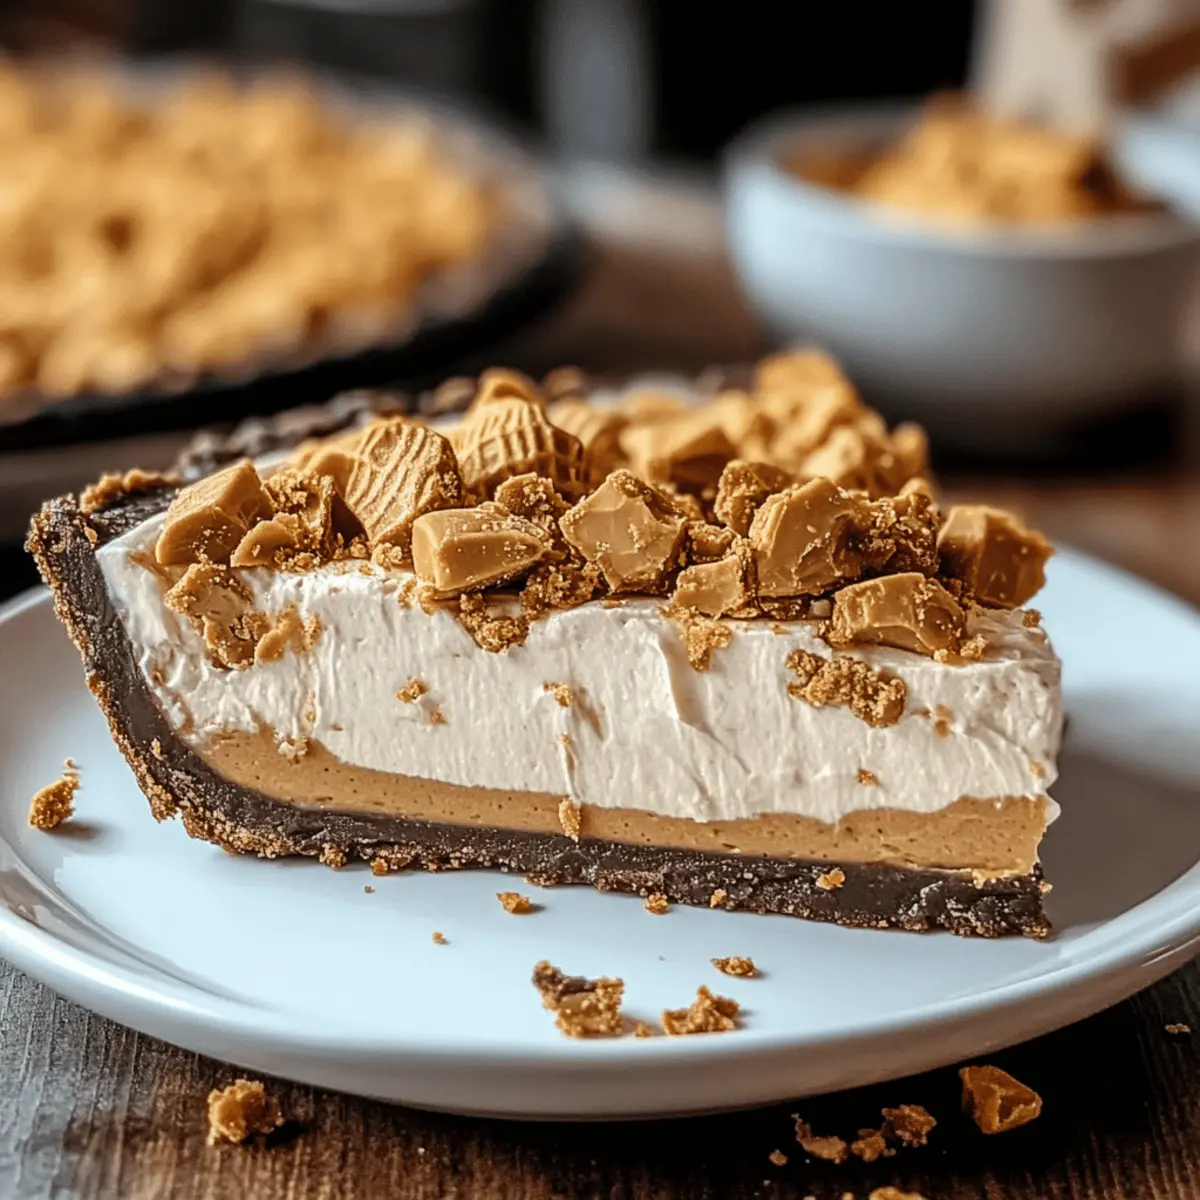
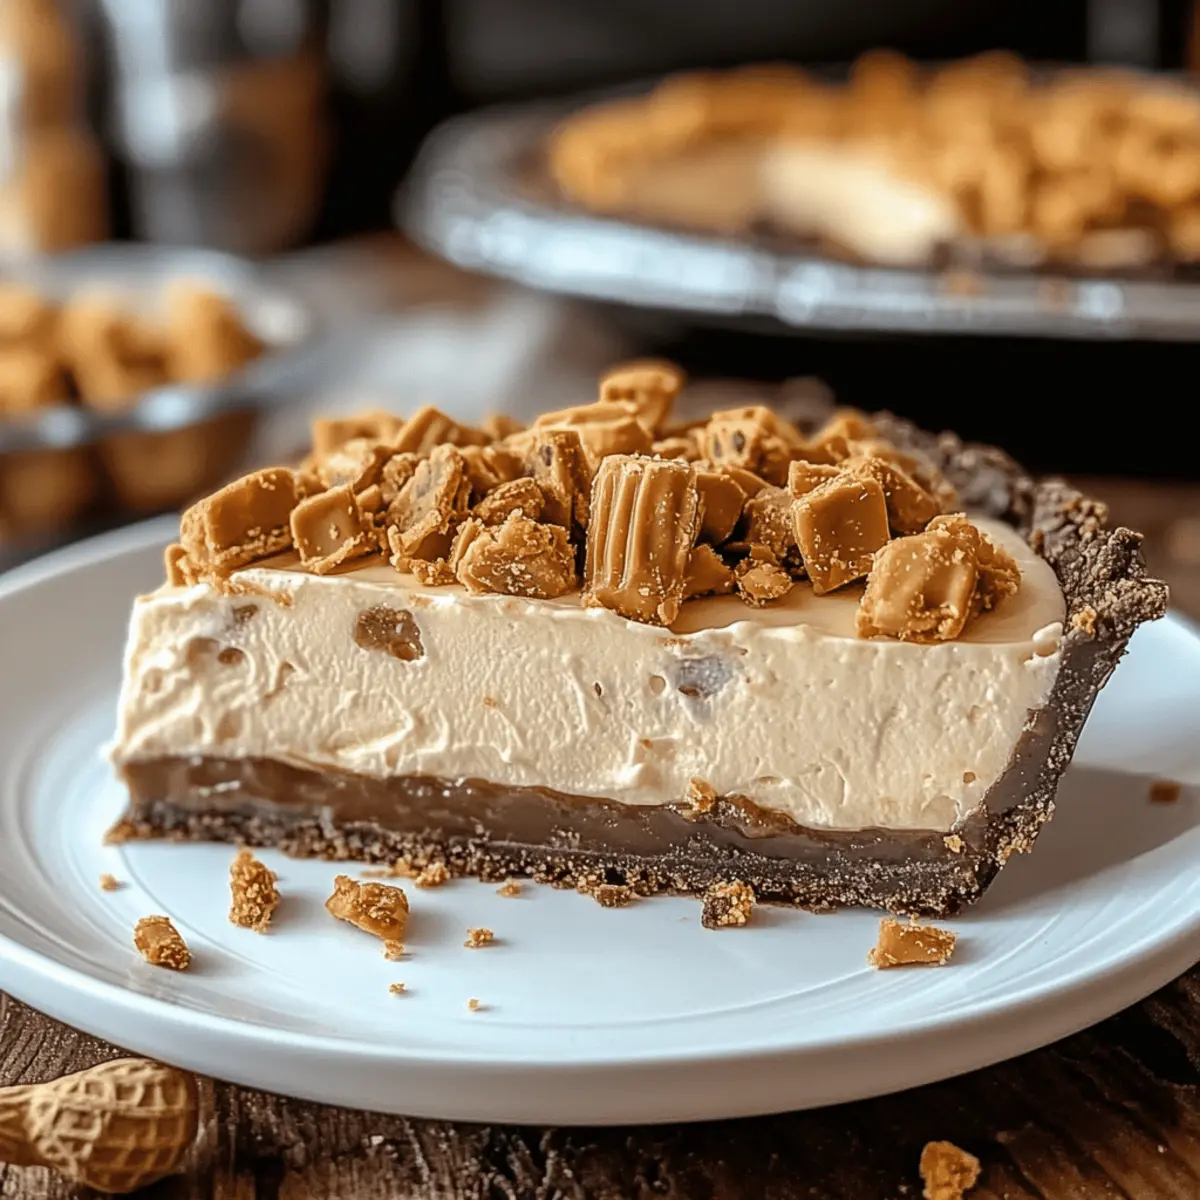
As I lifted the lid of my mixing bowl, a swirl of creamy peanut butter and sweet nostalgia wafted into the air, instantly transporting me back to carefree childhood days. This No-Bake Butterfinger Peanut Butter Pie is a must-have for anyone who adores simple yet delightful desserts. With its luscious peanut butter filling and crunchy Butterfinger surprises throughout, this pie strikes the perfect balance between sweetness and texture. Not only is it incredibly easy to whip up—perfect for busy weeknights—it’s also a guaranteed crowd-pleaser, sure to impress family and friends alike. Ready to make a dessert that will leave hearts and taste buds full? Let’s dive into this deliciously fun recipe!
Why Choose Butterfinger Peanut Butter Pie?
Irresistible combination: The blend of creamy peanut butter, fluffy whipped topping, and crunchy Butterfinger bits delivers a flavor explosion that everyone loves!
No-bake convenience: Skip the oven and save time with this simple, no-bake recipe that’s perfect for those warm days when you’d rather avoid extra heat.
Effortlessly impressive: Your friends will think you spent hours in the kitchen, while you bask in the glory of this delightful creation.
Versatile indulgence: Try swapping in almond butter or using chocolate-flavored whipped topping for a delicious twist! Pair it with a scoop of ice cream or drizzle with chocolate syrup for extra decadence, just like in our Garlic Butter Steak recipe.
Crowd-pleasing treat: Whether it's a birthday party or a casual family dinner, this pie is sure to be the star of the dessert table.
Butterfinger Peanut Butter Pie Ingredients
• Discover the key components for your next creamy delight!
For the Crust
- 2 cups graham cracker crumbs – The perfect base that adds a delightful crunch; you can also try crushed Oreos for a chocolatey twist.
- ½ cup unsalted butter, melted – Binds the crust together; make sure it's fully melted for a smooth blend.
For the Filling
- 1 cup creamy peanut butter – The heart of the pie; opt for a smooth, high-quality variety to maximize flavor.
- 8 oz cream cheese, softened – Creates a rich and creamy texture; let it soften to room temperature for easy mixing.
- 1 cup powdered sugar – Sweetens and stabilizes the filling; sift if it’s clumpy for seamless incorporation.
- 1 teaspoon vanilla extract – Enhances the flavors; always choose pure extract for the best results.
- 8 oz whipped topping (e.g., Cool Whip), thawed – Lightens your filling, making it airy; ensure it’s completely thawed for optimal mixing.
- 4 Butterfinger candy bars, crushed (plus extra for topping) – Adds signature crunch and flavor; chop into uneven pieces for texture variation.
Enjoy crafting a Butterfinger Peanut Butter Pie that's sure to delight everyone!
Step‑by‑Step Instructions for Butterfinger Peanut Butter Pie
Step 1: Prepare the crust
In a large mixing bowl, combine 2 cups of graham cracker crumbs with ½ cup of melted unsalted butter until the mixture resembles wet sand. Press the mixture firmly into the bottom and up the sides of a 9-inch pie dish to create an even crust. Chill the crust in the refrigerator for at least 30 minutes to help it set before adding the filling.
Step 2: Make the filling
In another bowl, beat together 8 ounces of softened cream cheese and 1 cup of creamy peanut butter using an electric mixer on medium speed until the mixture is smooth and creamy, about 2-3 minutes. Gradually add in 1 cup of powdered sugar and 1 teaspoon of vanilla extract, mixing until fully combined and there are no lumps.
Step 3: Fold in whipped topping
Gently fold in 8 ounces of thawed whipped topping and 4 crushed Butterfinger candy bars into the peanut butter mixture. Use a spatula for this step, ensuring that the whipped topping maintains its light and airy texture as you combine it with the rich peanut butter filling. The result should be a thick, creamy mixture with delightful crunchy bits throughout.
Step 4: Assemble the pie
Take the chilled crust from the refrigerator and pour the creamy filling into it, smoothing the top with a spatula to ensure an even layer. For an extra touch, sprinkle additional crushed Butterfinger bars over the top of the pie, allowing their vibrant color and texture to add a pop of visual appeal.
Step 5: Chill
Cover the pie with plastic wrap and chill in the refrigerator for at least 4 hours, or overnight for the best texture. This chilling time is essential for the filling to set properly, allowing each slice to hold its shape when served.
Step 6: Serve
Once set, slice the Butterfinger Peanut Butter Pie into equal portions and enjoy the creamy, crunchy dessert! Pair each slice with a scoop of vanilla ice cream or a drizzle of chocolate syrup for added indulgence and decadence, making every bite even more delightful.
Make Ahead Options
These Butterfinger Peanut Butter Pie are perfect for meal prep enthusiasts! You can prepare the crust and filling up to 3 days in advance, which saves you valuable time on the day of your gathering. To do this, simply make the crust as directed and chill it, then whip up the filling, combining the peanut butter, cream cheese, powdered sugar, and whipped topping. Refrigerate the filling in an airtight container. On the day you're ready to serve, just pour the filling into the pre-set crust, top it with the extra crushed Butterfinger, and let it chill for an additional 4 hours (or overnight, for the best results). This way, you’ll ensure your pie is just as delicious when you serve it!
Butterfinger Peanut Butter Pie Variations
Get ready to elevate your Butterfinger Peanut Butter Pie with these exciting twists!
- Nut Butter Swap: Use almond or cashew butter for a delightful nutty flavor that adds a new dimension.
- Choco-Crunch: Swap in chocolate-flavored whipped topping or mix in cocoa powder with the filling to satisfy chocoholics.
- Different Candy Bars: Experiment with Snickers or Reese’s for a playful candy mash-up that’s sure to surprise!
- Add Texture: Include chopped nuts like pecans or walnuts for added crunch and a nutty twist, enhancing the experience even further.
- Flavor Boost: Drizzle caramel sauce over the top before serving, bringing a luscious finish that pairs beautifully with the peanut butter.
- Spicy Kick: Add a pinch of cayenne or a dash of cinnamon to the filling for a surprising warmth that complements the sweetness perfectly.
- Mini Pies: Create individual portions in muffin tins for fun, bite-sized treats that are perfect for parties or lunchboxes.
- Layered Delight: Consider layering the filling with extra toppings like graham crackers or crushed Butterfinger bars for a stunning presentation.
Feel free to let your creativity shine while making this delightful dessert! Just like our Butternut Squash Soup, it’s all about making a recipe your own!
Expert Tips for Butterfinger Peanut Butter Pie
- Use Quality Ingredients: High-quality peanut butter and pure vanilla extract enhance the overall flavor of your Butterfinger Peanut Butter Pie, making a noticeable difference.
- Soften Cream Cheese: Make sure your cream cheese is at room temperature before mixing to prevent lumps and ensure a smooth filling.
- Don't Rush Chilling: Allow the pie to chill for at least 4 hours, preferably overnight. Cutting too soon can lead to an oozy filling and messy slices.
- Press Crust Firmly: When forming the crust, press it down firmly to avoid any crumbling when you slice into the pie later.
- Variations Are Fun: Experiment by swapping in different candy bars or using almond butter for a unique twist on your Butterfinger Peanut Butter Pie.
What to Serve with Butterfinger Peanut Butter Pie?
Transport your taste buds to dessert heaven while creating a delightful dining experience that pairs perfectly with your rich, creamy pie.
-
Vanilla Ice Cream: A cold, creamy scoop offers a luscious contrast to the pie’s rich filling, enhancing every bite.
-
Chocolate Syrup Drizzle: Sweet and smooth, this addition complements the peanut butter flavor, elevating the dessert to new heights.
-
Fresh Berries: Juicy strawberries or raspberries add a refreshing tartness, balancing the pie’s sweetness beautifully. Serve them on the side or atop a slice for extra flair.
-
Whipped Cream: A dollop of freshly whipped cream creates a light, airy topping that contrasts the pie’s dense filling, enhancing its indulgence.
-
Espresso or Coffee: A hot cup of coffee provides a lovely bitterness that counteracts the sweetness, making each bite more satisfying with every sip.
-
Chocolate Chip Cookies: Serve alongside a couple of warm chocolate chip cookies for a delightful combination that guarantees a blissful dessert experience.
Whether for a gathering or a special weeknight treat, these pairings will make your Butterfinger Peanut Butter Pie a memorable finish to any meal.
How to Store and Freeze Butterfinger Peanut Butter Pie
Fridge: Keep your pie covered in an airtight container in the refrigerator for up to 5 days. Enjoy chilled for the best texture and flavor!
Freezer: If you want to extend its shelf life, wrap the pie tightly in plastic wrap and aluminum foil to freeze for up to 2 months. Thaw in the fridge overnight before serving.
Pre-Made: You can make the Butterfinger Peanut Butter Pie up to 3 days in advance. Just store it in the fridge until you're ready to serve.
Reheating: While this dessert is best enjoyed cold, you can let it sit at room temperature for about 10-15 minutes before slicing to make it easier to cut.
Butterfinger Peanut Butter Pie Recipe FAQs
What is the best way to select ripe ingredients for this recipe?
To ensure your Butterfinger Peanut Butter Pie turns out perfect, choose a high-quality, creamy peanut butter that has a smooth texture without added sugars. When selecting your cream cheese, opt for full-fat, which will yield a richer filling. Look for packages that are not near their expiration date, as freshness matters for the pie’s flavor.
How should I store my Butterfinger Peanut Butter Pie?
You can keep your pie refrigerated in an airtight container for up to 5 days. Ensure you cover it well to prevent it from absorbing any odors from the fridge. For the best flavor and texture, enjoy it chilled!
Can I freeze Butterfinger Peanut Butter Pie, and if so, how?
Absolutely! To freeze your Butterfinger Peanut Butter Pie, wrap it tightly in plastic wrap and then in aluminum foil for added protection against freezer burn. This method allows it to be stored for up to 2 months. When you're ready to enjoy it again, simply transfer the pie to the refrigerator to thaw overnight before serving.
What should I do if my filling is too runny?
If you find your filling is too runny, it could be due to not chilling it long enough. If this occurs, place the pie back in the refrigerator and let it chill for an additional 1-2 hours to firm up. If needed, you can also fold in a bit more whipped topping to help stabilize it and add extra creaminess.
Is this recipe suitable for those with allergies?
This recipe contains common allergens, including peanuts and dairy. If you're making it for someone with a peanut allergy, you could substitute almond butter, but please ensure there are no cross-contamination risks. For dairy-free alternatives, seek out vegan cream cheese and non-dairy whipped topping options.
How can I adapt the recipe for different dietary needs?
You can easily modify this Butterfinger Peanut Butter Pie! For a gluten-free variance, use gluten-free graham cracker crumbs or crushed Oreos. To make it vegan, substitute the cream cheese with cashew cream or a vegan alternative, and use dairy-free whipped topping. Mix and match according to your taste while keeping the same delightful buttery crunch!
Decadent Butterfinger Peanut Butter Pie for Easy Joyful Treats
Ingredients
Equipment
Method
- Combine graham cracker crumbs and melted butter until the mixture resembles wet sand. Press into a 9-inch pie dish. Chill for at least 30 minutes.
- Beat cream cheese and peanut butter until smooth. Gradually add powdered sugar and vanilla extract until fully combined.
- Fold in whipped topping and crushed Butterfinger bars. Mix gently to maintain airiness.
- Pour filling into chilled crust. Sprinkle additional crushed Butterfinger bars on top.
- Cover with plastic wrap and chill for at least 4 hours or overnight.
- Slice and serve with ice cream or chocolate syrup if desired.


Leave a Reply