
Have you ever found yourself staring at a stack of plain pancakes, wishing for something a little more exciting? That was me last Sunday, and in a moment of inspiration, I decided to whip up these delightful Cheese & Chive Pancakes. Merging the fluffy goodness of traditional pancakes with sharp cheddar and fresh chives, this savory twist on breakfast is a game-changer. Perfect for a cozy weekend brunch or a quick and satisfying lunch, this easy recipe is great for both seasoned chefs and kitchen newcomers alike. What’s better? You’ll have a crowd-pleaser on your hands that elevates any meal without spending hours in the kitchen. Curious about how to make these scrumptious pancakes a reality? Let’s dive in!
What Makes Cheese & Chive Pancakes Special?
Flavor Explosion: Each bite is a delightful blend of rich cheddar and fresh chives, creating a mouthwatering savory delight that's far from ordinary pancakes.
Beginner-Friendly: You don’t need to be a pro in the kitchen; this recipe is easy enough for anyone to master and impress.
Versatile Meal Option: These pancakes are perfect for breakfast, brunch, or a quick lunch, easily loved by everyone at the table.
Crowd-Pleasing Appeal: Guests will rave about this unique twist, making it a go-to recipe for gatherings or family meals.
Quick and Simple: Ready in under 30 minutes, you can enjoy these fluffy treats without hours of cooking fuss.
Pair these with crispy bacon for a hearty treat, or check out our Grilled Cheese Burrito for another deliciously cheesy option!
Cheese & Chive Pancakes Ingredients
• Get ready to create a savory masterpiece!
For the Pancake Batter
- All-Purpose Flour – Provides structure and a tender crumb; you can use whole wheat flour for a denser pancake.
- Baking Powder – This leavening agent helps the pancakes rise, giving them a fluffy texture.
- Salt – Enhances the flavors of the cheese and chives, balancing the overall taste.
- Milk – Hydrates the batter and adds a hint of sweetness; try non-dairy milk for a lactose-free version.
- Large Egg – Binds the ingredients and adds richness; for a vegan option, consider flaxseed meal as a substitute.
- Unsalted Butter – Brings in moisture and flavor; olive oil or coconut oil works great for a dairy-free choice.
For Savory Additions
- Shredded Cheddar Cheese – Adds a rich, sharp flavor that's essential for cheesy pancakes; Gruyère or Gouda can be delightful substitutes.
- Fresh Chives – Infuses freshness and a mild onion taste; dried chives can be used but may lack vibrancy.
For Cooking
- Additional Butter or Oil – Keeps the pancakes from sticking and ensures they achieve a beautiful golden crust.
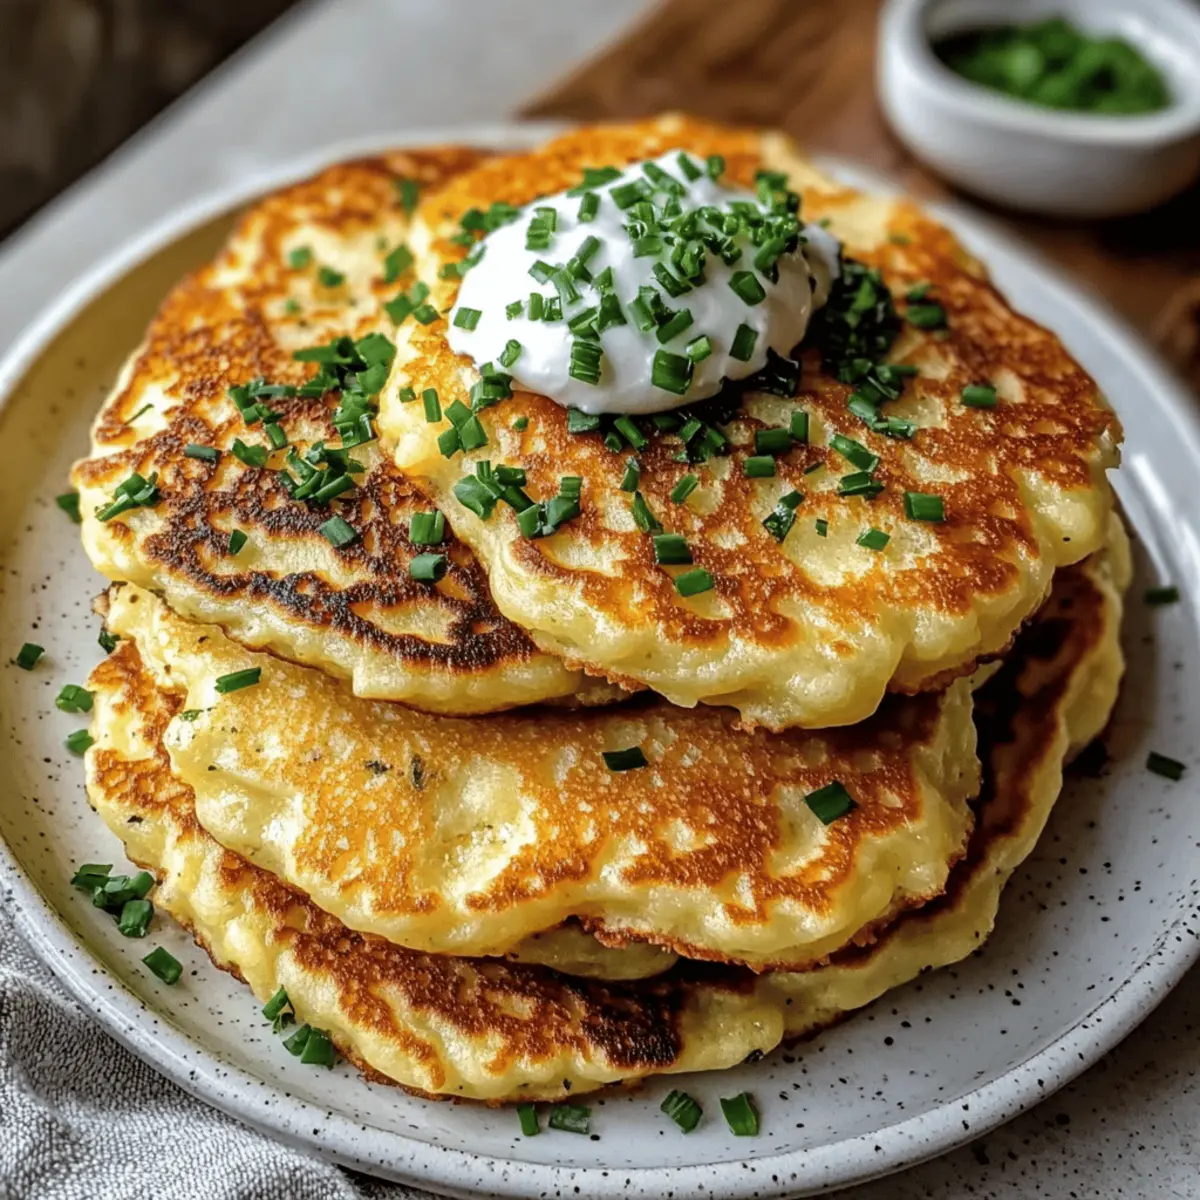
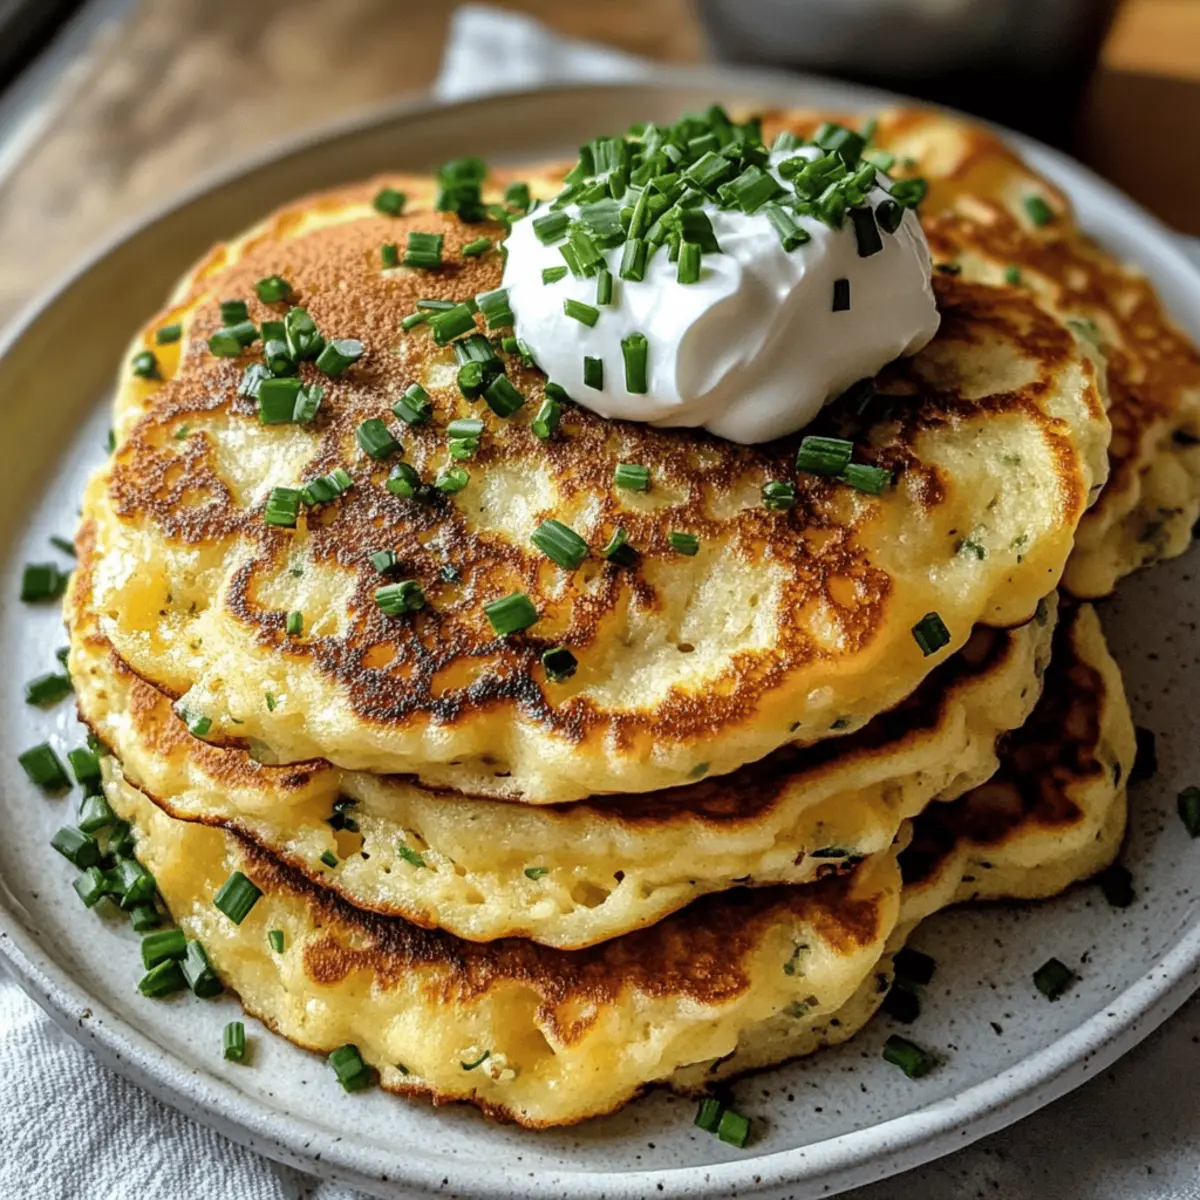
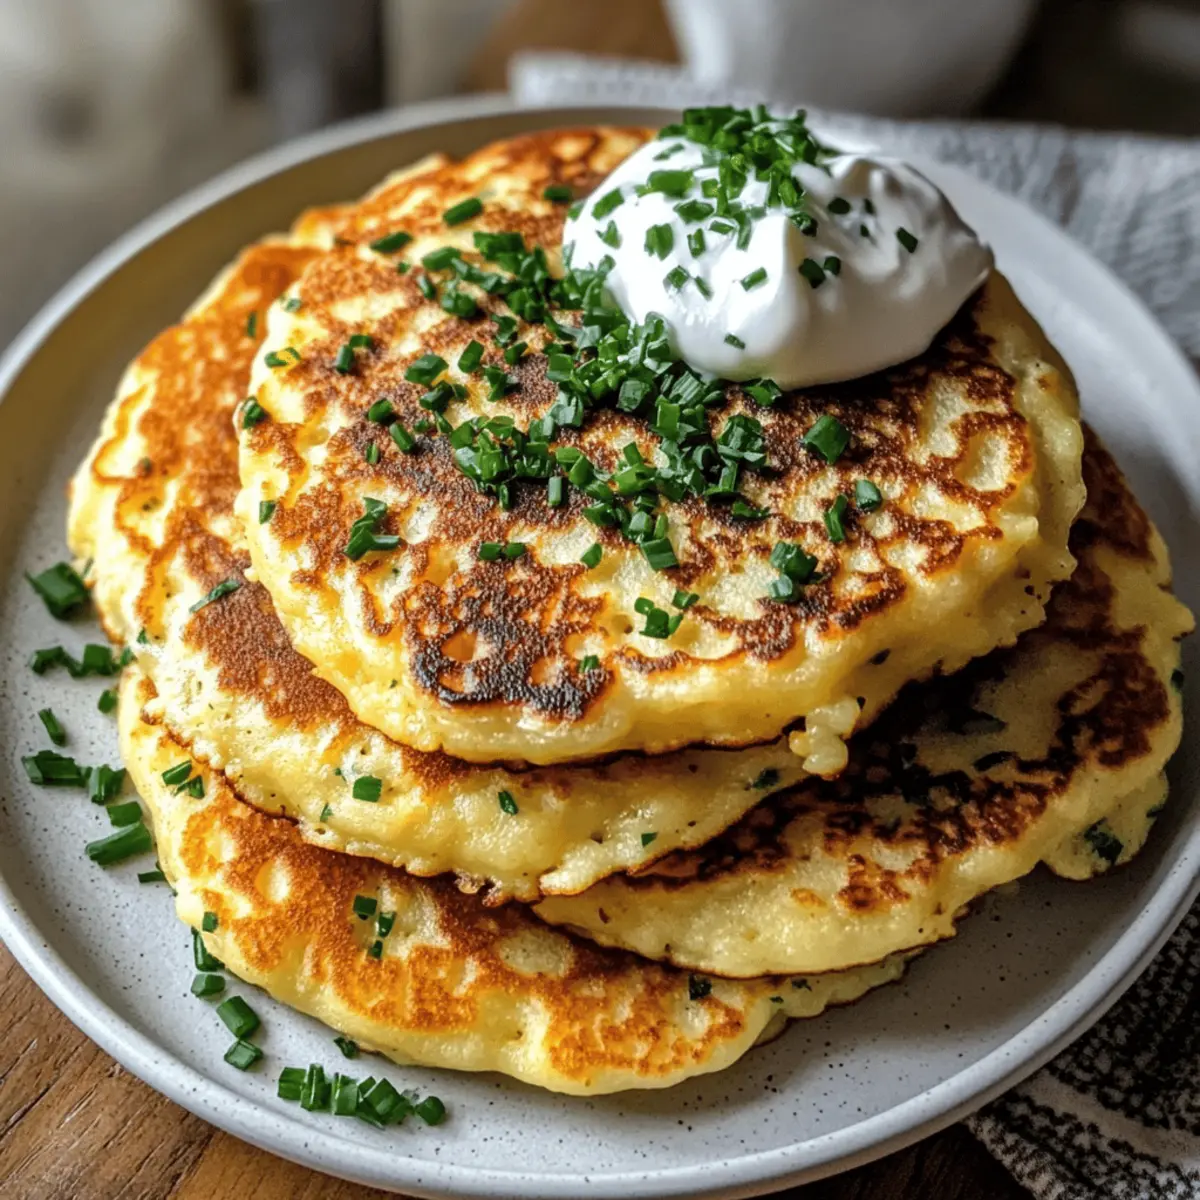
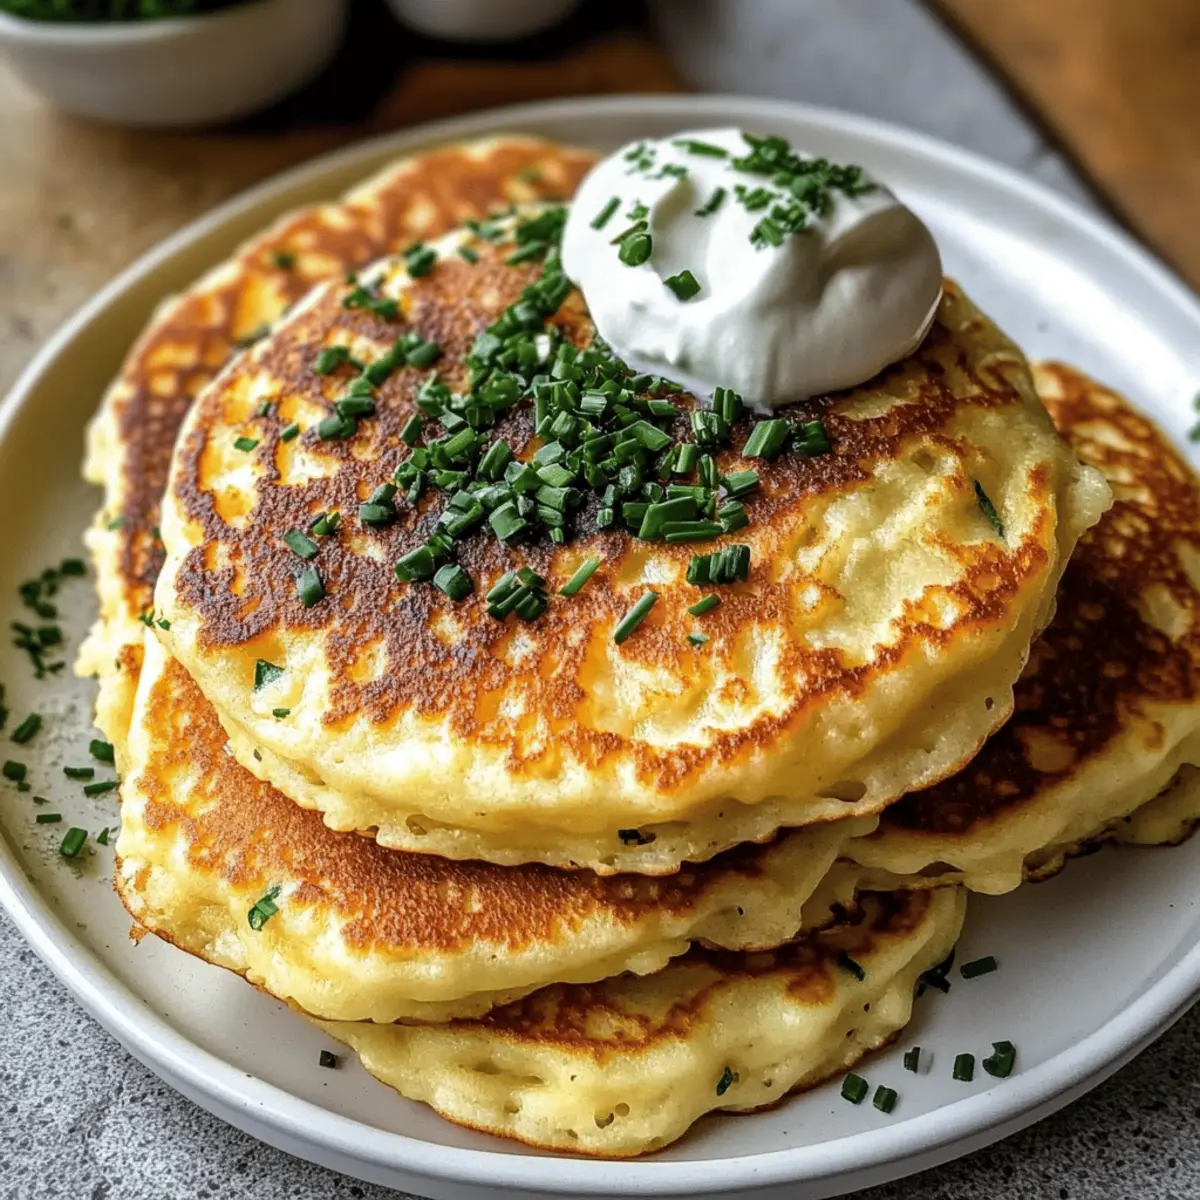
Now you have everything you need to whip up these mouthwatering Cheese & Chive Pancakes—just imagine the cheesy goodness paired with a dollop of sour cream!
Step‑by‑Step Instructions for Cheese & Chive Pancakes
Step 1: Whisk Dry Ingredients
In a large mixing bowl, combine 1 cup of all-purpose flour, 2 teaspoons of baking powder, and a pinch of salt. Use a whisk to mix these dry ingredients together thoroughly, ensuring no lumps remain. This step is crucial for light, fluffy Cheese & Chive Pancakes, as it aerates the flour mixture while you prepare the wet ingredients.
Step 2: Prepare Wet Ingredients
In a separate bowl, crack in 1 large egg and beat it until smooth. Add 1 cup of milk and 2 tablespoons of melted unsalted butter, then mix all together until well combined. Ensure the mixture is homogenous with a nice, creamy consistency, which will be vital in creating a tender batter for your Cheese & Chive Pancakes.
Step 3: Combine Wet and Dry Mixtures
Gently pour the wet mixture into the bowl containing the dry ingredients. Using a spatula, stir the two mixtures together until just combined; it’s okay if there are small lumps—overmixing will lead to tough pancakes. This careful folding technique keeps the batter light and fluffy, ensuring your Cheese & Chive Pancakes turn out perfectly.
Step 4: Fold in Cheese and Chives
Carefully fold in 1 cup of shredded cheddar cheese and ¼ cup of chopped fresh chives into the batter. This will evenly distribute the rich cheesy flavor and aromatic hints of onion throughout the pancake mix. Ensure that every scoop of batter is packed with deliciousness to elevate your Cheese & Chive Pancakes.
Step 5: Heat the Cooking Surface
Place a non-stick skillet or griddle on medium heat, allowing it to warm gradually for about 3-5 minutes. Lightly grease the skillet with a little butter or oil, spreading it evenly over the surface. This preparation is key to achieving beautifully golden, non-stick Cheese & Chive Pancakes.
Step 6: Cook the Pancakes
Using a measuring cup, pour about ¼ cup of batter onto the hot skillet for each pancake. Cook for approximately 2 minutes, or until you see bubbles forming on the surface. Once the bubbles pop, gently flip the pancakes to cook the other side for another 1-2 minutes, until they are golden brown and irresistibly fluffy.
Step 7: Keep Warm and Repeat
As each batch of Cheese & Chive Pancakes cooks, transfer them to a warm plate and cover them with a kitchen towel to keep them toasty. Repeat the cooking process until all the batter is used. This will allow everyone to enjoy a hot, fresh pancake experience, ideal for sharing with friends and family.
Step 8: Serve and Garnish
Finally, serve your delightful Cheese & Chive Pancakes warm, garnished with additional chives and a dollop of sour cream if desired. These garnishes not only enhance the visual appeal but also elevate the savory flavor profile, making your meal a true breakfast delight!
Make Ahead Options
These Cheese & Chive Pancakes are perfect for meal prep enthusiasts! You can prepare the pancake batter up to 24 hours in advance; simply mix the dry ingredients in one bowl and whisk the wet ingredients in another. When ready to cook, combine them, fold in the cheese and chives, and pour onto a hot skillet. Alternatively, you can cook the pancakes and store them in the refrigerator for up to 3 days, layering between parchment paper to maintain quality. To reheat, simply pop them in a toaster or skillet before serving for deliciously warm results. This strategy saves you time on busy mornings while making every bite just as delightful!
Cheese & Chive Pancakes: Variations & Substitutions
Feel free to get creative with your Cheese & Chive Pancakes—these ideas will add a delightful twist to your breakfast routine!
-
Whole Wheat Flour: Swap all-purpose flour for whole wheat for a heartier, denser pancake.
-
Dairy-Free: Substitute regular milk with almond or oat milk, and use olive oil instead of butter for a dairy-free version.
-
Herb Swaps: Try fresh parsley or dill instead of chives for a fragrant flavor twist. Each brings a unique aroma and taste that brightens the pancakes.
-
Veggie Boost: Stir in sautéed spinach or bell peppers for a nutritious pop of color and added flavor. The extra texture creates a delightful surprise with every bite.
-
Cheese Variety: Experiment with various cheeses such as Gruyère or Gouda for a different flavor profile. This adds a gourmet touch that elevates your pancake experience.
-
Add Heat: Sprinkle in some red pepper flakes or diced jalapeños for a spicy kick that awakens your taste buds.
-
Meat Lover’s Delight: Add cooked bacon or ham into the batter for savory pockets of goodness in every bite. This hearty addition is perfect for any meat lover’s breakfast!
-
Sweet Savory Blend: For those adventurous in flavor, mix in a hint of maple syrup or honey into the batter. This adds a delightful sweetness that contrasts beautifully with the savory cheese.
Feel inspired? These variations will give your Cheese & Chive Pancakes a new life each time you whip them up! Be sure to pair them with crispy bacon for an unbeatable brunch. Don’t forget to check out our Burnt Basque Cheesecake for a decadent dessert to complete your meal!
Expert Tips for Cheese & Chive Pancakes
-
Avoid Overmixing: Keep your pancakes fluffy by mixing the batter gently—it's okay to have some lumps for the best Cheese & Chive Pancakes.
-
Proper Heat: Ensure your skillet is preheated to medium heat. Too hot can burn the pancakes, while too low can leave them soggy.
-
Resting Time: Letting the batter rest for about 5 minutes before cooking can help create a fluffier texture.
-
Cook Evenly: Use a measuring cup for consistent pancake sizes, which ensures they cook evenly and look appealing.
-
Customization Options: Don’t hesitate to experiment with add-ins like cooked bacon or spinach for extra flavor and nutrition!
Storage Tips for Cheese & Chive Pancakes
-
Room Temperature: Cheese & Chive Pancakes can sit out at room temperature for up to 2 hours. After that, they should be refrigerated to maintain freshness.
-
Fridge: Store leftovers in an airtight container in the refrigerator for up to 3 days. This will help prevent them from drying out while preserving their savory richness.
-
Freezer: For longer storage, freeze pancakes in a single layer separated by parchment paper to avoid sticking, and keep them in a freezer-safe bag for up to 2 months.
-
Reheating: When ready to enjoy, reheat in a toaster or on a skillet over low heat until warmed through. A microwave works too, though it may make the pancakes a bit softer.
What to Serve with Cheese & Chive Pancakes
Elevate your pancake experience with thoughtful pairings that bring harmony to your meal.
-
Crispy Bacon: The salty crunch of bacon complements the soft, cheesy pancakes perfectly—the ultimate breakfast duo.
-
Scrambled Eggs: Creamy scrambled eggs add a light, fluffy texture to the meal, creating a lovely balance with savory pancakes.
-
Fresh Arugula Salad: A bright arugula salad with lemon vinaigrette brings a fresh, peppery contrast that enhances the richness of the pancakes.
-
Smoked Salmon: This luxurious pairing adds a burst of flavor and sophistication, ideal for brunch or a light lunch.
-
Herbed Yogurt Dip: A tangy yogurt dip infused with fresh herbs pairs beautifully, providing a delicious, cooling effect against the pancakes' warmth.
-
Tomato Salsa: A refreshing tomato salsa brings an unexpected zing, adding brightness and a burst of freshness to every bite.
-
Roasted Vegetables: Tossed with olive oil and herbs, roasted veggies bring a delightful texture and complement the savory cheese and chives.
-
Sparkling Water or Mimosa: Refreshing beverages like sparkling water enhance the brunch experience, while mimosas add a festive flair perfect for gatherings.
Cheese & Chive Pancakes Recipe FAQs
How do I choose the right cheese for my Cheese & Chive Pancakes?
Absolutely! The type of cheese can greatly influence the flavor of your pancakes. I recommend using sharp cheddar for its rich taste, but other hard cheeses like Gruyère or Gouda work well too. Just make sure the cheese is shredded finely to melt properly into the batter!
What’s the best way to store leftover Cheese & Chive Pancakes?
Very! Store your leftovers in an airtight container in the refrigerator for up to 3 days. This helps retain their moisture and flavorful profile. You can reheat them in a toaster, skillet, or microwave—just keep an eye on them to avoid overcooking.
Can I freeze the Cheese & Chive Pancakes for later?
Absolutely! To freeze your pancakes, first cool them completely. Then, place them in a single layer separated by parchment paper on a baking sheet. Once frozen, transfer them to a freezer-safe bag. They can be stored for up to 2 months. When you’re ready to enjoy, reheat them straight from the freezer!
What should I do if my pancakes are too dense?
If you find your Cheese & Chive Pancakes are turning out dense, it may be due to overmixing the batter or using too much flour. To correct this, try mixing your ingredients until just combined—some lumps are perfectly fine! Additionally, ensure your baking powder is fresh as this helps the pancakes rise.
Can my pets have Cheese & Chive Pancakes?
While it's tempting to share, you should avoid giving your pets these pancakes due to ingredients like cheese and salt, which can upset their digestive systems. If you want to treat them, consider making a pet-friendly pancake using plain oats, mashed banana, and water.
What’s the cooking temperature for the perfect Cheese & Chive Pancakes?
Very! Preheat your non-stick skillet on medium heat, which is critical for achieving beautifully golden pancakes. If it’s too hot, the pancakes can burn; if it’s too low, they may end up soggy. Aim for a steady heat that allows for even cooking!
Cheese & Chive Pancakes: Savory Breakfast Delight Awaits
Ingredients
Equipment
Method
- In a large mixing bowl, combine the flour, baking powder, and salt. Whisk together thoroughly.
- In another bowl, beat the egg, then add milk and melted butter, mixing until well combined.
- Gradually combine wet and dry ingredients, stirring gently until just mixed, avoiding overmixing.
- Fold in shredded cheese and chopped chives until evenly distributed.
- Heat a non-stick skillet over medium heat and grease it lightly with butter or oil.
- Pour ¼ cup of batter onto the skillet for each pancake. Cook until bubbles form; flip and cook until golden brown.
- Transfer cooked pancakes to a warm plate and cover with a kitchen towel. Repeat the process until all batter is used.
- Serve warm, garnished with additional chives and sour cream if desired.

Leave a Reply