
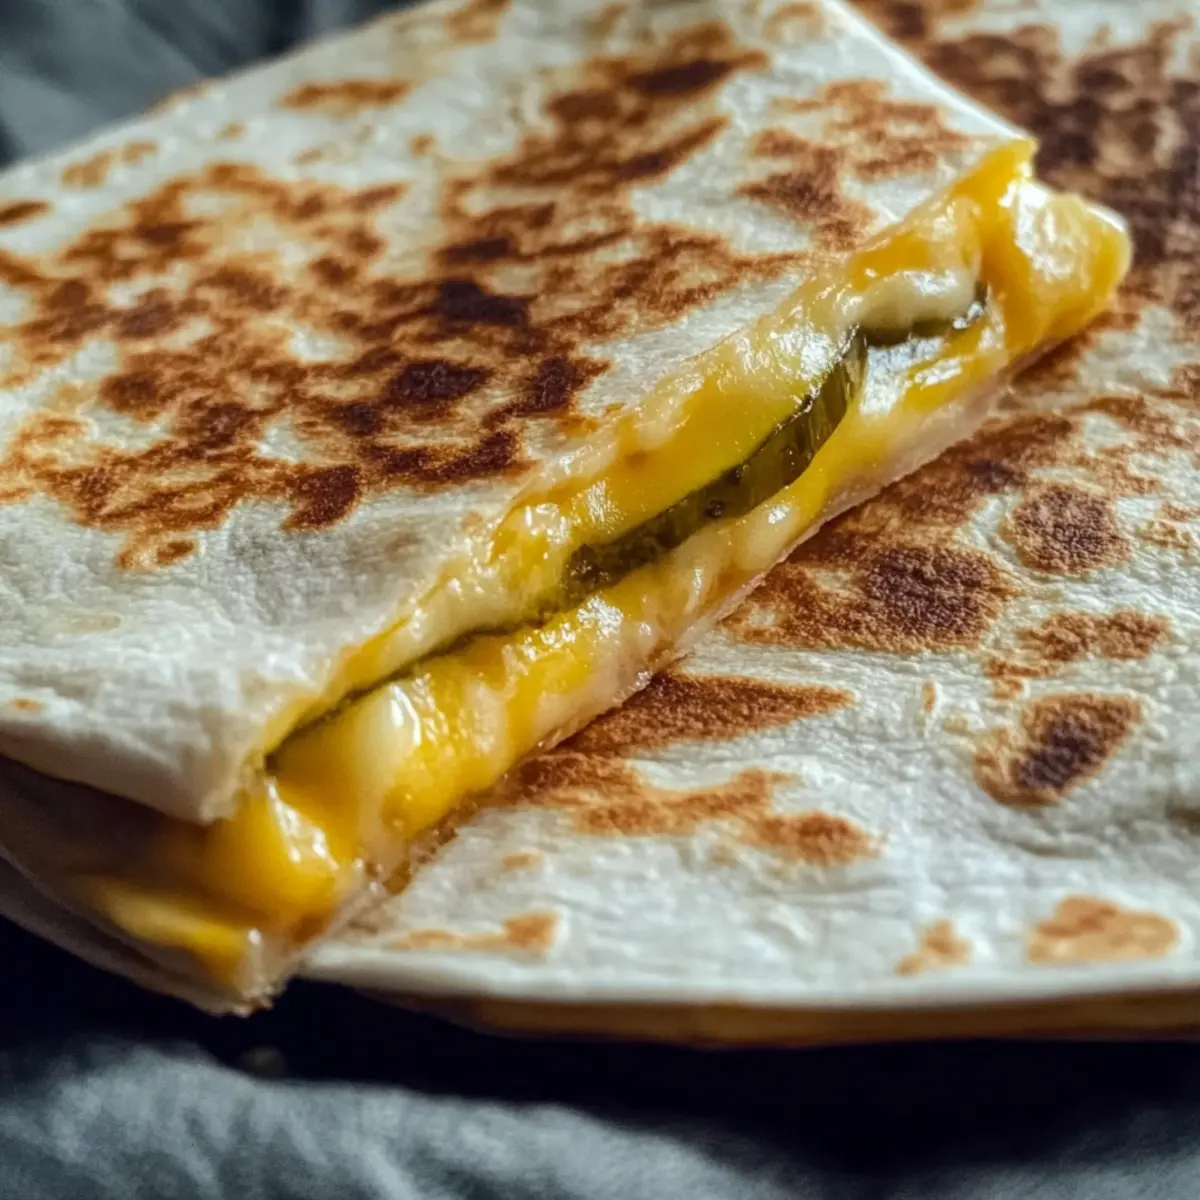
A delightful tangy crunch meets gooey, melty goodness in my Cheesy Dill Pickle Quesadilla! As I took my first bite, I was immediately transported to a time when simple flavors made snacks unforgettable. This recipe is a game-changer: ready in under 10 minutes, it’s the perfect quick and easy solution for those afternoons when you want something satisfying yet different. With each crispy bite, you'll enjoy the joy of homemade food without the fuss. Whether you're looking for a fun family snack or a unique twist for your gathering, this cheesy gem is sure to impress. Ready to elevate your snacking game with this irresistible treat?
Why You’ll Crave This Quesadilla?
Quick Preparation: Whipping up this Cheesy Dill Pickle Quesadilla takes less than 10 minutes, making it an ideal choice when hunger strikes unexpectedly.
Flavor Fusion: The tangy crunch of dill pickles perfectly complements the rich, melty cheese, creating an irresistible combination you won’t find in ordinary snacks.
Family-Friendly: This recipe is a hit with all ages, providing a unique twist that keeps mealtime exciting. Add some cooked bacon for an extra flavor boost that appeals to adults!
Versatile Snack: Whether served as an appetizer or a main dish, versatile variations like cheddar or pepper jack can be easily adapted to suit your taste.
Crowd-Pleaser: Impress your guests with this fun and unique recipe, perfect for gatherings or casual nights in. Pair it with a refreshing side salad for a complete meal!
Cheesy Dill Pickle Quesadilla Ingredients
For the Quesadilla
• Wheat Tortilla – Use large, soft tortillas for a flexible base that's easy to fold and fill.
• Dill Havarti Cheese – This creamy cheese enhances the flavor balance; substitute with Monterey Jack or cheddar for a different twist.
• Dill Pickle Chips – Provides a tangy crunch; make sure they’re thinly sliced to avoid excess moisture that can make your quesadilla soggy.
Optional Add-Ins
• Cooked Bacon or Ham – For those who crave extra protein and a savory kick, these can elevate your quesadilla to a hearty snack.
• Sautéed Onions or Peppers – Add these for additional flavor and texture, complementing the richness of the cheese and the tanginess of the pickles.
Dive into this Cheesy Dill Pickle Quesadilla, where flavor meets simplicity!
Step‑by‑Step Instructions for Cheesy Dill Pickle Quesadilla
Step 1: Prepare the Pickles
Begin by patting dry your dill pickle chips with paper towels to remove excess moisture. This crucial step prevents your Cheesy Dill Pickle Quesadilla from becoming soggy. Aim for a single layer of pickles for even distribution, and set them aside while you preheat your cooking surface.
Step 2: Heat the Griddle
Preheat a griddle pan or skillet over medium-high heat until it's hot enough that a few drops of water sizzle immediately upon contact. This should take about 2-3 minutes. The right temperature ensures a crispy exterior while giving the cheese the perfect melting environment for a delicious quesadilla.
Step 3: Assemble the Quesadilla
Lay a large wheat tortilla flat on a clean cutting board. Sprinkle half of the dill Havarti cheese evenly across one half of the tortilla, creating a cheesy base. Then, arrange your prepared dill pickle chips in a single layer on top of the cheese to enhance the flavor profile of your Cheesy Dill Pickle Quesadilla.
Step 4: Add More Cheese and Fold
Sprinkle the remaining cheese on top of the pickles, ensuring every nook is covered. Carefully fold the tortilla in half, encasing the cheesy and tangy filling. Gently press down on the quesadilla to seal it and help the cheese melt evenly as it cooks.
Step 5: Cook the Quesadilla
Transfer the folded quesadilla to the preheated griddle pan and cook undisturbed for 4-5 minutes. Watch for the bottom to turn a lovely golden brown, indicating the cheese has started melting. Avoid flipping early to ensure the quesadilla develops a crispy texture.
Step 6: Flip and Finish Cooking
After the initial cooking time, carefully flip the quesadilla using a spatula. Cook for an additional 4-5 minutes until the other side is also golden brown, and the cheese is completely melted. Keep an eye on it to prevent burning, adjusting the heat if necessary.
Step 7: Rest and Slice
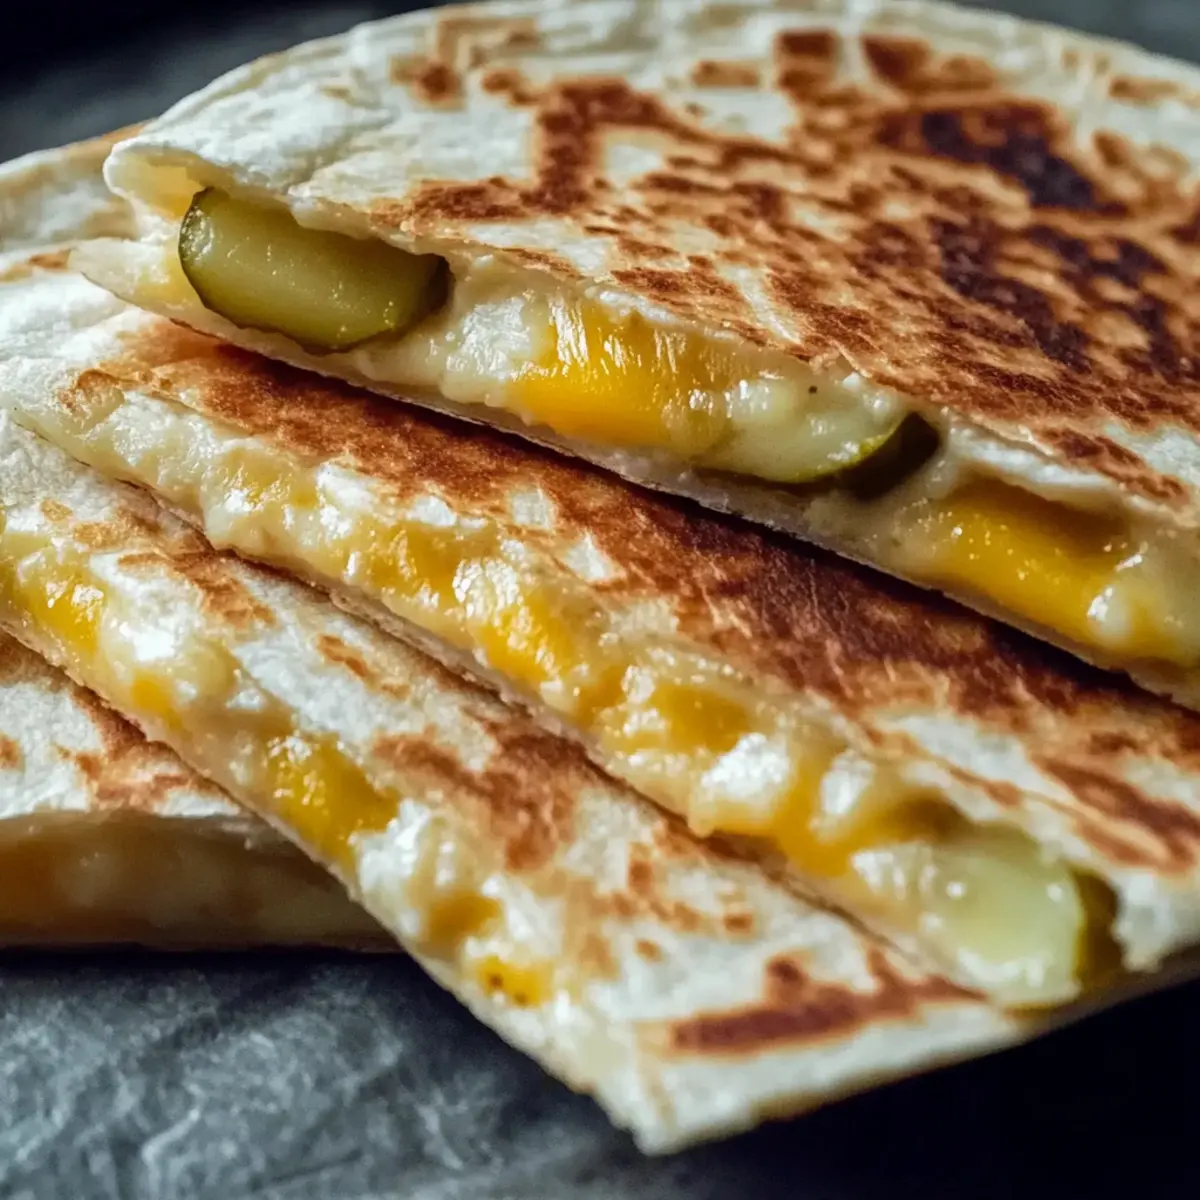
Once cooked, remove the quesadilla from the griddle and let it rest for about one minute. This resting time allows the cheese to set slightly, making it easier to cut. Using a sharp knife or pizza cutter, slice the Cheesy Dill Pickle Quesadilla into quarters for easy sharing.
Step 8: Serve
Plate up your delicious Cheesy Dill Pickle Quesadilla and serve it warm. Consider offering a side of sour cream or ranch dressing for dipping, adding a delightful contrast to the rich flavors. Enjoy your fresh, homemade snack that’s sure to impress!
Expert Tips for Cheesy Dill Pickle Quesadilla
• Pat the Pickles: Make sure to dry your dill pickle chips thoroughly with paper towels. This prevents excess moisture, ensuring a crispy quesadilla.
• Single Layer Magic: Avoid overcrowding your quesadilla with pickles. A single layer helps the cheese melt beautifully and keeps it from becoming soggy.
• Adjust the Heat: Cook on medium or medium-low heat. This helps achieve a perfect golden crust without burning, allowing your Cheesy Dill Pickle Quesadilla to cook evenly.
• Rest Before Slicing: Allow the quesadilla to sit for about a minute after cooking. This resting time helps the melted cheese set, making it easier to cut without spilling.
• Experiment with Cheese: Feel free to swap dill Havarti for other melty cheeses like cheddar or Monterey Jack to find your favorite flavor combination.
Cheesy Dill Pickle Quesadilla Variations
Customize your Cheesy Dill Pickle Quesadilla with these fun and delicious twists that will make your taste buds dance!
-
Cheddar Twist: Swap out the dill Havarti for sharp cheddar for an extra burst of flavor. This creamy substitution creates a rich, cheesy experience!
-
Bacon Lovers: Add cooked bacon bits for a delightful crunch and savory boost. The smoky flavor mingles beautifully with the tangy pickles.
-
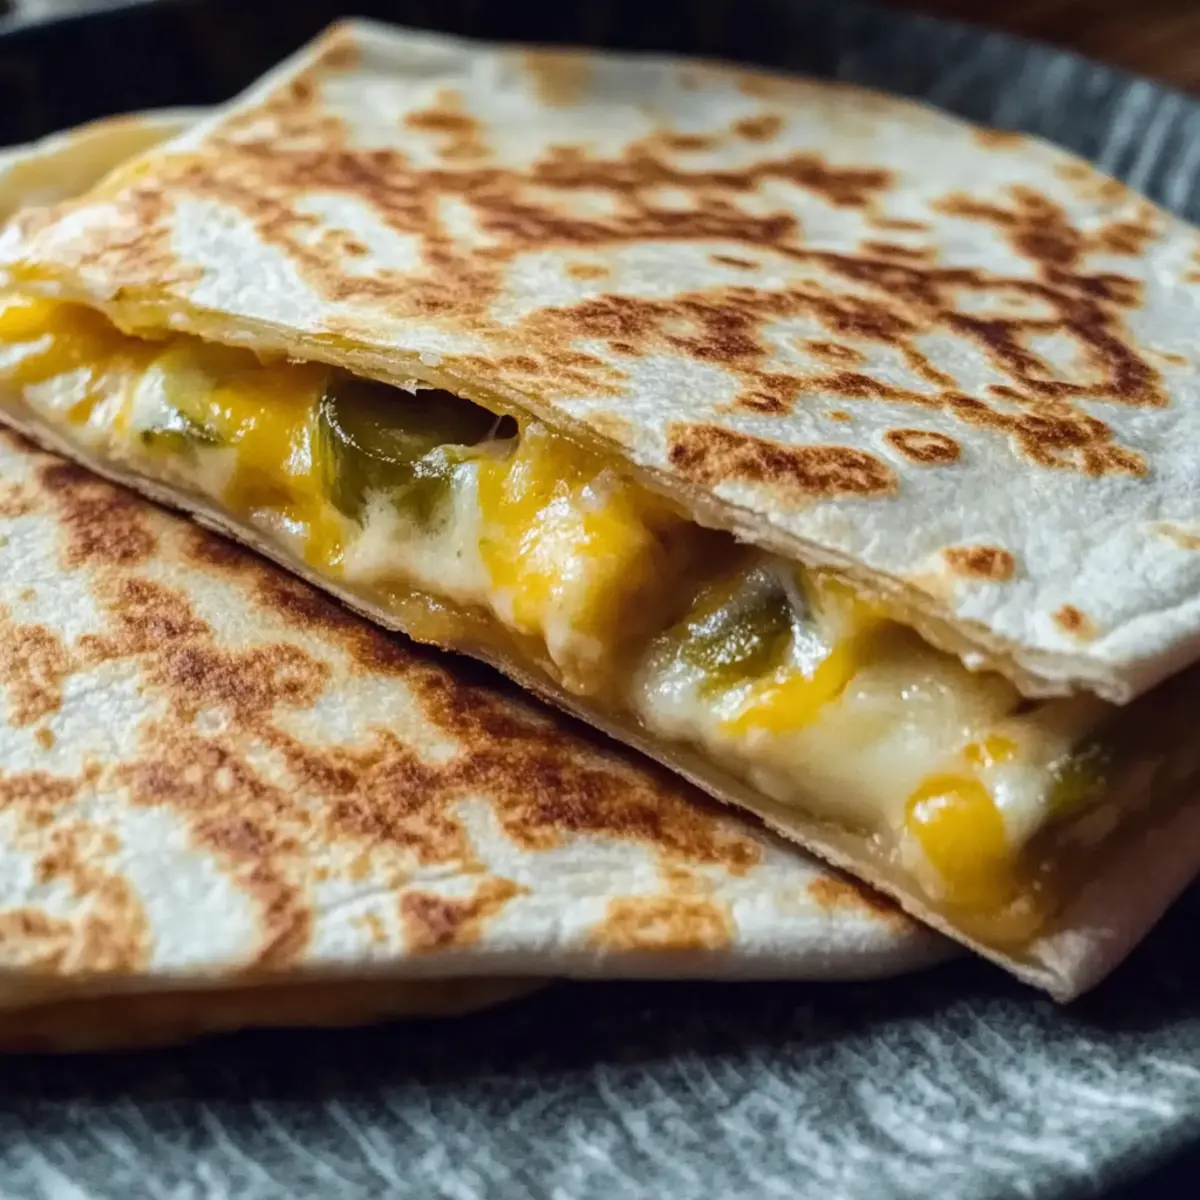
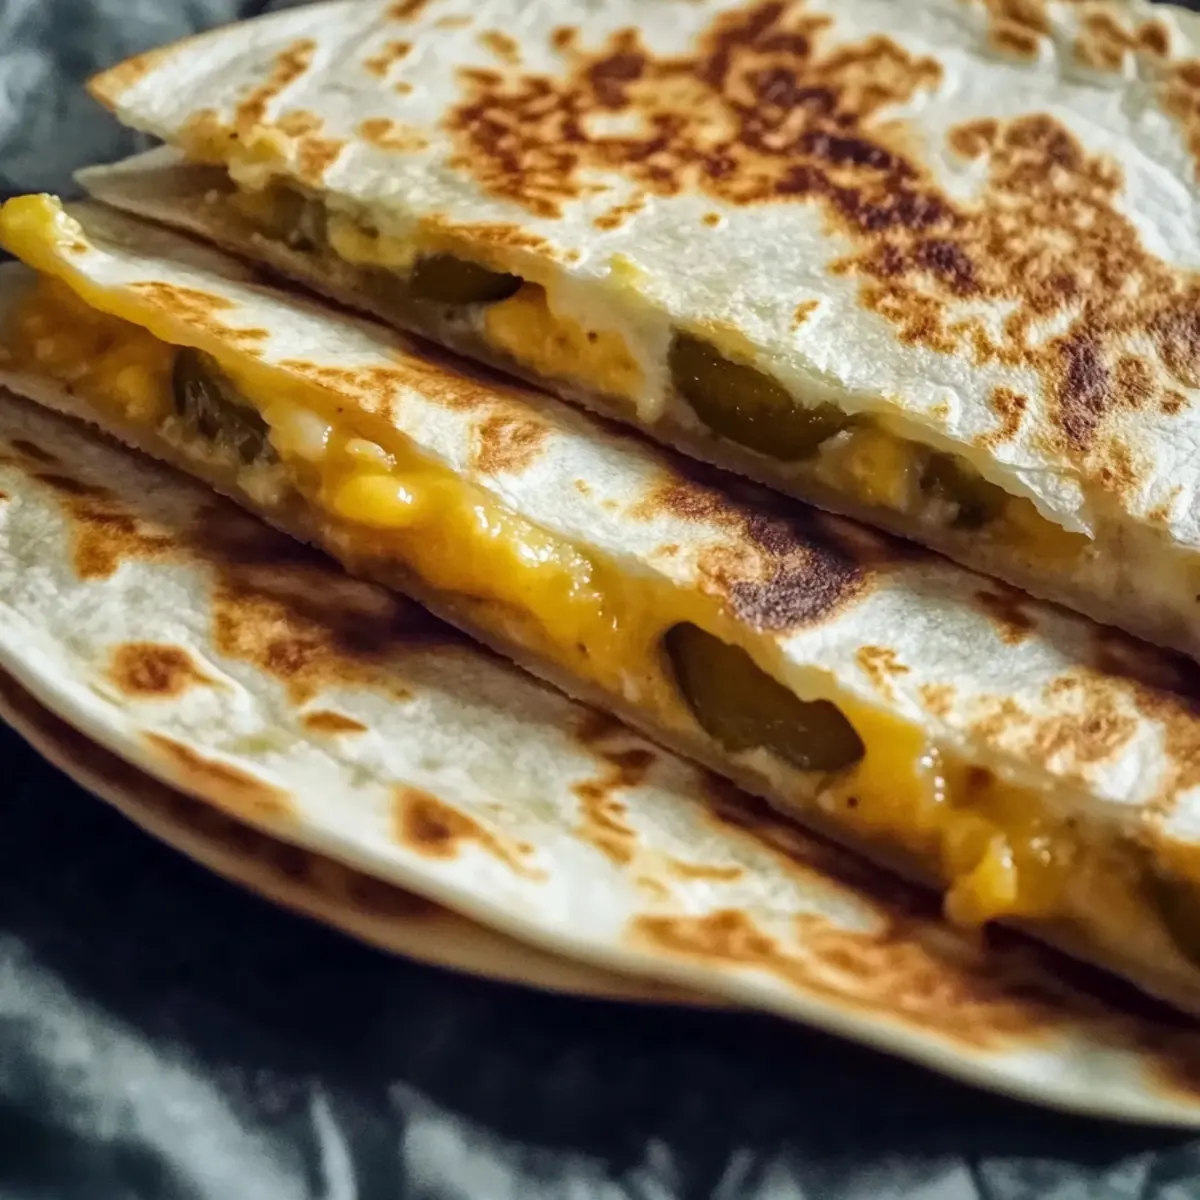
Spicy Kick: Incorporate sliced jalapeños or a drizzle of hot sauce for a fiery touch. The heat complements the tanginess, elevating your quesadilla to a whole new level.
-
Veggie Delight: Sauté onions and bell peppers before adding them to the quesadilla for a colorful and flavorful addition. This not only enhances texture but also adds a bit of sweetness to balance the tang from the pickles.
-
Loaded Style: Layer on extra toppings like fresh avocado or salsa for added creaminess and flavor. These fresh additions brighten each bite, making it a delightful treat.
-
Herbed Boost: Sprinkle fresh dill or chives inside for an added herbaceous layer of flavor. This pop of freshness will take your quesadilla to a delightful new realm.
-
Smoky Flavor: Try using smoked gouda for an intriguing twist. The smokiness pairs beautifully with the pickles, creating a complex yet comforting bite.
For more cheesy inspiration, why not check out my Ooey Gooey Cheesy dish? Or, if you're feeling adventurous, pair your quesadilla with a side of Spicy Pickle Brine for an exciting zing. Enjoy experimenting with these variations, and let your snack time shine!
Storage Tips for Cheesy Dill Pickle Quesadilla
Refrigerate: Store any leftover Cheesy Dill Pickle Quesadilla in an airtight container for up to 3 days. Expect some softening of the tortilla due to moisture from the pickles.
Freeze: For longer storage, you can freeze the quesadilla for up to 1 month. Wrap individual pieces tightly in plastic wrap to prevent freezer burn and maintain flavor.
Reheating: To enjoy your quesadilla again, reheat in a skillet or toaster oven on medium heat until warmed through and crispy. Avoid using the microwave, as it can make the quesadilla soggy.
Make Ahead Options
These Cheesy Dill Pickle Quesadillas are perfect for busy weeknights and meal prep enthusiasts! You can prep the tortillas and cheese filling up to 24 hours in advance, storing the assembled quesadillas in an airtight container in the fridge (separate layers with parchment paper to prevent sticking). Additionally, pat down the pickle chips before layering them, which will help to maintain texture and prevent sogginess. When you're ready to enjoy your snack, simply cook the quesadillas on a preheated griddle for about 4-5 minutes on each side until golden and crispy. This way, you’ll have a delightful, homemade treat ready with minimal effort, just as delicious as if you made it fresh!
What to Serve with Cheesy Dill Pickle Quesadilla?
Indulge in a medley of flavors and textures to transform your Cheesy Dill Pickle Quesadilla into a complete meal experience!
-
Crispy Sweet Potato Fries: Their natural sweetness and crunchy texture create a delightful contrast to the savory quesadilla.
-
Fresh Garden Salad: Light and refreshing, a salad balances the richness of the quesadilla while adding vibrant colors and vitamins.
-
Creamy Avocado Dip: Smooth and rich, this dip adds a luscious texture that elevates the tangy notes of the quesadilla.
-
Homemade Salsa: A zesty, fresh salsa brings bright acidity and a touch of heat to complement the pickles' tanginess.
-
Cool Sour Cream: A classic partner, its smooth creaminess allows for a delightful contrast, balancing the bold flavors of the quesadilla perfectly.
-
Sparkling Lemonade: Refreshing and slightly sweet, this drink adds a fizzy brightness that pairs beautifully with the hearty quesadilla.
-
Pickled Vegetables: For an adventurous side, pickled veggies echo the dill pickle flavor and add an extra tangy crunch.
Cheesy Dill Pickle Quesadilla Recipe FAQs
What type of tortillas work best for this recipe?
I recommend using large, soft wheat tortillas for flexibility. They hold the cheesy filling without tearing and make it easy to fold. If you prefer something different, feel free to experiment with corn tortillas for a gluten-free option.
How long can I store leftovers?
Any leftover Cheesy Dill Pickle Quesadilla can be stored in an airtight container in the refrigerator for up to 3 days. Just keep in mind that the tortilla may soften due to moisture from the pickles, so they are best enjoyed fresh.
Can I freeze the Cheesy Dill Pickle Quesadilla?
Absolutely! You can freeze the quesadilla for up to 1 month. To do this, wrap individual pieces tightly in plastic wrap or foil. This protects them from freezer burn and keeps them tasting fresh. When you're ready to enjoy, simply thaw in the refrigerator overnight, then reheat in a skillet or toaster oven for a crispy bite.
What if my quesadilla gets soggy?
To prevent sogginess, pat the dill pickle chips dry with paper towels before adding them to the quesadilla. Using a single layer of pickles instead of overcrowding will also help keep things crispy. If you followed these tips but still encounter sogginess, consider reducing the cooking temperature for more even, controlled heating.
Are there any dietary considerations I should be aware of?
If you're making this for someone with dairy allergies, you can try using dairy-free cheese alternatives that melt well. For those with gluten sensitivities, opt for gluten-free tortillas. Always check the ingredients list to ensure they're suitable for your dietary needs.
What to do if I'm short on time?
You can prep the ingredients in advance! Slice the pickles and cheese ahead of time, and store them in the refrigerator. When you're ready to cook, it will only take a few minutes to assemble and grill your Cheesy Dill Pickle Quesadilla. This is a fantastic way to have a quick and easy snack on busy days!
Cheesy Dill Pickle Quesadilla: A Flavorful Twist on a Classic
Ingredients
Equipment
Method
- Pat dry dill pickle chips with paper towels to remove excess moisture.
- Preheat griddle pan or skillet over medium-high heat for 2-3 minutes.
- Lay tortilla flat, sprinkle half of the cheese on one half.
- Arrange pickle chips in a single layer on top of cheese.
- Sprinkle remaining cheese over pickles, fold tortilla in half.
- Cook folded quesadilla on the griddle for 4-5 minutes until golden brown.
- Flip quesadilla and cook for another 4-5 minutes until the other side is golden brown.
- Remove from heat, let rest for one minute, then slice into quarters.
- Serve warm with sour cream or ranch dressing.
Leave a Reply