
Amidst the hustle and bustle of everyday life, there's a sweet retreat waiting in your kitchen: the Chocolate & Orange Punchcake. This delightful dessert masterfully marries the indulgent richness of chocolate with the bright, zesty notes of fresh oranges, creating a slice of heaven for anyone with a sweet tooth. What makes this cake truly special? Not only is it a showstopper for gatherings, but it also boasts a remarkably simple preparation, making it perfect for bakers of all skill levels. Imagine presenting this moist, luscious creation with its glossy ganache and vibrant orange slices to family and friends. Are you ready to create an unforgettable treat that brings joy to your table? Let’s dive into this delicious adventure!
Why You'll Love This Punchcake
Irresistible flavor fusion: The combination of luscious chocolate and zesty orange offers a unique taste experience that’s simply unforgettable.
Effortless preparation: With straightforward steps, even novice bakers can impress with a stunning dessert that looks as good as it tastes.
Versatile delight: Ideal for celebrations or just a cozy night in, this cake accommodates any occasion, making it a must-try.
Crowd-pleaser: Whip up smiles at your next gathering; this dessert is sure to be the highlight of your spread! For something equally indulgent and chocolatey, check out our Chocolate Zucchini Cake for another twist on classic flavors.
Make-ahead magic: Bake your cake layers in advance, allowing you to focus on other details come serving time—because great food should never create stress!
Chocolate & Orange Punchcake Ingredients
For the Cake
- All-purpose flour – Provides structure to the cake; feel free to substitute with gluten-free flour for a delightful alternative.
- Granulated sugar – Adds sweetness, ensuring each slice is wonderfully moist.
- Unsweetened cocoa powder – Essential for that rich chocolate flavor; choosing high-quality cocoa makes all the difference.
- Baking powder – A leavening agent that helps the cake rise to perfection.
- Baking soda – Works alongside the cake's acidic components to create a light texture.
- Salt – Enhances the overall flavor profile; don’t skip this for balance!
- Large eggs – Help to bind the ingredients and provide moisture; can be replaced with flax eggs for a vegan option.
- Whole milk – Contributes to the cake’s richness; almond milk serves as a great dairy-free substitute.
- Vegetable oil – Adds moisture, ensuring a tender crumb; consider using melted coconut oil for an additional layer of flavor.
- Vanilla extract – Enhances the cake’s flavor; opting for pure vanilla extract will yield the best taste.
- Boiling water – It’s the secret weapon, blooming the cocoa and intensifying that chocolate goodness!
For the Orange Flavor
- Orange zest – Introduces refreshing citrus notes; a crucial component for that vibrant flavor.
- Orange juice – Adds acidity, beautifully complementing the chocolate; it's vital for the punchcake's unique profile.
For Extra Delight
- Semisweet chocolate chips – These add pockets of melted goodness throughout the cake; consider swapping with rich dark chocolate for a more intense experience.
Now that you have all the essential ingredients for our Chocolate & Orange Punchcake, you’re just steps away from creating an indulgent dessert that not only looks divine but tastes heavenly, too!
Step‑by‑Step Instructions for Chocolate & Orange Punchcake
Step 1: Preheat the Oven
Begin by preheating your oven to 350°F (175°C). While it warms, generously grease two 9-inch round cake pans with butter or cooking spray, then lightly dust them with flour to prevent sticking. This is an important step to ensure your Chocolate & Orange Punchcake releases beautifully once baked.
Step 2: Prepare the Dry Ingredients
In a large mixing bowl, sift together the all-purpose flour, granulated sugar, unsweetened cocoa powder, baking powder, baking soda, and salt. Whisk them gently until well combined to aerate the mixture, which will contribute to the fluffy texture of your cake. Set this bowl aside as you prepare the wet ingredients.
Step 3: Mix the Wet Ingredients
In a separate medium bowl, whisk the large eggs, whole milk, vegetable oil, and vanilla extract together until fully blended. The mixture should be smooth and creamy, allowing the flavors to meld harmoniously. This flavorful wet mix will enhance the overall richness of your Chocolate & Orange Punchcake.
Step 4: Combine Wet and Dry Ingredients
Gradually pour the wet ingredient mixture into the bowl with the dry ingredients, mixing at medium speed using an electric mixer. As you blend, slowly add in the boiling water until the batter is completely smooth and well mixed. The batter will be quite thin, but that's perfectly okay!
Step 5: Incorporate the Citrus Flavors
Gently fold in the freshly squeezed orange juice and zest using a spatula, ensuring even distribution of the citrus flavor, which will elevate the taste of your punchcake. Then, add in the semisweet chocolate chips, folding them in carefully so that they are evenly scattered throughout the batter.
Step 6: Bake the Cake Layers
Pour the batter evenly into the prepared cake pans, using a spatula to smooth the tops. Place them in the preheated oven and bake for 30-35 minutes. To check doneness, insert a toothpick into the center of each cake; if it comes out clean or with a few moist crumbs, they are ready.
Step 7: Cool the Cakes
Once baked, remove the cake layers from the oven and let them cool in the pans for about 10 minutes. Then, carefully transfer them to wire racks to cool completely. This is crucial because cooling allows for easier frosting without melting the ganache when it’s time to assemble your Chocolate & Orange Punchcake.
Step 8: Assemble and Frost
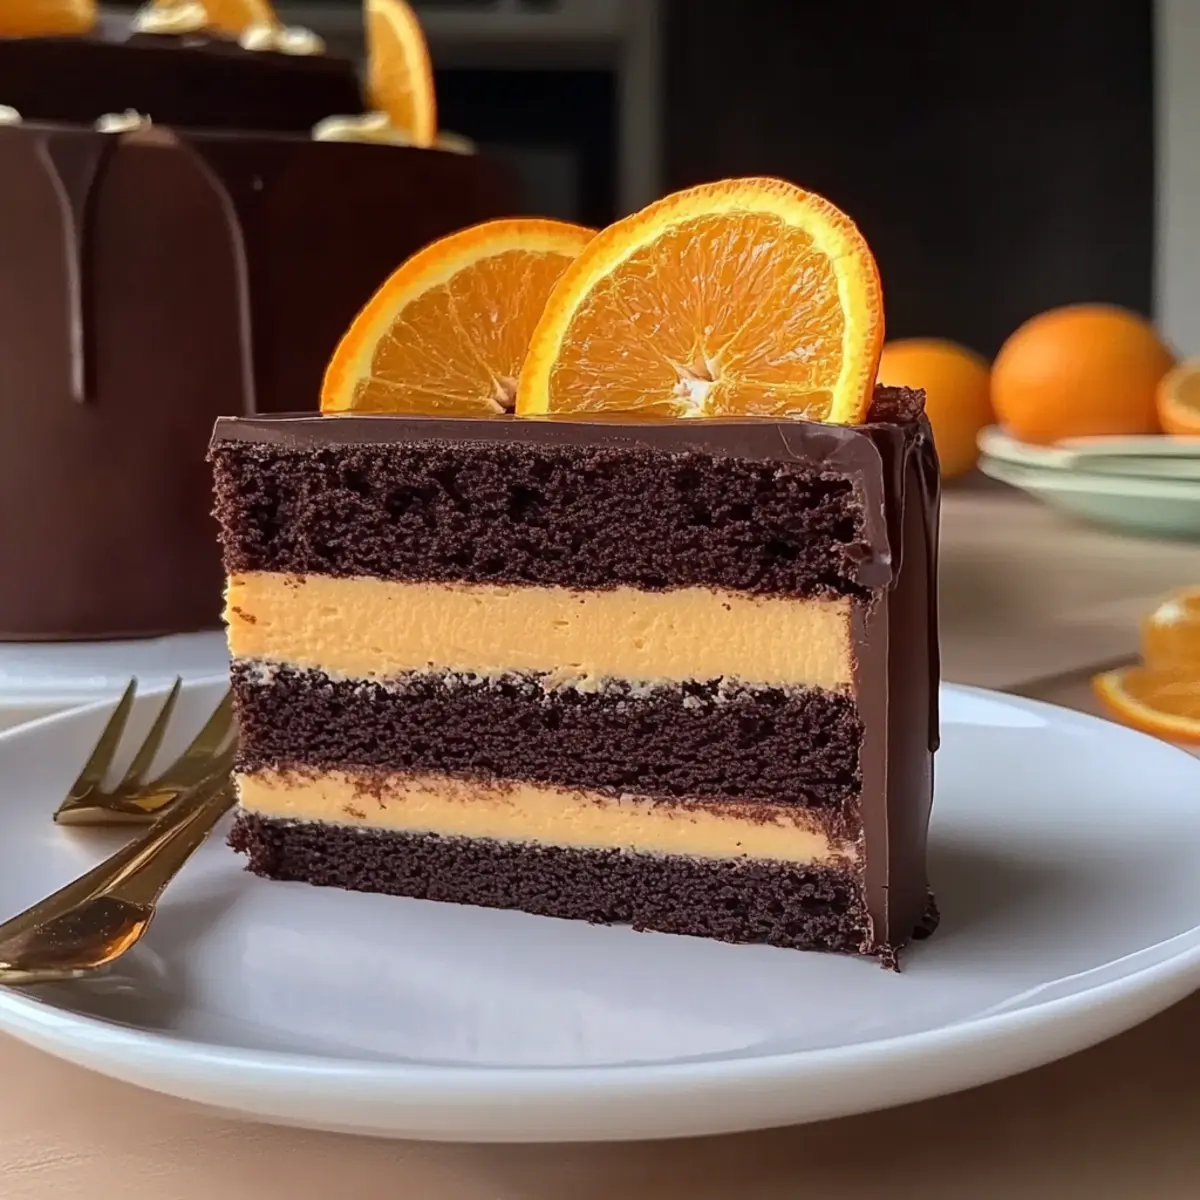
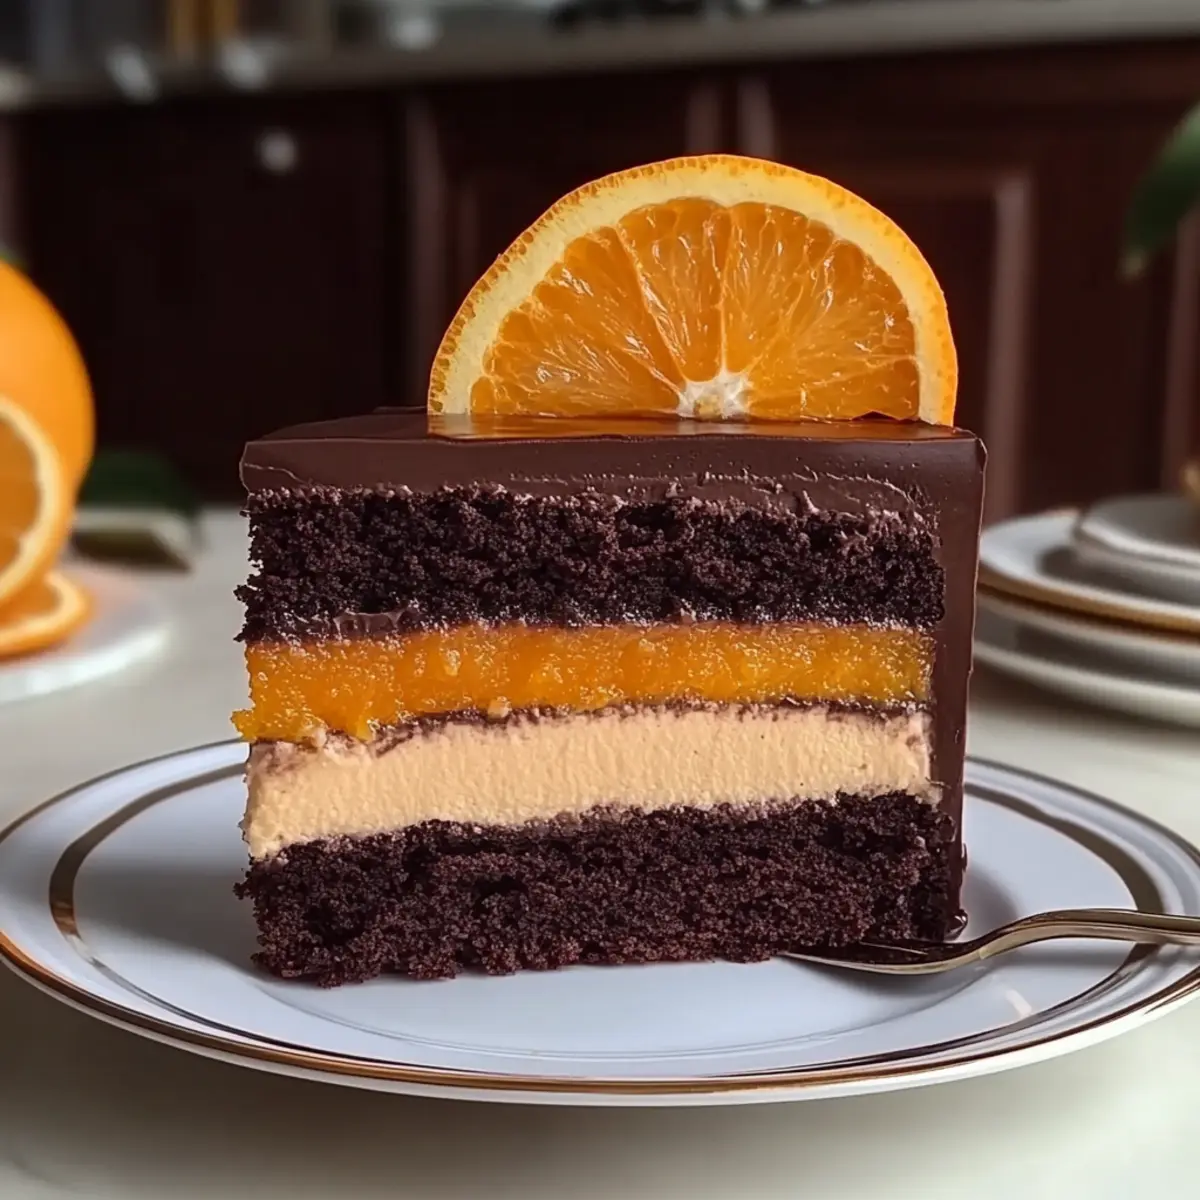
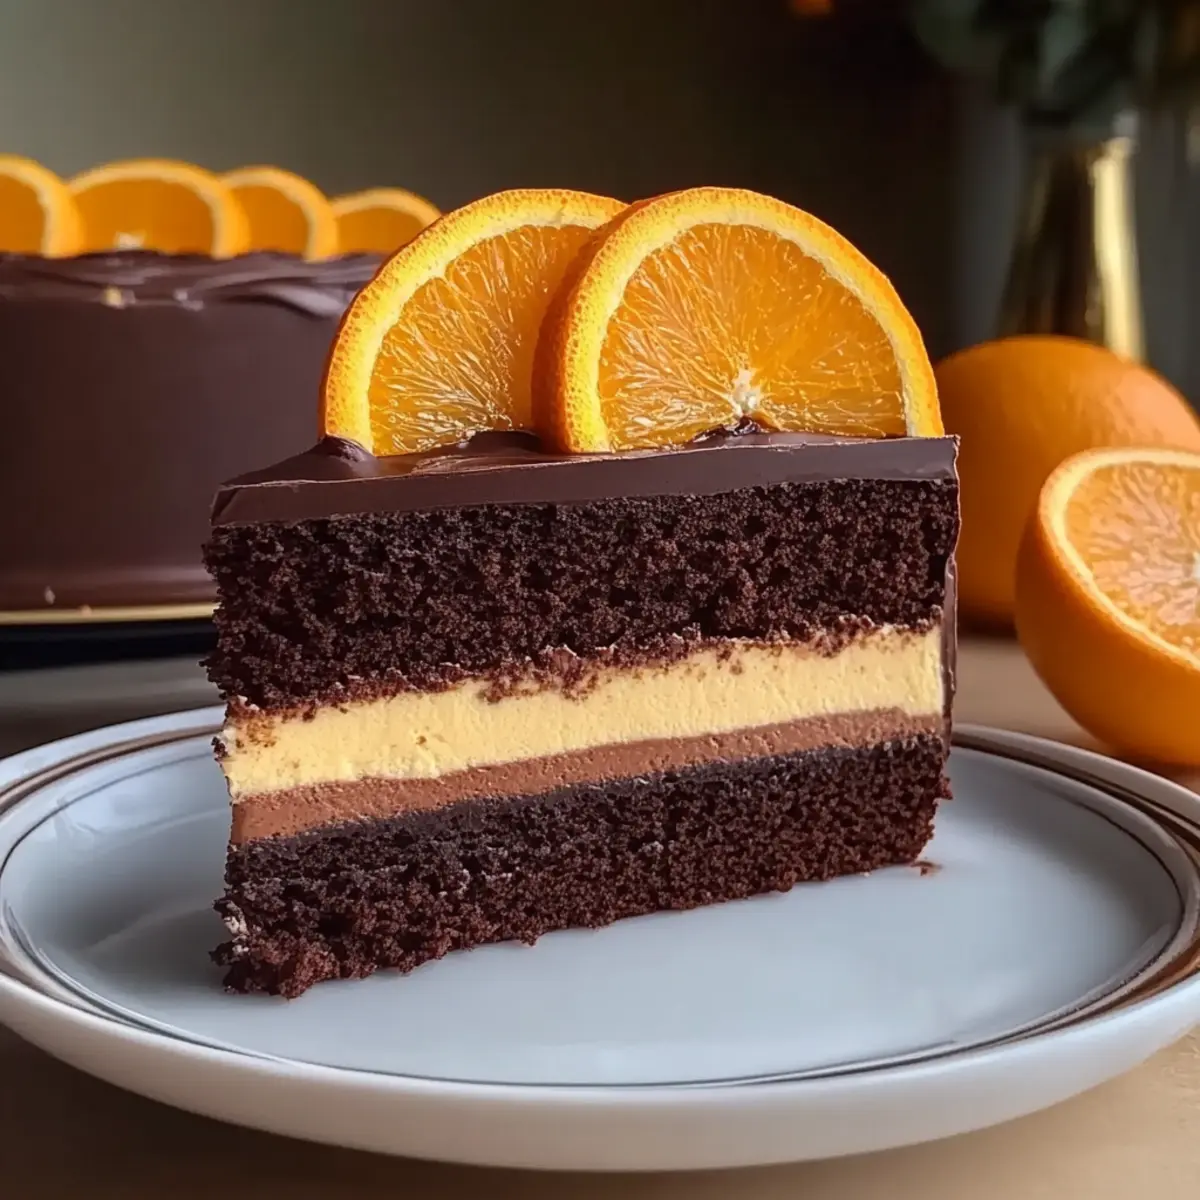
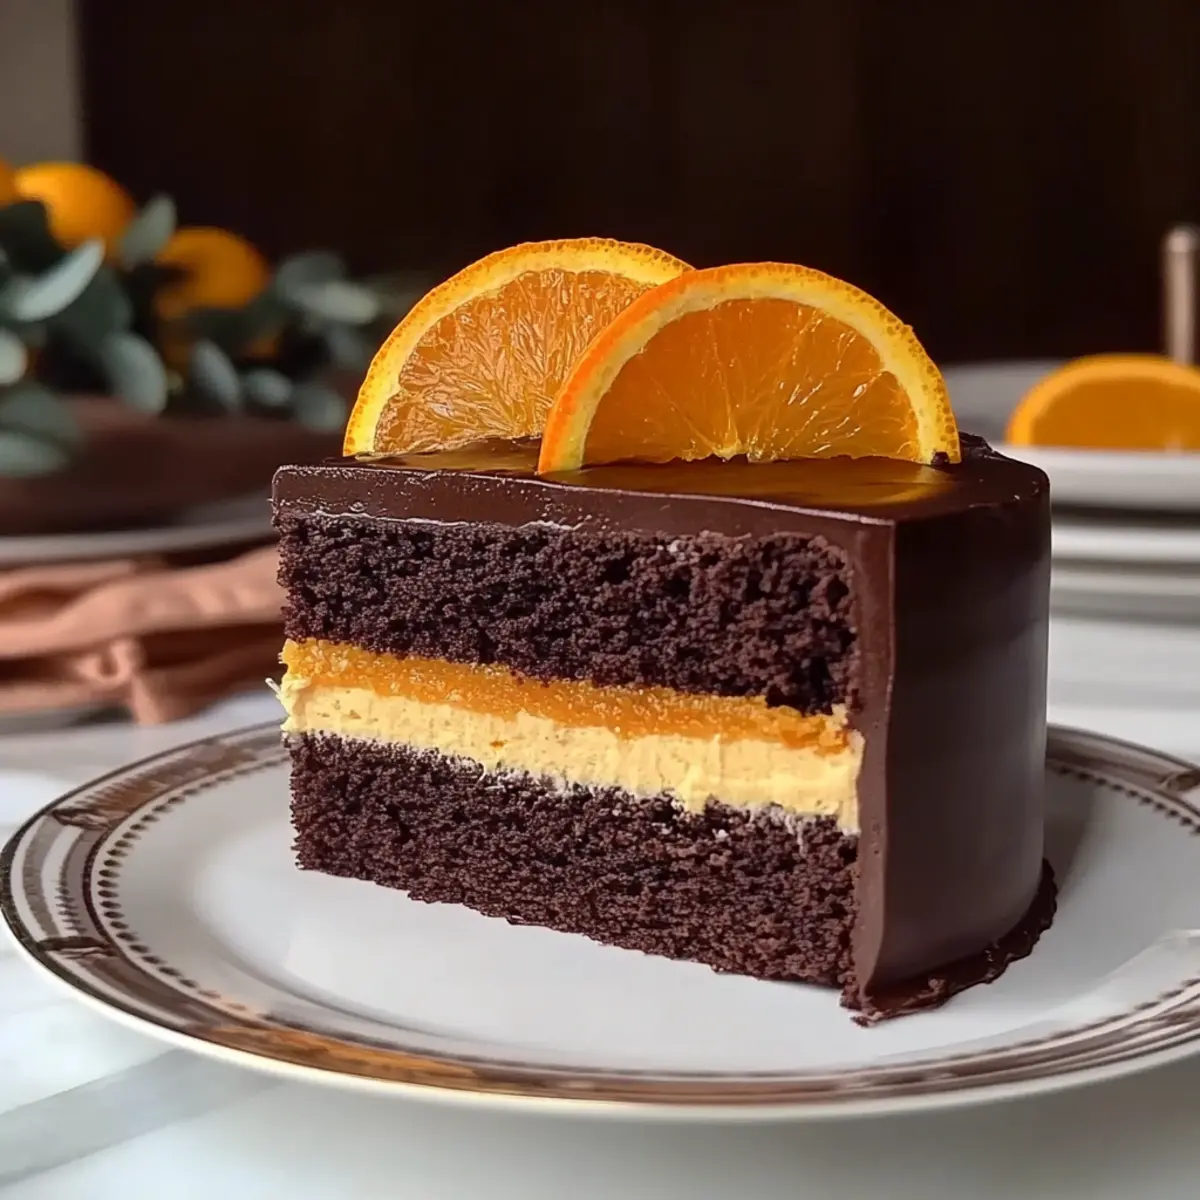
When the cakes are completely cool, place one layer on a serving plate. Spread a generous layer of chocolate ganache evenly between the two layers, followed by placing the second layer on top. Finish by spreading more ganache over the top and sides, and don’t forget to garnish with fresh orange slices to add a vibrant touch!
How to Store and Freeze Chocolate & Orange Punchcake
Airtight Container: Store the cake in an airtight container at room temperature for up to 3 days to maintain its moisture and flavor.
Refrigeration: If not consumed within 3 days, refrigerate the Chocolate & Orange Punchcake for up to a week. Cover it well to prevent it from drying out.
Freezing: To freeze, wrap the cooled cake layers tightly in plastic wrap and then in aluminum foil. It can be frozen for up to 3 months. Thaw in the fridge before serving.
Reheating: If frozen, allow the cake to thaw completely, then consider microwaving individual slices for about 10-15 seconds for a warm treat.
Make Ahead Options
These Chocolate & Orange Punchcake layers are perfect for busy home cooks looking to save time! You can bake the cake layers up to 24 hours in advance; once cooled, wrap them tightly in plastic wrap to maintain their moisture and prevent them from drying out. This not only allows the flavors to meld beautifully but also makes assembly quick and stress-free. If you wish to prep even further, the chocolate ganache can be made up to 3 days ahead and stored in the refrigerator—just reheat gently before using. When you’re ready to serve, simply frost the cooled cake layers with ganache, garnish with fresh orange slices, and enjoy this indulgent dessert with minimal effort!
Chocolate & Orange Punchcake Variations
Feel free to get creative with your Chocolate & Orange Punchcake to suit your taste preferences and dietary needs!
-
Lemon Twist: Replace orange zest and juice with lemon for a refreshing lemon-chocolate flavor. This brightens the cake while keeping it just as indulgent.
-
Nutty Crunch: Stir in chopped walnuts or pecans for delightful texture and nutty flavor. The added crunch complements the cake's moist crumb beautifully.
-
Flavored Chips: Swap semisweet chocolate chips for orange-infused or dark chocolate chips to amplify the citrus notes even further. Each bite will burst with flavor!
-
Gluten-Free Delight: Use a 1:1 gluten-free flour blend instead of all-purpose flour to make this recipe gluten-free without sacrificing taste or texture. Your gluten-sensitive friends will thank you!
-
Dairy-Free Option: Substitute whole milk with almond milk and oil with coconut oil for a dairy-free adaptation, ensuring a rich and moist texture still shines through.
-
Spices for Warmth: Add a dash of cinnamon or espresso powder to the dry ingredients; these spices enhance the chocolate flavor, adding depth to your dessert.
-
Frosting Finesse: Experiment with different frostings or glazes, such as cream cheese frosting or a bright citrus glaze, for a fun twist to the presentation and flavor.
-
Party Size: Double the recipe to make a three-layer cake for larger gatherings or special occasions. It's sure to wow your guests!
For more indulgent chocolate delights, don't miss our Pistachio White Chocolate cookies or try a rich slice of Chocolate Zucchini Cake.
What to Serve with Chocolate & Orange Punchcake
Celebrate your indulgent dessert with delightful accompaniments that elevate every bite and create a memorable dining experience.
- Vanilla Ice Cream: A scoop of creamy vanilla ice cream melts beautifully into the warm cake, enhancing its richness and providing a satisfying contrast.
- Whipped Cream: Light and airy, whipped cream adds a velvety texture, allowing the chocolate and orange flavors to shine while keeping it refreshing.
- Fresh Berries: Juicy strawberries or raspberries provide a tart sweetness that balances the richness of the punchcake, adding a pop of vibrant color to your plate.
- Citrus Sorbet: A refreshing citrus sorbet reinforces the orange notes, cleansing the palate and making each bite more delightful with its icy, zesty goodness.
- Coffee or Espresso: A warm cup of coffee or espresso complements the chocolate beautifully, bringing out its deeper flavors and making it a perfect afternoon delight.
- Chocolate Ganache Drizzle: For the ultimate indulgence, drizzle extra chocolate ganache over the cake just before serving, creating a stunning visual appeal and an extra layer of chocolatey goodness.
- Mint Leaves: Fresh mint leaves can be a lovely garnish to add a hint of herbal brightness, creating a beautiful contrast with the cake’s richness and enhancing its aroma.
Expert Tips for Chocolate & Orange Punchcake
-
Quality Ingredients: Use high-quality cocoa powder and chocolate chips; they significantly enhance the flavor of your Chocolate & Orange Punchcake.
-
Room Temperature Eggs: Ensure your eggs are at room temperature for better aeration. This will give your cake a lighter, fluffier texture.
-
Don’t Overmix: After adding boiling water to the batter, mix just until combined. A few lumps are fine; overmixing can lead to a dense cake.
-
Cool Completely: Allow the cakes to cool completely before frosting. This prevents the ganache from melting and ensures a beautiful finish.
-
Garnish Wisely: Fresh orange slices on top add visual appeal and reinforce the orange flavor; choose fruits that are just ripe for the best taste.
Chocolate & Orange Punchcake Recipe FAQs
How do I choose ripe oranges for this recipe?
Absolutely! When selecting oranges for your Chocolate & Orange Punchcake, look for firm, heavy oranges with smooth skin. They should have a rich aroma and a slight give when squeezed, indicating juiciness. Avoid any oranges with dark spots or blemishes.
What’s the best way to store the Chocolate & Orange Punchcake?
Very! To maintain its delicious moisture, store your cake in an airtight container at room temperature for up to 3 days. If you want it to last longer, refrigerate it for up to a week, making sure it's well covered to prevent dryness.
Can I freeze leftover Chocolate & Orange Punchcake?
Absolutely! To freeze, wrap the cooled cake layers tightly in plastic wrap, followed by aluminum foil. This helps protect against freezer burn. It can be frozen for up to 3 months. When you’re ready to enjoy, simply thaw it in the refrigerator overnight.
What should I do if my cake is dense instead of light and fluffy?
Not to worry! If your Chocolate & Orange Punchcake turns out dense, it may be due to overmixing the batter after adding the boiling water or using cold eggs. Ensure your eggs are at room temperature and mix just until combined when adding water. If the batter is thick, it’s okay; just don’t overdo it!
Is this cake suitable for people with allergies?
The more the merrier! If you're catering to allergies, you can make a few simple substitutions. Use gluten-free flour for those with gluten sensitivities and flax eggs to accommodate vegan diets. Always double-check ingredient labels for potential allergens, especially in chocolate and baking powder.
How long can I keep the Chocolate & Orange Punchcake in the refrigerator?
Very! You can keep the refrigerated Chocolate & Orange Punchcake for about a week. Just ensure it’s stored in an airtight container to keep it fresh and moist. Enjoy those lovely flavors while they last!
Chocolate & Orange Punchcake: A Flavorful Indulgence Adventure
Ingredients
Equipment
Method
- Preheat your oven to 350°F (175°C). Grease two 9-inch round cake pans with butter and dust with flour.
- Sift together all-purpose flour, granulated sugar, cocoa powder, baking powder, baking soda, and salt in a large bowl.
- In a separate bowl, whisk together large eggs, whole milk, vegetable oil, and vanilla extract until smooth.
- Gradually pour the wet mixture into the dry ingredients while mixing at medium speed, adding boiling water until smooth.
- Fold in the orange juice and zest, then add semisweet chocolate chips, ensuring even distribution.
- Pour the batter into the prepared pans and bake for 30-35 minutes. Check doneness with a toothpick.
- Allow the cakes to cool in the pans for 10 minutes, then transfer to wire racks to cool completely.
- Assemble by placing one cake layer on a plate, adding ganache in between, then top with another layer and ganache on top.


Leave a Reply