
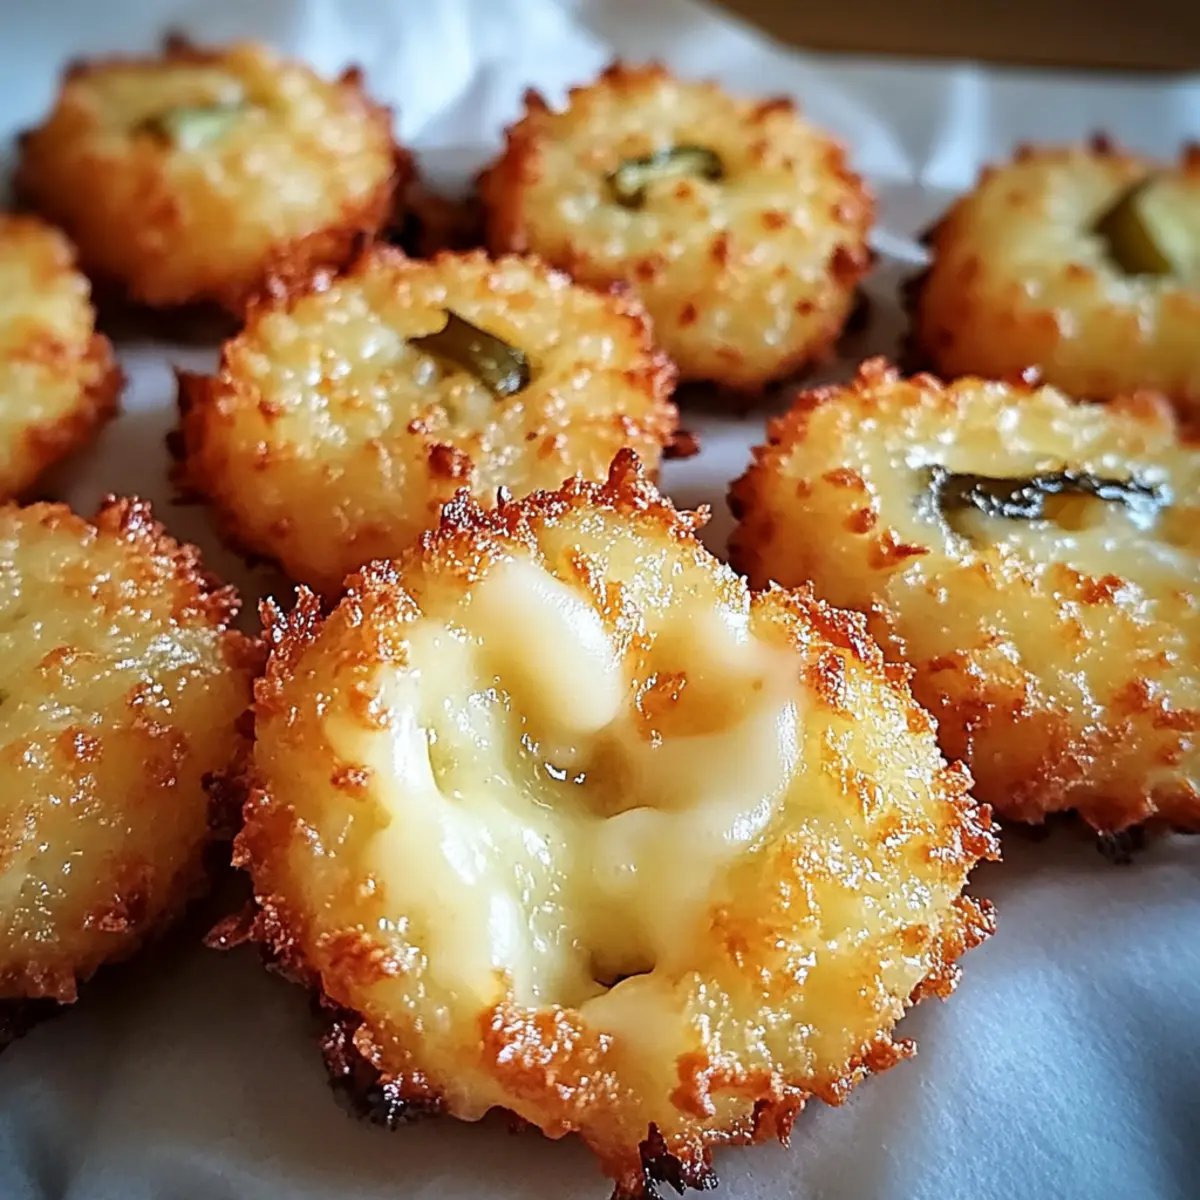
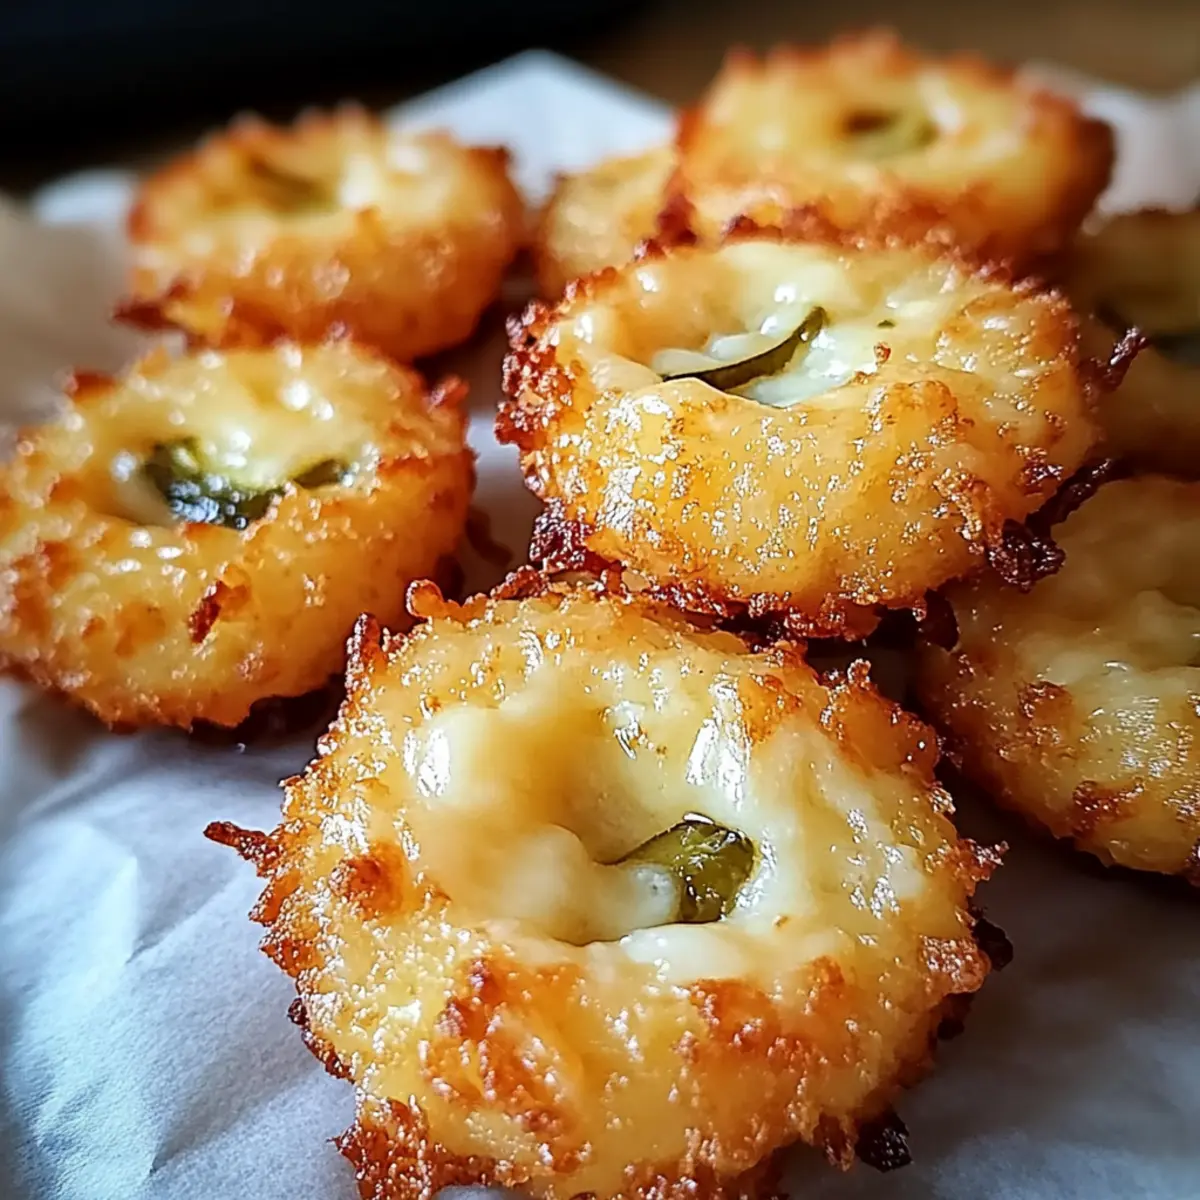
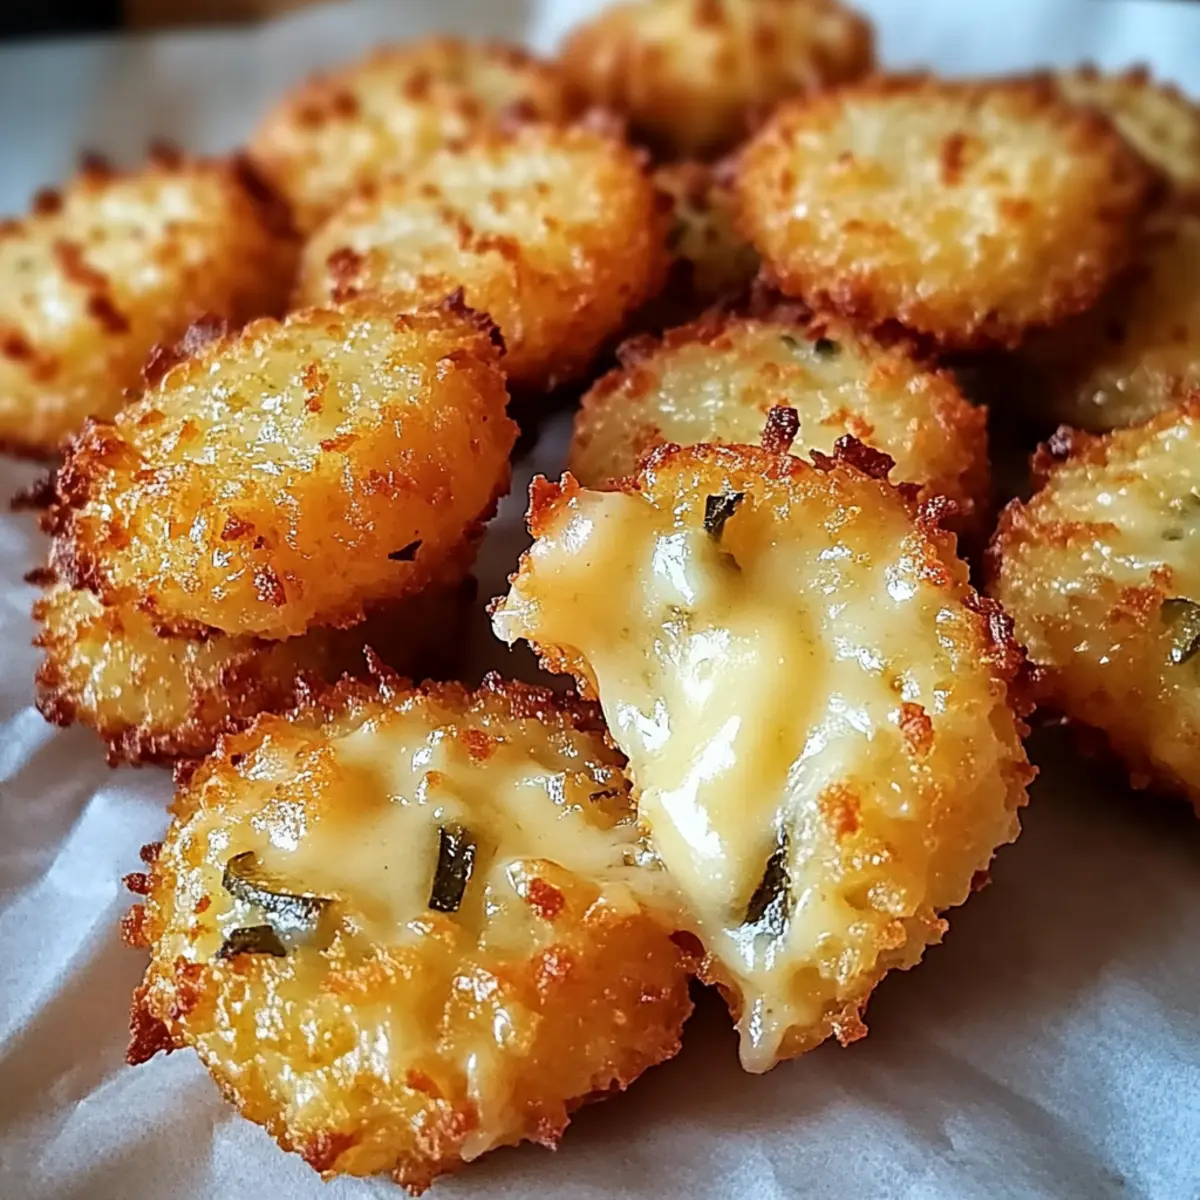
As I rummaged through my fridge the other day, I stumbled upon a jar of dill pickles that sparked a delightful idea for a snack revolution. Enter Crispy Pickle Cheese Bites, a quick and scrumptious treat that harmoniously combines gooey cheese and tangy pickle crunch. With just 20 minutes of your time, these customizable bites are perfect for satisfying those afternoon cravings or impressing friends at your next gathering. Plus, they cater to various tastes with options for spicy twists, herb-infused delights, or even a vegan take! Are you ready to dive into this cheesy adventure that’s sure to become a household favorite?
Why Are Crispy Pickle Cheese Bites So Amazing?
Irresistible Crunch: You’ll love the satisfying crunch of the crispy exterior combined with the gooey center – it’s a flavor explosion with every bite!
Quick & Easy: Ready in just 20 minutes, these bites are perfect for busy evenings or last-minute gatherings.
Customizable Flavors: Whether you prefer a spicy kick from pepper jack or a fresh herb infusion, these bites allow you to play with flavors. Don’t miss out on trying them alongside some creamy ranch or spicy sriracha mayo for dipping!
Crowd-Pleasing: Perfect for parties or cozy movie nights, everyone will be clamoring for more – they’re an instant hit!
Gluten-Free Option: If you’re watching your diet, simply swap in gluten-free breadcrumbs for a tasty alternative, making these snacks inclusive for everyone.
With so many options to customize, it’s no wonder these Crispy Pickle Cheese Bites will become your new go-to snack!
Crispy Pickle Cheese Bites Ingredients
• For the Cheese Mixture
- Shredded Cheddar Cheese – Provides a rich, tangy flavor; substitute with Monterey Jack or pepper jack for a twist.
- Shredded Mozzarella Cheese – Adds creaminess and stretchiness; Provolone or Gouda work great, too.
- Finely Chopped Dill Pickles – Adds tang and crunch; if unavailable, try bread-and-butter pickles or pickled jalapeños for different flavors.
- Garlic Powder – Enhances flavor; consider subs with onion powder for an extra kick.
• For the Coating
- Breadcrumbs – Ensures extra crunchiness; omit or use gluten-free breadcrumbs for a gluten-free version.
- Nonstick Spray/Parchment Paper – Helps with easy baking and cleanup to achieve the perfect Crispy Pickle Cheese Bites.
With these ingredients at hand, you're just moments away from crafting the most mouth-watering snack!
Step‑by‑Step Instructions for Crispy Pickle Cheese Bites
Step 1: Preheat the Oven
Begin by preheating your oven to 375°F (190°C). This will ensure that your Crispy Pickle Cheese Bites cook evenly and achieve that perfect golden color. While the oven warms up, prepare a baking sheet by lining it with parchment paper or lightly spraying it with nonstick spray to prevent sticking.
Step 2: Make the Cheese Mixture
In a large mixing bowl, combine shredded cheddar and mozzarella cheeses with finely chopped dill pickles and garlic powder. Stir until everything is evenly mixed, creating a cheesy, tangy base for your bites. If you'd like an extra crunch, fold in the breadcrumbs at this stage to enhance the texture further, creating a mouthwatering cheese mixture.
Step 3: Shape the Bites
Using your hands, scoop out portions of the cheese mixture and gently roll them into small balls or bite-sized portions. Arrange these bites on the prepared baking sheet, leaving enough space between them to allow for even cooking. Press them slightly down for a more uniform shape if desired, ensuring all your Crispy Pickle Cheese Bites are ready for the oven.
Step 4: Bake the Bites
Place the baking sheet in the oven and bake the bites for about 10 minutes, or until they turn golden brown and crispy. Keep a close eye on them during the last few minutes to achieve that delightful color without burning. The aroma will signal that they are nearly ready!
Step 5: Cool Before Serving
Once baked to perfection, remove the Crispy Pickle Cheese Bites from the oven and let them cool for a few moments on the baking sheet. Be cautious when serving, as the gooey cheese center may be quite hot. This brief cooling time will ensure they remain deliciously crispy while still warm and cheesy inside.
What to Serve with Crispy Pickle Cheese Bites
Diving into the world of Crispy Pickle Cheese Bites invites the chance to create a delightful spread that enhances your snacking experience.
- Creamy Ranch Dip: The cool and tangy ranch provides a luscious contrast to the warm, cheesy bites, making each bite a flavorful masterpiece.
- Spicy Sriracha Mayo: This zesty condiment adds a kick; the creaminess calms the heat, creating a well-balanced dipping delight!
Indulging in these combinations makes snacking fun and interactive.
- Sweet and Spicy Jalapeño Jam: The sweet and spicy elements perfectly complement the savory cheese bites and offer an exciting burst of flavor.
- Crunchy Veggies: Carrot sticks or celery add freshness and crunch, balancing the richness of the bites while offering a healthy contrast.
Pairing Crispy Pickle Cheese Bites with these tantalizing options not only elevates flavors but also turns your snack time into a feast!
Storage Tips for Crispy Pickle Cheese Bites
Room Temperature: Keep your Crispy Pickle Cheese Bites at room temperature for up to 1 hour to enjoy their crunchiness; they tend to lose their texture beyond this timeframe.
Fridge: Store leftover bites in an airtight container in the fridge for up to 2 days. Reheat in the oven to restore their crispiness and flavor.
Freezer: For longer storage, freeze unbaked bites for up to 3 months. Bake directly from frozen, adding a few additional minutes to the cooking time for perfectly crispy bites.
Reheating: To reheat, place the bites back in a preheated oven at 375°F (190°C) for about 8-10 minutes until heated through and crispy again.
Make Ahead Options
These Crispy Pickle Cheese Bites are ideal for busy cooks looking to save time without sacrificing flavor! You can prepare the cheese mixture up to 24 hours in advance by mixing the shredded cheddar and mozzarella cheeses, chopped dill pickles, and garlic powder. Simply refrigerate the mixture, tightly covered, to maintain its freshness. On the day you plan to enjoy these bites, shape the mixture into balls and bake them directly from the fridge for about 10 minutes. By prepping the mixture ahead of time, you’ll have a delightful snack ready with minimal effort, perfect for unexpected guests or quick weeknight treats!
Expert Tips for Crispy Pickle Cheese Bites
• Fresh Cheese Matters: Use freshly shredded cheese for the best melt and flavor. Pre-packaged cheese may not activate the creamy goodness as intended.
• Prevent Sogginess: Blot the finely chopped dill pickles with a paper towel to remove excess moisture, ensuring your Crispy Pickle Cheese Bites stay delightfully crunchy.
• Chill Before Shaping: If the cheese mixture feels too sticky, refrigerate it for about 15 minutes. This will make shaping the bites much easier and prevent them from falling apart.
• Keep an Eye on Baking: During the last few minutes of baking, watch closely to prevent over-browning. Perfectly baked bites should be golden but not burnt – trust your nose!
• Spice it Up: Feel free to add spices like smoked paprika or cayenne pepper to the cheese mixture. This gives a delightful kick that enhances the overall flavor of your bites.
Enjoy your cooking adventure with these tips to make the most of your Crispy Pickle Cheese Bites!
Crispy Pickle Cheese Bites Variations
Feel free to dive into your creative side and make these bites your own with these delicious twists!
-
Spicy Cheese: Swap cheddar for pepper jack to add heat and zing to your bites. This fiery version is perfect for those who like their snacks with an extra kick.
-
Jalapeño Twist: Finely chop jalapeños and add them to the cheese mixture for a spicy crunch. This addition brings a vibrant flavor explosion that complements the tang of the pickles.
-
Herb Infusion: Incorporate fresh herbs like dill, chives, or even basil into the cheese mixture for added freshness. The aroma will fill your kitchen as you bake them, creating an inviting atmosphere.
-
Vegan Option: Replace dairy cheese with your favorite dairy-free cheese and use gluten-free bread crumbs. This way, everyone can enjoy these bites without feeling left out at your gatherings!
-
Sweet Heat: Drizzle a touch of honey into the cheese mixture to create a sweet and savory balance. It’s a delightful contrast to the tangy pickles, making each bite memorable.
-
Garlic Lovers: Increase the garlic powder or even add roasted garlic for a more robust flavor. This version will have garlic aficionados raving about your ingenuity!
-
Cheesy Trio: Combine cheddar, mozzarella, and gouda for a rich blend of flavors. Each mouthful will offer a deliciously creamy experience that’s hard to resist.
Feel inspired? Try these variations to elevate your Crispy Pickle Cheese Bites and discover new favorites! Don’t forget to enjoy them with a side of creamy ranch or for something different, consider a spicy sriracha mayo dip!

Crispy Pickle Cheese Bites Recipe FAQs
How do I choose the best pickles for this recipe?
Absolutely! The pickles you select can make all the difference in flavor. For the best results, opt for finely chopped dill pickles as they provide that iconic tanginess. However, if you want a sweeter touch, bread-and-butter pickles can be substituted, or for those who enjoy a little heat, try using pickled jalapeños. Just ensure to blot any excess moisture from the pickles with a paper towel to keep your bites crunchy.
What’s the best way to store leftover Crispy Pickle Cheese Bites?
Very! Store your leftover Crispy Pickle Cheese Bites in an airtight container in the fridge for up to 2 days. This keeps them fresh and flavorful, but be aware that they will lose some of their initial crunch. When ready to enjoy, simply reheat them in a preheated oven at 375°F (190°C) for about 8-10 minutes to revive their crispy texture.
Can I freeze the Crispy Pickle Cheese Bites?
Absolutely! Freezing is a fantastic option. Shape the bites but do not bake them. Place unbaked bites on a baking sheet lined with parchment paper and freeze for up to 3 months. Once they're solid, transfer them to a freezer bag or airtight container. When ready to bake, cook them directly from frozen, giving them an extra 2-3 minutes in the oven for perfect crispiness.
What should I do if my cheese mixture is too sticky?
Very! If your cheese mixture feels a bit too sticky to handle, chilling it in the refrigerator for about 15 minutes is an excellent way to firm it up. This makes it much easier to shape the bites without them falling apart. Alternatively, adding a touch more breadcrumbs can also help to absorb moisture and tidy up the mixture's texture.
Are there any dietary considerations for these bites?
Definitely! These Crispy Pickle Cheese Bites can be tailored to meet dietary needs. To make them gluten-free, simply use gluten-free breadcrumbs instead of regular ones. For those who are vegan, replace the dairy cheeses with your favorite dairy-free alternatives, and you can also omit the breadcrumbs for a lighter version. With these simple swaps, everyone can enjoy this cheesy treat!
How should I know when my Crispy Pickle Cheese Bites are perfectly baked?
Exactly! The baking time is crucial for achieving that ideal crispy texture. You should aim for about 10 minutes in the oven at 375°F (190°C). Keep a close eye on them during the final minutes—look for a lovely golden brown color on the outside, which signals that they’re ready to come out. The moment you catch that delicious aroma wafting through your kitchen, you know they are nearly perfect!
Crispy Pickle Cheese Bites: Your New Favorite Snack Sensation
Ingredients
Equipment
Method
- Preheat your oven to 375°F (190°C) and prepare a baking sheet with parchment paper or nonstick spray.
- In a large mixing bowl, combine shredded cheddar and mozzarella cheeses with finely chopped dill pickles and garlic powder.
- Scoop out portions of the cheese mixture and roll them into small balls. Arrange the bites on the prepared baking sheet.
- Bake the bites for about 10 minutes, or until golden brown and crispy.
- Remove from the oven and let them cool for a few moments before serving.
Leave a Reply