
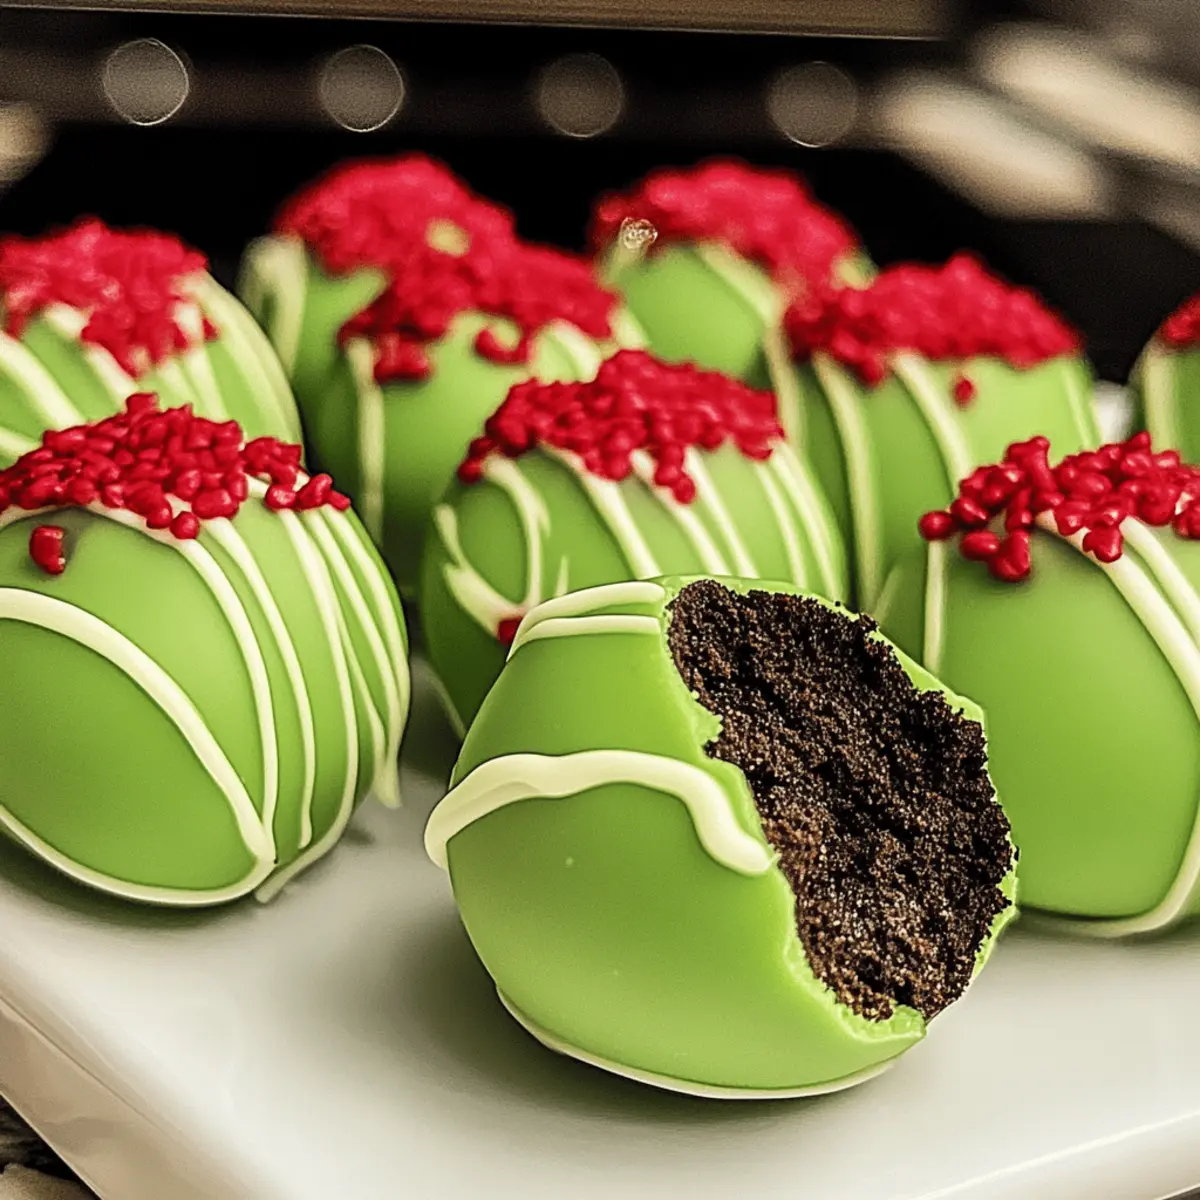
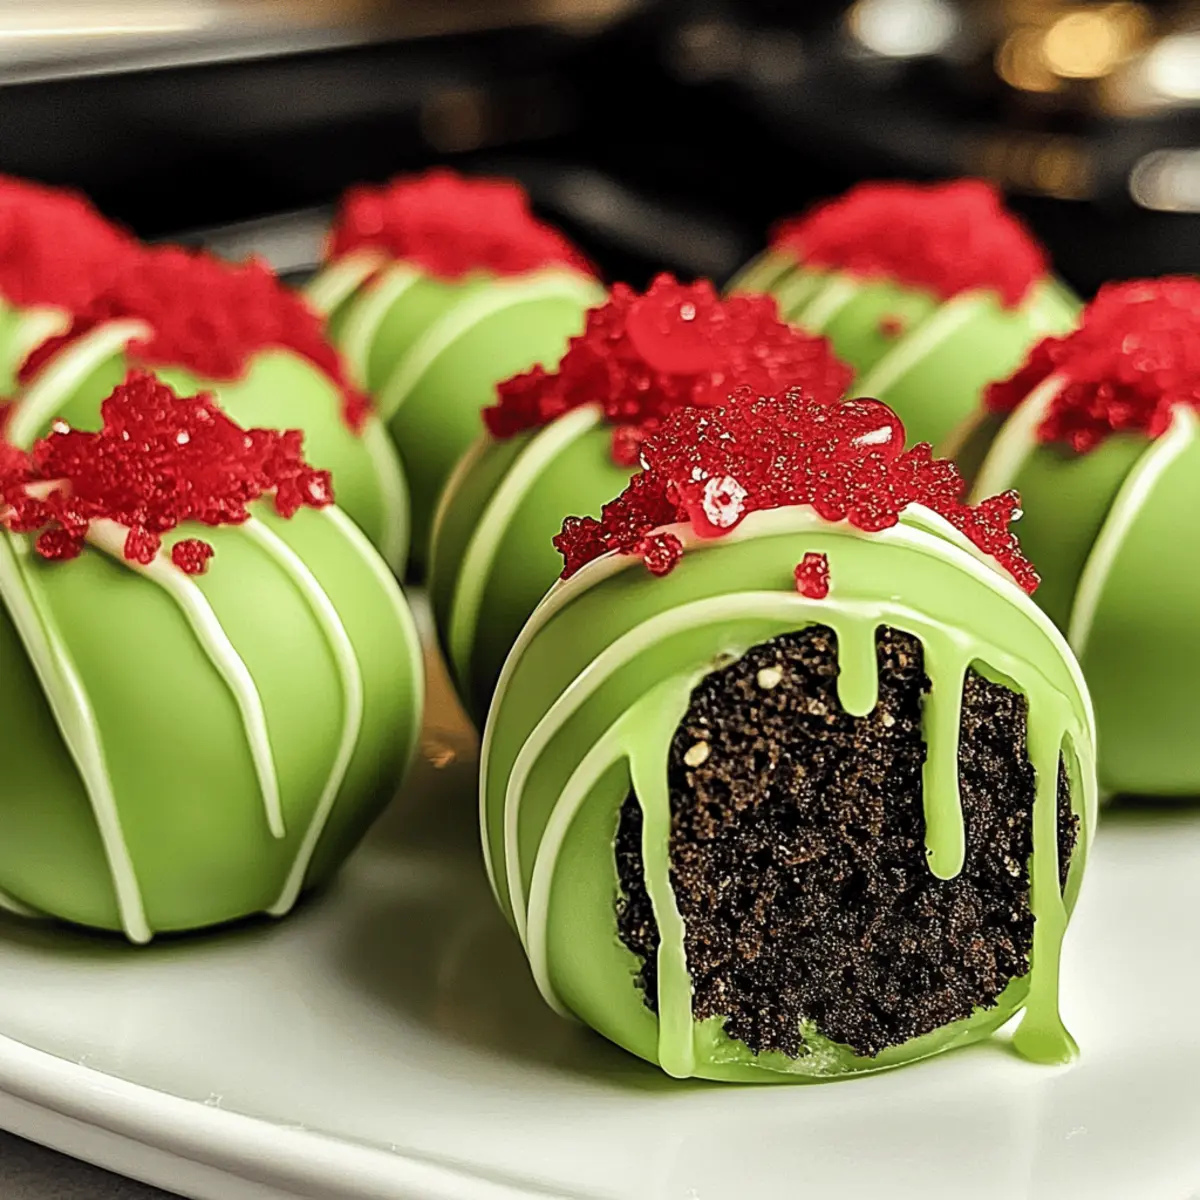
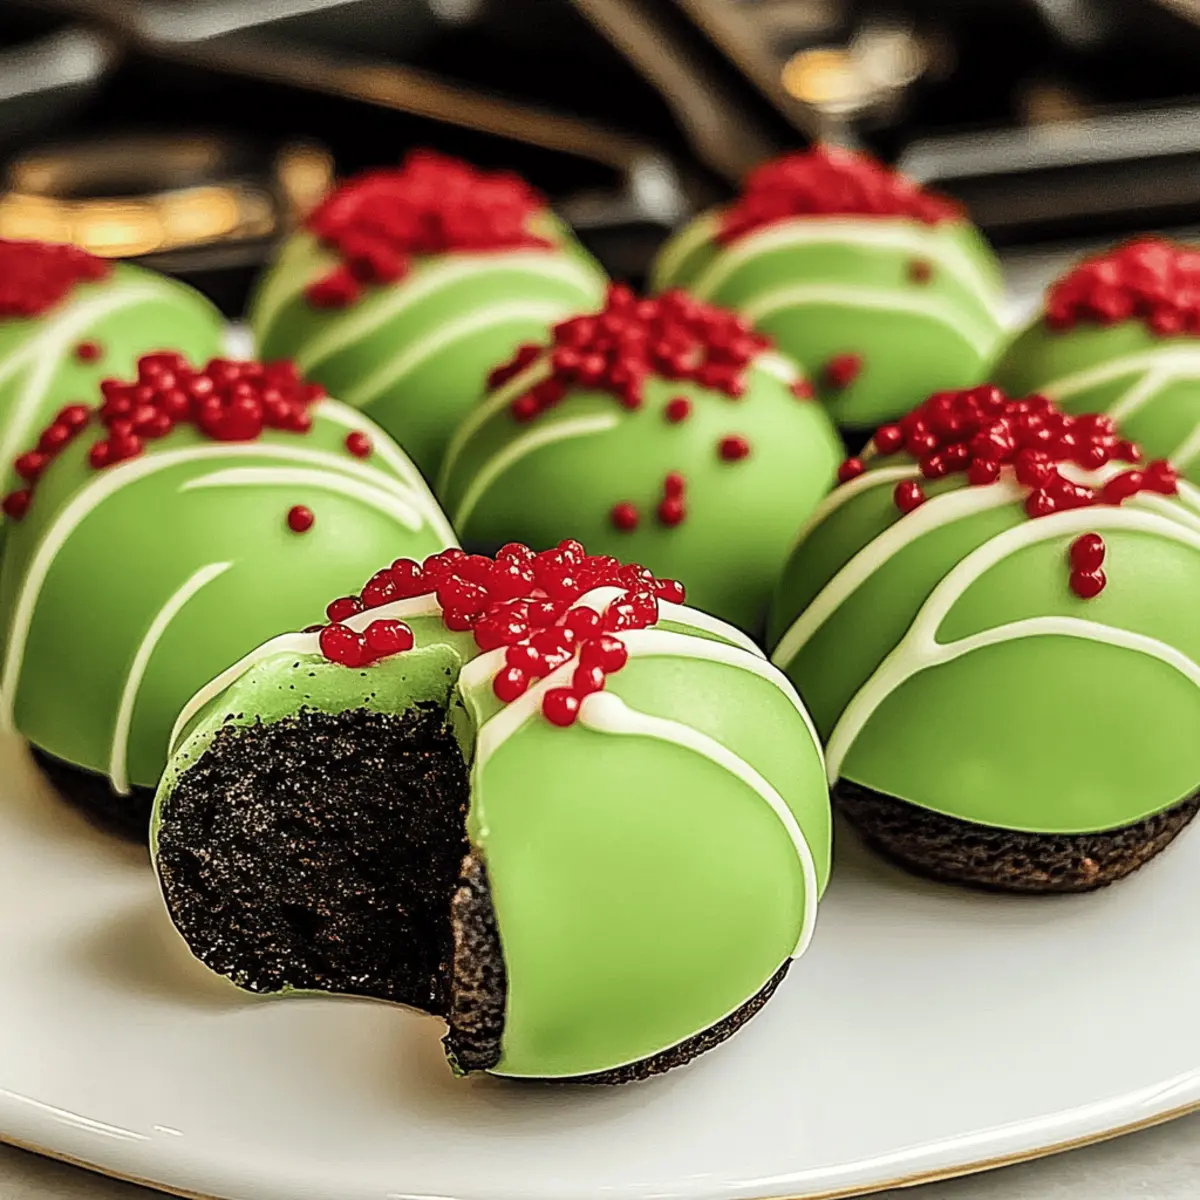
As I rummaged through my pantry, I stumbled upon a hidden treasure—an entire box of Red Velvet Oreos just waiting to be transformed into something magical. That’s when I decided to create Grinch Oreo Balls, a festive no-bake treat that perfectly captures the spirit of the holidays. With their vibrant green candy coating and a sweet red heart on top, these delightful bites offer an easy way to spread cheer at any gathering. Not only are they a showstopper that will impress friends and family, but they also come together in a flash, allowing you to enjoy more of what the season is all about. Ready to whip up these whimsical treats that look as good as they taste? Let’s dive in!
Why Are Grinch Oreo Balls Irresistible?
Festive Appeal: These Grinch Oreo Balls bring a pop of color to your holiday desserts, making them an eye-catching addition to any party table.
Effortless Preparation: With just a few simple steps, you'll have a delicious treat that requires no baking—perfect for busy holiday schedules.
Endless Variations: Feeling adventurous? Swap out Red Velvet Oreos for Peppermint or Golden Oreos for a unique twist!
Crowd-Pleaser: Their delightful flavors and playful presentation guarantee smiles for kids and adults alike. Explore more festive ideas alongside your Grinch Oreo Balls—check out these delightful Oreo Balls Decadent!
Gifting Made Easy: Package them in festive boxes to share the joy with friends and family, spreading holiday sweetness wherever you go.
Grinch Oreo Balls Ingredients
For the Batter
• Red Velvet Oreos – The star ingredient, providing a unique flavor and texture; feel free to swap in Regular Oreos for a different taste!
• Cream Cheese – Binds everything together into a creamy filling; make sure it’s softened for easy mixing.
• Light Green Candy Melts – Creates the festive green coating; substitute with white chocolate and green food coloring if needed.
For Decoration
• Red Candy Hearts – Adds a charming touch and symbolizes the Grinch's transformed heart; look for these in baking stores or online.
Get ready to bring magic to your holiday gatherings with these Grinch Oreo Balls!
Step‑by‑Step Instructions for Grinch Oreo Balls
Step 1: Preparation
Begin by lining a large baking sheet with parchment paper, creating a non-stick surface for your Grinch Oreo Balls. This step is essential to ensure easy removal after the treats are assembled. Set the lined tray aside while you prepare the filling mixture, gathering all your ingredients within reach to streamline the process.
Step 2: Crush Oreos
Use a food processor to finely crush the Red Velvet Oreos into a powder-like consistency, which should take about 30 seconds. If you prefer a more hands-on approach, place the Oreos in a zip-lock bag and crush them with a rolling pin until no large pieces remain. The goal is to achieve fine crumbs that will blend smoothly with the cream cheese.
Step 3: Mix
In a large mixing bowl, beat the softened cream cheese with an electric mixer on medium speed until it's smooth and creamy, around 1-2 minutes. Gradually add the crushed Oreo crumbs to the cream cheese, blending until well combined. The mixture should form a dough-like consistency that holds together, perfect for shaping into balls.
Step 4: Shape
Using a 1.5-inch cookie scoop, portion the Oreo mixture and roll each portion into smooth balls with your hands. Place them on the prepared baking sheet, ensuring they are evenly spaced. This step should yield around 24 balls, which will later be coated in the festive green candy melts, adding to their holiday charm.
Step 5: Chill
Refrigerate the shaped balls for at least 2 hours, allowing them to firm up. Chilling ensures that the Oreo balls maintain their shape during the dipping process. Make sure to cover the tray loosely with plastic wrap to prevent the balls from drying out while they firm up.
Step 6: Melt Candy
While the Oreo balls chill, gently heat the light green candy melts in a double boiler or microwave until fully melted and smooth, stirring frequently. If using a microwave, heat in 30-second intervals, mixing between each interval to prevent overheating. The melted candy should have a glossy appearance and be ready for dipping.
Step 7: Dip
Once the Oreo balls are chilled, take each one and dip it into the melted candy using a fork. Allow the excess candy to drip off before placing the coated ball back on the parchment-lined tray. This creates a smooth, even coating on your Grinch Oreo Balls.
Step 8: Decorate
After coating all the balls, drizzle any leftover melted candy over them for a decorative touch. Quickly place a red candy heart on top of each ball while the candy coating is still slightly warm to ensure it sticks properly. This final adornment showcases the cheerful spirit of the Grinch.
Step 9: Set
Refrigerate the decorated Grinch Oreo Balls until the candy coating is fully set, which typically takes about 30 minutes. Once the coating is firm, they are ready to be served or packaged for gifting, making you a holiday hit!

Grinch Oreo Balls Variations & Substitutions
Customize your Grinch Oreo Balls with these fun twists to spark joy and creativity in the kitchen!
-
Dairy-Free: Use dairy-free cream cheese and swap the candy melts for dark chocolate melted with a bit of coconut oil for a rich coating.
-
Minty Fresh: Opt for Peppermint Oreos instead of Red Velvet for a refreshing holiday twist. The cool mint flavor adds a wonderful surprise with every bite.
-
Golden Delight: Substitute Golden Oreos for a lighter flavor. These will yield a charming buttery taste while still bringing that beloved Oreo crunch.
-
Nutty Addition: Add crushed walnuts or pecans to the filling for a delightful crunch. The nuttiness offers a nice contrast to the sweet fudge-like experience.
-
Chocolate Lover's Dream: Dip in semi-sweet chocolate instead of candy melts for a richer taste. Chocolate lovers rejoice, as this variation amplifies the dessert’s decadence!
-
Festive Sparkle: Sprinkle edible glitter or silver sprinkles on top before the coating sets to make them even more festive. A whimsical touch that makes them stand out on any holiday tray.
-
Heat It Up: Incorporate a pinch of cayenne pepper or chili powder into the mix for an unexpected spicy kick. This twist will intrigue adventurers who love a bit of heat in their sweets!
-
Flavor Explosion: Experiment with different flavored extract additions—consider peppermint, almond, or vanilla—to infuse the creamy filling with unique flavors. These small changes can drastically alter the overall profile of your treats.
While you're at it, don't forget to check out these delightful Oreo Balls Decadent for even more inspiration!
Make Ahead Options
These Grinch Oreo Balls are ideal for meal prep, allowing you to enjoy festive treats with less stress during the busy holiday season! You can prepare the filling mixture and form the balls up to 24 hours in advance; simply refrigerate them on the lined tray after rolling. To ensure they stay fresh and don't dry out, cover the tray loosely with plastic wrap. When you're ready to serve, melt your green candy melts and dip each chilled ball to create the delightful coating. Finish by adding the red candy hearts, and you'll have charming treats that are just as delicious, ready to spread holiday cheer with minimal last-minute effort!
Storage Tips for Grinch Oreo Balls
Fridge: Store your Grinch Oreo Balls in an airtight container in the refrigerator for up to one week. This keeps them fresh and ready for indulgent snacking.
Freezer: For longer storage, freeze the uncoated Oreo balls for up to three months. Just remember to thaw them before coating and decorating for best results.
Room Temperature: If serving them straight away, keep them at room temperature for a few hours, but avoid leaving them out for too long to maintain the creamy filling.
Reheating: There's no need for reheating; simply enjoy these festive treats chilled or at room temperature for the best flavor experience!
What to Serve with Grinch Oreo Balls
Transform your festive gatherings into a delightful experience by pairing these vibrant treats with complementary dishes and drinks.
- Peppermint Hot Cocoa: Rich and creamy hot cocoa with minty undertones enhances the holiday spirit and perfectly complements the sweet flavors of the Grinch Oreo Balls.
- Sugar Cookies: Soft and buttery sugar cookies make a great contrast in texture, offering a classic dessert experience alongside these fun and colorful treats.
- Spiced Apple Cider: Warm apple cider infused with cinnamon spices brings a cozy, comforting warmth to your holiday spread, perfectly balancing the sweetness of your Oreo delight.
- Christmas Fruit Platter: A vibrant selection of fresh fruits adds a refreshing touch, creating a lively contrast to the rich, sweet Grinch Oreo Balls.
- Chocolate-Covered Strawberries: Luxurious chocolate-covered strawberries enhance the festive feel and add a touch of elegance, making your dessert table even more inviting.
- Vanilla Ice Cream: A scoop of creamy vanilla ice cream offers a cool and luscious contrast, making each bite of the Grinch Oreo Balls even more satisfying.
- Ginger Ale Mocktail: Crisp ginger ale with a splash of cranberry juice creates a refreshing, fizzy drink that pairs beautifully with the joyful vibes of the holidays.
Expert Tips for Grinch Oreo Balls
- Crush Carefully: Use a food processor for uniform crumbs; avoid large pieces by crushing until fine, ensuring a smooth filling.
- Soften Cream Cheese: Always let your cream cheese reach room temperature for easy mixing; this helps blend seamlessly into the batter.
- Chill Before Dipping: Let the shaped Oreo balls chill thoroughly; this prevents cracking when dipping in the melted candy and keeps their shape intact.
- Melt at Low Heat: Be gentle when melting candy melts to avoid seizing; keep stirring frequently, ensuring a smooth consistency for dipping.
- Add a Twist: For a different flavor, switch Red Velvet Oreos for Peppermint Oreos; your Grinch Oreo Balls can take on a festive minty flair!
Grinch Oreo Balls Recipe FAQs
What type of Oreos should I use for Grinch Oreo Balls?
Absolutely! While Red Velvet Oreos are perfect for this recipe, you can have fun experimenting with different flavors. Regular Oreos work wonderfully, but I also love using Peppermint Oreos during the holiday season for a refreshing twist. The more, the merrier!
How long can I store Grinch Oreo Balls, and what’s the best way?
You can keep your Grinch Oreo Balls in an airtight container in the refrigerator for up to one week. Just make sure they’re sealed properly to maintain their freshness. For longer storage, you can freeze the uncoated Oreo balls for up to three months! When you're ready to enjoy them, simply thaw them in the fridge before coating and decorating.
What should I do if my candy melts seize while melting?
Very gently, if your candy melts begin to seize, it’s likely that they got too hot. Here's what you can do: Add a tablespoon of vegetable shortening or coconut oil to the melted candy, and stir to help smooth it out. Heat it at lower power settings next time, or try heating in shorter bursts to prevent this from happening again!
Can I make Grinch Oreo Balls gluten-free?
Absolutely! If you opt for gluten-free Oreos, you can make these delightful treats gluten-free without compromising on taste. Be sure to check for gluten-free candy melts as well, so you can enjoy this festive treat without any worries!
Can I involve kids in making Grinch Oreo Balls?
Very much! Involving kids in the kitchen can be a joyful experience. They can help crush the Oreos and roll the balls. Just ensure to supervise the use of the microwave or stove when melting the candy melts. It’s an excellent way to create lovely holiday memories together!
Grinch Oreo Balls: Festive No-Bake Delights for the Holidays
Ingredients
Equipment
Method
- Begin by lining a large baking sheet with parchment paper.
- Use a food processor to finely crush the Red Velvet Oreos into a powder-like consistency.
- In a large mixing bowl, beat the softened cream cheese until smooth, then add crushed Oreo crumbs.
- Using a cookie scoop, portion the mixture and roll into smooth balls.
- Refrigerate the shaped balls for at least 2 hours.
- Melt the light green candy melts in a double boiler or microwave until smooth.
- Dip each chilled Oreo ball into the melted candy and allow excess to drip off.
- Drizzle any leftover melted candy over the coated balls and quickly add a red candy heart on top.
- Refrigerate until the candy coating is fully set.


Leave a Reply