
As autumn settles in and the leaves start to crunch underfoot, I can't help but get excited about Halloween treats that bring joy to both kids and adults alike. One of my all-time favorites is my Halloween Dirt Cupcakes, which transform a simple cupcake into a wickedly fun dessert that’s sure to impress at any spooky gathering. With just the right balance of rich chocolatey goodness and creamy cream cheese frosting, these little delights are not only quick to whip up but also an absolute showstopper at parties. The best part? They’re kid-friendly and offer a playful twist that will have everyone smiling—worms included! Curious how to bring this spooky masterpiece to life? Let’s dive into the recipe!
Why will kids love these cupcakes?
Kid-Friendly Fun: These Halloween Dirt Cupcakes are both a treat and a playful adventure, perfect for engaging children during spooky season.
Easy to Make: With simple steps and common ingredients, you can whip up these delightful cupcakes in no time, great for busy bakers!
Versatile Decor: Swap gummy worms for other creepy candies to customize your spooky treats, making them unique for every occasion.
Rich Chocolate Flavor: Each bite bursts with a moist chocolate cake, beautifully paired with creamy frosting that balances the sweetness perfectly.
Crowd-Pleasing Dessert: These cupcakes are bound to be the highlight at any Halloween party, filling your home with laughter and joy!
Storage Tips: Make-ahead for convenience! Store in an airtight container for up to four days, and add your gummy worms just before serving to keep them fresh and fun.
Halloween Dirt Cupcake Ingredients
For the Cupcakes
- All-Purpose Flour – Provides structure; gluten-free flour can be used for a gluten-free version.
- Cocoa Powder – Adds rich chocolate flavor; Dutch-processed cocoa yields a smoother taste.
- Baking Powder – Acts as a leavening agent to help cupcakes rise; no substitutes recommended.
- Salt – Enhances flavor; feel free to omit for low-sodium diets.
- Eggs – Binds ingredients and adds moisture; replace with flax eggs for a vegan option.
- Granulated Sugar – Sweetness and moisture; can be substituted with coconut sugar for a lighter flavor.
- Vegetable Oil – Keeps cupcakes moist; melted coconut oil or applesauce are healthier alternatives.
- Milk – Adds richness; almond or oat milk works well for a dairy-free version.
- Vanilla Extract – Enhances flavor; no substitutions recommended.
For the Frosting
- Milk Chocolate Chips – Provide a rich chocolate flavor; dark chocolate is a delicious substitute.
- Unsalted Butter – Adds creaminess in frosting; use vegan butter for a dairy-free option.
- Cream Cheese – Offers texture and flavor; vegan cream cheese is an excellent alternative.
- Powdered Sugar – Sweetens and thickens the frosting; no substitutes recommended.
For the Decoration
- Oreo Cookies – Crushed to mimic dirt for decoration; feel free to choose your preferred brand.
- Gummy Worms – Fun and playful decoration; other creepy candies can be swapped in for variety.
Ready to create your Halloween Dirt Cupcakes? Let’s head to the instructions and make some spooky magic happen!
Step‑by‑Step Instructions for Halloween Dirt Cupcakes
Step 1: Preheat the Oven
Begin by preheating your oven to 350°F (180°C). This ensures that your Halloween Dirt Cupcakes will bake evenly and rise beautifully. While the oven heats up, gather your cupcake liners and place them in a cupcake or muffin pan, ready for the delicious batter to come.
Step 2: Mix Dry Ingredients
In a mixing bowl, whisk together the all-purpose flour, cocoa powder, baking powder, and salt until well combined. This step is crucial for ensuring even distribution of the baking powder, which will help your cupcakes rise. The mixture should be uniform and free of lumps, giving you a solid foundation for those rich cupcake flavors.
Step 3: Mix Wet Ingredients
In a separate bowl, whisk together the eggs, granulated sugar, vegetable oil, milk, and vanilla extract until smooth and creamy. This should take about 2-3 minutes of vigorous whisking to achieve a light and airy texture. The wet mixture will add moisture and richness, setting the stage for your decadent Halloween Dirt Cupcakes.
Step 4: Combine Mixtures
Gradually add the dry ingredients to the wet mixture, gently folding them together with a spatula. Be careful not to overmix; stop as soon as you see no dry flour. The goal is to create a tender, moist batter, which will yield fluffy cupcakes that are perfectly baked in about 18-22 minutes.
Step 5: Bake the Cupcakes
Scoop the batter into the prepared cupcake liners, filling them about three-quarters full. Place the pan in the preheated oven and bake for 18-22 minutes, or until a toothpick inserted into the center comes out clean. Keep an eye on them; as they bake, you’ll smell the delicious chocolate aroma filling your kitchen!
Step 6: Cool the Cupcakes
Once baked, remove the cupcake pan from the oven and allow the cupcakes to cool in the pan for 5 minutes. Then, transfer them to a wire rack to cool completely. It’s important to let them cool entirely to avoid melting your frosting when you start decorating your Halloween Dirt Cupcakes.
Step 7: Prepare the Frosting
In a saucepan over low heat, melt the milk chocolate chips. Once melted, combine them with softened unsalted butter and cream cheese in a mixing bowl. Beat the mixture until smooth and creamy. Gradually incorporate the powdered sugar and additional cocoa powder, mixing until the frosting reaches a thick, spreadable consistency that’s ready to adorn your cupcakes.
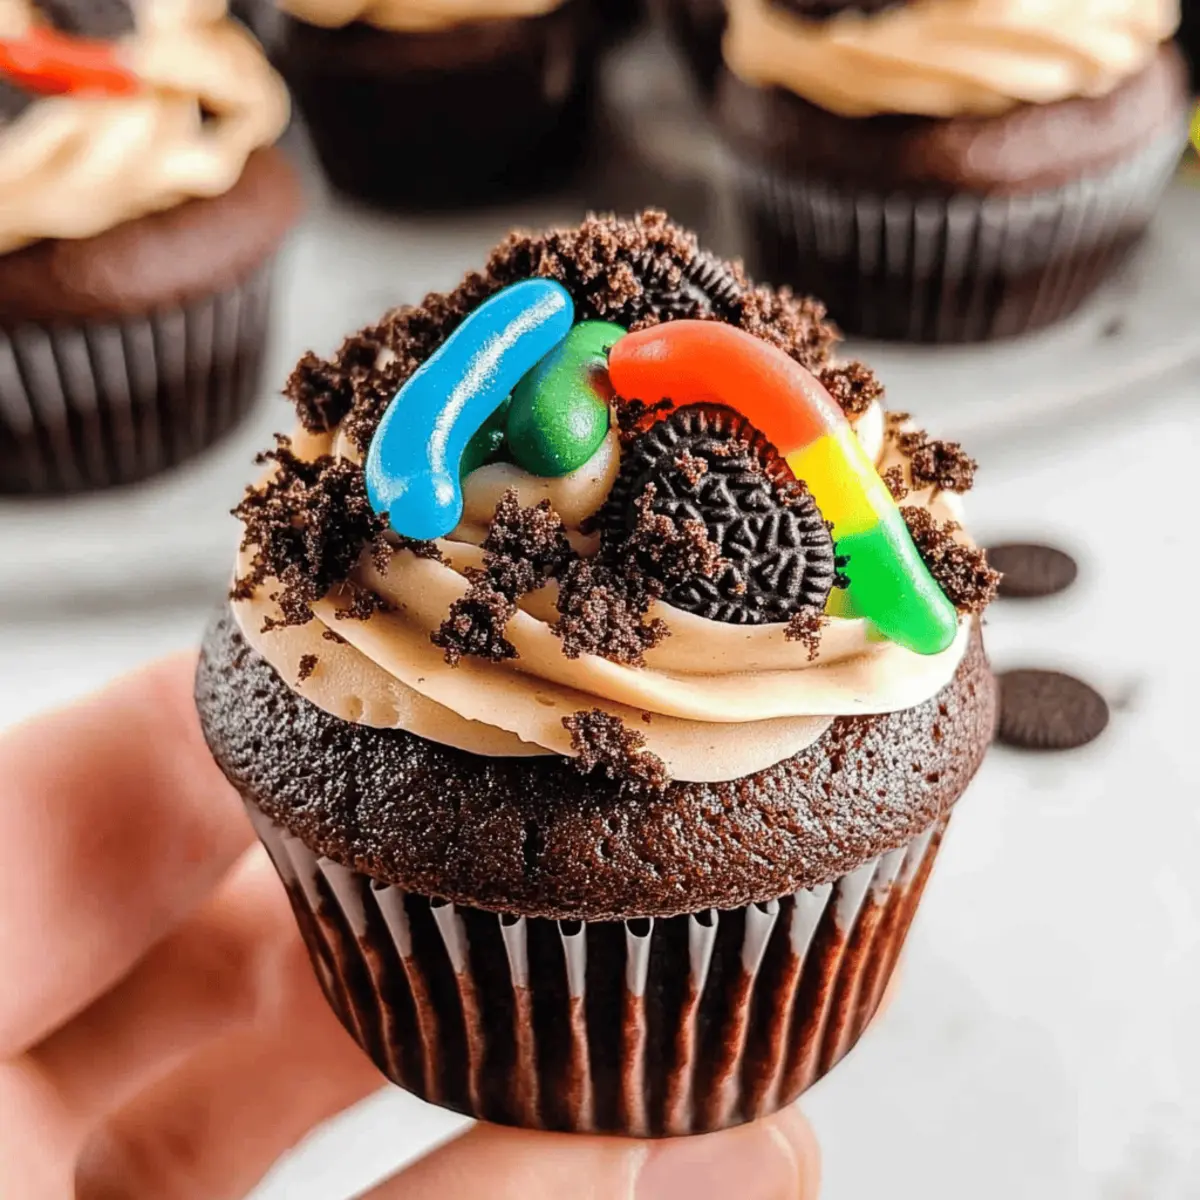
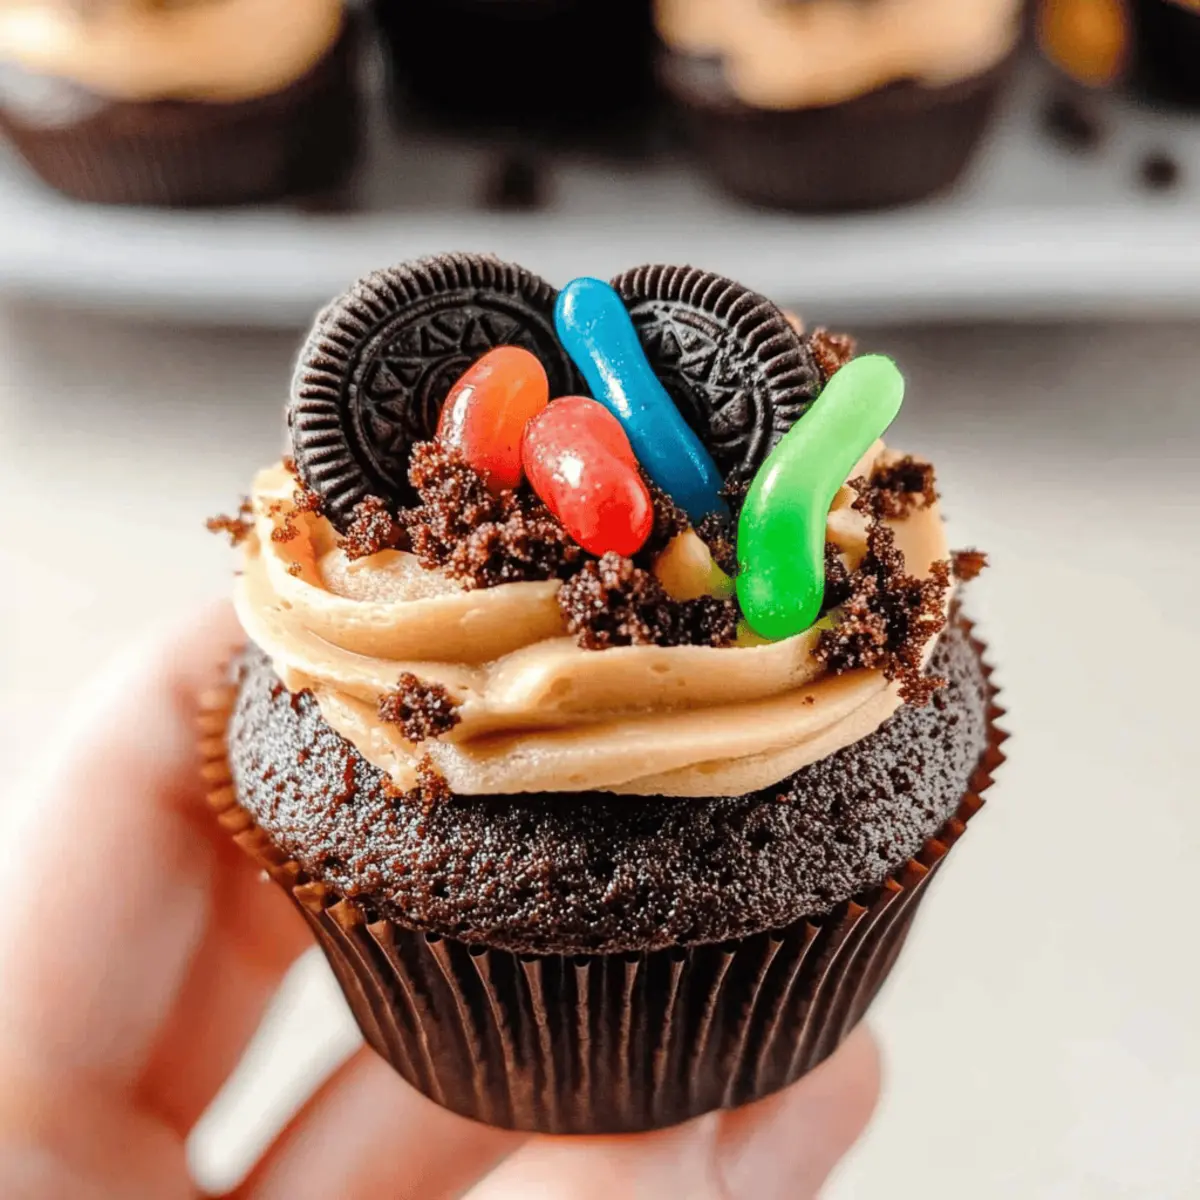
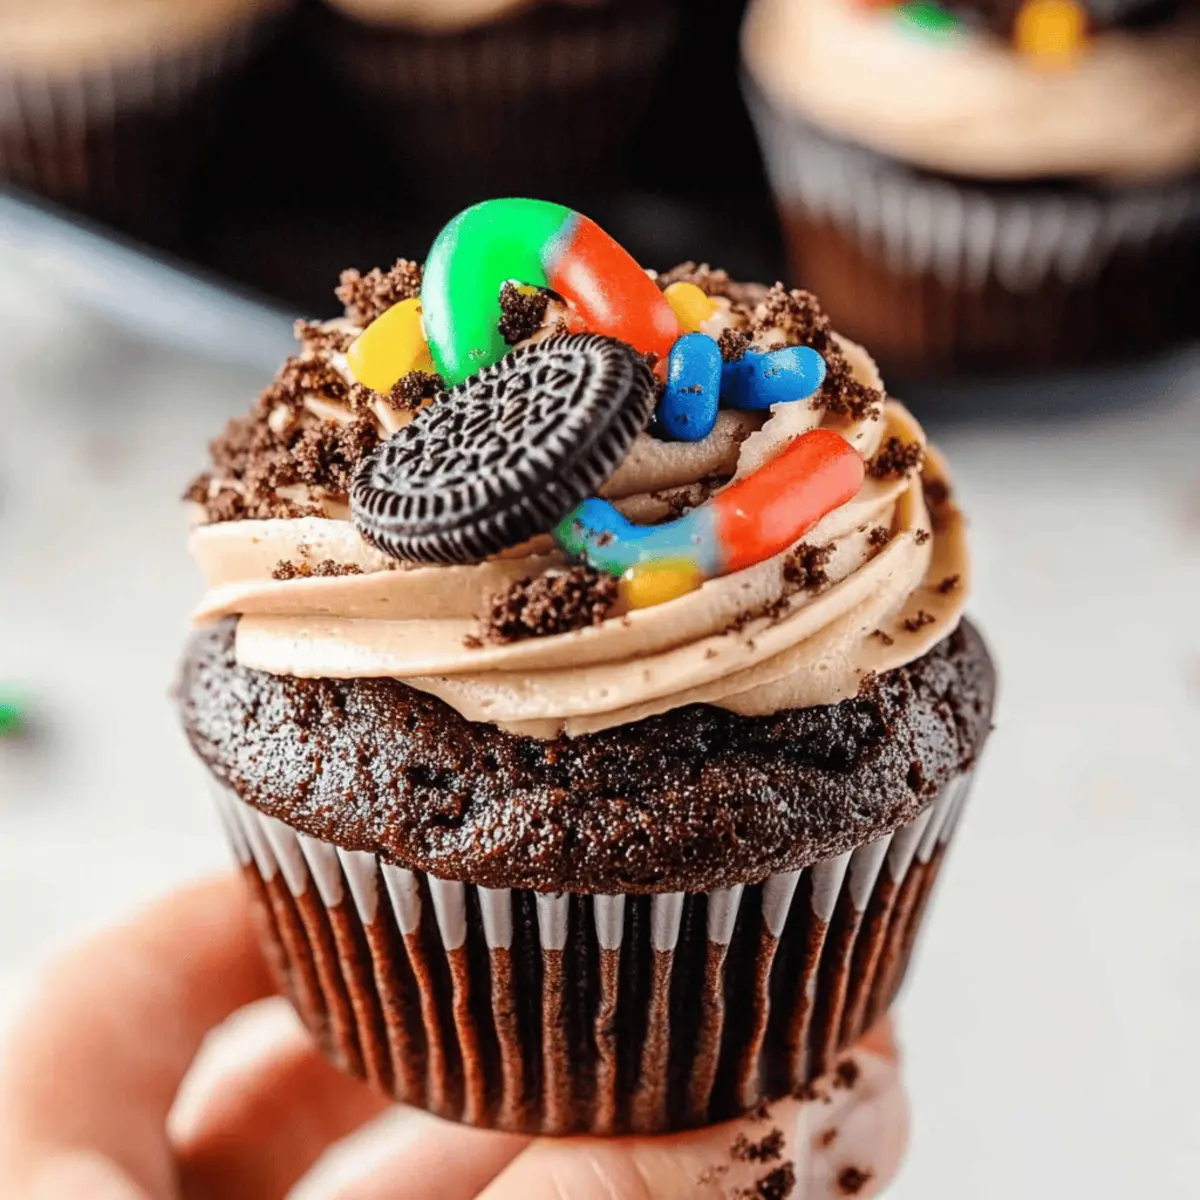
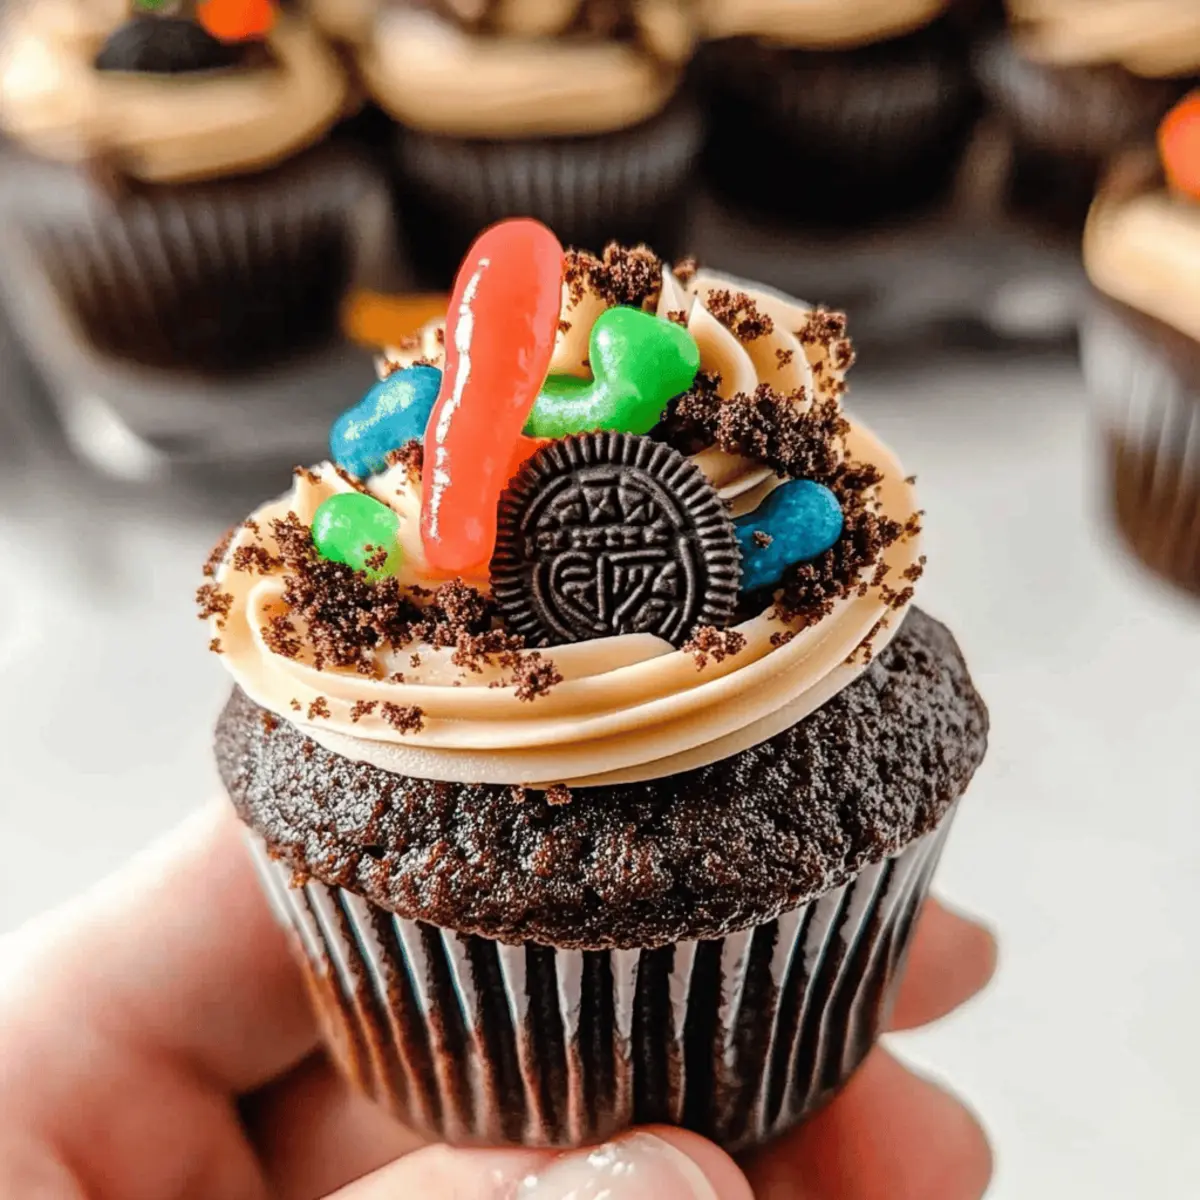
Step 8: Decorate the Cupcakes
Once the cupcakes are completely cool, use a piping bag or a knife to generously frost each cupcake with the rich chocolate cream cheese frosting. Next, crush the Oreo cookies until they resemble fine dirt, and sprinkle them generously over the frosted cupcakes. Top each with a playful gummy worm, creating a fun and eye-catching decoration for your Halloween Dirt Cupcakes.
Make Ahead Options
These Halloween Dirt Cupcakes are perfect for busy home cooks looking to save time during the Halloween rush! You can prepare the cupcake batter and store it in the refrigerator for up to 24 hours before baking. Simply cover the bowl tightly with plastic wrap to maintain freshness. Additionally, the cream cheese frosting can be made ahead and stored in an airtight container in the fridge for up to 3 days. When you’re ready to bake, just pull out the batter, let it sit at room temperature for about 30 minutes, then bake as usual. This way, you’ll have delicious, freshly baked Halloween Dirt Cupcakes with minimal last-minute effort!
What to Serve with Halloween Dirt Cupcakes
These whimsical Halloween Dirt Cupcakes are just the beginning of a spooktacular feast that invites both festive flair and fun flavors into your celebration.
- Creepy Cobweb Salad: A fresh green salad topped with shredded cheese to mimic cobwebs complements the sweetness of the cupcakes perfectly.
- Spooky Spider Pizza: Personal pizzas shaped like spiders add a savory touch amidst the sweet chaos, delightful for both kids and adults alike.
- Pumpkin Spice Cookies: These soft, spiced treats enhance your dessert table with their seasonal flavors, making every bite feel like a warm hug.
- Witch's Brew Punch: A fizzy punch made with lemonade and lime soda brings a refreshing contrast to the rich cupcakes, keeping the party lively.
- Oreo Mice Delights: Chocolate-covered Oreos with candy eyes make for a playful accompaniment that pairs wonderfully with the cupcake's "dirt" theme.
- Chocolate Milkshakes: Indulging in creamy, chocolatey milkshakes provides a delightful pairing and a nostalgic vibe that everyone loves.
- Apple Slices with Caramel Dip: Crisp apples and gooey caramel create a playful balance to the rich sweetness of your cupcakes, deliciously satisfying!
- Candy Corn Parfaits: Layered with whipped cream and custard, these colorful treats add a festive touch to your spread that kids will adore.
- Pumpkin Spice Lattes: Embrace autumn flavors with warm lattes to offer a cozy drink option that pairs beautifully with sweet desserts.
Expert Tips for Halloween Dirt Cupcakes
• Avoid Overmixing: Gently fold the wet and dry ingredients together to maintain a light and fluffy texture; overmixing can lead to dense cupcakes.
• Cool Completely: Ensure the cupcakes are fully cooled before frosting. This prevents the frosting from melting and maintains a beautiful appearance.
• Use Quality Ingredients: Opt for high-quality cocoa powder and chocolate chips for the richest flavor in your Halloween Dirt Cupcakes.
• Chill Gummy Worms: Keep gummy worms in the fridge until decorating time to prevent them from melting into the frosting.
• Experiment with Decoration: Feel free to swap gummy worms with other creepy candies or fun sprinkles to make your cupcakes uniquely festive!
How to Store and Freeze Halloween Dirt Cupcakes
Room Temperature: Keep your Halloween Dirt Cupcakes in a cool, dry place for up to 2 days. Store them in a covered cake dome or an airtight container to prevent them from drying out.
Fridge: For extended freshness, store in an airtight container in the refrigerator for up to 4 days. Just remember to add the gummy worms right before serving to keep their fun appearance!
Freezer: To freeze, wrap each cupcake tightly in plastic wrap and place them in a freezer-safe bag. They can be frozen for up to 3 months. Thaw them in the fridge before decorating.
Reheating: If you prefer warm cupcakes, simply microwave them for about 10-15 seconds. Enjoy the delightful taste of your Halloween Dirt Cupcakes fresh from the freezer!
Halloween Dirt Cupcakes Variations
Feel free to explore different twists on these Halloween Dirt Cupcakes that will excite your creativity and satisfy your taste buds!
- Boxed Chocolate Cake Mix: Use a chocolate cake mix instead of homemade batter for a quicker treat. Just follow box instructions for perfect results!
- Gluten-Free Version: Substitute all-purpose flour with a 1:1 gluten-free flour blend for those with gluten sensitivities. Everyone deserves dessert, right?
- Dairy-Free Delight: Swap milk for almond or oat milk and use vegan butter and cream cheese to create a completely dairy-free cupcake experience.
- Nutty Flavor: Add finely chopped nuts like walnuts or almonds in the batter for a delightful crunch. The contrast between the texture and flavor is sure to impress!
- Spicy Touch: Incorporate a pinch of cinnamon or pumpkin spice into the batter for a warm, autumn-inspired flavor. This gives your cupcakes a seasonal twist!
- Fruity Fun: Add a few drops of orange or raspberry extract to the frosting for a fruity burst that's unexpected and delicious. Kids will love the extra surprise!
- Decor Explosion: Try different candies for decoration, like creepy crawly sprinkles or chocolate rocks, to customize the look and experience. The creativity is endless!
- Savory Twist: Experiment with savory elements like crushed pretzels mixed into the Oreo "dirt" for a sweet and salty combo that offers a fun balance of flavors.
For further fun, consider using our tips for how to store and freeze your cupcakes for future events. Let's make every bite a festive delight!
Halloween Dirt Cupcakes Recipe FAQs
How do I choose the right cocoa powder for my Halloween Dirt Cupcakes?
Absolutely! For the richest flavor, opt for a high-quality unsweetened cocoa powder. If you want a smoother taste, you can try Dutch-processed cocoa, which has a mellower flavor and darker color. Just make sure it's unsweetened; otherwise, sweetness levels in your cupcakes may become unbalanced!
How should I store my Halloween Dirt Cupcakes?
To keep your cupcakes fresh, store them in an airtight container at room temperature for up to 2 days. If you need a few more days, refrigerating them is perfect for up to 4 days. Just remember to add the gummy worms right before serving to maintain their adorable appearance!
Can I freeze Halloween Dirt Cupcakes, and if so, how?
Yes! To freeze your festive cupcakes, wrap each one tightly in plastic wrap and place them in a freezer-safe bag. They’ll stay fresh for up to 3 months. When you’re ready to enjoy them, simply thaw the cupcakes in the fridge overnight. Once thawed, you can frost and decorate them to bring back that delightful spooky magic!
What if my cupcakes turn out dense or dry?
Very! A common culprit for dense cupcakes is overmixing the batter. Make sure to mix just until the flour is incorporated; this keeps your cupcakes light and fluffy. Also, be sure to check your baking time—if they’re in the oven too long, they can dry out. For added moisture, consider including a tablespoon of applesauce in the wet ingredients; it works wonderfully!
Are there any allergy considerations with this recipe?
Absolutely! These Halloween Dirt Cupcakes can easily be adapted for dietary restrictions. For dairy-free options, use almond or oat milk, vegan butter, and vegan cream cheese for the frosting. For a gluten-free version, swap in gluten-free flour and ensure all other ingredients are free from gluten. Always check labels to avoid allergens, especially with the candies used for decoration.
Halloween Dirt Cupcakes That Will Wow Your Guests
Ingredients
Equipment
Method
- Preheat your oven to 350°F (180°C). Gather your cupcake liners in a cupcake pan.
- Whisk together all-purpose flour, cocoa powder, baking powder, and salt in a mixing bowl.
- In a separate bowl, whisk the eggs, granulated sugar, vegetable oil, milk, and vanilla extract until smooth.
- Gradually add the dry ingredients to the wet mixture, folding gently with a spatula until just combined.
- Scoop the batter into the cupcake liners, filling them about three-quarters full, and bake for 18-22 minutes.
- Remove the cupcakes from the oven and cool in the pan for 5 minutes, then transfer to a wire rack to cool completely.
- Melt the milk chocolate chips in a saucepan over low heat. Mix with softened butter and cream cheese until smooth.
- Gradually incorporate powdered sugar and cocoa powder to achieve a thick frosting consistency.
- Frost each cupcake with the chocolate cream cheese frosting, then sprinkle crushed Oreos on top and add gummy worms.


Leave a Reply