
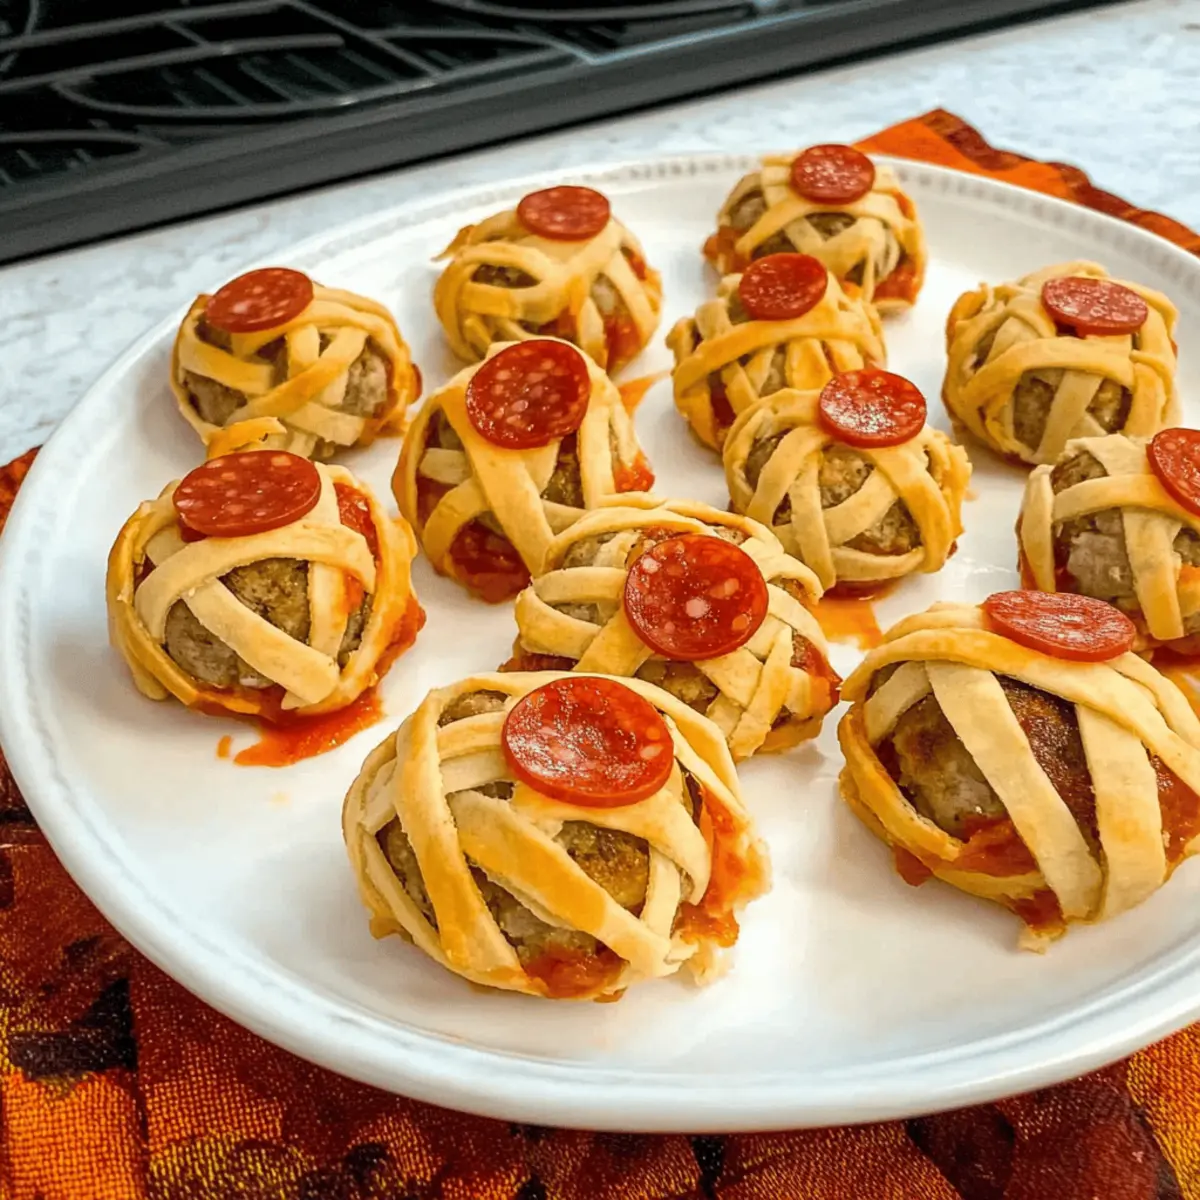
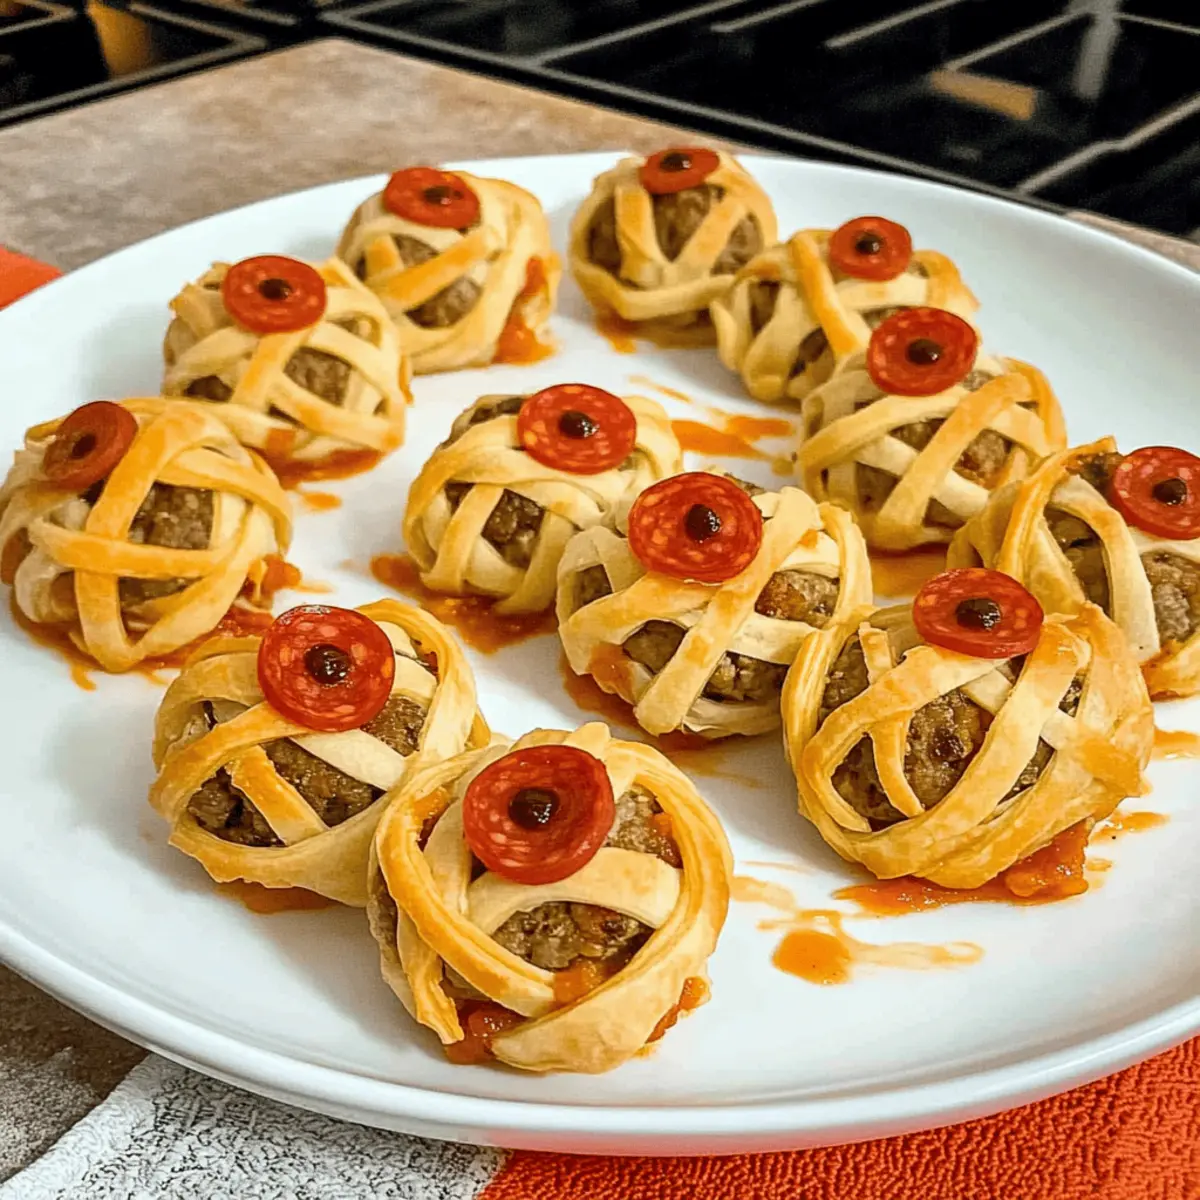
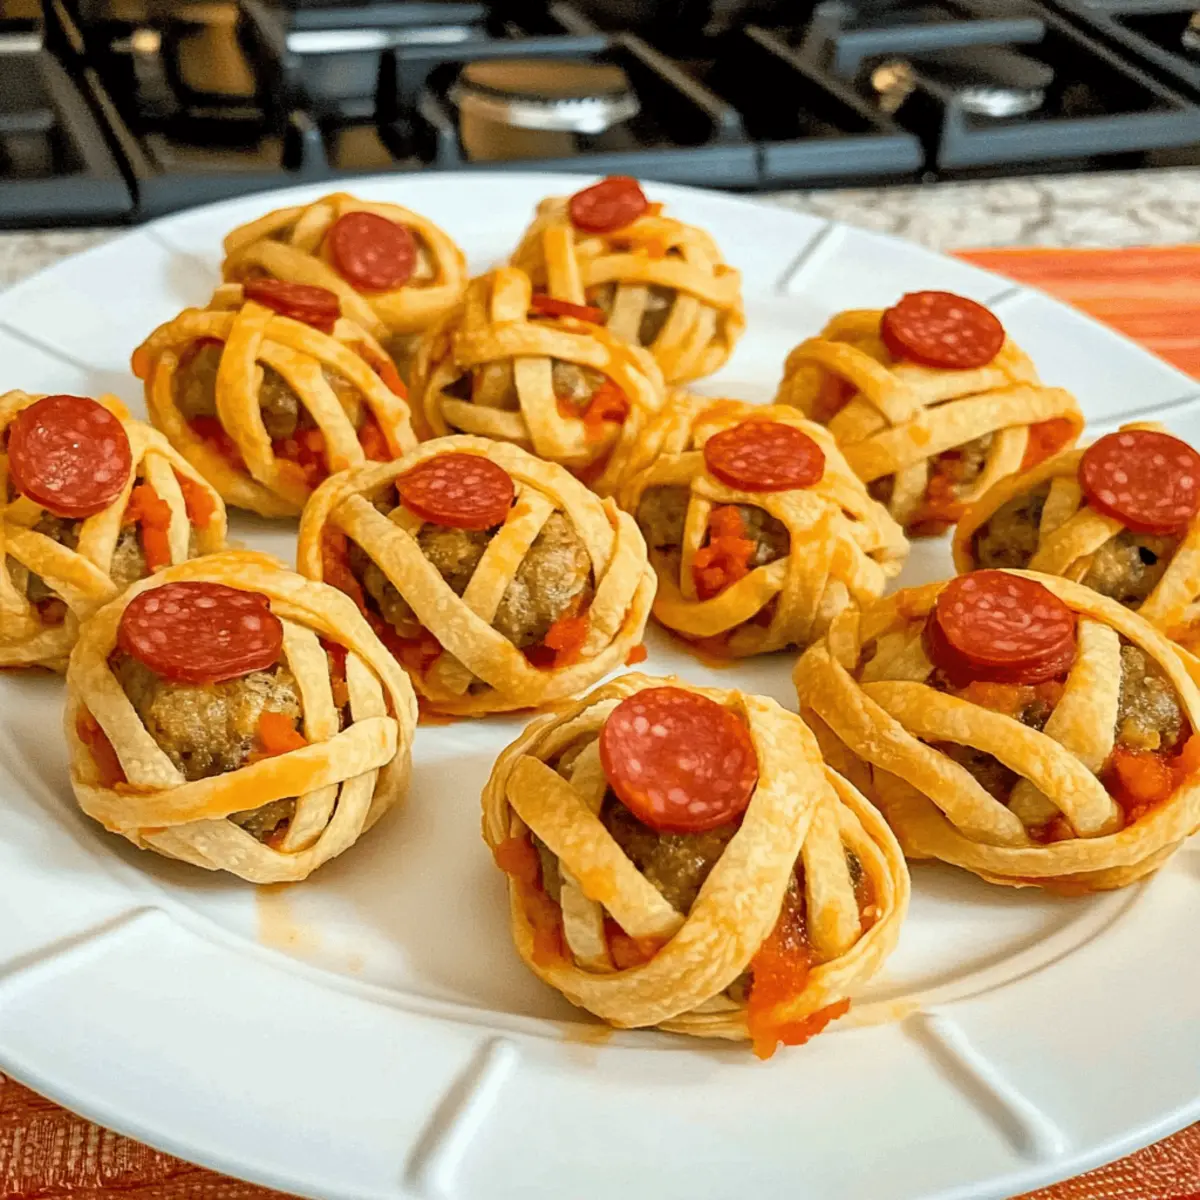
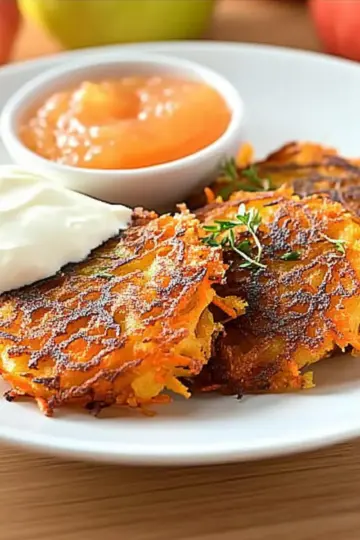
As October rolls in, the countdown to Halloween begins, bringing a whirlwind of spooky fun and festive food ideas! This year, why not elevate your celebrations with Halloween Mummy Meatballs? These playful bites marry the comforting flavors of savory meatballs with the whimsical twist of golden crescent dough, creating an appetizer that’s both delicious and eye-catching. What I love most is how quick these are to prepare—just 30 minutes—and they offer a savory alternative that balances out the usual sea of sweets during the festivities. Perfectly suited for parties or casual gatherings, these meaty mummies promise to get everyone smiling (and snacking) in no time. Are you ready to bring a little frightful fun to your Halloween table?
Why Make Halloween Mummy Meatballs?
Fun and Festive: These Halloween Mummy Meatballs are not just delicious; they bring a delightful Halloween spirit to your table that’s sure to be a conversation starter.
Quick to Prepare: With just 30 minutes in the kitchen, they’re an excellent choice for last-minute gatherings, ensuring you're not stuck in the kitchen while the fun happens.
Crowd-Pleasing Appeal: Whimsically wrapped in crescent dough, they look as good as they taste, making them a hit at any Halloween party.
Versatile Ingredients: Feel free to substitute meatballs based on your dietary needs—whether you prefer beef, turkey, or even veggie options, the concept remains playful and palatable.
Dipping Delight: Pair them with various sauces like marinara or BBQ for a dip that enhances flavor, giving your guests even more reason to indulge! Don't forget to check out other fun ideas like Halloween Pizza Potato Skins for a complete spooky feast!
Halloween Mummy Meatballs Ingredients
For the Meatballs
- Frozen Meatballs – Ensure you use pre-cooked meatballs for easy prep; any variety like beef, pork, chicken, or veggie works great.
For the Wrap
- Crescent Roll Dough – This dough forms the mummies' bandages; while store-bought is a time-saver, feel free to use homemade if you have the extra time.
For the Eyes
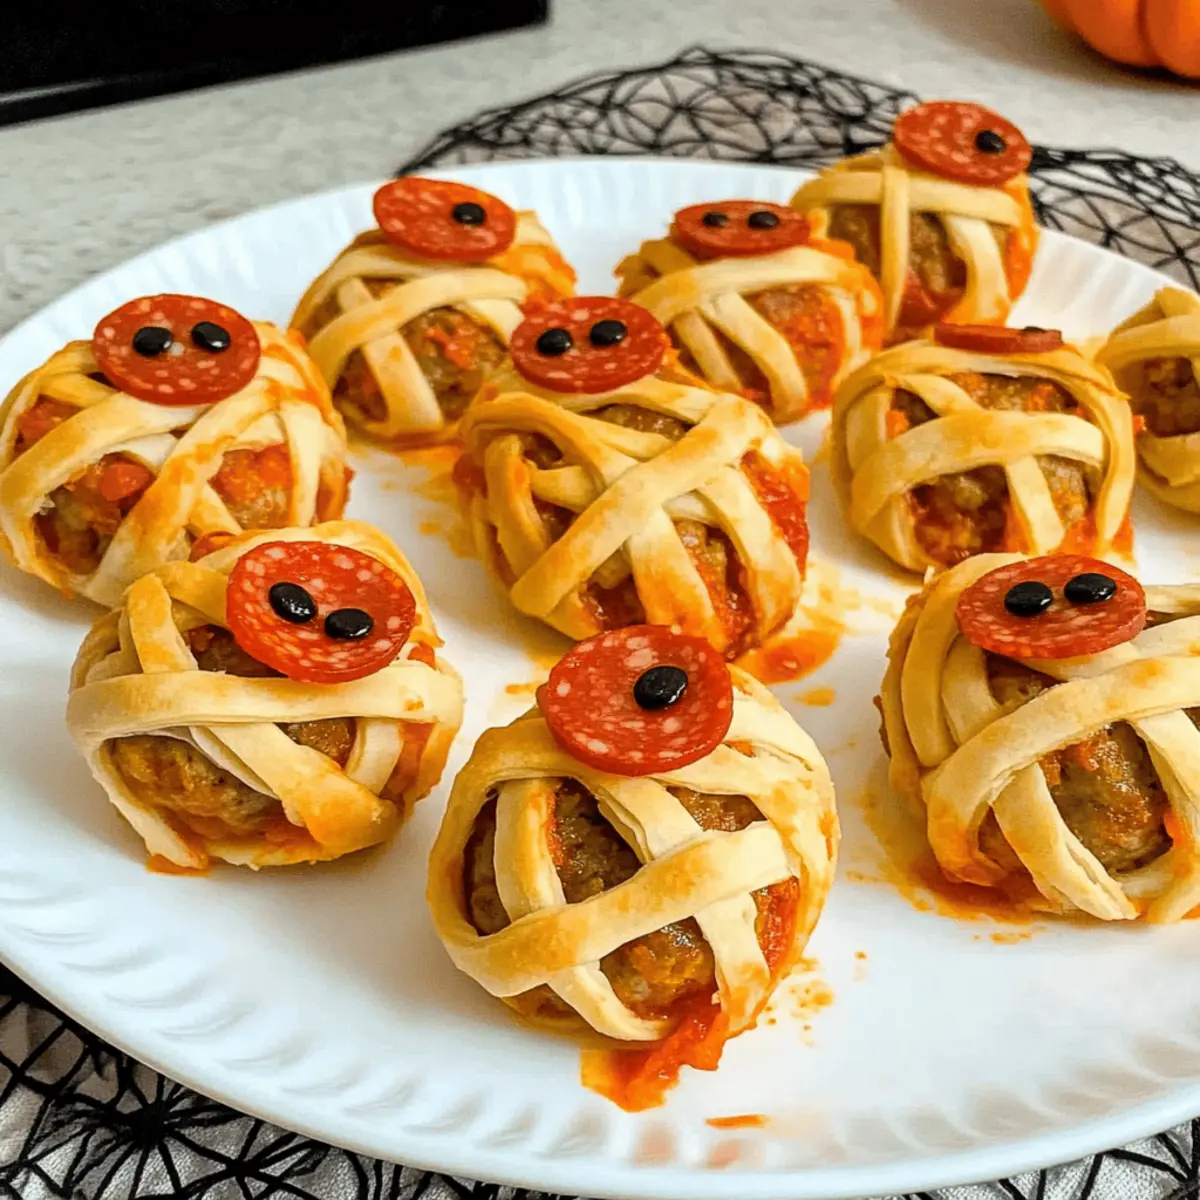
- Pepperoni – Cut small circles to give your mummies life; you can also use olives or dots of mustard for a fun alternative!
For Dipping Sauce
- Desired Sauce for Serving – Enhance the enjoyment and flavor with marinara, BBQ sauce, or cheese sauce; each option pairs wonderfully with these Halloween Mummy Meatballs.
Step‑by‑Step Instructions for Halloween Mummy Meatballs
Step 1: Preheat the Oven
Begin by preheating your oven to 400°F (200°C). This temperature will ensure that your Halloween Mummy Meatballs bake perfectly, developing a golden and crispy exterior. While waiting for the oven, gather your ingredients and a baking sheet lined with parchment paper, making your workstation efficient and organized for the fun ahead.
Step 2: Prepare the Dough Strips
Open the crescent roll dough and unroll it onto a clean surface. Use a sharp knife or pizza cutter to slice the dough into thin strips, approximately ¼ inch wide. This creates the perfect “bandages” for wrapping around each meatball. Consider how the strips will overlap, as a haphazard wrap adds to the spooky charm of your Halloween Mummy Meatballs.
Step 3: Wrap the Meatballs
Take a frozen meatball and wrap it in 1-2 strips of crescent dough. Be sure to press the dough firmly enough to adhere but don’t worry about perfection; the messier, the spookier! Continue this process until all meatballs are wrapped, creating an army of little mummies that are ready to be transformed into spooky treats.
Step 4: Bake the Wrapped Meatballs
Arrange the wrapped meatballs on the prepared baking sheet, ensuring they have enough space to cook evenly. Place the baking sheet in the preheated oven and bake for 12-15 minutes. Keep an eye on them; they’re ready when the crescent dough is puffed and golden brown, enveloping the warm meatballs inside.
Step 5: Create the Eyes
While the Halloween Mummy Meatballs are baking, take your pepperoni slices and use a small round cutter or glass to cut out tiny circles to serve as eyes. Setting the eyes aside will allow you to finalize your spooky presentation as soon as the meatballs are out of the oven.
Step 6: Adhere the Eyes
Once the Halloween Mummy Meatballs are finished baking, remove them from the oven and let them cool slightly for a few minutes. Using a small dab of sauce or a drop of water, stick two pepperoni circles onto the top of each meatball to create eyes. This final touch will bring your mummies to life and make them irresistibly cute!
Step 7: Serve and Enjoy
Arrange your spooky Halloween Mummy Meatballs on a serving platter, and pair them with your choice of dipping sauce, such as marinara or BBQ sauce. These festive bites are best served warm, so gather your friends and family as they dive into this delightful and savory Halloween treat that will surely charm everyone at the party!
What to Serve with Halloween Mummy Meatballs?
Pairing delightful dishes with your Halloween Mummy Meatballs is essential for a spooktacular celebration, ensuring every bite brings joy!
-
Creamy Mashed Potatoes: The smooth, buttery texture contrasts beautifully with the crispy mummies, creating a comforting side that everyone adores.
-
Garlic Breadsticks: Savory garlic-infused breadsticks are perfect for dipping in sauce, complementing the flavors of your meaty treats.
-
Crispy Coleslaw: This crunchy and refreshing coleslaw adds a vibrant color to your plate while balancing the richness of the meatballs, ensuring a varied texture experience.
-
Pumpkin Soup: A warm bowl of creamy pumpkin soup adds an autumnal touch to your spread, enhancing the cozy, festive vibe of your Halloween gathering.
-
Mini Cornbread Muffins: Sweet yet savory, these muffins bring a homestyle warmth to the table, pairing perfectly with the meaty, flaky treats.
-
Fruit Platter: A fresh selection of fruity treats not only provides color but also adds a lightness to balance the savory meatballs, making for a lovely, well-rounded meal.
-
Spooky Mocktails: Serve refreshing non-alcoholic beverages like orange soda with spooky eyeball ice cubes to keep the fun alive!
-
Mummy-Themed Cupcakes: Cap off your Halloween feast with cupcakes designed to look like mummies for a delightful dessert that keeps the theme going!
Halloween Mummy Meatballs Variations
Feel free to get creative with these Halloween Mummy Meatballs; personalize them to suit your taste and dietary preferences!
-
Turkey Meatballs: Substitute beef meatballs with turkey for a leaner option that still delivers flavor.
-
Vegetarian Mummies: Replace meatballs with veggie or plant-based meat alternatives; they’ll still be a spooky delight!
-
Homemade Dough: For a fun twist, try making your own crescent dough; it adds a delicious homemade touch that lets you flaunt your baking skills.
-
Spicy Surprise: Add a kick by using spicy sausage meatballs or drizzling sriracha over the top before serving—if your guests enjoy heat, they'll love the surprise!
-
Cheesy Delight: Incorporate shredded cheese into the wraps for an ooey-gooey texture; a bit of mozzarella pairs perfectly for added creaminess.
-
Creative Sauces: Experiment with unique dipping sauces, like pumpkin hummus for a festive flair or a ranch dip to balance the flavors; it opens up a world of tasty options!
-
Fun Eyes: Instead of pepperoni, use black olives or even cherry tomatoes for the mummy’s eyes, offering an engaging twist that's a bit more refreshing!
-
Mini Mummies: Make smaller versions of these mummies using cocktail-sized meatballs—perfect for party appetizers that keep the fun alive without overwhelming your guests!
These delicious adaptations will keep your Halloween gatherings exciting—don’t forget to check out Halloween Pizza Potato Skins for even more festive inspiration!
Make Ahead Options
These Halloween Mummy Meatballs are perfect for busy home cooks looking to save time during the spooky season! You can wrap the meatballs in crescent dough and refrigerate them up to 24 hours in advance, ensuring they maintain their fluffy texture. To do this, simply prepare the meatballs as instructed, cover them tightly with plastic wrap, and store them in the fridge. When it's time to serve, preheat your oven and bake as directed, giving you quick access to a delicious treat without the last-minute fuss. Just remember to check for doneness to keep them just as delightful when hot and ready to impress your guests!
Expert Tips for Spooky Mummy Meatballs
-
Cooked Meatballs Only: Ensure your frozen meatballs are pre-cooked; raw meats won't cook fully in the baking time, leading to food safety issues.
-
Creative Wrapping: Don’t stress about perfection when wrapping—haphazard strips give your Halloween Mummy Meatballs a more authentic, spooky look.
-
Dough Alternatives: Homemade crescent roll dough can add a personal touch, but store-bought is quicker, especially during busy Halloween prep.
-
Eye Placement: Use a toothpick or small dab of sauce to secure the pepperoni when adding eyes—this helps them stay in place for a more polished appearance.
-
Serving Suggestions: Pair these mummy meatballs with a variety of sauces to please different palates; marinara is classic, but BBQ is a fun twist!
How to Store and Freeze Halloween Mummy Meatballs
Fridge: Store any leftover Halloween Mummy Meatballs in an airtight container for up to 3 days. Reheat in the oven for best results, keeping them crispy.
Freezer: You can freeze cooked Mummy Meatballs in a freezer-safe bag. They can last up to 2 months. When ready to enjoy, thaw overnight in the fridge and reheat.
Reheating: To retain their crispy texture, reheat the meatballs in a preheated oven at 350°F (175°C) for 10-15 minutes until warm. Avoid microwaving to prevent sogginess.
Wrap Carefully: If storing unbaked wrapped meatballs, place them in a single layer on a baking sheet, freeze for an hour, then transfer them to a bag. Bake straight from frozen, adding a few extra minutes to the cooking time.
Halloween Mummy Meatballs Recipe FAQs
How do I choose the right frozen meatballs?
Absolutely! Opt for pre-cooked frozen meatballs, and feel free to select any variety you enjoy—beef, pork, chicken, or even veggie options work beautifully. Just make sure they’re cooked through; raw meatballs won’t achieve the desired texture within the baking time.
What’s the best way to store leftover Halloween Mummy Meatballs?
Very! Store any uneaten Halloween Mummy Meatballs in an airtight container in the refrigerator for up to 3 days. When you're ready to enjoy them, I recommend reheating them in the oven to keep the dough crispy—about 10-15 minutes at 350°F (175°C) should do the trick!
Can I freeze Halloween Mummy Meatballs, and if so, how?
Of course! To freeze cooked Mummy Meatballs, place them in a freezer-safe bag—they’ll last up to 2 months. When you're in the mood for a spooky snack, thaw overnight in the fridge, then reheat in the oven for about 10-15 minutes at 350°F (175°C) until warmed through. Avoid microwaving to prevent them from becoming soggy.
What if my crescent dough doesn’t stick well to the meatballs?
No worries! If you find that the dough isn't sticking, try pressing it down a bit more or using a fork to create small indentations on the meatballs that help the dough adhere better. Also, make sure the dough strips are cut thin enough; this helps with wrapping and helps them stick better!
Can I make this recipe vegetarian-friendly?
Absolutely! For a delightful vegetarian version, simply substitute the frozen meatballs with your favorite veggie meatballs. Most brands offer delicious alternatives that are just as satisfying and perfect for this festive recipe.
How can I make these Halloween Mummy Meatballs allergy-friendly?
Such a thoughtful consideration! For gluten-free and dairy-free options, look for gluten-free crescent roll dough and vegan meatballs. Always check ingredient labels for allergens, ensuring your spooky snack remains safe for all your guests!
Spooky Halloween Mummy Meatballs that Wow Your Guests
Ingredients
Equipment
Method
- Preheat your oven to 400°F (200°C).
- Open the crescent roll dough and cut it into thin strips.
- Wrap each meatball in 1-2 strips of dough.
- Place wrapped meatballs on a baking sheet and bake for 12-15 minutes.
- Prepare pepperoni circles for eyes.
- Attach pepperoni eyes using a dab of sauce or water.
- Serve warm with your choice of dipping sauce.


Leave a Reply