
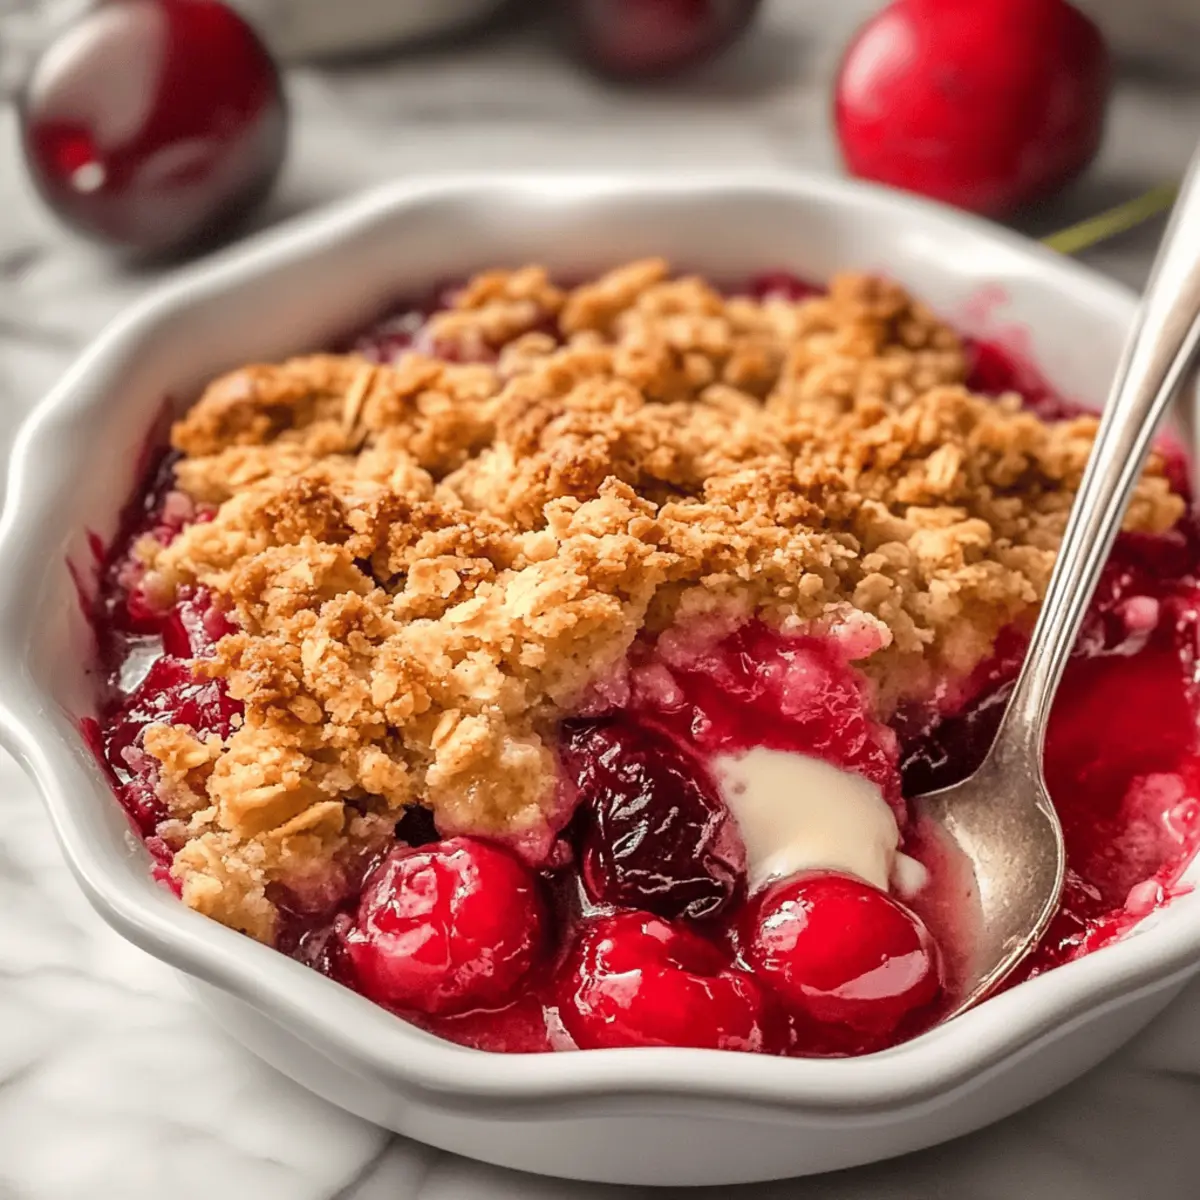
The sweet scent of cherries wafts through the kitchen, instantly transporting me to lazy summer afternoons filled with laughter and sunshine. If you're looking for a comforting indulgence that captures the essence of those warm days, look no further than this Homemade Cherry Crumble. This easy-to-make dessert perfectly melds the sweetness of juicy cherries with a buttery, crisp topping, making it a versatile choice for any occasion—whether it’s a family gathering or a cozy night in. Bonus? It only takes 20 minutes to prep, giving you more time to enjoy the moments that matter. Plus, with a gluten-free option available, this delightful treat is sure to please everyone at your table! Ready to dive into this cherry-filled experience? Let’s get started!
Why is Homemade Cherry Crumble a Must-Try?
Irresistible Flavor: The balance of sweet, juicy cherries with a buttery crumble topping creates an explosion of taste in every bite.
Quick Prep Time: With only 20 minutes needed for prep, you can whip this up even on the busiest days.
Versatile Options: Substitute cherries with any fruit you love—think blueberries, peaches, or apples—for new flavor adventures. You might enjoy trying it with fresh fruits just like with our [Cinnamon Peach Crumble](https://fourrecipes.com/cinnamon-peach-crumble-bars/).
Gluten-Free Friendly: Easily adapt the recipe with gluten-free ingredients without sacrificing taste or texture.
Crowd-Pleasing Delight: Whether served warm or cold, it’s an instant hit at any gathering, and who doesn't love a scoop of ice cream with it?
This Homemade Cherry Crumble is not just a dessert; it's a sweet slice of nostalgia that will definitely become a favorite.
Homemade Cherry Crumble Ingredients
• The right ingredients can make all the difference in your Homemade Cherry Crumble!
For the Cherry Filling
- Cherry Pie Filling – Provides sweetness and juiciness; fresh cherries can also be pitted and halved for a delightful twist.
- Granulated Sugar – Enhances sweetness; feel free to reduce or substitute with a sweetener if desired.
- Cornstarch – Thickens the cherry filling; tap into tapioca starch for a gluten-free option!
- Lemon Juice – Adds acidity and brightness; lime juice can bring in a refreshing change.
- Vanilla Extract – Enhances overall flavor; try a dash of almond extract for a unique twist.
For the Crumble Topping
- Flour – Forms the base of the crumble topping; almond flour makes it a fantastic gluten-free alternative.
- Rolled Oats – Adds lovely texture and chewiness; quick oats can work well in a pinch.
- Brown Sugar – Provides a deeper sweetness with a touch of molasses flavor; regular sugar can also be used if needed.
- Cinnamon – Creates warmth and spice; nutmeg is a great alternative for a different flavor note.
- Salt – Balances flavors, ensuring sweetness doesn’t overwhelm; it’s a must, even in desserts.
- Cold Cubed Butter – Contributes richness for a flaky texture; coconut oil can be used for a dairy-free option.
These ingredients will ensure your Homemade Cherry Crumble is bursting with flavor and nostalgia, making it a dessert to remember!
Step‑by‑Step Instructions for Homemade Cherry Crumble
Step 1: Preheat the Oven
Begin by preheating your oven to 375°F (190°C). This will ensure that your Homemade Cherry Crumble bakes evenly and achieves a golden, crispy topping. If your baking dish isn’t non-stick, lightly grease it with butter or cooking spray to prevent sticking. Set it aside while you prepare the filling and crumble topping.
Step 2: Prepare the Cherry Filling
In a large mixing bowl, combine the cherry pie filling, granulated sugar, cornstarch, lemon juice, and vanilla extract. Stir until all the ingredients are well combined, ensuring the cornstarch is evenly distributed to thicken the filling as it bakes. You’ll want a smooth mixture that captures the sweetness of the cherries—this will become the luscious base of your Homemade Cherry Crumble.
Step 3: Mix the Crumble Topping
In another bowl, mix together the flour, rolled oats, brown sugar, cinnamon, and salt. This blend creates a rich, flavorful crumble topping. Incorporate the cold cubed butter into the dry ingredients, using your fingers or a pastry cutter to blend until the mixture resembles coarse crumbs, about the size of peas. This texture is key for achieving that perfect crispy topping.
Step 4: Combine the Layers
Evenly pour the cherry filling mixture into your prepared baking dish, spreading it out with a spatula to ensure an even layer. Next, take the crumble topping you prepared and sprinkle it generously over the cherry layer, covering it completely. This beautiful contrast between the juicy cherries and the buttery crumble will make your Homemade Cherry Crumble irresistible.
Step 5: Bake to Perfection
Place the baking dish in your preheated oven and bake for 50–60 minutes. You’ll know it’s ready when the cherry filling is bubbling up around the edges and the crumble topping is a lovely golden brown. Be sure to keep an eye on it toward the end of the baking time to prevent over-browning.
Step 6: Cool and Serve
Once baked, remove your Homemade Cherry Crumble from the oven and let it cool for about 10–15 minutes. This cooling period allows the juices to thicken a bit, making it easier to scoop. Serve it warm, optionally with a scoop of vanilla ice cream or a dollop of whipped cream for a deliciously comforting treat everyone will love!

How to Store and Freeze Homemade Cherry Crumble
Fridge: Store leftover Homemade Cherry Crumble covered in the refrigerator for up to 3 days to maintain freshness.
Freezer: For longer storage, freeze the crumble before baking by wrapping it tightly in plastic wrap and then aluminum foil; it will last up to 3 months.
Reheating: To reheat, bake thawed crumble in a preheated oven at 350°F (175°C) for about 15-20 minutes until the topping is crispy again.
Serving Suggestions: Enjoy warm or at room temperature, and consider pairing it with a scoop of ice cream for an extra special treat!
What to Serve with Homemade Cherry Crumble?
Treat your senses to a complete dining experience by pairing this delightful dessert with complementary dishes that enhance its sweet, fruity charm.
-
Creamy Vanilla Ice Cream: The smoothness of ice cream balances the crunchy texture of the crumble, creating a comforting mouthful. A scoop melts beautifully over the warm topping, sending you straight to dessert heaven.
-
Fresh Whipped Cream: This light and airy addition brings a silky touch that elevates the overall decadence of the crumble. It’s a simple yet effective accompaniment that enhances each spoonful.
-
Tangy Lemonade: The tartness of freshly squeezed lemonade contrasts wonderfully with the sweet cherries, providing a refreshing sip between bites. It’s perfect for a sunny day or any time you need a bright drink.
-
Nutty Granola: Sprinkle a bit of your favorite granola on top for an added crunch and nutty flavor. This unexpected twist brings both texture and nutritional benefits, making each portion even more satisfying.
-
Sautéed Cinnamon Apples: Cooking apples in butter, sugar, and cinnamon creates a warm, spiced flavor that pairs perfectly with the cherry filling. This flavor union evokes the essence of cozy autumn evenings.
-
Coffee or Tea: A warm cup of coffee or herbal tea makes for a comforting complement to the sweet flavors. The slight bitterness of coffee perfectly offsets the sugary dessert while enhancing the overall experience.
-
Chocolate Sauce Drizzle: For those who adore the combination of cherry and chocolate, a simple drizzle of warm chocolate sauce can take your dessert to a luxurious level. This indulgence creates a symphony of flavors that is impossible to resist.
Indulging in Homemade Cherry Crumble is just the beginning—combine it with these delightful pairings for a remarkable dessert experience!
Tips for the Best Homemade Cherry Crumble
-
Keep Butter Cold: Ensure your butter is very cold for a light, crispy topping; overmixing can result in a dense crumble that loses its allure.
-
Watch for Bubbling: Look for bubbling around the edges of the filling during baking—it’s a sign that the cornstarch has thickened properly, ensuring a delightful texture.
-
Adjust Sugar to Taste: Depending on the sweetness of your cherries, you might want to adjust the granulated sugar. Fresh cherries can vary, so taste as you go!
-
Use Parchment Paper: If your baking dish isn’t non-stick, consider lining it with parchment paper for easy removal and fewer dishes to clean.
-
Let It Cool: Allow your Homemade Cherry Crumble to cool slightly before serving. This helps the filling set up, making it much neater to serve.
-
Serve Warm: For the most indulgent experience, serve warm with a scoop of ice cream or whipped cream, enhancing that comforting feeling that comes with every spoonful!
Make Ahead Options
These Homemade Cherry Crumble preparations are perfect for busy weeknights! You can prepare the cherry filling and crumble topping up to 24 hours in advance, storing them separately in airtight containers in the refrigerator. To maintain the quality, ensure the cherry filling is covered tightly to prevent browning, while keeping the crumble topping in a cool place for optimal texture. When you’re ready to enjoy, simply layer the cherry mixture in your baking dish, sprinkle the crumble on top, and bake as directed. This way, you’ll have a delicious dessert ready with minimal effort, making weeknight treats a breeze!
Homemade Cherry Crumble Variations
Feel free to get creative and make this recipe your own—there are endless tasty possibilities!
-
Berry Blast: Swap cherries for a mix of strawberries, blueberries, and raspberries for a vibrant, colorful twist. This summer berry blend will offer a juicy burst in every bite.
-
Peachy Keen: Use fresh peaches instead of cherries for a sweet, fragrant alternative. The natural sweetness of ripe peaches brings a delightful freshness that’s perfect for warm evenings.
-
Nutty Crunch: Add chopped walnuts or pecans to the crumble topping for a delightful crunch and added texture. The nuttiness complements the fruity filling beautifully, creating a satisfying contrast.
-
Oat-Free Delight: If you prefer a lighter topping, skip the oats and use only flour in your crumble. This version enhances the buttery flavor and gives you a classic crumble texture.
-
Spice It Up: Add a pinch of ginger or allspice to the crumble for a warm, aromatic twist. This will elevate the flavor profile, providing a cozy comfort that pairs beautifully with cherries.
-
Coconut Love: For a tropical twist, incorporate shredded coconut into your crumble topping. This addition not only works well with the sweet filling but also lends a delightful chewiness.
-
Chili Kick: If you're feeling adventurous, add a pinch of cayenne or chili powder to the cherry mix for a spicy surprise. It creates a unique contrast that’s sure to impress adventurous eaters.
For more inspiration, consider trying our delicious [Cinnamon Peach Crumble](https://fourrecipes.com/cinnamon-peach-crumble-bars/) or explore the intriguing flavors of [Spicy Pickle Brine](https://fourrecipes.com/spicy-pickle-brine-essentials/). Enjoy customizng your Homemade Cherry Crumble!
Homemade Cherry Crumble Recipe FAQs
How do I select the best cherries for my Homemade Cherry Crumble?
Absolutely! When selecting fresh cherries, look for ones that are plump, shiny, and free from any dark spots or blemishes. Sweet cherries should feel firm to the touch and have a deep red or dark purple hue. If using frozen cherries, choose those that are pitted and have no added sugar for the best results.
How should I store leftovers of the Homemade Cherry Crumble?
You can store any leftover crumble covered in the refrigerator for up to 3 days. Make sure to let it cool completely first, as this helps maintain its flavor and texture. When you’re ready to enjoy it again, simply reheat it in the oven for a few minutes to restore its crispiness.
Can I freeze my Homemade Cherry Crumble?
Yes, indeed! For long-term storage, you can freeze your Homemade Cherry Crumble before baking it. Wrap it tightly in plastic wrap and then in aluminum foil to prevent freezer burn. It will hold well for up to 3 months. When you're ready to bake it, let it thaw in the refrigerator overnight, and it can then be baked as per the recipe!
What should I do if my crumble topping turns out too dense?
If your crumble topping is dense, take note for next time. To ensure a light and crispy texture, always use cold butter and avoid overmixing when combining the ingredients. It's best to mix until the texture resembles coarse crumbs, about the size of peas. This will keep your topping airy and delightful!
Is this recipe suitable for someone with food allergies?
Very! This Homemade Cherry Crumble can be easily adapted to cater to various dietary preferences. For a gluten-free option, simply use almond flour instead of regular flour. Additionally, if you need to avoid dairy, coconut oil can replace the cold cubed butter. Always check labels for allergens in processed ingredients like cherry pie filling!
Can I make substitutions for the cherry filling?
Absolutely! One of the best things about this recipe is its versatility. While cherries are delightful, you can substitute with blueberries, peaches, or even apples for a different flavor profile. Just remember, if you use different fruits, you might need to adjust the sugar content based on their natural sweetness!
Deliciously Easy Homemade Cherry Crumble for Cozy Nights
Ingredients
Equipment
Method
- Preheat your oven to 375°F (190°C) and prepare your baking dish.
- In a large mixing bowl, combine the cherry pie filling, granulated sugar, cornstarch, lemon juice, and vanilla extract.
- In another bowl, mix together the flour, rolled oats, brown sugar, cinnamon, and salt. Incorporate the cold cubed butter.
- Pour the cherry filling mixture into the baking dish and cover with the crumble topping.
- Bake for 50–60 minutes until the filling is bubbling and the topping is golden brown.
- Allow to cool for 10–15 minutes before serving.


Leave a Reply