
Stepping into my kitchen, I’m often inspired by the vibrant flavors of Japanese street food and the communal joy it brings to meal times. That’s where my love for this Okonomiyaki recipe began, a customizable savory pancake that turns simple ingredients into a delightful culinary experience. Not only is it incredibly versatile—allowing you to tailor it with your favorite vegetables, meats, or even tofu—but it also comes together in a snap, making it perfect for quick weeknight meals or family gatherings. Every bite captures the essence of creativity and comfort in cooking, transforming your kitchen into a haven of delicious smells. So, what unique twist will you add to your Okonomiyaki tonight?
Why is Okonomiyaki So Special?
Customizable Flavors: You can make this dish your own by choosing from a variety of fillings and toppings. Healthy Options: Load it up with veggies and lean proteins to create a meal that’s nutritious and satisfying. Quick and Easy: Preparing Okonomiyaki is uncomplicated, making it perfect for busy weeknights. Plus, you can easily prepare the uncooked batter in advance! Family-Friendly Fun: Cooking this savory pancake is a fantastic way to bring the family together, allowing everyone to choose their favorite ingredients. For more exciting variations, check out Recipe and Recipe. Delicious Results: With a crispy exterior and a tender interior, each bite is a delightful experience that the whole family will love!
Okonomiyaki Recipe Ingredients
For the Batter
- Flour – The foundation of your Okonomiyaki; for a gluten-free version, substitute with gluten-free flour.
- Dashi (or water) – This adds a rich umami flavor; can be replaced with vegetable stock for a lighter taste.
- Egg – Helps bind the ingredients together; can use a flaxseed meal mixture as a vegan alternative.
For the Filling
- Cabbage – Provides texture and bulk; feel free to swap it out for any leafy green like spinach.
- Green onions – Infuses freshness and a mild kick; can be omitted or substituted with chives for a similar flavor.
- Protein (shrimp, pork, etc.) – Optional, but adds hearty flavor; choose any protein you love or tofu for a vegetarian option.
For the Toppings
- Mayonnaise – For that creamy touch; Japanese mayo gives a fantastic unique flavor.
- Okonomiyaki sauce – A sweet and savory drizzle that enhances the whole dish; try using sriracha or teriyaki sauce for a fun twist.
- Bonito flakes – For that authentic touch, sprinkle some on; these add a delightful umami note!
Feel free to mix and match as you explore the vast world of this Okonomiyaki recipe; the possibilities are truly endless!
Step‑by‑Step Instructions for Ultimate Japanese Okonomiyaki - Customizable Savory Pancake Delight
Step 1: Prepare the Batter
In a large mixing bowl, combine flour, dashi (or water), and egg, stirring until the mixture is smooth and lump-free, about 2-3 minutes. The batter should have a pourable consistency that clings to a spoon. This will be the foundation of your Okonomiyaki, ready to embrace all your chosen fillings!
Step 2: Fold in the Fillings
Next, delicately fold in finely chopped cabbage, sliced green onions, and any chosen proteins like shrimp or pork. Ensure everything is evenly coated with the batter, using a spatula, so each bite of your Okonomiyaki is packed with delicious flavors and textures. This step should take about 3-4 minutes.
Step 3: Heat the Skillet
Place a non-stick skillet or griddle over medium heat, allowing it to warm up for about 5 minutes. To ensure a crispy exterior, lightly grease the surface with oil, swirling it around until evenly coated. The skillet should be hot enough that a droplet of water sizzles upon contact.
Step 4: Cook the Pancake
Pour a portion of the batter mixture onto the skillet, shaping it into a round pancake about ½ inch thick. Cook the Okonomiyaki for 5-7 minutes, or until the bottom is golden brown. Use a spatula to gently lift the edge to check for doneness, ensuring a crispy crust without burning.
Step 5: Flip and Finish Cooking
Carefully flip the pancake using two spatulas to maintain its shape, and cook the other side for an additional 5-7 minutes. The Okonomiyaki should be beautifully browned and firm to the touch. Adjust the heat as needed so the inside cooks thoroughly while avoiding a burnt exterior.
Step 6: Serve with Toppings
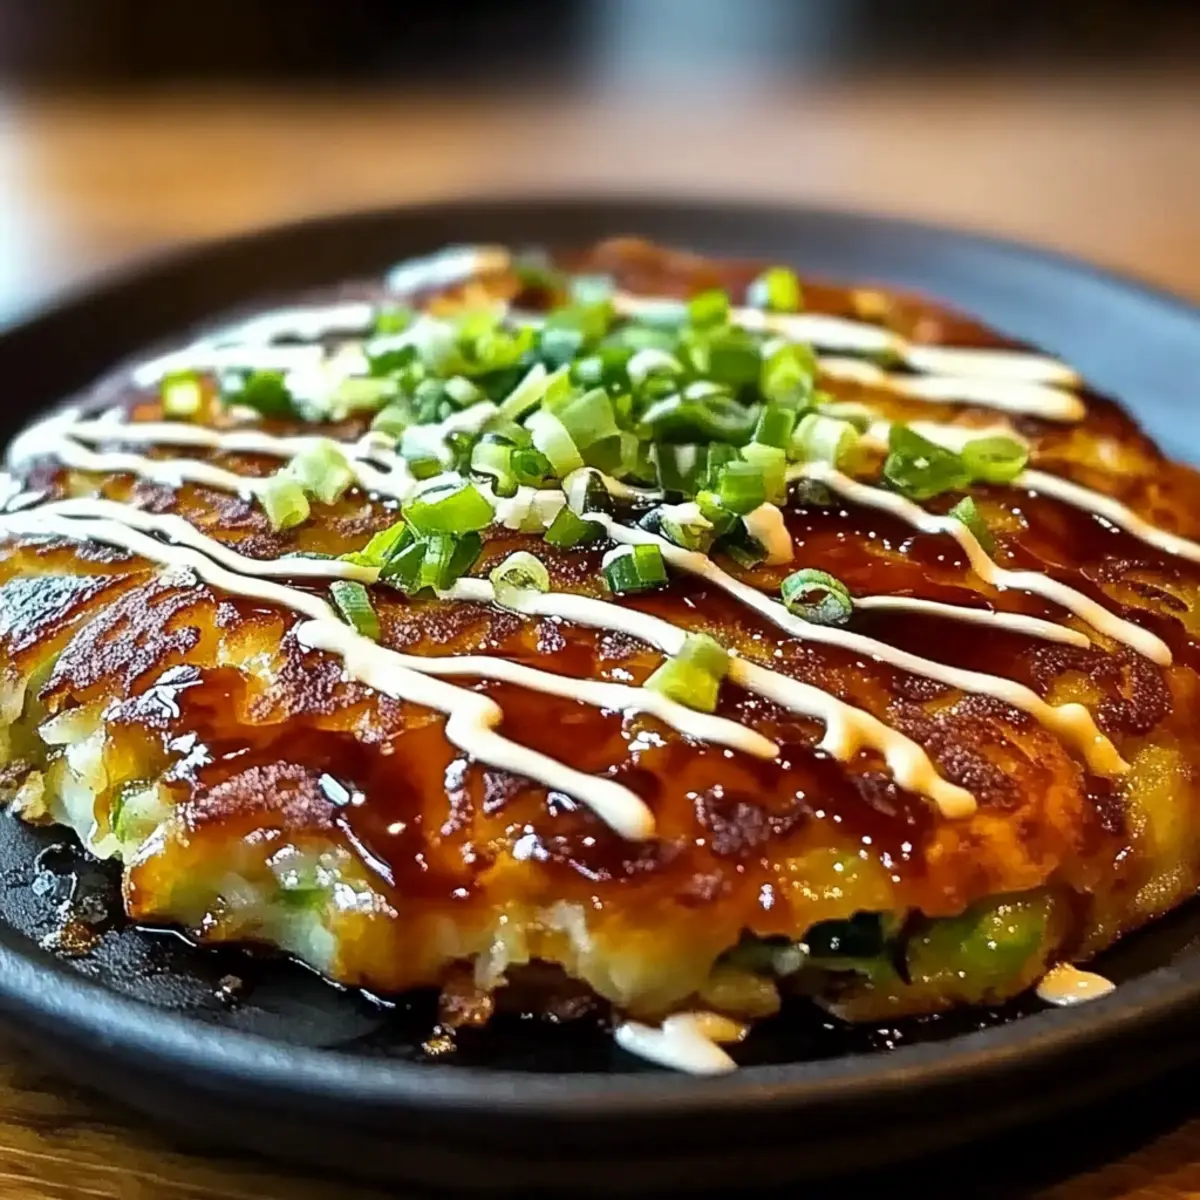
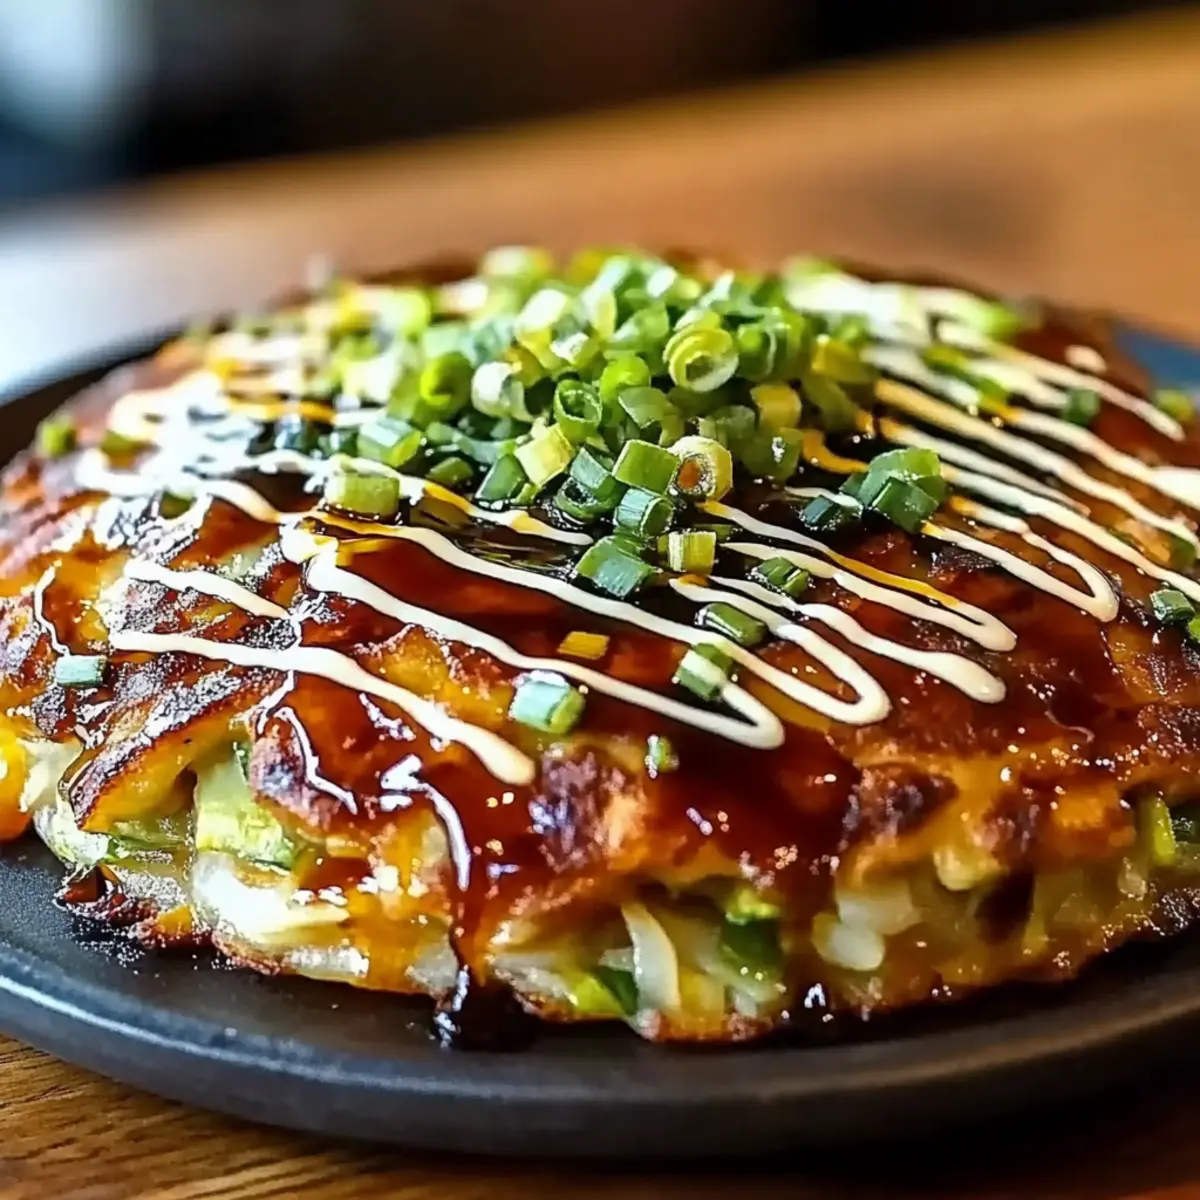
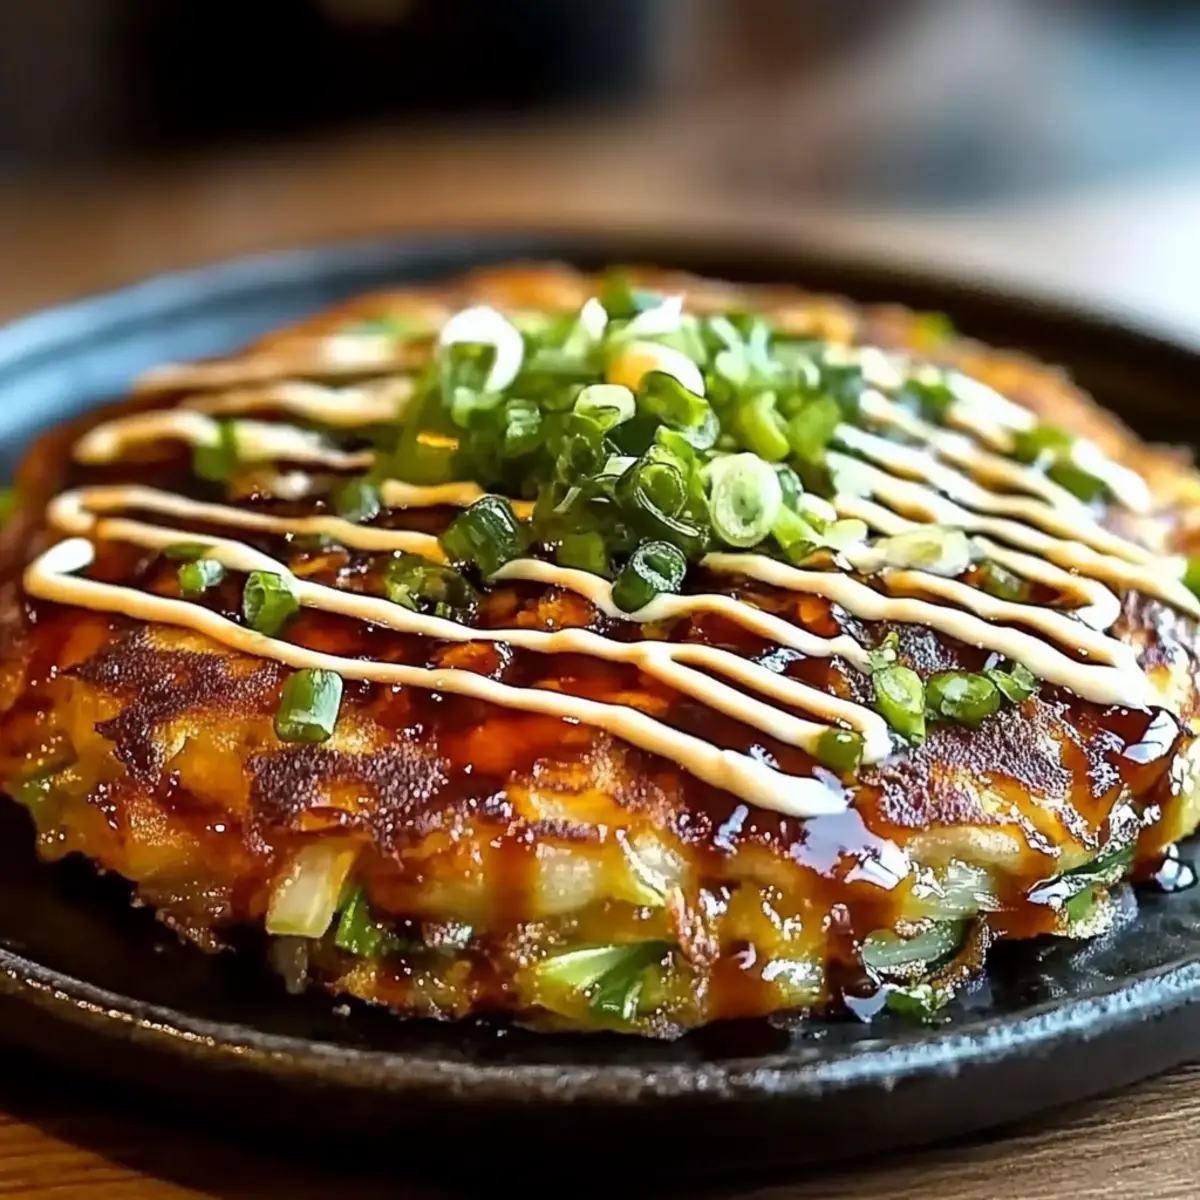
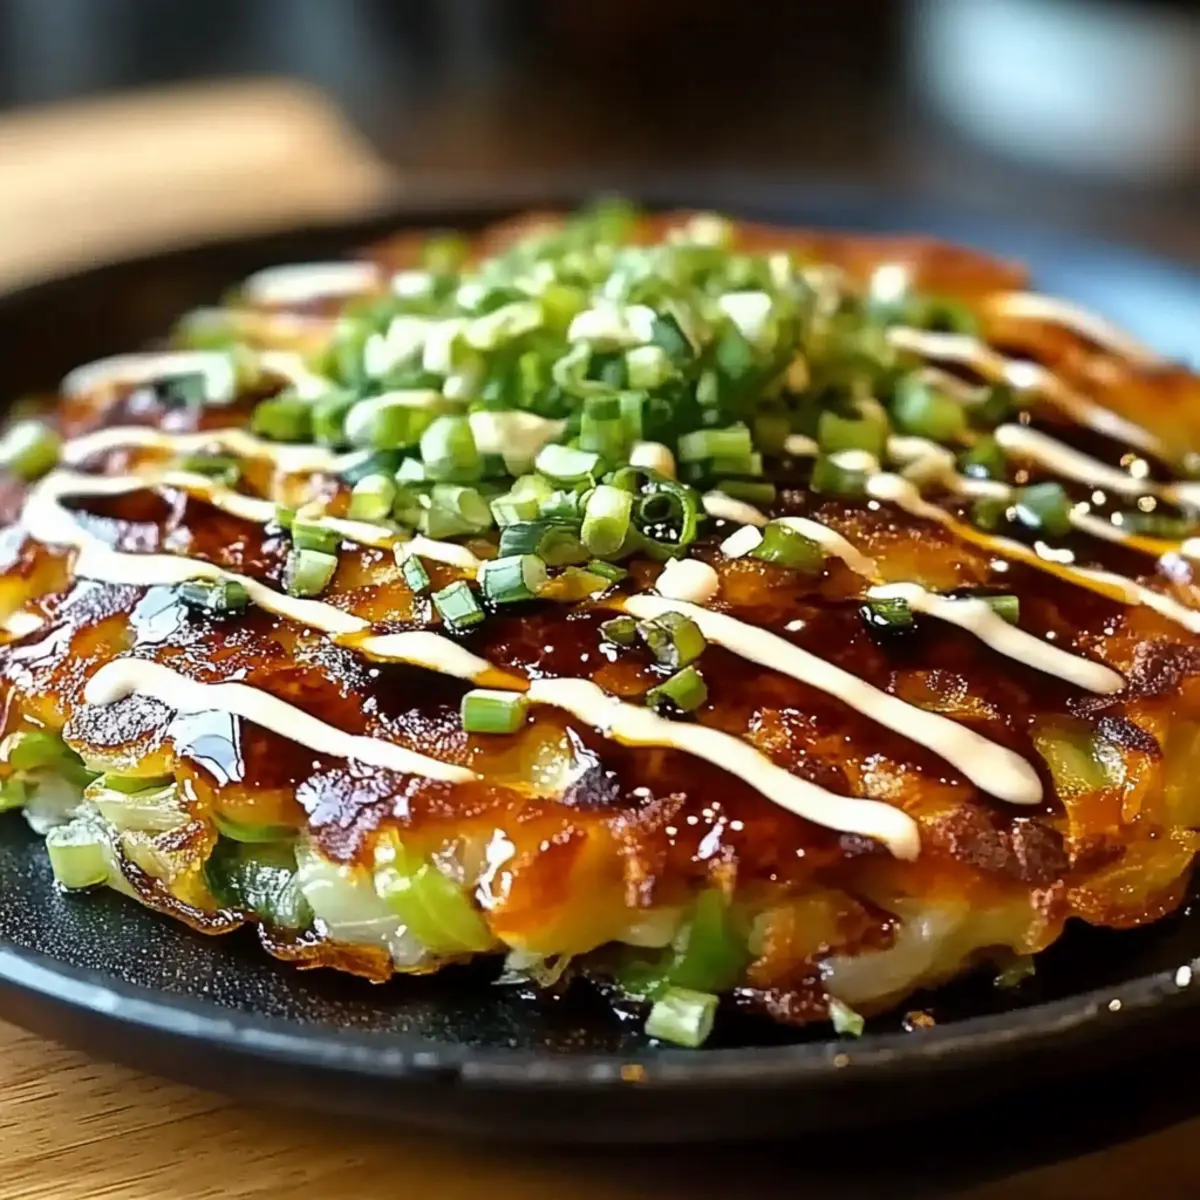
Once cooked, transfer the Okonomiyaki to a serving plate, and let it cool slightly. Drizzle with savory okonomiyaki sauce and creamy mayonnaise, and sprinkle bonito flakes if desired for an authentic touch. Serve hot, letting everyone add their favorite toppings for a customizable dining experience!
Step 7: Enjoy Your Creation
Gather your family around the table to savor this delicious Okonomiyaki together. The beautiful combination of crispy, savory flavors filled with your choices will surely create a joyful atmosphere and culinary delight that everyone will love!
Expert Tips for the Best Okonomiyaki
-
Hot Skillet: Ensure your skillet is adequately heated before pouring in the batter. This step is crucial for achieving that perfect crispy exterior.
-
Consistent Thickness: Aim for a pancake thickness of about ½ inch for even cooking. Too thick may leave the inside undercooked, while too thin can dry it out.
-
Gentle Flipping: Use two spatulas to flip the Okonomiyaki gently. This helps maintain its shape and prevents it from breaking apart.
-
Check Doneness: A toothpick or skewer is your best friend! Insert it into the pancake; when it comes out clean, your Okonomiyaki is perfectly cooked.
-
Experiment with Fillings: Don’t be afraid to mix things up! Try adding different proteins or vegetables to your Okonomiyaki recipe to find your favorite combination.
Make Ahead Options
Preparing your delicious Okonomiyaki ahead of time can save you precious minutes during your busy week! You can mix the batter (flour, dashi, and egg) up to 24 hours in advance and refrigerate it in an airtight container. This ensures the flavors meld beautifully, giving you a rich base to work with. Cut your vegetables and proteins the night before and store them in the fridge as well. When you're ready to cook, simply fold in your prepped ingredients and pour the batter onto a hot skillet. Enjoy a quick, satisfying meal that’s just as delicious when freshly cooked!
Okonomiyaki Recipe Variations
Get ready to unleash your creativity in the kitchen with these exciting twists on your Okonomiyaki!
-
Vegetarian Delight: Substitute all proteins with your favorite vegetables like bell peppers or mushrooms for a vibrant, plant-based version. It's a great way to pack in nutrients without sacrificing flavor.
-
Cheesy Indulgence: Add shredded cheese, such as mozzarella, to your batter for a deliciously gooey texture. This creamy element brings a comforting touch that elevates the dish.
-
Spicy Kick: Incorporate finely chopped jalapeños or a splash of sriracha into the batter for a bold heat. If you’re a fan of spicy food, this twist will make your taste buds dance with joy!
-
Savoury Seafood: Choose seafood options like squid or scallops in place of traditional proteins, creating a delicious seafood medley. The ocean's freshness will add a delightful twist that's sure to impress!
-
Cabbage Alternatives: Use other leafy greens, like spinach or kale, in place of cabbage. This swap can bring exciting new flavors and additional nutritional benefits.
-
Gluten-Free Option: Swap regular flour for a 1:1 gluten-free flour blend. This ensures everyone can enjoy the yumminess without worry.
-
Twist on Toppings: Experiment with toppings like avocado slices or a drizzle of sesame oil for extra richness. A little creativity here can turn a good dish into a great one!
To explore even more flavorful ideas, check out Recipe and Recipe for additional inspiration. Let your imagination run wild with this Okonomiyaki recipe and share your unique creations with family and friends!
What to Serve with Ultimate Japanese Okonomiyaki?
Transform your savory pancake into a full meal with these delightful pairings that tantalize the palate.
-
Miso Soup: A warm bowl enhances the umami experience, making each bite of Okonomiyaki even more satisfying. This comforting soup adds depth and warmth to your meal.
-
Cucumber Salad: A fresh and crunchy side that balances the richness of the pancake. Tossed in a light vinegar dressing, this salad brings a refreshing contrast to every bite.
-
Pickled Veggies: Add a tangy crunch with traditional Japanese pickles. They provide a delightful contrast to the savory flavors of Okonomiyaki, tantalizing your taste buds with every crunch.
-
Steamed Edamame: These tender soybeans make for a delightful snack or side dish, providing a protein-packed complement. Pop them open for a burst of flavor that enhances the meal's heartiness.
-
Japanese Green Tea: Sipping on this fragrant beverage refreshes the palate between bites. The earthy notes of green tea perfectly complement the savory richness of Okonomiyaki.
-
Sushi Rolls: For a fun twist, serve alongside fresh sushi rolls. The clean flavors of sushi not only enhance your dining experience but also offer a variety of tastes to enjoy.
-
Sweet Potato Fries: Crispy on the outside and soft on the inside, these fries provide a delightful contrast in texture. The natural sweetness pairs wonderfully with savory Okonomiyaki.
-
Fruit Sorbet: End your meal on a light note with a refreshing sorbet. The fruity chill cleanses the palate beautifully, leaving you satisfied and ready for a repeat.
How to Store and Freeze Okonomiyaki
Fridge: Store leftover cooked Okonomiyaki in an airtight container for up to 3 days. Reheat on a skillet over medium heat until warmed through, about 3-4 minutes per side.
Freezer: If you have extra uncooked batter, freeze it in a sealed bag prior to cooking for up to 1 month. Thaw in the fridge overnight before cooking for the best results.
Reheating: For reheating cooked Okonomiyaki, use a hot skillet to retain its crispy texture. Avoid using the microwave as it can make them soggy.
Freshness Tip: The Okonomiyaki recipe is best enjoyed fresh, but properly stored leftovers can offer delightful flavors for a quick meal later!
Okonomiyaki Recipe FAQs
What kind of flour should I use?
You can use all-purpose flour as the base for your Okonomiyaki, but I often recommend substituting it with gluten-free flour if you're looking for a gluten-free option. Just make sure to check the package for any necessary adjustments to the liquid content in your batter!
How should I store leftover Okonomiyaki?
Store your leftover cooked Okonomiyaki in an airtight container in the fridge for up to 3 days. When you’re ready to enjoy it again, reheat it on a skillet over medium heat for about 3-4 minutes on each side until warmed through. This method helps to keep the exterior crispy instead of turning it soggy!
Can I freeze Okonomiyaki batter?
Absolutely! If you have extra uncooked batter, you can freeze it in a sealed bag or container. Just make sure to remove as much air as possible to prevent freezer burn. The batter will keep well for about 1 month. When you’re ready to cook, simply thaw it in the fridge overnight and stir gently before pouring it onto your skillet.
What should I do if my Okonomiyaki is burning?
If you notice that your Okonomiyaki is browning too quickly, reduce the heat of your skillet. A gentle, steady temperature is key for a perfectly cooked pancake. It’s also a good idea to check the thickness; if it’s too thick, the inside may remain undercooked while the outside burns.
Are there any dietary considerations for Okonomiyaki?
Yes! You can easily make your Okonomiyaki suitable for various dietary needs. For a gluten-free version, just use gluten-free flour. Additionally, if you're vegan, replace the egg with a flaxseed meal mixture (1 tablespoon of flaxseed meal mixed with 2.5 tablespoons of water, allowed to sit until it thickens). Always check individual ingredient labels for allergens to ensure they meet your dietary requirements.
Delicious Okonomiyaki Recipe: Your Customizable Pancake Delight
Ingredients
Equipment
Method
- In a large mixing bowl, combine flour, dashi (or water), and egg, stirring until smooth and lump-free, about 2-3 minutes.
- Fold in finely chopped cabbage, sliced green onions, and proteins, ensuring everything is evenly coated with the batter, using a spatula.
- Place a non-stick skillet over medium heat for about 5 minutes. Lightly grease the surface with oil.
- Pour a portion of the batter onto the skillet, shaping into a round pancake about ½ inch thick. Cook for 5-7 minutes until golden brown.
- Carefully flip the pancake using two spatulas; cook the other side for an additional 5-7 minutes.
- Transfer the Okonomiyaki to a plate, drizzle with okonomiyaki sauce and mayonnaise, sprinkle with bonito flakes, and serve hot.
- Enjoy your creation with family, allowing them to add their favorite toppings.


Leave a Reply