
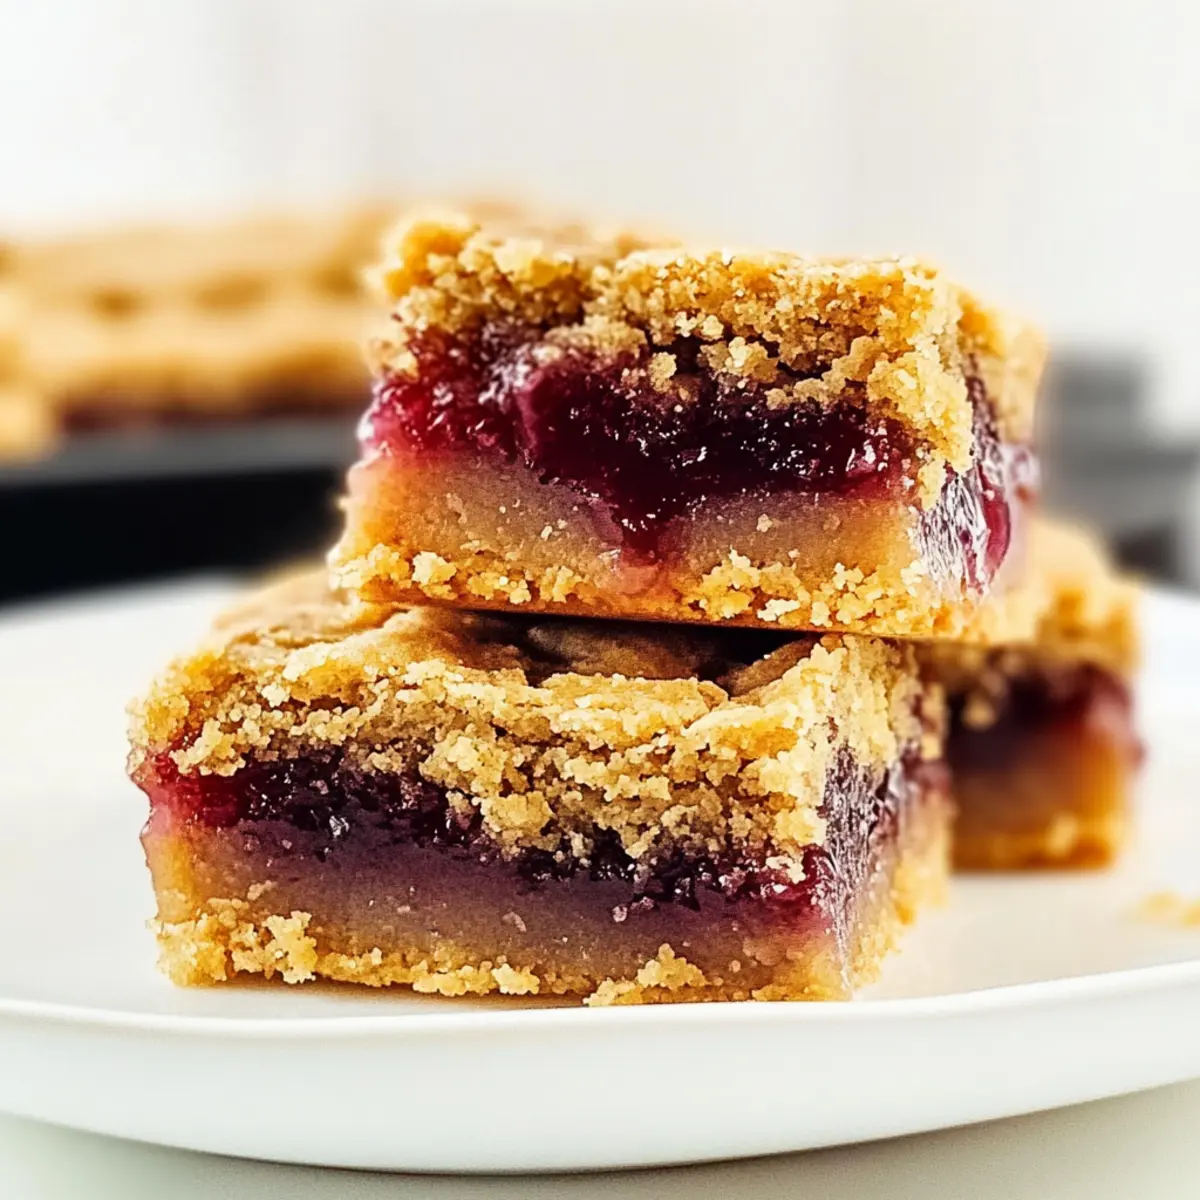
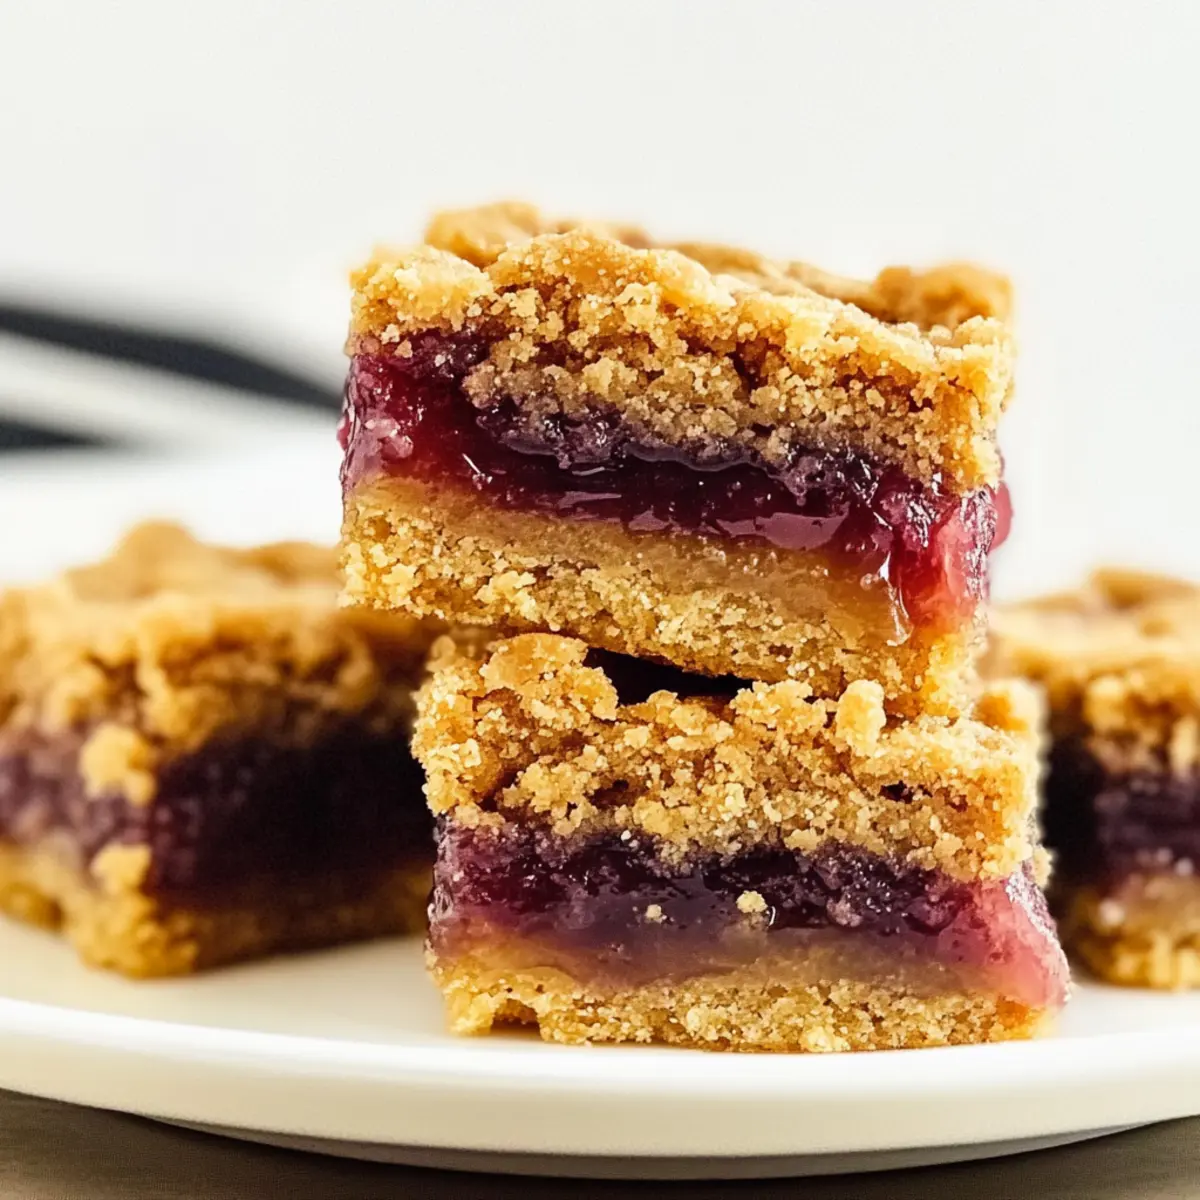
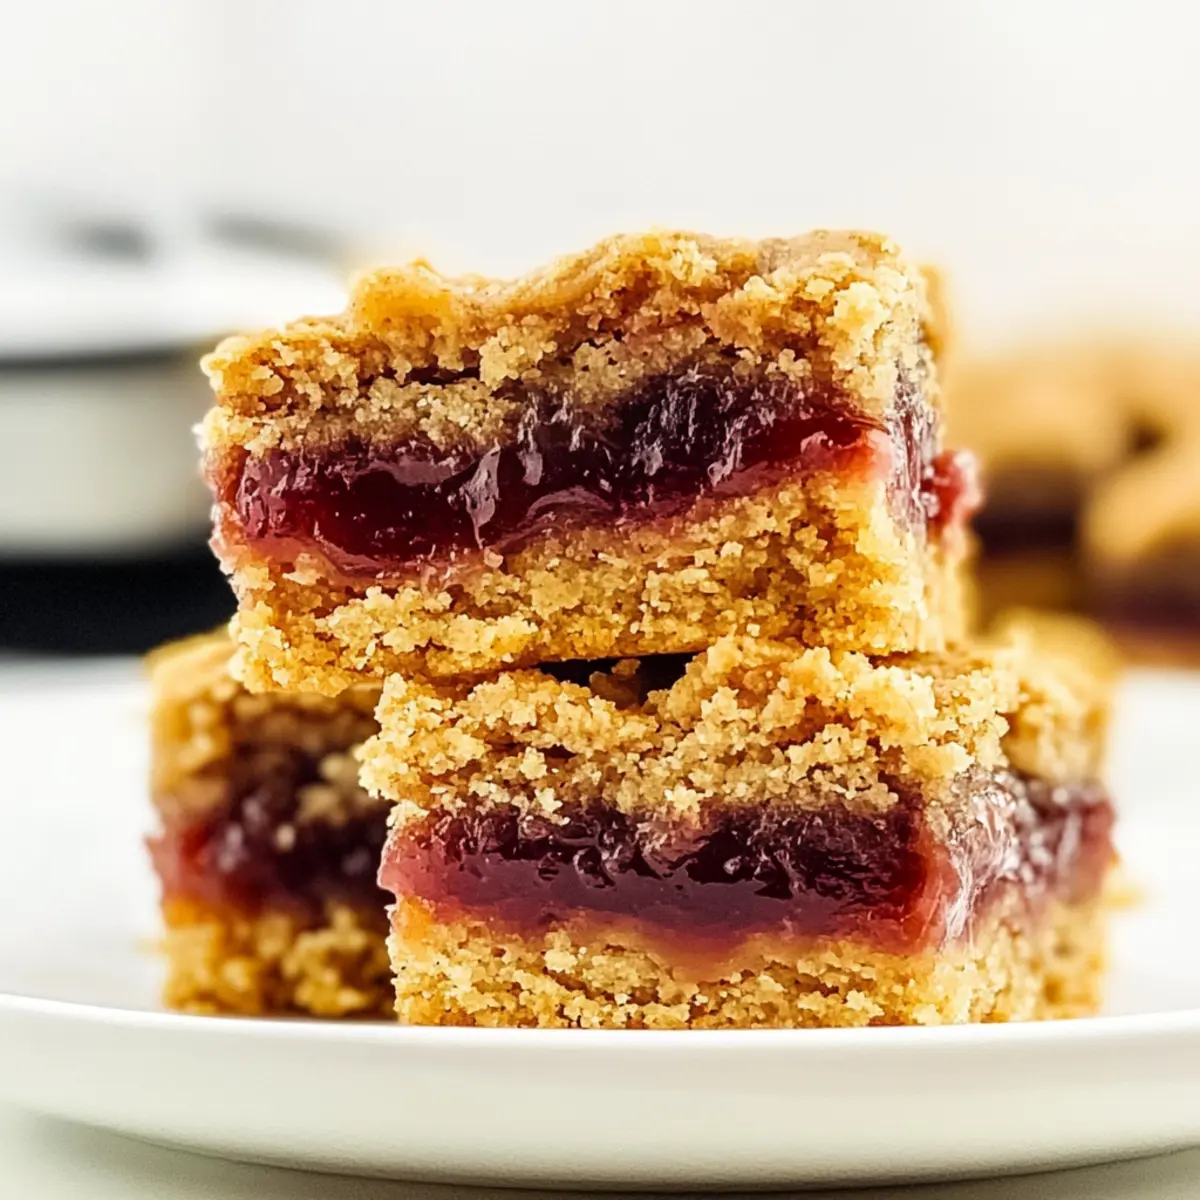
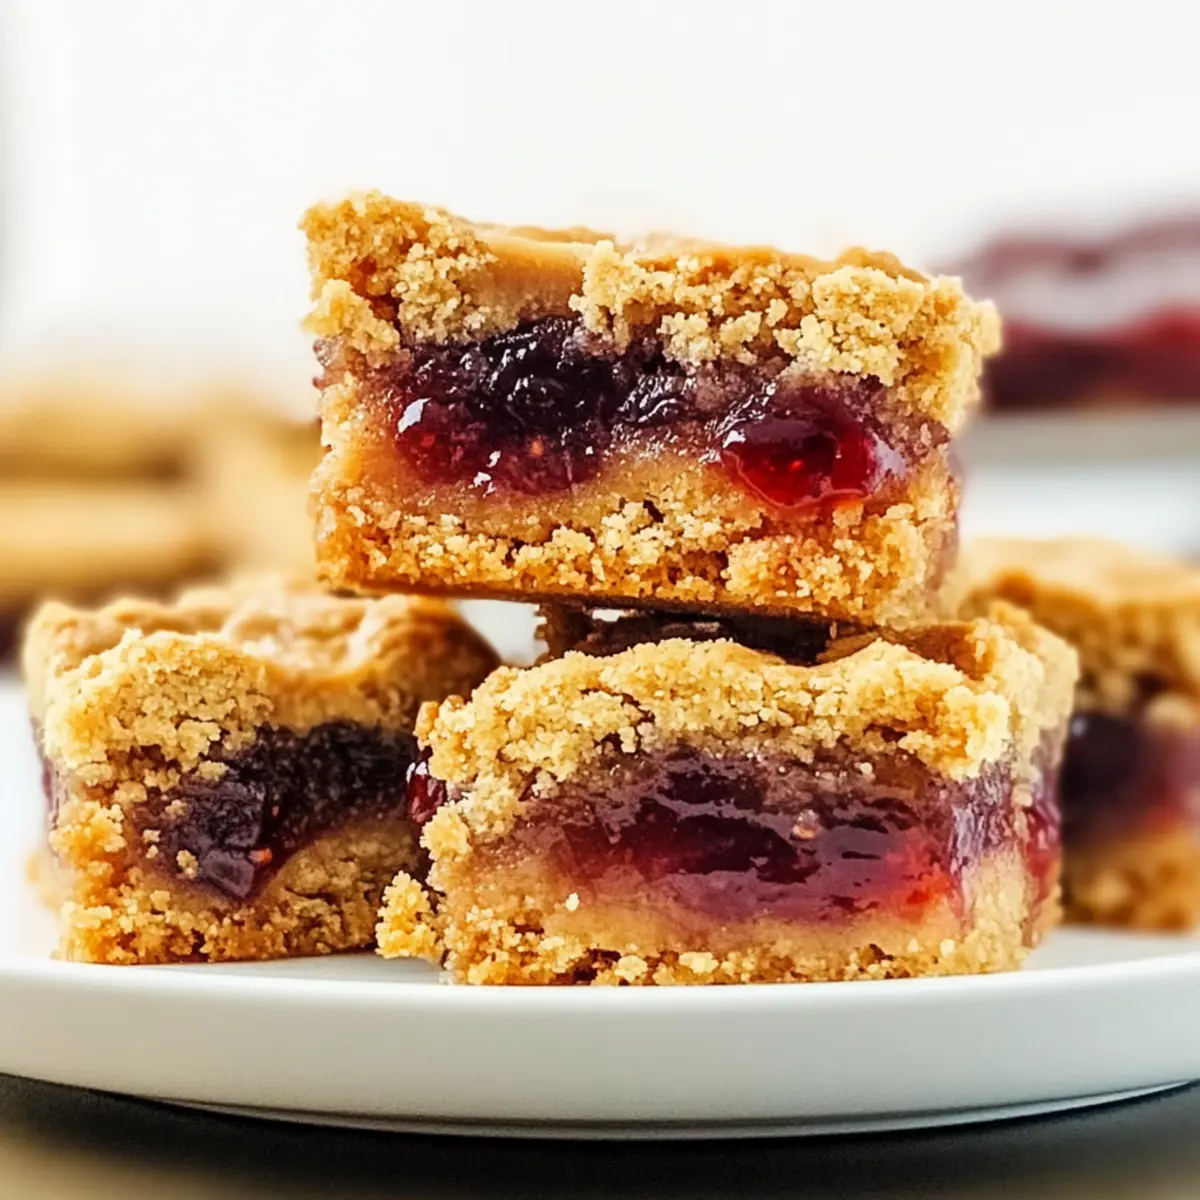
As I rummaged through my pantry the other day, I stumbled upon an almost forgotten jar of grape jelly, bringing back a flood of sweet childhood memories. This discovery inspired me to whip up a batch of Easy Peanut Butter and Jelly Bars, a delightful treat that seamlessly marries creamy peanut butter with the fruity essence of jelly. Not only are these bars quick to prepare, making them perfect for impromptu gatherings or after-school snacks, but they also allow for endless variations—substituting jams and nut butters to suit your palate. Whether you're reminiscing about carefree afternoons or introducing a new generation to this classic flavor combination, these bars are sure to satisfy those sweet cravings. Curious about how to bring this nostalgic treat to life? Let’s dive into the recipe!
Why are Peanut Butter and Jelly Bars a must-try?
Nostalgic Flavor: These bars evoke the comforting taste of childhood, combining creamy peanut butter with your favorite jelly.
Versatile Options: Switch up the flavors by using different jams or nut butters, like almond butter for a new twist!
Quick and Easy: Made in just under an hour, these bars are perfect for spontaneous snack cravings or last-minute dessert needs.
Kid-Friendly: A delightful crowd-pleaser that kids and adults alike will love, making them ideal for bake sales or family gatherings.
Perfect Pairing: Serve with a glass of cold milk for that classic peanut butter and jelly experience. For an additional treat, check out my recipe for Peach Crumble Bars that everyone can enjoy!
Peanut Butter and Jelly Bars Ingredients
• Prepare to create the ultimate nostalgic treat with these delightful Peanut Butter and Jelly Bars!
For the Base
- Butter – Adds richness and moisture; opt for unsalted for better control over flavor.
- Brown Sugar – Provides sweetness and a soft texture, making every bite moist and chewy.
- Granulated Sugar – Balances overall sweetness and contributes to a tender dough.
- Vanilla Extract – Enhances flavor, bringing all elements together.
- Eggs – Binds the ingredients; using 2 whole eggs and 1 yolk enriches the texture.
- Self-Rising Flour – Gives structure; if unavailable, substitute with all-purpose flour, baking powder, and salt.
For the Filling
- Creamy Peanut Butter – The star of the show, offering that classic nutty flavor; consider a no-sugar-added variety for fewer sugars.
- Grape Jelly – Adds a sweet fruity layer; feel free to substitute with your favorite jam for a fun twist.
Enjoy crafting these delightful Peanut Butter and Jelly Bars, an irresistible treat ready to satisfy any sweet craving!
Step‑by‑Step Instructions for Peanut Butter and Jelly Bars
Step 1: Preheat the Oven
Begin by preheating your oven to 350°F (175°C) and generously greasing a 9x13-inch baking dish with butter or non-stick spray. This preparation sets the stage for our Peanut Butter and Jelly Bars, ensuring they cook evenly and come out of the pan smoothly. As the oven heats, gather your mixing bowls and beaters for the next stage.
Step 2: Cream the Butters and Sugars
In a large mixing bowl, cream together the softened unsalted butter, brown sugar, and granulated sugar using an electric mixer on medium speed for about 1-2 minutes. You’re aiming for a fluffy, pale mixture that doubles in volume. This step is crucial for achieving a soft texture in your Peanut Butter and Jelly Bars, so don’t rush it!
Step 3: Add Eggs and Vanilla
Now, crack in the two whole eggs and one additional egg yolk, along with the vanilla extract. Mix on low speed until the mixture is well combined and smooth, scraping down the sides of the bowl as needed. This adds richness and flavor to your bars, setting a delightful foundation for the rest of the ingredients.
Step 4: Incorporate the Flour
Gradually add the self-rising flour to the egg and sugar mixture, mixing gently until just combined. Avoid overmixing to maintain that light and crumbly texture that makes these Peanut Butter and Jelly Bars irresistible. You should see a cohesive dough forming without any dry patches.
Step 5: Spread the Dough Base
Take roughly two-thirds of your dough and spread it evenly across the bottom of the greased baking dish. Use a spatula to create an even layer, ensuring all corners are covered. This base will serve as a soft and tender foundation for the delicious jelly layer, so put in a little care here.
Step 6: Prepare the Jelly Layer
In a small bowl, whisk the grape jelly until it’s smooth and spreadable. Pour this delightful mixture evenly over the dough base you just spread in the pan. Make sure to cover it fully, as this fruity layer will add a sweet burst of flavor to each bite of your Peanut Butter and Jelly Bars.
Step 7: Add the Topping Dough
Take the remaining dough and drop it in dollops over the jelly layer. It's okay if it doesn’t cover the entire layer, as the dough will spread during baking. This will create a beautifully textured topping and keep some of that frosty jelly peeking through for a charming look.
Step 8: Bake to Perfection
Place your assembled dish in the preheated oven and bake for about 30-40 minutes. You’ll know they’re ready when the edges turn a lovely golden brown, giving a hint of warmth and cozy aroma throughout your kitchen. Keep an eye on them towards the end to prevent over-baking.
Step 9: Cool and Cut
Once golden brown, remove the baking dish from the oven and allow the bars to cool in the pan. This cooling time helps them set and makes cutting easier. After about 15 minutes, slice the bars into squares or rectangles, showcasing that luscious peanut butter and jelly combination waiting to be enjoyed!
Make Ahead Options
These Easy Peanut Butter and Jelly Dessert Bars are perfect for meal prep, allowing you to enjoy homemade sweetness without the last-minute rush! You can prepare the dough up to 24 hours in advance by assembling the base layer and jelly filling, then storing them separately in the refrigerator. Keep the dough tightly wrapped (to prevent drying) and the jelly in an airtight container. When you’re ready to bake, let the dough sit at room temperature for about 15 minutes before spreading the jelly and topping with remaining dough. This way, you'll achieve that delightful soft and crumbly texture, ensuring the bars are just as delicious as when freshly made!
How to Store and Freeze Peanut Butter and Jelly Bars
Room Temperature: Keep the bars in an airtight container at room temperature for up to 3 days to maintain their softness and flavor.
Fridge: For extended freshness, store in the refrigerator for up to a week. Allow them to come to room temperature before serving for the best taste.
Freezer: Wrap individual bars tightly in plastic wrap and freeze for up to 1 month. Thaw at room temperature when you're ready to indulge in these delightful Peanut Butter and Jelly Bars.
Reheating: If desired, gently warm the bars in the microwave for a few seconds to enjoy that gooey peanut butter flavor all over again!
Expert Tips for Peanut Butter and Jelly Bars
-
Avoid Overmixing: Gently combine the ingredients to maintain a light and crumbly texture, ensuring your Peanut Butter and Jelly Bars are perfectly soft.
-
Even Jelly Spread: Smooth out the jelly evenly for consistent flavor. This ensures every bite offers that delightful peanut butter and jelly experience.
-
Watch Your Bake Time: Keep an eye on the bars as they bake, taking them out once the edges turn golden to prevent drying them out.
-
Texture Enhance: Consider folding in chopped peanuts into the dough for added crunch, giving your Peanut Butter and Jelly Bars an extra layer of flavor and texture.
-
Cool before Cutting: Allow the bars to cool in the pan, which makes slicing much easier and helps them hold their shape beautifully.
Peanut Butter and Jelly Bars Variations
Feel free to customize these delightful bars to suit your taste preferences and dietary needs!
- Flavor Swaps: Replace grape jelly with strawberry, raspberry, or blackberry jam for a fruity twist.
- Nut Alternatives: Use almond butter or cashew butter in place of peanut butter for unique nutty flavors.
- Add Crunch: Fold in chopped nuts like pecans or walnuts for added texture and a satisfying crunch.
- Chocolate Delight: Drizzle melted chocolate over the top before serving, creating a delicious chocolate-peanut butter combo.
- Sweet & Spicy: Mix in a pinch of cinnamon or a dash of cayenne pepper to give the bars a warm, spicy kick.
- Oatmeal Addition: Incorporate rolled oats into the dough for a wholesome take on the classic bars and extra chewiness.
- Vegan Version: Substitute eggs with flax eggs and use dairy-free butter and jam for a lovely vegan-friendly treat.
- No-Bake Option: For a quick twist, mix the ingredients and refrigerate instead of baking for a cool, creamy dessert.
As you experiment, consider pairing these bars with a comforting bowl of Butternut Squash Soup or a delightful plate of Garlic Butter Steak Bites for a complete feast that speaks to your warm and comforting cravings!
What to Serve with Easy Peanut Butter and Jelly Dessert Bars
Looking to create a delightful meal around these nostalgic dessert bars? Here are some yummy pairings that will complete your spread and tease your taste buds.
-
Cold Milk: A classic pairing that enhances the peanut butter flavor and brings back childhood vibes, perfect for dunking!
-
Vanilla Ice Cream: The creamy sweetness of ice cream contrasts beautifully with the chewy texture of the bars, creating an indulgent treat.
-
Fruit Salad: A refreshing mix of juicy berries and apples balances the sweetness of the bars with a hint of tartness. This is especially nice for adding color to your table.
-
Chocolate Drizzle: Elevate the bars by drizzling warm chocolate over them, adding an exciting richness that kids will love. This extra layer of flavor creates a special treat.
-
Hot Cocoa: A cozy beverage that pairs wonderfully on chilly evenings; the warmth complements the bars’ texture, making for a delightful snack.
-
Caramel Sauce: Drizzling caramel over the bars introduces a rich, buttery flavor that takes this nostalgic treat to the next level! It’s a sweet indulgence that complements the peanut butter well.
-
Coffee: For the grown-ups, a rich cup of coffee brings balance to the sweetness of the bars; the bitterness cuts through the dessert’s richness.
-
Cheesecake Bites: Mini cheesecake bites can offer a creamy contrast to the bars; their smooth richness provides variety and is bound to please your guests at a gathering.
-
Nutty Granola: A sprinkle of crunchy granola adds texture and can be served alongside the bars for a delightful snack option that meets both sweet and savory cravings!
-
Herbal Tea: A warm, soothing cup of herbal tea provides a delightful counterpoint to the sweetness, perfect for a cozy evening after a long day.
Peanut Butter and Jelly Dessert Bars Recipe FAQs
How do I select the best jelly for my Peanut Butter and Jelly Bars?
Absolutely! When choosing jelly, look for options that have a vibrant color and a smooth consistency. I recommend selecting a fruit jelly that you love, like grape or strawberry—just avoid those with dark spots or a watery appearance as they may not hold up well during baking.
How should I store leftover Peanut Butter and Jelly Bars?
To keep your delicious bars fresh, store them in an airtight container at room temperature for up to 3 days. If you want them to last longer, you can refrigerate them for up to a week, ensuring they retain their delightful softness. Let them come to room temperature before enjoying for the best flavor!
Can I freeze Peanut Butter and Jelly Bars?
Very! To freeze your bars, wrap each individual piece tightly in plastic wrap and then place them in a freezer-safe bag. They can stay fresh in the freezer for up to 1 month. When you’re ready to eat, simply let them thaw at room temperature for a few hours.
What should I do if my Peanut Butter and Jelly Bars are too crumbly?
If your bars come out too crumbly, it may be due to overmixing or insufficient fat content in the dough. To troubleshoot, ensure you’re gently incorporating your ingredients and avoid adding too much flour. If they seem dry before baking, a splash of milk can help. They should be soft yet hold together when baked correctly!
Are these bars suitable for kids with nut allergies?
Absolutely! You can make these bars nut-free by substituting the peanut butter with sunflower seed butter or a similar alternative. Just make sure to check the jelly’s ingredients as well to avoid any cross-contact with allergens.
Can I substitute the self-rising flour in this recipe?
Yes, you can! If you don’t have self-rising flour on hand, you can create a substitutive blend using 2½ cups of all-purpose flour, along with 1 teaspoon of baking powder and ½ teaspoon of salt. This will still give your bars the proper structure needed!
Irresistible Peanut Butter and Jelly Bars for Nostalgic Cravings
Ingredients
Equipment
Method
- Preheat your oven to 350°F (175°C) and grease a 9x13-inch baking dish.
- Cream together the softened unsalted butter, brown sugar, and granulated sugar using an electric mixer for about 1-2 minutes.
- Add in the two whole eggs, one additional yolk, and vanilla extract. Mix until smooth.
- Gradually add the self-rising flour to the mixture, mixing gently until just combined.
- Spread two-thirds of the dough evenly in the greased baking dish.
- Whisk the grape jelly until smooth and pour over the dough base evenly.
- Drop the remaining dough in dollops over the jelly layer.
- Bake for 30-40 minutes until the edges are golden brown.
- Allow the bars to cool in the pan for 15 minutes then slice into squares.
Leave a Reply