
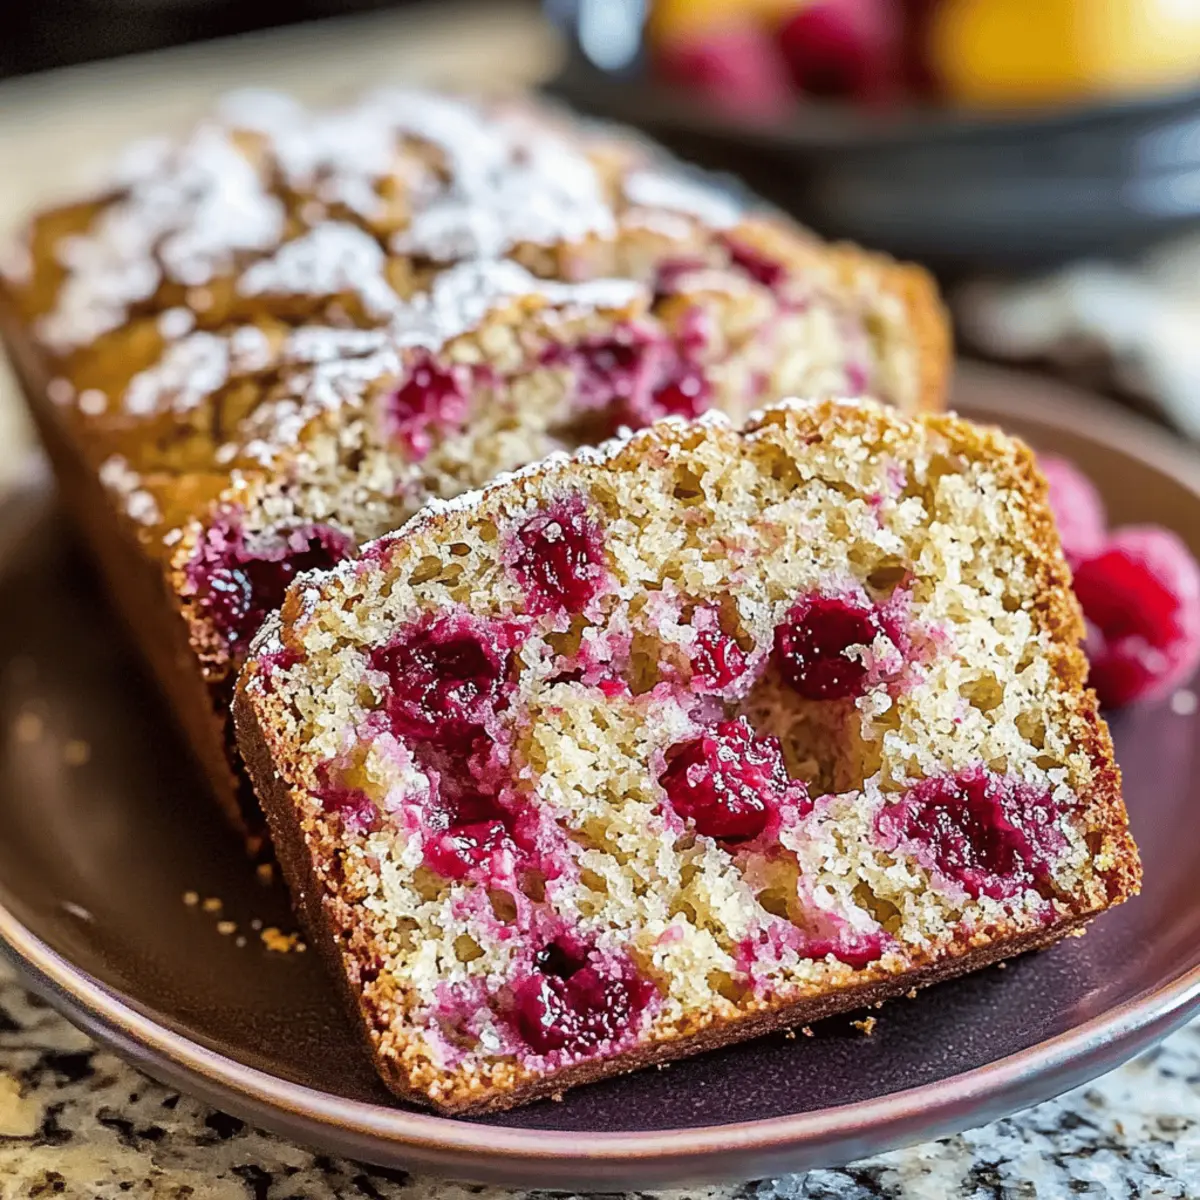
As I stood in my kitchen, the vibrant ruby-red raspberries caught my eye, instantly sparking a wave of inspiration. That’s when I decided it was the perfect moment to whip up a batch of Easy Raspberry Bread. With its soft, fluffy texture and a delightful play of sweet and tangy flavors, this treat is ideal for breakfast or as a cheerful afternoon snack. Not only is this recipe a breeze to make, it also fills your home with a scrumptious aroma that transforms any ordinary day into something special. Whether you’re a seasoned baker or just starting out, you’ll love the joy this Raspberry Bread brings to your table. Ready to fill your kitchen with warmth and laughter? Let’s dive into this berry-delicious adventure!
Why is Raspberry Bread a Must-Try?
Deliciously Sweet and Tangy: Each slice is bursting with vibrant raspberry flavor, striking the perfect balance between sweet and tart.
Super Easy to Make: This recipe requires minimal baking skills, so anyone can master it without hassle.
Irresistible Aroma: Baking this bread fills your home with a warm, inviting scent that’s guaranteed to bring smiles all around.
Versatile Treat: Perfect for breakfast, an afternoon snack, or even dessert, it suits any occasion.
Make-Ahead Friendly: Prep the batter the night before for a quick bake in the morning, making your busy days easier!
Don’t forget to explore serving it warm with a smear of butter or alongside your favorite tea, just like you might enjoy with Iced Raspberry Vanilla for a delightful combination!
Raspberry Bread Ingredients
For the Batter
- Raspberries – Provide sweetness and tartness; fresh or frozen works well, just reduce liquid slightly if using frozen.
- All-purpose flour – This forms the base structure of your Raspberry Bread; you can substitute with gluten-free flour for a gluten-free option.
- Sugar – Adds sweetness and moisture; using brown sugar will give your bread a deeper, richer flavor.
- Baking powder – This leavening agent ensures a light and fluffy texture; make sure it's fresh for the best results.
- Vanilla extract – Enhances the overall flavor profile; optional but highly recommended for added depth.
- Salt – Balances sweetness and enhances flavors overall.
- Butter – Contributes richness and moisture; opt for unsalted for better control over the final saltiness of your bread.
- Eggs – These provide structure and moisture; feel free to substitute with flax eggs for a vegan alternative.
Feel free to gather these ingredients and savor the anticipation of baking your delicious Raspberry Bread!
Step‑by‑Step Instructions for Raspberry Bread
Step 1: Preheat the Oven
Begin by preheating your oven to 350°F (175°C). This is a crucial step to ensure that your Raspberry Bread bakes evenly and rises properly. While the oven heats up, prepare your baking equipment by greasing a loaf pan to prevent sticking. A little butter or cooking spray works wonders for this task.
Step 2: Prepare the Dry Ingredients
In a large mixing bowl, combine the all-purpose flour, sugar, baking powder, and salt. Whisk these dry ingredients together until they are well-blended, ensuring no lumps remain. This blending is important for the perfect texture in your Raspberry Bread. Set this bowl aside for the moment while you work on the wet ingredients.
Step 3: Mix the Wet Ingredients
In a separate bowl, gently mix the melted butter, eggs, vanilla extract, and the vibrant raspberries. Aim to blend these ingredients until they're just combined, being careful not to overmix. The raspberries should remain whole to provide delightful bursts of flavor. This mixture will add moisture and character to your Raspberry Bread.
Step 4: Combine Mixtures with Care
Now it's time to combine the dry and wet ingredients. Gradually fold the dry mixture into the wet ingredients, using a spatula to incorporate them gently. You want the ingredients to be just combined without overmixing to ensure a tender texture in your final product. The resulting batter should be slightly lumpy, but that’s perfectly fine!
Step 5: Pour and Spread the Batter
Pour the prepared batter into your greased loaf pan, smoothing the top with a spatula for an even bake. Ensure that the batter reaches the corners of the pan for a perfectly shaped Raspberry Bread. With the batter now ready, it’s time to send it into the oven for baking.
Step 6: Bake the Bread
Place the loaf pan in the preheated oven and bake for 50 to 60 minutes. To check for doneness, insert a toothpick into the center of the bread; it should come out clean or with a few moist crumbs. During baking, enjoy the warm aroma wafting through your kitchen that signifies a delicious Raspberry Bread is on its way.
Step 7: Cool before Serving
Once baked to perfection, remove the Raspberry Bread from the oven and let it cool in the pan for about 10 minutes. After that, carefully transfer it to a wire rack to cool completely. This cooling process will help the flavors settle beautifully and make slicing much easier. Enjoy this sweet and tangy treat when it's ready!
Raspberry Bread Variations & Substitutions
Customize your Raspberry Bread with these delightful twists and substitutes that enhance flavor, texture, and dietary needs!
-
Gluten-Free: Replace all-purpose flour with a 1:1 gluten-free flour blend for a tasty gluten-free option. Your Raspberry Bread will still be soft and fluffy!
-
Nutty Crunch: Stir in ½ cup of chopped walnuts or almonds for added texture and flavor. The crunchy nuts beautifully complement the juicy raspberries.
-
Citrus Zest: Add 1 tablespoon of lemon or orange zest to the batter for a refreshing citrus kick. It elevates the flavor profile and adds a bright aroma.
-
Mixed Berries: Swap out raspberries for blueberries or strawberries for a delightful berry medley. Each variation offers its own unique taste, making it a fun twist!
-
Dairy-Free: Use coconut oil in place of butter and choose non-dairy milk for a completely dairy-free Raspberry Bread. This keeps it moist and delicious without compromising flavor.
-
Extra Sweetness: For those with a sweet tooth, drizzle honey or maple syrup over the top of warm slices, just like pairing with a nice cup of tea or coffee, similar to how one enjoys an afternoon treat with Cinnamon Crunch Bread.
-
Spicy Heat: Add a pinch of cayenne pepper to the batter for a surprising, subtle heat that contrasts beautifully with the sweetness of the raspberries.
-
Cream Cheese Swirl: For an indulgent touch, swirl softened cream cheese into the batter before baking. This adds a luscious richness and elevates your Raspberry Bread experience.
Feel free to experiment with these variations and make this recipe your very own! Each twist brings new flavors and textures that make every bite special.
Make Ahead Options
These Easy Raspberry Bread loaves are perfect for busy home cooks looking to save time! You can prep the batter up to 24 hours in advance by mixing the dry and wet ingredients separately and refrigerating them. Just be sure to cover both bowls tightly to maintain freshness and prevent the raspberries from browning. When you're ready to bake, simply combine the mixtures and pour into the greased loaf pan, then bake as directed. This way, you’ll enjoy freshly baked Raspberry Bread with minimal effort, making your mornings much sweeter without the morning rush!
Expert Tips for Raspberry Bread
-
Fresh Vs. Frozen: Use fresh raspberries for the best flavor, but if using frozen, remember to reduce the liquids slightly to prevent a soggy batter.
-
Mix Carefully: Overmixing can make your Raspberry Bread dense. Mix just until combined for a fluffy texture.
-
Check for Freshness: Ensure your baking powder is fresh; expired leavening can lead to less fluffy bread. Test it by adding a bit to hot water; it should fizz.
-
Cooling Time: Let the bread cool thoroughly before slicing. This helps maintain its lovely, moist texture and holds its shape.
-
Store Properly: For long-lasting flavor, wrap your Raspberry Bread tightly in plastic wrap or store it in an airtight container. This keeps it fresh for days!
What to Serve with Easy Raspberry Bread
Combine the delightful taste of Raspberry Bread with these scrumptious pairings for a complete and satisfying meal!
- Creamy Butter: A generous smear of butter on a warm slice enhances the bread's sweetness and adds a rich, velvety texture.
- Tangy Cream Cheese: Spread a layer of cream cheese for a zesty contrast that perfectly complements the raspberry's fruity tartness.
- Fresh Fruit Salad: Light and refreshing, a medley of berries and citrus will brighten your plate and add a burst of freshness.
- Greek Yogurt Parfait: Layerings of Greek yogurt and granola alongside your Raspberry Bread create a wholesome, satisfying experience.
- Herbal Tea: Pair it with a steaming cup of herbal tea for a soothing treat that elevates the iconic bread experience.
- Vanilla Ice Cream: Serve a slice warm with a scoop of vanilla ice cream on the side for a delightful dessert that shines!
- Prosecco Sparkler: Sip on fizzy Prosecco to bring out the fruitiness of the Raspberry Bread, creating a refreshing beverage pairing.
- Chocolate Drizzle: Add drizzles of melted chocolate on top to elevate sweetness and provide a decadent finishing touch.
Each of these pairings not only complements your Raspberry Bread but also creates a joyful, flavorful journey at your table!
How to Store and Freeze Raspberry Bread
Room Temperature: Store your Raspberry Bread wrapped tightly in plastic wrap or in an airtight container at room temperature for up to 3 days for optimal freshness.
Fridge: If you want it to last longer, you can refrigerate the bread in an airtight container for up to 1 week, though it may lose some moisture.
Freezer: For long-term storage, slice the Raspberry Bread and freeze the slices individually wrapped in plastic wrap for up to 3 months. Thaw at room temperature as needed.
Reheating: To enjoy your Raspberry Bread warm, simply pop it in the microwave for 10-15 seconds. It's perfect to bring back that fresh-baked taste!
Raspberry Bread Recipe FAQs
What kind of raspberries should I use?
You can use either fresh or frozen raspberries in this recipe. I recommend fresh raspberries for the best flavor and texture, but if using frozen, just remember to reduce the liquid in your batter slightly to prevent it from getting too wet. It’s that simple!
How should I store leftover Raspberry Bread?
To maintain the freshness of your Raspberry Bread, wrap it tightly in plastic wrap or keep it in an airtight container at room temperature for up to 3 days. For longer storage, you can refrigerate it for up to a week, but be cautious that it may lose a bit of moisture.
Can I freeze Raspberry Bread?
Absolutely! To freeze your Raspberry Bread, slice it into individual portions and wrap each slice tightly in plastic wrap. Place the wrapped slices in a freezer bag or container, and they will stay fresh for up to 3 months. For serving, simply thaw at room temperature or pop a slice in the microwave for 10-15 seconds to enjoy that just-baked taste!
Why is my Raspberry Bread dense?
If your Raspberry Bread turns out dense, it might be due to overmixing the batter. Be gentle when combining the wet and dry ingredients, and mix just until you see no dry flour. Also, ensure your baking powder is fresh; old leavening agents can greatly affect the texture!
Are there any dietary considerations I should be aware of?
Good question! The recipe contains eggs and dairy from butter, so if you need it to be dairy-free or vegan, you can substitute eggs with flax eggs and use a dairy-free butter alternative. Additionally, if anyone has berry allergies, you can easily swap raspberries for blueberries or strawberries!
Delightful Raspberry Bread for a Sweet Morning Boost
Ingredients
Equipment
Method
- Preheat your oven to 350°F (175°C) and grease a loaf pan.
- In a large bowl, combine the flour, sugar, baking powder, and salt. Whisk until well-blended.
- In another bowl, mix the melted butter, eggs, vanilla extract, and raspberries until just combined.
- Gradually fold the dry mixture into the wet ingredients, being careful not to overmix.
- Pour the batter into the greased loaf pan, smoothing the top.
- Bake for 50 to 60 minutes, checking doneness with a toothpick.
- Let the bread cool in the pan for 10 minutes, then transfer to a wire rack to cool completely.


Leave a Reply