
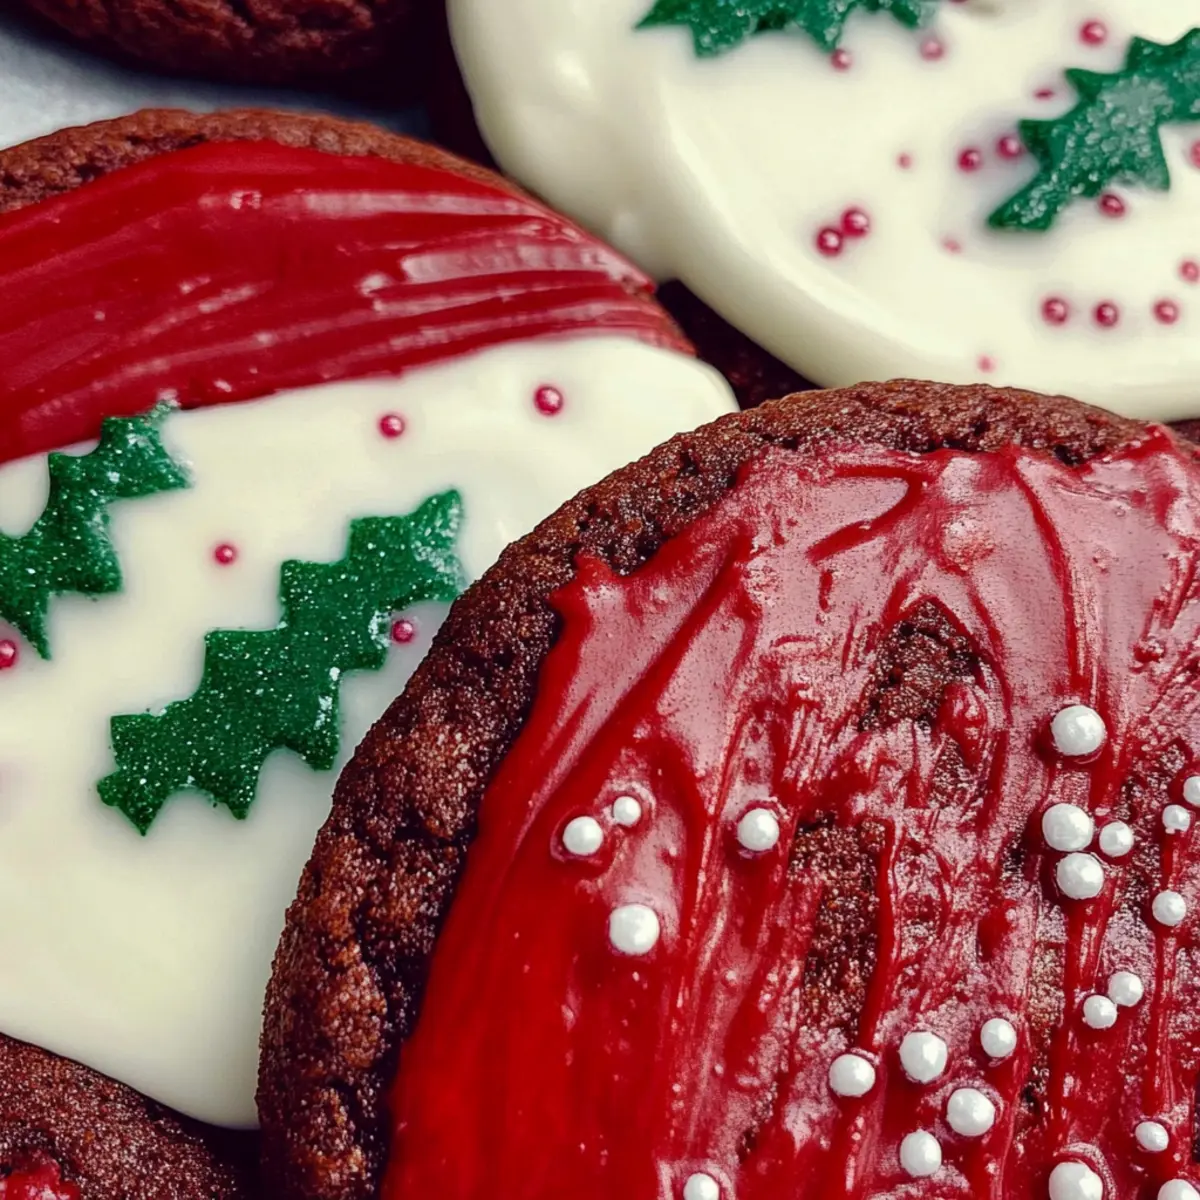
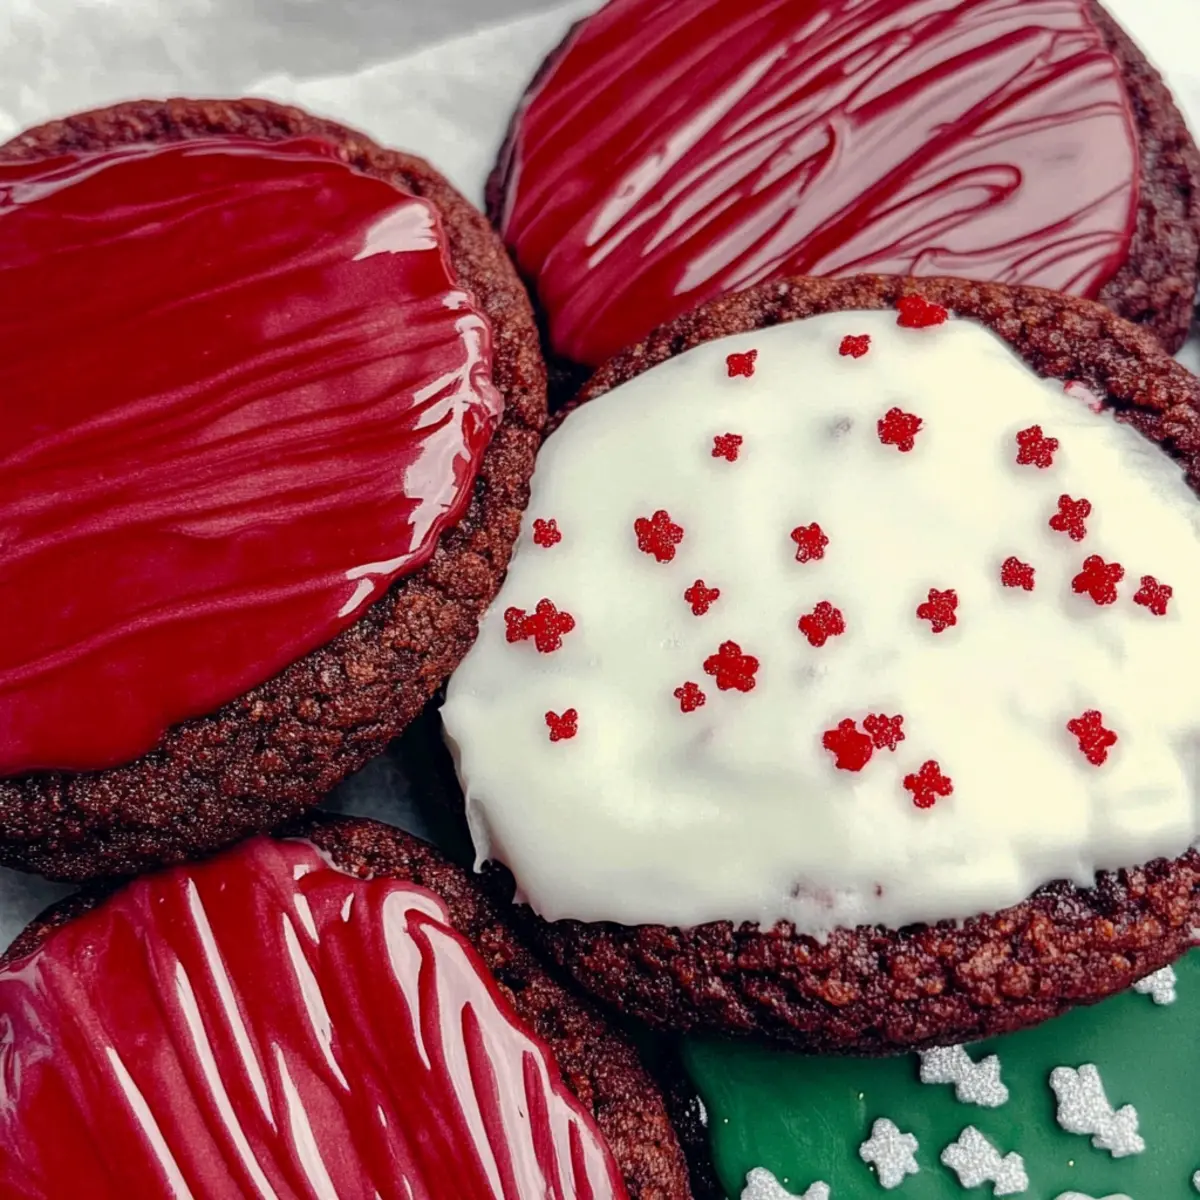
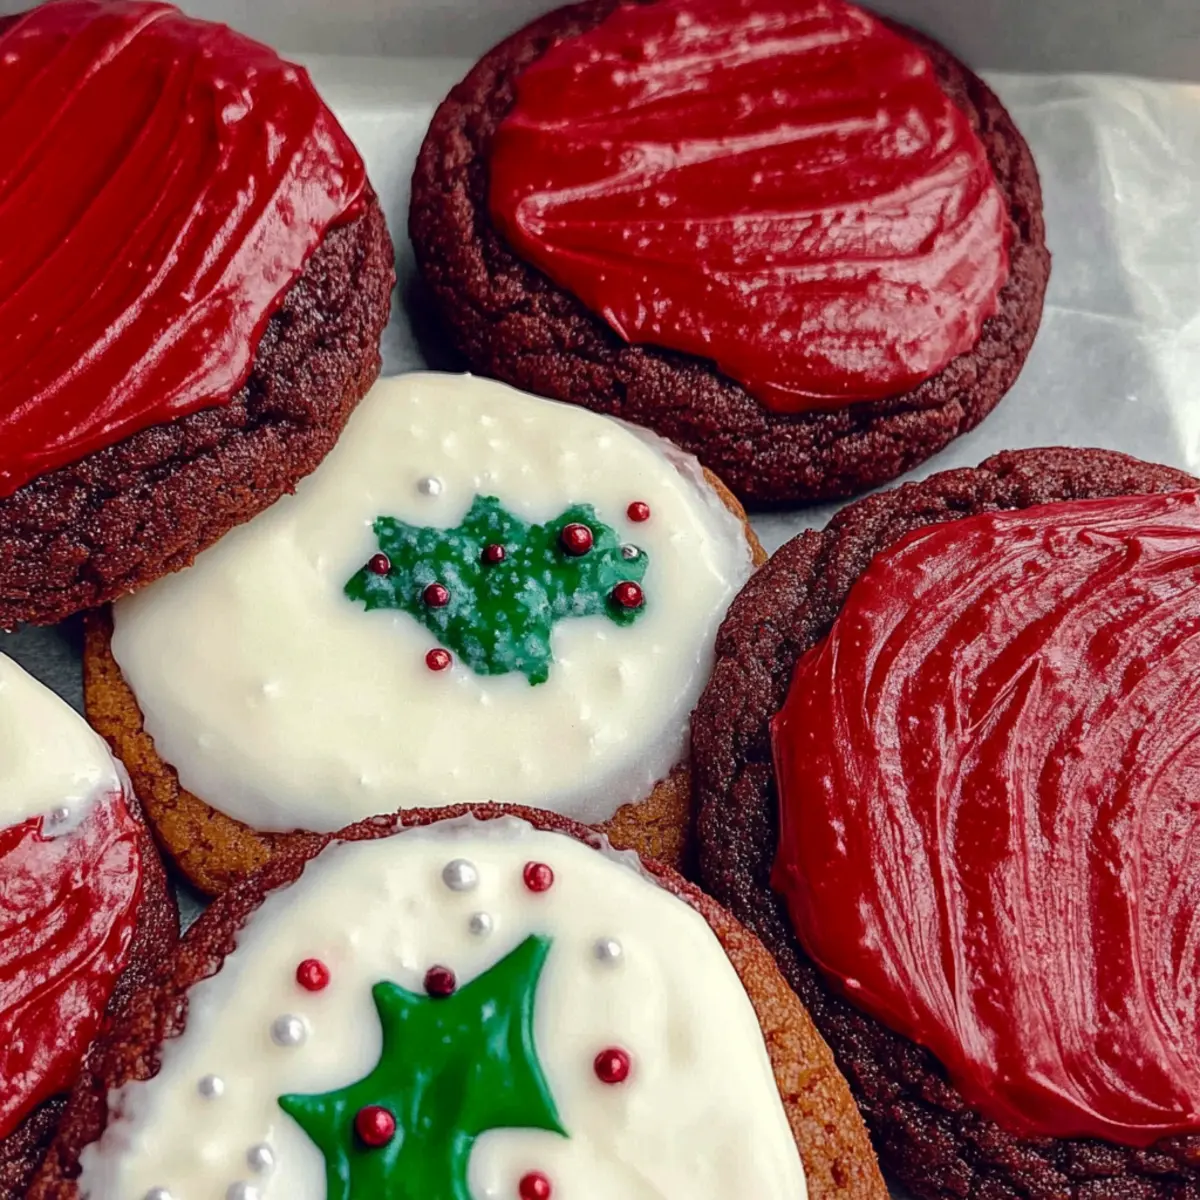
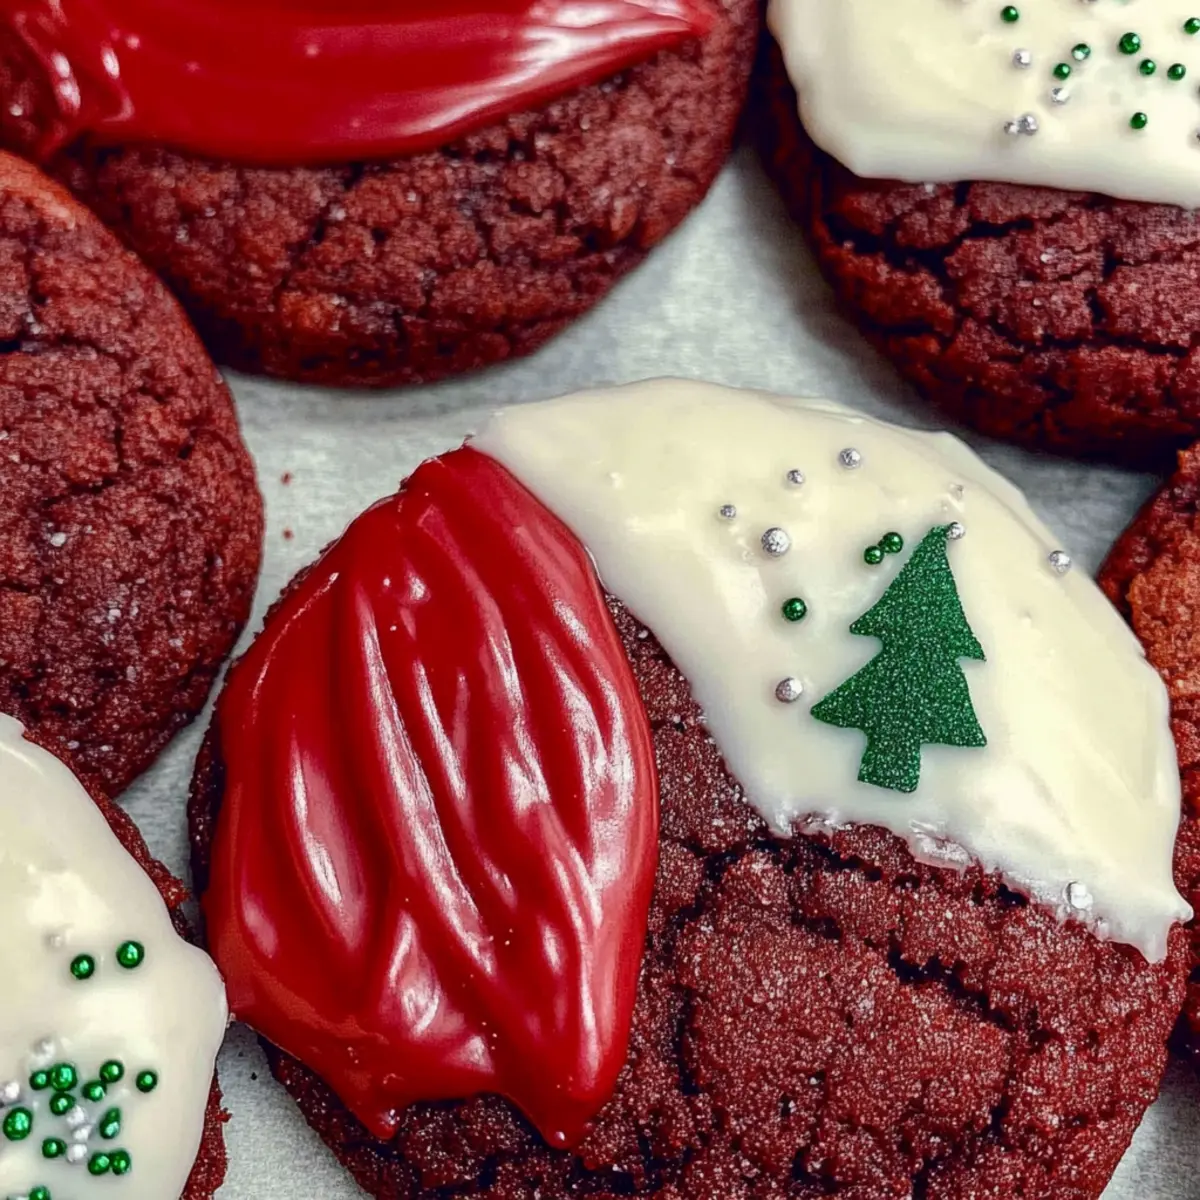
A delightful kitchen experiment unfolded when I first tried making Red Velvet Pan-Banging Cookies. The magical pan-banging technique elevates these festive cookies, giving them those gorgeous, rippled edges while maintaining a soft, chewy center that truly captivates. With the signature red hue and cocoa notes reminiscent of a classic red velvet cake, these cookies are not just a treat—they're a holiday showstopper! The sweet cream cheese icing drizzled on top provides an irresistible finish that takes them over the edge. Ready in no time, they are the perfect answer to your holiday baking needs, blending ease with that homemade charm we all crave. Are you ready to experience the joy of baking these festive wonders?
Why Are These Cookies So Special?
Festive Charm: These Red Velvet Pan-Banging Cookies bring the holiday spirit straight to your kitchen with their stunning burgundy hue.
Unique Twist: Inspired by classic flavors, this recipe combines beloved traditions with innovative baking techniques!
Irresistible Icing: The silky cream cheese drizzle adds a delightful tang, perfectly balancing the rich chocolate undertones.
Easy to Make: You’ll love how simple it is to whip up these cookies, making them ideal for both seasoned bakers and novices alike.
Crowd-Pleasing Delight: Whether you're hosting a festive gathering or just craving something sweet, these cookies are guaranteed to impress! Pair them with a glass of milk or coffee for the perfect experience.
Red Velvet Pan-Banging Cookies Ingredients
For the Cookie Dough
- All-Purpose Flour – Provides structure and texture; you can substitute with a gluten-free flour blend for a similar outcome.
- Baking Soda – Leavens the cookies; it's essential for creating that desirable rise.
- Fine Salt – Enhances flavor; feel free to use kosher salt if you prefer.
- Cream of Tartar – Stabilizes the mixture and contributes to that chewy texture we love.
- Unsalted Butter – Adds richness and moisture; ensure it's softened to room temperature for better creaming.
- Granulated Sugar – Sweetens the cookies and helps create a tender bite.
- Large Egg – Binds the ingredients and adds necessary moisture; make sure it’s also at room temperature.
- Dutch-Process Cocoa Powder – Infuses a subtle chocolate flavor while deepening the red color of the cookies.
- Red Food Coloring – Essential for that classic red velvet look; using gel-based coloring will yield the best results.
- Vanilla Extract – Adds a delightful depth of flavor to the cookies.
For the Cream Cheese Icing
- Cream Cheese – The base for the icing, providing that distinctive tang we adore in red velvet desserts.
- Unsalted Butter for Icing – Enhances the creaminess of the icing and complements the cream cheese well.
- Water – Adjusts the icing consistency as needed for a smooth finish.
- Confectioners' Sugar – Sweetens and thickens the icing; adjust as needed to achieve your preferred texture.
For Decoration
- Holly Sprinkles – Optional, but these adorable decorations enhance the festive presentation of your cookies!
As you gather these ingredients, get excited to create your own batch of Red Velvet Pan-Banging Cookies and spread joy this holiday season!
Step‑by‑Step Instructions for Red Velvet Pan-Banging Cookies
Step 1: Preheat the Oven
Begin by preheating your oven to 350°F (180°C). While the oven heats up, line your baking sheet with foil or parchment paper, ensuring the surface is ready for your delicious Red Velvet Pan-Banging Cookies. This setup is essential for achieving those beautiful, rippled edges as the cookies bake.
Step 2: Whisk the Dry Ingredients
In a medium bowl, whisk together the all-purpose flour, baking soda, fine salt, and cream of tartar. This combination creates the perfect dry mix, ensuring your cookies rise beautifully and have that chewy texture you crave. Set this bowl aside as you prepare to mix your wet ingredients.
Step 3: Cream the Butter and Sugar
In the bowl of a stand mixer, cream the softened unsalted butter on medium speed for about 1 minute. Gradually add granulated sugar and continue mixing for 2–3 minutes until the mixture is light and fluffy. This step is crucial as it builds the foundation of richness in your Red Velvet Pan-Banging Cookies.
Step 4: Add Egg, Cocoa, and Color
Next, incorporate the large egg, Dutch-process cocoa powder, red food coloring, and vanilla extract. Mix these ingredients on low speed until fully combined. The vibrant red hue will start to develop, reflecting the signature look of your red velvet creation, while the cocoa adds a delightful depth of flavor.
Step 5: Combine the Dry and Wet Ingredients
Slowly add the dry flour mixture to the wet ingredients, mixing just until incorporated. Be careful not to overmix, as you want your dough to be smooth but still thick and rich. The cookie dough should be vibrant and ready to form into beautiful balls for baking.
Step 6: Form the Cookie Balls
Using a cookie scoop or your hands, form the dough into 3 oz (85 g) balls and arrange them on the prepared sheet pans, leaving adequate space between each ball. This spacing is vital as the cookies will spread while baking, creating those irresistible rippled edges.
Step 7: Bake the Cookies
Bake one pan of cookies at a time in the preheated oven. After the first 5 minutes, carefully lift and drop the pan onto the oven rack to create the desired texture. Continue baking for 13-16 minutes until the edges are set but the centers remain slightly underbaked, achieving that chewy, soft inside.
Step 8: Cool the Cookies
Once baked, remove the cookies from the oven and let them cool on the baking sheet for about 10 minutes. This brief cooling period allows them to firm up slightly without losing their gooey centers. Afterward, transfer the cookies to a wire rack to cool completely while you prepare the icing.
Step 9: Make the Cream Cheese Icing
To make the icing, melt the unsalted butter and whisk it together with cream cheese, water, vanilla extract, and a pinch of salt in a medium bowl. Gradually mix in the confectioners' sugar until you reach your desired icing consistency. This creamy, tangy topping will perfectly complement your Red Velvet Pan-Banging Cookies.
Step 10: Finish and Decorate
Once the cookies have cooled, dip half of each cookie into the cream cheese icing. If desired, sprinkle holly sprinkles over the icing for a festive touch. Allow the icing to set before serving or storing, ensuring your delicious Red Velvet Pan-Banging Cookies are ready to delight!
Red Velvet Pan-Banging Cookies Variations
Feel free to personalize your Red Velvet Pan-Banging Cookies with these delightful twists and substitutions!
- Gluten-Free: Use a gluten-free flour blend for a version everyone can enjoy without sacrificing taste or texture.
- Coconut Flour: Substitute some all-purpose flour with coconut flour for a unique tropical flavor—just reduce the quantity, as coconut flour absorbs more moisture.
- Dairy-Free: Replace butter and cream cheese with vegan alternatives like coconut oil or cashew cream, making it a vegan delight!
- Nutty Addition: Stir in some finely chopped walnuts or pecans for a crunchy texture that beautifully contrasts the chewy cookie.
- Spicy Twist: Add a teaspoon of cinnamon or a pinch of nutmeg to the batter, infusing warmth into each delicious bite!
- Chocolate Variants: For a rich double chocolate experience, mix in some chocolate chips or chunks into the dough before baking.
- Mini Cookies: Create bite-sized versions by forming smaller dough balls (about 1 oz), perfect for sharing at holiday parties or gifting.
- Fun Decor: Instead of classic holly sprinkles, try using colorful holiday-themed sprinkles or white chocolate drizzle to elevate your festive presentation.
Each of these variations can help tailor this treat to your liking. If you're feeling adventurous, consider pairing your cookies with a steaming mug of Roasted Red Pepper soup for a warm meal or indulge in White Chocolate Cookies for dessert! Let your creativity shine while exploring these new flavors!
Expert Tips for Red Velvet Pan-Banging Cookies
- Use Gel Coloring: Opt for gel-based red food coloring for the most vibrant hue; liquid colors may dilute your cookie batter.
- Underbake Slightly: Remove cookies while still slightly gooey in the center; they will continue cooking as they cool on the baking sheet.
- Chill Dough Balls: If you have time, refrigerate the formed dough balls for 30 minutes before baking for even chewier texture.
- Proper Storage: Store cookies in an airtight container to prevent sogginess; only ice cookies you plan to eat on the same day.
- Experiment with Flavors: Feel free to add white chocolate chips or a splash of almond extract for a unique twist on your Red Velvet Pan-Banging Cookies!
Make Ahead Options
These Red Velvet Pan-Banging Cookies are perfect for meal prep, making it easy to enjoy festive treats without the last-minute rush! You can prepare the cookie dough balls and freeze them unbaked for up to 2 weeks—simply scoop the dough, place it on a baking sheet, and freeze until firm before transferring to a resealable bag. When you're ready to bake, no need to thaw; just add 1-2 minutes to the baking time! For the icing, you can make it up to 3 days in advance; store it in an airtight container in the refrigerator and give it a good whisk before dipping your cooled cookies. This way, you’ll have delicious cookies that feel just as fresh with minimal effort!
What to Serve with Red Velvet Pan-Banging Cookies
Indulge in a delightful culinary experience that transforms your festive gatherings into magical occasions with sweet, comforting pairings.
-
Creamy Mashed Potatoes: These fluffy potatoes bring a comforting contrast that complements the cookie’s sweetness, creating a cozy meal feeling.
-
Rich Hot Chocolate: A velvety cup of hot chocolate feels like a warm hug, delightfully pairing with festive flavors for a nostalgic treat.
-
Fruity Cheesecake Bars: The tangy notes elevate the rich icing, offering a fresh burst of flavor that dances beautifully with the cookies’ cocoa.
-
Sparkling Cider: This bubbly drink adds a festive touch, enhancing the celebration while refreshing your palate between bites of the sweet cookies.
-
Mint Chocolate Chip Ice Cream: The minty coolness cuts through the richness of the cookies, creating a refreshing dessert experience perfect for holiday gatherings.
-
Spiced Apple Cider: Warm and fragrant, this cider brings warmth and a hint of spice that pairs splendidly with the decadent taste of red velvet.
-
Caramel Drizzle: A warm drizzle over each cookie can amplify their charm, adding a touch of indulgent sweetness and inviting guests to savor each bite.
-
Chai Tea: The aromatic spices in chai offer a wonderful warming note, creating a delightful contrast to the sweetness of the cream cheese icing.
-
Pecan Pie Bars: For an extra festive touch, these add a creamy, nutty flavor that beautifully harmonizes with the cookie’s chocolatey goodness.
These pairings create an unforgettable feast, making your Red Velvet Pan-Banging Cookies the star of the show.
How to Store and Freeze Red Velvet Pan-Banging Cookies
Room Temperature: Keep uniced cookies in an airtight container at room temperature for up to 3 days to maintain their chewy texture and freshness.
Fridge: If your cookies are topped with cream cheese icing, store them in the refrigerator for up to 5 days to prevent spoilage while keeping the icing fresh.
Freezer: For longer storage, freeze unbaked cookie dough balls in a single layer, then transfer to a freezer bag for up to 2 weeks. Thaw before baking.
Reheating: To enjoy a warm cookie experience, microwave individual cookies for about 10-15 seconds or bake directly from frozen at 350°F (180°C) for a few extra minutes.
Red Velvet Pan-Banging Cookies Recipe FAQs
What type of flour should I use for the best results?
I recommend using all-purpose flour for a classic texture, but if you're looking for a gluten-free option, a gluten-free flour blend works well too. Just ensure it's designed for baking to replicate the chewy texture that makes these cookies so delightful.
How should I store my Red Velvet Pan-Banging Cookies?
Store uniced cookies in an airtight container at room temperature for up to 3 days. If you've added cream cheese icing, refrigerate them instead for up to 5 days to keep the icing fresh and prevent spoilage.
Can I freeze the cookie dough?
Absolutely! To freeze, form the cookie dough into 3 oz (85 g) balls and place them in a single layer on a baking sheet. Once they're frozen solid, transfer them to a freezer bag. This way, you can bake them fresh whenever you desire within 2 weeks! Just make sure to thaw them before baking.
Why are my cookies spreading too much?
This can happen if your dough is too warm or if there's too much butter. Always chill your dough for about 30 minutes before baking, which helps prevent excessive spreading. Additionally, make sure you're measuring your flour accurately—spoon it into your measuring cup and level it off without packing it down.
Can I substitute for cream cheese in the icing?
If you're looking for a dairy-free option or just don't have cream cheese on hand, you can use a dairy-free cream cheese alternative or even whipped coconut cream. Adjust the sweetness with confectioners' sugar to get the desired consistency and flavor!
Are these cookies safe for my pets?
No, these cookies are not suitable for pets, especially due to the ingredients like chocolate and cream cheese. Always keep baked goods out of their reach to ensure their safety!
Red Velvet Pan-Banging Cookies: A Festive Twist to Love
Ingredients
Equipment
Method
- Preheat your oven to 350°F (180°C) and prepare your baking sheet.
- In a bowl, whisk together the all-purpose flour, baking soda, fine salt, and cream of tartar.
- Cream the softened butter and sugar in a stand mixer until light and fluffy.
- Add egg, cocoa, red food coloring, and vanilla extract to the mixture and combine.
- Slowly mix in the dry ingredients until just incorporated.
- Form dough into 3 oz balls and place onto the prepared baking sheet.
- Bake, dropping the pan after 5 minutes for texture, for 13-16 minutes.
- Cool cookies on the baking sheet for 10 minutes then transfer to a wire rack.
- Make the icing by mixing melted butter, cream cheese, water, and sugar to desired consistency.
- Dip cookies in icing and sprinkle with holly sprinkles if desired.


Leave a Reply