
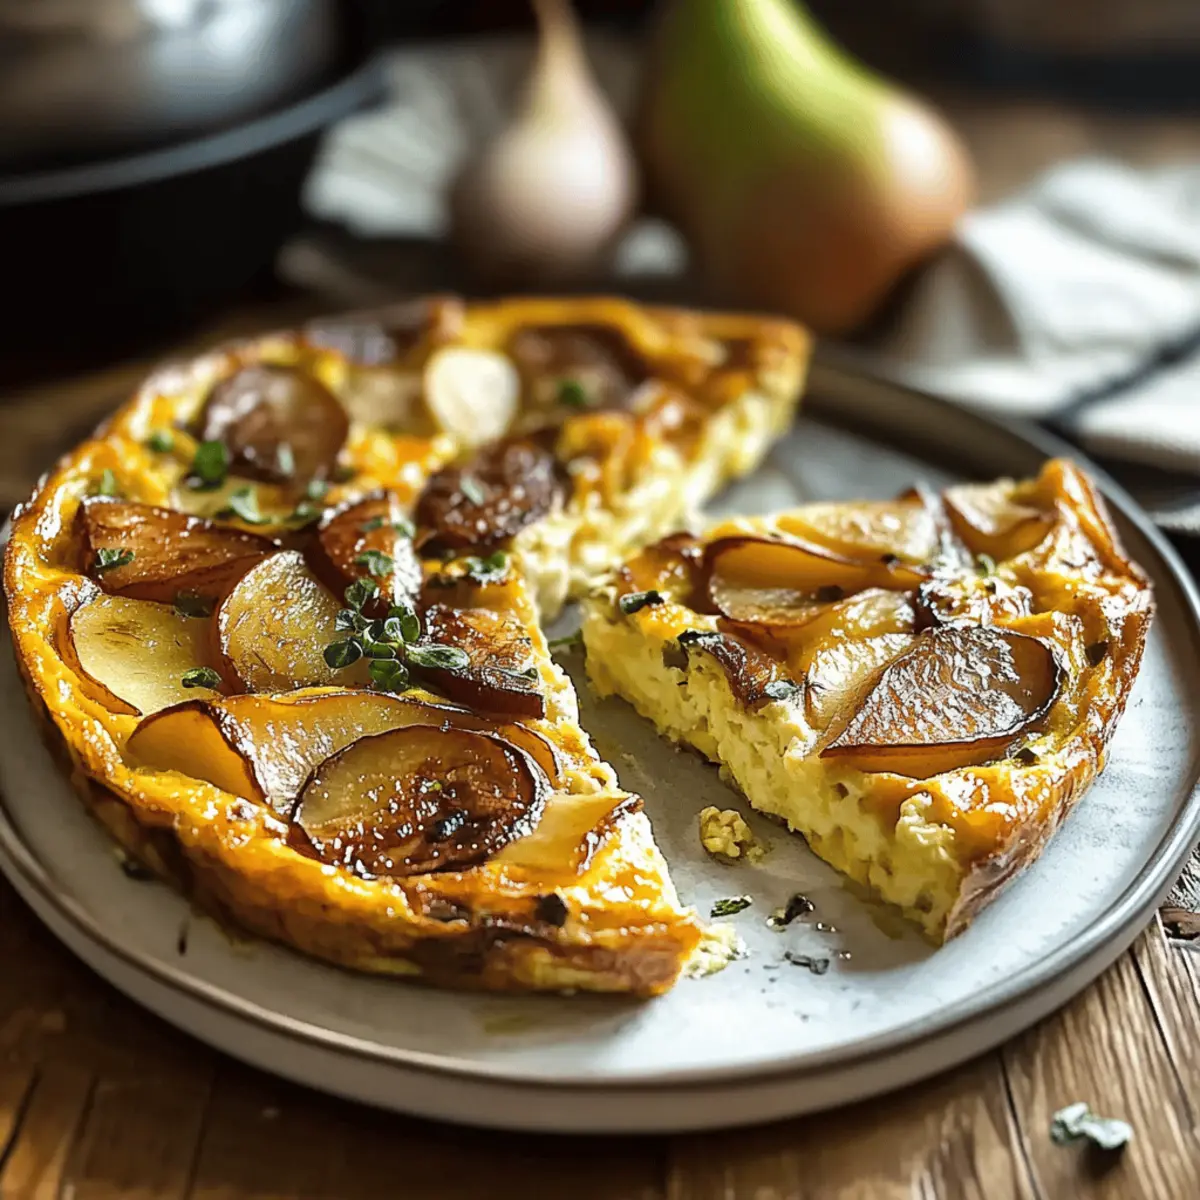
The kitchen was filled with the mouthwatering scent of roasted pears mingling with savory garlic and fresh herbs, a combination that made my heart skip a beat. Enter the Irresistible Roasted Pear Frittata, a delightful breakfast option that transforms simple ingredients into a stunning dish. Not only is this frittata incredibly easy to whip up, but it’s also a protein-packed way to start your day while impressing friends at brunch. Best of all, you can customize this recipe to suit your taste, whether you prefer sweet apples or sophisticated figs instead of pears. Curious to find out how to create this deliciously satisfying meal that fits perfectly into your busy lifestyle? Let’s dive into the recipe together!

Why is This Frittata Irresistible?
Simplicity is key: With just a few basic steps, you'll have a stunning dish ready in no time. Versatile ingredients make it adaptable to your preferences—swap pears for apples or figs to suit the season! Flavorful blend of roasted pears with garlic and fresh herbs creates a delightful taste sensation you won't forget. Plus, this frittata is healthy and packed with protein, perfect for breakfast or brunch gatherings. For an extra touch, serve it alongside a Garlic Parmesan Roasted side or a lovely Roasted Sweet Potatoes. Dinner in a pinch: Prep ahead and enjoy leftovers for a quick meal!
Roasted Pear Frittata Ingredients
• Perfect for your cozy brunch plans!
For the Frittata
- Eggs – Provides the main structure and protein; for a lighter option, substitute with egg whites.
- Pears – Adds sweetness and moisture; feel free to replace with seasonal fruits like apples or figs.
- Garlic – Infuses savory flavor; omit if you prefer a milder taste.
- Fresh herbs (e.g., basil, parsley) – Enhances flavor and adds freshness; dried herbs can be used if fresh is unavailable.
- Cheese (e.g., feta, goat cheese) – Adds creaminess and tang; sharp cheddar or Brie can work as alternatives.
- Olive oil – Used for sautéing and enhancing flavor; you can substitute with avocado oil or butter.
- Salt and pepper – For seasoning; adjust according to your personal taste.
Optional Toppings
- Fresh herbs – Sprinkle on top for added flavor and presentation.
- Balsamic reduction – A drizzle adds an elegant touch and enhances the dish's sweetness.
Step‑by‑Step Instructions for Irresistible Roasted Pear Frittata
Step 1: Preheat Oven
Begin by preheating your oven to 375°F (190°C). This temperature is perfect for roasting and will help create a beautifully fluffy frittata. While the oven warms, you can prepare your pears and other ingredients, ensuring everything is ready for the next steps.
Step 2: Roast Pears
Slice your pears into wedges and toss them in a bowl with olive oil, salt, and pepper. Spread the coated pears evenly on a baking sheet and roast them for about 15 minutes. They should become tender and caramelized, filling your kitchen with a delightful aroma as they begin to soften and brown slightly.
Step 3: Sauté Garlic
In an oven-safe skillet, heat a tablespoon of olive oil over medium heat. Add minced garlic and sauté for 1-2 minutes, stirring frequently until fragrant. Be careful not to let the garlic burn, as this can create a bitter taste. Once aromatic, remove the skillet from heat and set aside to cool slightly.
Step 4: Combine Eggs and Ingredients
In a separate bowl, whisk together 6 eggs until fully blended. Then, gently fold in the roasted pears, sautéed garlic, chopped fresh herbs, and cheese if you're using any. This melding of flavors will create a harmonious filling for your frittata, ready to pour into the skillet.
Step 5: Cook on Stovetop
Return the egg mixture to the skillet over low heat, ensuring it's evenly distributed. Cook for about 5 minutes until the edges start to set. This step is crucial for achieving that delightful texture in your roasted pear frittata, as it forms a solid base before baking.
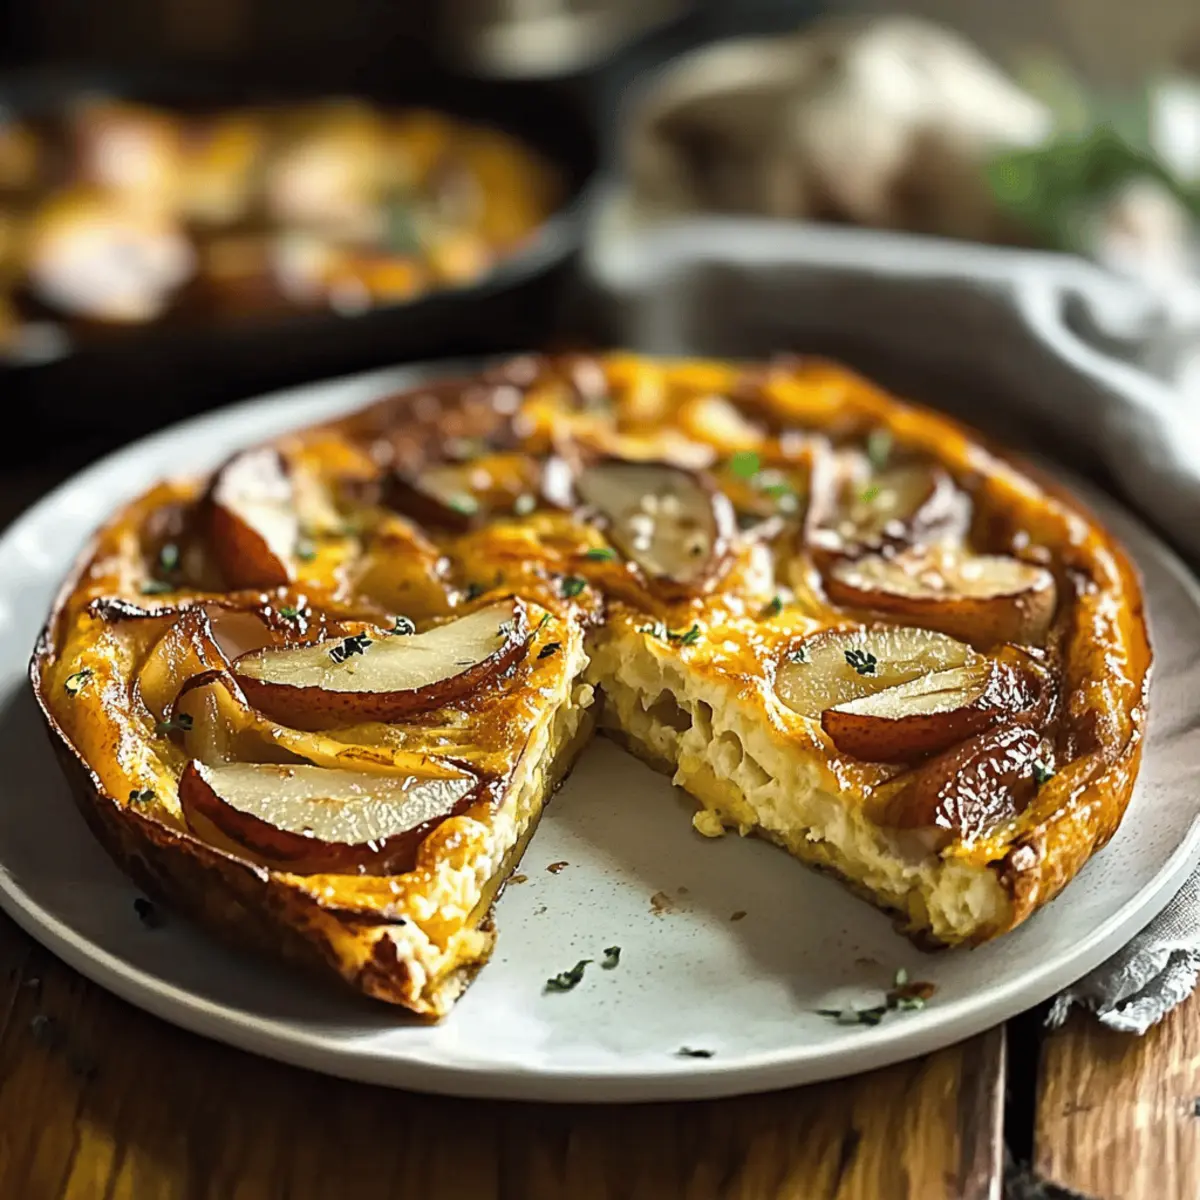
Step 6: Bake
Once the edges of the frittata are set, carefully transfer the skillet to your preheated oven. Bake for 20-25 minutes, or until the frittata is puffed up and golden brown. You’ll know it's done when a toothpick inserted in the center comes out clean, giving your dish a beautiful finish.
Step 7: Cool and Serve
After baking, remove the frittata from the oven and allow it to cool for a few minutes. This will make slicing easier and prevent toppings from sliding off. Cut into wedges and consider garnishing with fresh herbs or a drizzle of balsamic reduction for an elegant presentation.
How to Store and Freeze Roasted Pear Frittata
- Fridge: Store leftover roasted pear frittata in an airtight container for up to 3 days. This keeps it fresh and prevents any unwanted odors from mingling.
- Freezer: For longer storage, freeze individual slices of frittata wrapped tightly in plastic wrap and then in aluminum foil, where they can last up to 2 months.
- Reheating: To enjoy, simply thaw overnight in the fridge, then reheat slices gently in the microwave or in a 350°F (175°C) oven for about 10-15 minutes until heated through.
- Make Ahead: This dish can be prepared in advance, making it an ideal option for meal prep, brunch gatherings, or post-holiday feasts, ensuring you have a delicious roasted pear frittata ready to go!
What to Serve with Irresistible Roasted Pear Frittata
Enhance your brunch experience with delightful accompaniments that perfectly complement the flavors of this savory frittata.
- Fresh Garden Salad: A light, crisp salad with mixed greens and a tangy vinaigrette adds refreshing contrast to the rich frittata.
- Crispy Toasted Bread: Serve with slices of artisan bread, brushed with garlic butter. The crispy texture balances the fluffiness of the frittata beautifully.
- Creamy Greek Yogurt: A dollop of tangy Greek yogurt on the side provides a cooling element that pairs wonderfully with the sweet roasted pears.
- Savory Roasted Potatoes: Golden, seasoned roasted potatoes add heartiness and a satisfying crunch, making your meal more filling and comforting.
- Sparkling Fruit Juice: A glass of bubbly fruit juice brings a cheerful, festive touch to your brunch table, enhancing the sweet notes of the pears.
- Herbed Quinoa: Nutty quinoa tossed with fresh herbs elevates your meal, adding a lovely texture and nutty flavor that harmonizes perfectly.
- Zesty Fruit Compote: A side of homemade fruit compote brings a sweet and tangy dimension, enriching each bite of the roasted pear frittata.
Add these options to your brunch spread, and watch your guests savor every moment!
Expert Tips for Roasted Pear Frittata
- Use Quality Eggs: Choose fresh eggs for the best flavor and texture. Free-range or organic options often provide richer-tasting frittatas.
- Don't Overcrowd Skillet: Ensure even cooking by not overwhelming your skillet with too many ingredients. This helps the frittata set without being soggy.
- Perfect Baking Time: Check for doneness at the 20-minute mark. The frittata should be puffed and slightly golden; overbaking can lead to dryness.
- Cool Before Slicing: Allow the frittata to cool slightly before cutting. This helps it hold its shape and enhances the presentation when serving.
- Explore Variations: Feel free to experiment with ingredients, swapping pears for apples or adding smoked salmon for a gourmet touch in your roasted pear frittata!
Make Ahead Options
These Roasted Pear Frittata are perfect for meal prep enthusiasts! You can roast the pears and sauté the garlic up to 24 hours in advance, then simply refrigerate them in an airtight container. When you're ready to prepare the frittata, whisk and combine the eggs with the prepped ingredients, then cook on the stovetop and bake as usual. For best results, store the frittata in the fridge for up to 3 days and reheat gently in the oven or microwave before serving. This way, you’ll enjoy a delightful breakfast treat that’s just as delicious as when it was freshly made, saving you valuable time during busy mornings!
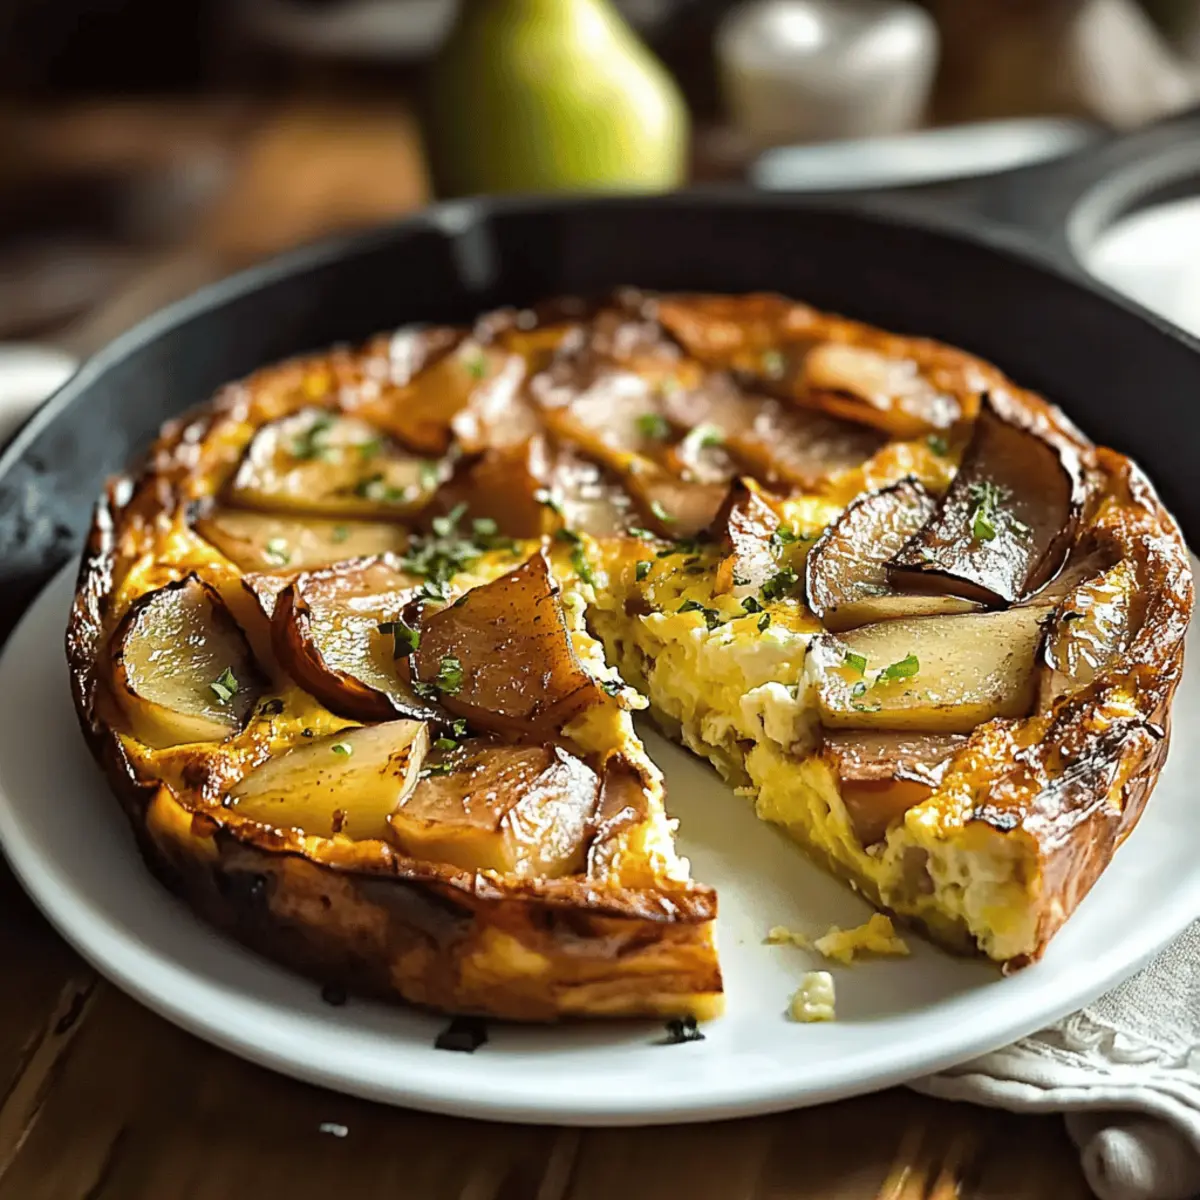
Roasted Pear Frittata Variations
Customize your frittata with delightful swaps and twists that bring out different flavors and textures!
- Fruity Twist: Replace pears with seasonal fruits like figs or apples for a fresh flavor experience. Each fruit brings its own sweetness and aroma, making it uniquely delicious!
- Heartier Option: Add cooked bacon or sausage for a meatier frittata that combines savory flavors. The richness complements the sweet pears perfectly, enriching your brunch spread.
- Cheesy Delight: Experiment with strong sharp cheddar or creamy Brie instead of feta or goat cheese for a bolder flavor profile. Each cheese adds distinctive textures, creating a delightful creamy experience.
- Vegetable Boost: Toss in sautéed bell peppers or zucchini for an extra veggie punch. Not only will this enhance the dish's nutrition, but it also adds vibrant colors that are great for the eyes!
- Mini Frittatas: For easy-serving, create mini frittatas in muffin tins. Perfect for brunches or gatherings, they are bite-sized pieces of deliciousness everyone will love.
- Herb Mix: Try using different fresh herbs, such as thyme or chives, for a unique twist. Each herb adds a fresh burst of flavor that transforms the dish.
- Spicy Kick: Add a pinch of red pepper flakes or diced jalapeños if you crave some heat. This touch will add excitement to every bite, balancing the sweetness of the pears.
For more delicious ideas, consider pairing this dish with a refreshing side salad or try making a delightful Roasted Red Pepper soup for a complete meal. Customize to your heart's content, and enjoy the delicious journey of flavors with each variation!
Roasted Pear Frittata Recipe FAQs
How do I choose the right pears for my frittata?
Absolutely! Look for pears that are slightly firm to the touch but yield to gentle pressure, signaling ripeness. Avoid pears with dark spots or bruises, as these can affect both the taste and texture. Varieties like Bartlett or Anjou are great choices, bringing natural sweetness to your dish.
How should I store leftover Roasted Pear Frittata?
Very simply! Allow the frittata to cool completely, then store it in an airtight container in the fridge for up to 3 days. This keeps it fresh and preserves the delightful flavors without any musty odors. Make sure to slice it for individual portions, making it easier to grab a piece on the go!
Can I freeze Roasted Pear Frittata?
Yes, you can! For freezing, wrap individual slices tightly in plastic wrap and then in aluminum foil. This double wrapping helps avoid freezer burn and keeps the flavors intact. The frittata will last in the freezer for up to 2 months. Just remember to thaw overnight in the fridge before reheating!
What if my frittata is too dry? How can I fix it?
If you find your frittata is a bit dry, it may have been overbaked. To achieve a moister texture next time, be sure to whisk your eggs until fully combined and avoid cooking the edges too long on the stovetop before transferring to the oven. Keep an eye on the baking time, too—it should be golden and puffed but still slightly jiggly in the center.
Can my pets share a small bite of the Roasted Pear Frittata?
While cooked eggs are generally safe for dogs in moderation, the pears, herbs, and cheeses can sometimes be problematic for pets. Make sure to avoid onions or garlic, as these are harmful to dogs. Always consult your vet before giving your pet any table scraps.
Can I modify the frittata for dietary restrictions?
Absolutely! You can create gluten-free versions by ensuring your choice of cheese and any additional ingredients are labeled gluten-free. For a dairy-free alternative, experiment with nut-based cheeses or simply omit the cheese entirely. Everyone can enjoy this delightful dish tailored to their dietary preferences!
Delicious Roasted Pear Frittata for a Cozy Brunch Delight
Ingredients
Equipment
Method
- Preheat your oven to 375°F (190°C).
- Slice pears into wedges, toss with olive oil, salt, and pepper. Spread on a baking sheet and roast for 15 minutes.
- In an oven-safe skillet, heat olive oil and sauté minced garlic for 1-2 minutes until fragrant.
- Whisk together eggs in a bowl and fold in roasted pears, sautéed garlic, fresh herbs, and cheese.
- Return the egg mixture to the skillet over low heat and cook for about 5 minutes until edges start to set.
- Carefully transfer the skillet to the preheated oven and bake for 20-25 minutes until puffed and golden.
- Allow the frittata to cool for a few minutes, then cut into wedges and garnish if desired.


Leave a Reply