
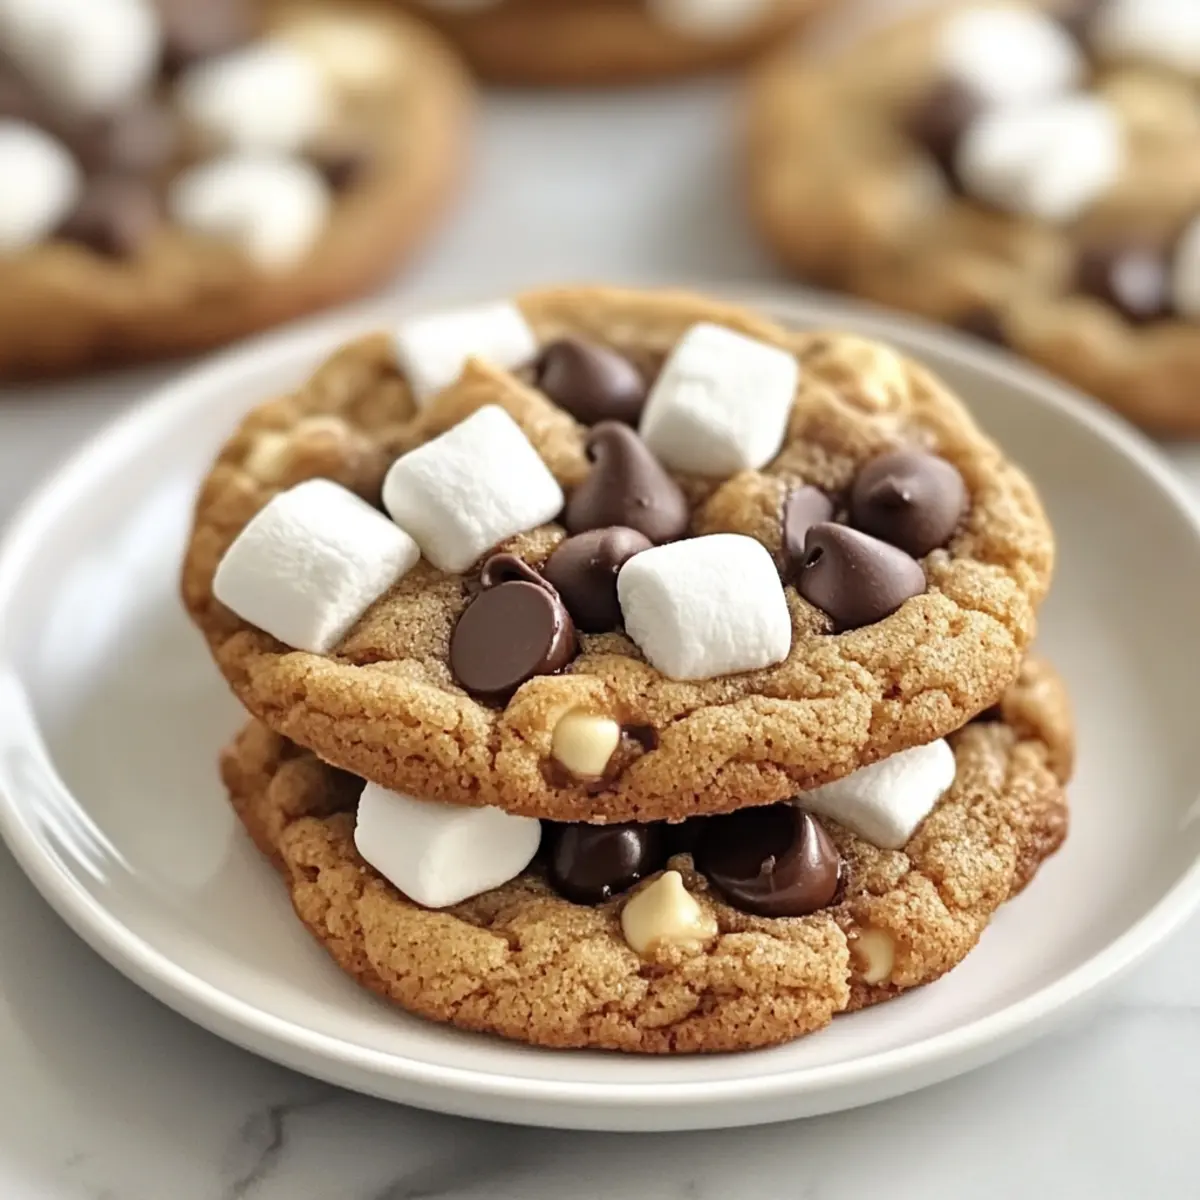
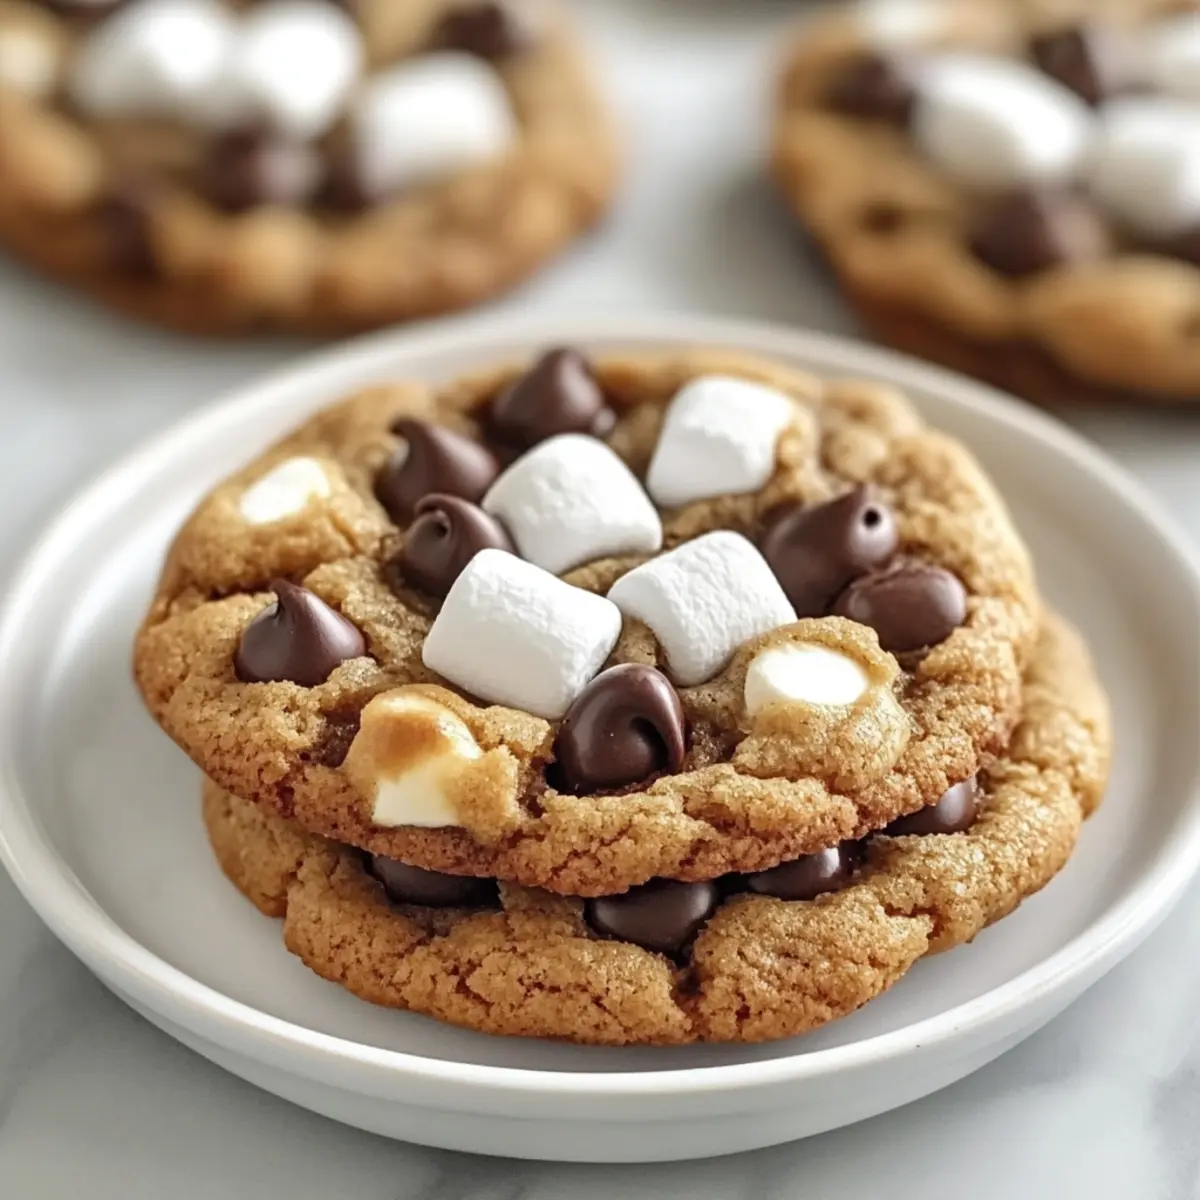
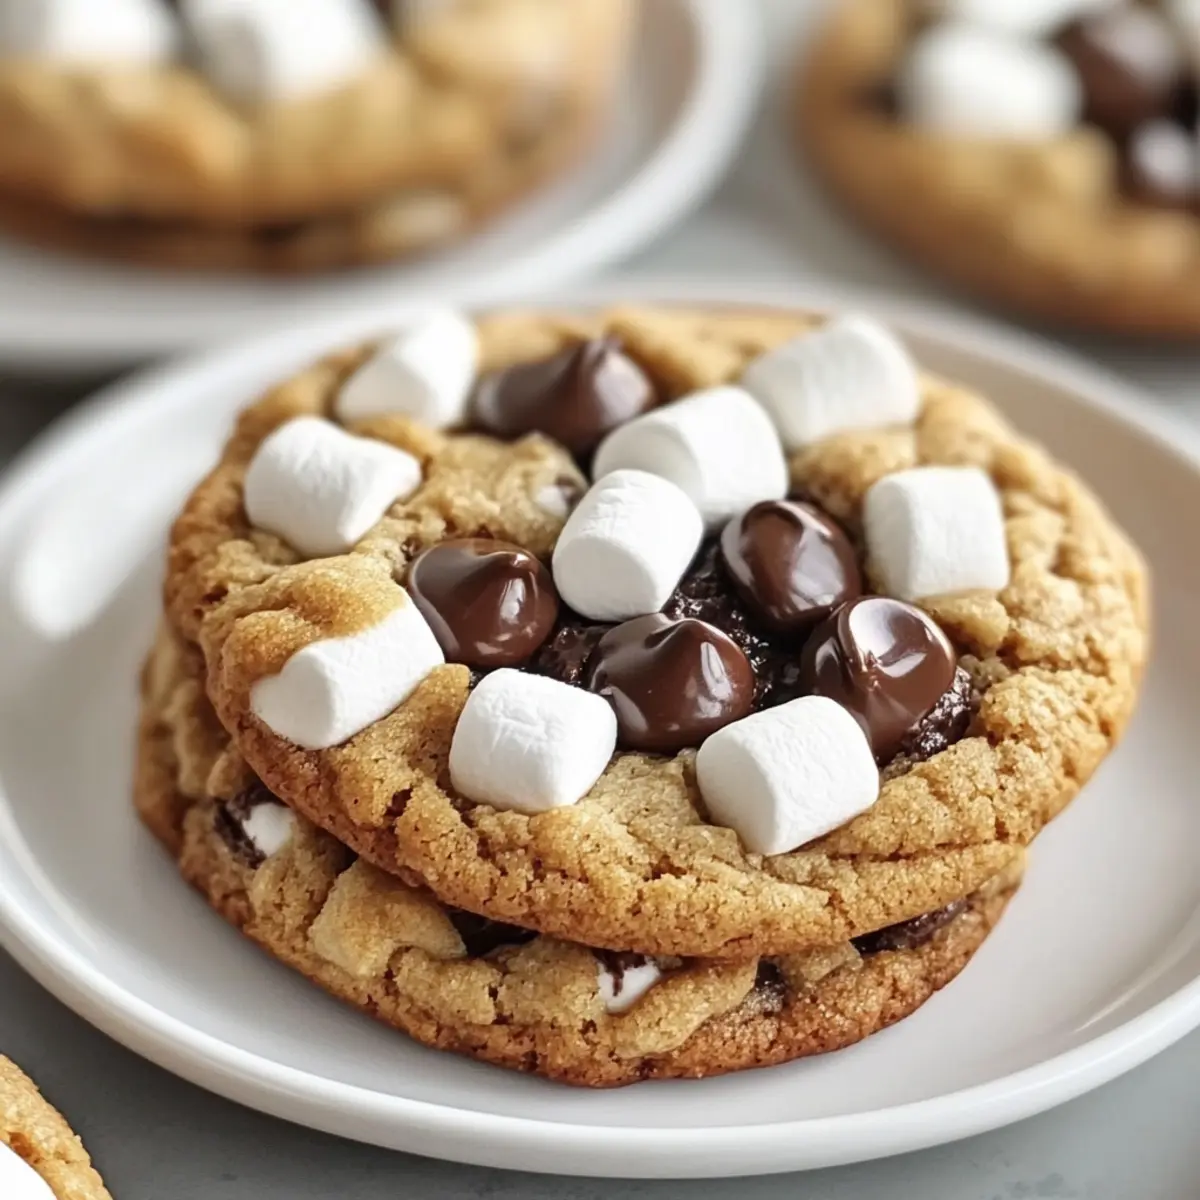
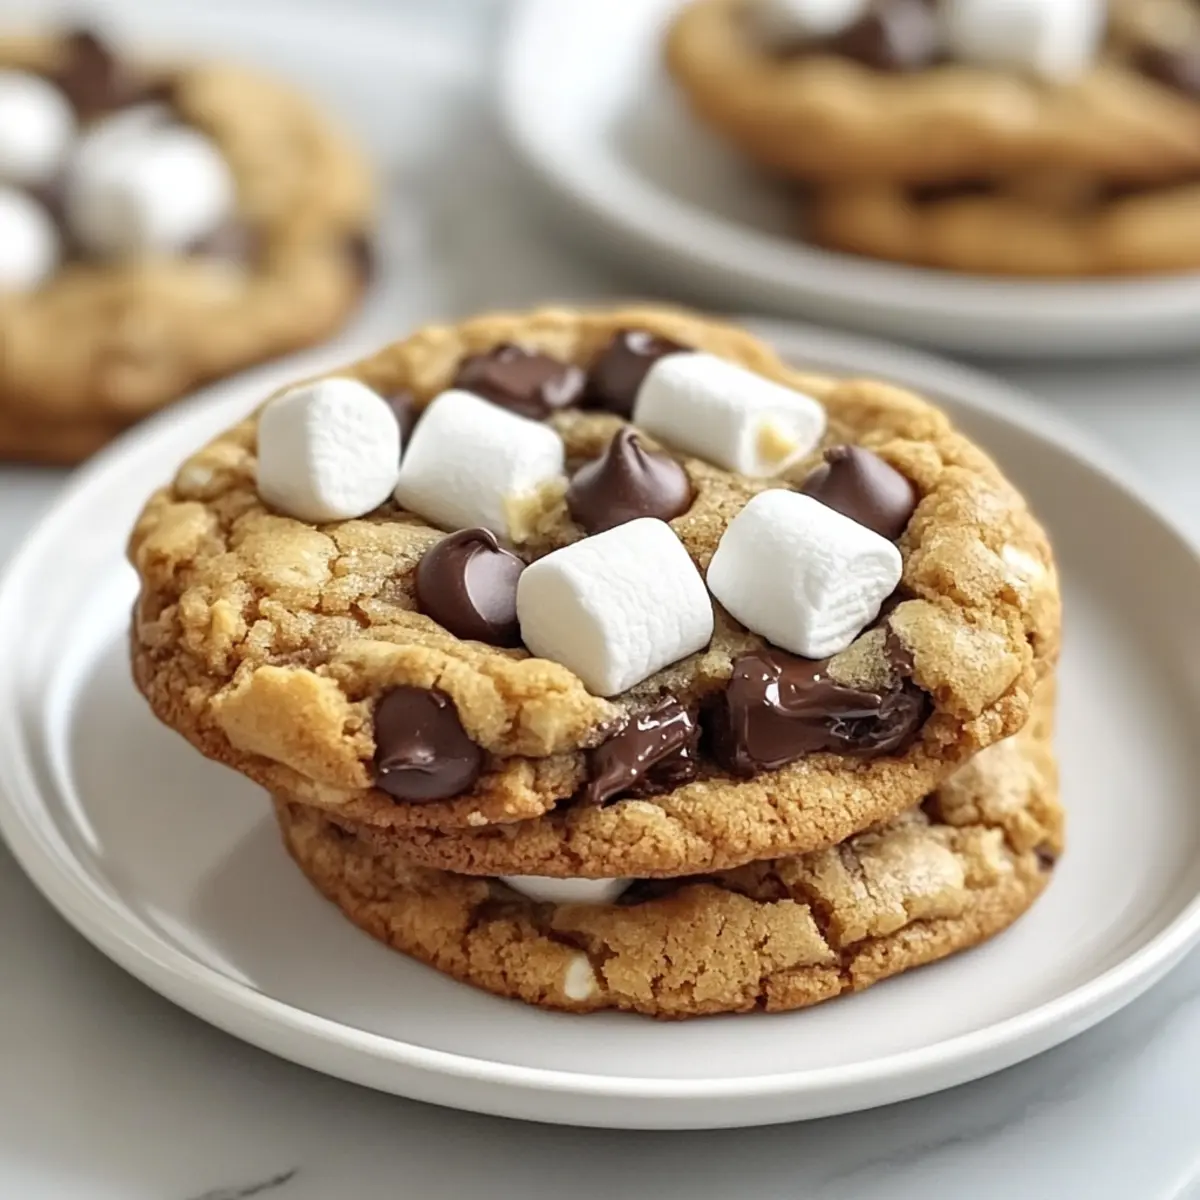
As I stood in my kitchen, the smell of melting chocolate and toasted marshmallows wafted through the air, instantly transporting me back to carefree summer nights by the campfire. These Chewy S’mores Cookies capture that nostalgic spirit in a delightful treat that’s as easy to make as it is satisfying. With their golden-baked edges and gooey, sweet centers, they're perfect for any occasion—not just for kids, but for anyone who craves a homemade cookie with a fun twist! Plus, they’re customizable, allowing everyone to enjoy their favorite flavor combinations. Whether you're hosting a family gathering or just need a little comfort, these cookies are your go-to solution. Ready to dive into the recipe and relive those cherished memories?
Why Are Chewy S’mores Cookies So Irresistible?
Nostalgic Flavors: The delightful taste of these cookies takes you back to joyful campfire nights, blending chocolate and marshmallows in every bite.
Quick & Easy: Perfect for busy cooks, this recipe comes together in no time, making it great for spontaneous cravings!
Customizable Goodness: Feel free to switch up the chocolate or add nuts to cater to your unique taste. Think about pairing these with a refreshing glass of milk or serving them warm with the extra toppings found in my Pineapple Cookies Tropical recipe.
Kid-Friendly Fun: Whether baking with kids or satisfying your own sweet tooth, these cookies are a delightful way to share the joy of cooking!
Crowd-Pleaser: Make these cookies for parties or gatherings, and watch them disappear faster than you can say "s'mores!"
Perfect Texture: Expect a chewy center with crispy edges that combines all the beloved elements of a classic s'more into one deliciously satisfying cookie!
S’mores Cookies Ingredients
• Get ready to bake a batch of nostalgia-filled treats that everyone will love!
-
For the Cookie Dough
-
Butter (½ cup, 115g) – Use softened butter for the best chewy texture; melted butter may lead to flat cookies.
-
Brown Sugar (½ cup, 100g) – This adds moisture and a rich flavor, helping you achieve the perfect chewiness.
-
White Sugar (¼ cup, 50g) – Brightens the flavor and aids in browning, enhancing overall sweetness.
-
Egg (1) – Acts as a binder and adds richness, holding all ingredients together beautifully.
-
Vanilla Extract (1 teaspoon) – Infuses a sweet aroma and complex flavor to elevate the cookie experience.
-
All-Purpose Flour (1 cup, 125g) – Gives the cookies body; don't overmix, or the cookies may turn out tough.
-
Crushed Graham Crackers (½ cup, 45g) – This key ingredient contributes to that classic s’mores flavor and adds a delightful crunch.
-
Baking Soda (½ teaspoon) – Enhances the cookie’s rise and lightness, creating that chewy texture.
-
Salt (¼ teaspoon) – Balances the sweetness and intensifies the flavors, making every bite delectable.
-
For the Treats Inside
-
Chocolate Chips (½ cup, 90g) – Melty semi-sweet or milk chocolate pieces add luscious richness; feel free to mix it up!
-
Mini Marshmallows (½ cup, 40g) – Create gooey pockets of sweetness that perfectly mimic those beloved campfire s’mores.
-
Mini Chocolate Chips (¼ cup, 25g) - Optional – Use for extra chocolatey goodness and visual appeal.
-
For Garnishing
-
Extra Graham Cracker Pieces & Mini Marshmallows – Use these for topping your cookies before baking, elevating both presentation and flavor.
With these S’mores Cookies ingredients in hand, you're all set to recreate sweet memories and enjoy a heartwarming batch that's perfect for any occasion!
Step‑by‑Step Instructions for Chewy S’mores Cookies
Step 1: Preheat the Oven
Begin by preheating your oven to 350°F (180°C). While the oven heats up, prepare a baking sheet by lining it with parchment paper. This ensures that your Chewy S’mores Cookies will bake evenly and won’t stick, making cleanup a breeze.
Step 2: Cream the Butters and Sugars
In a large mixing bowl, combine softened butter, brown sugar, and white sugar. Using a hand mixer or stand mixer, cream together these ingredients on medium speed until the mixture is light and fluffy, about 2-3 minutes. You’ll know it’s ready when it appears pale and airy—a perfect base for your cookies.
Step 3: Add Egg and Vanilla
Next, beat in one egg and one teaspoon of vanilla extract into the creamed mixture. Continue mixing until just combined, taking care not to overmix. The batter should be smooth and creamy—a delightful blend to enhance your S’mores Cookies.
Step 4: Combine Dry Ingredients
In a separate bowl, whisk together the all-purpose flour, crushed graham crackers, baking soda, and salt. This dry mixture is crucial for the cookie structure. Once combined, gradually add this mixture to the wet ingredients, stirring gently until the dough just comes together without any dry pockets.
Step 5: Fold in Chocolate and Marshmallows
Carefully fold in the chocolate chips and mini marshmallows into the dough using a spatula. Ensure they’re evenly distributed throughout, creating pockets of gooey goodness in the Chewy S’mores Cookies. Avoid overworking the dough to keep the cookies soft and chewy.
Step 6: Scoop the Dough
Using a tablespoon, scoop out generous amounts of dough and place them on the prepared baking sheet. Make sure to leave about 2 inches of space between each scoop to allow for spreading while baking. You want them nicely spaced for even baking!
Step 7: Add Toppings
Before baking, press a few additional mini marshmallows and chocolate chips onto the tops of the cookie dough balls. This will add a delightful bakery-style finish and enhance the delicious s’mores flavor as they melt during baking.
Step 8: Bake the Cookies
Place the baking sheet in the preheated oven and bake for 9 to 11 minutes. You’ll know the cookies are done when the edges begin to turn golden brown while the centers remain slightly soft and underbaked. This will create that beloved chewy texture.
Step 9: Cool the Cookies
Once baked, allow the cookies to cool on the baking sheet for about 5 minutes. This helps them set perfectly. Afterward, transfer the cookies to a wire rack to cool completely. The final cooling stage will enhance the chewy consistency of your S’mores Cookies.
Step 10: Serve and Store
Enjoy your Chewy S’mores Cookies warm, perhaps with a glass of milk. If you have leftovers, store them in an airtight container at room temperature for up to 5 days. For longer storage, consider freezing them, ensuring that every bite remains just as delightful as the first!
Variations & Substitutions for S’mores Cookies
Get ready to personalize your S’mores Cookies experience with these delightful twists that will elevate your cookie game!
-
Stuffed Cookies: Place a whole marshmallow or a chocolate chunk inside the dough for an oozy, unexpected center. Imagine the joy of biting into a cookie with a gooey surprise—it takes your classic s'mores to a whole new level!
-
Double Chocolate: Add cocoa powder to the dough or use a chocolate chip base to create a more intense chocolate flavor. This variant brings richness that chocolate lovers will adore.
-
Flavorful Chips: Swap out the chocolate chips for white chocolate, dark chocolate chunks, or even peanut butter chips for an exciting change. The flavor combinations add a fun twist while maintaining that nostalgic s'mores essence.
-
Nutty Addition: Incorporate crushed nuts, like pecans or almonds, for an extra crunch and nutty undertone. The added texture complements the gooeyness of the marshmallows beautifully.
-
Spiced Up: Add a pinch of cinnamon or nutmeg to the dough for a warm, cozy flavor that pairs well with chocolate and marshmallows. It’s an unexpected twist that will surely delight your taste buds!
-
Dried Fruit: Toss in some dried fruit like cranberries or cherries for a tangy contrast. This adds both flavor and color, making each bite a little more interesting!
-
Mini S’mores Bars: Instead of cookies, press the dough into a baking dish to create bars. This makes for a fun twist, perfect for serving at parties—cut them into squares for easy sharing.
Feel free to experiment with these ideas and let your creativity shine! And if you ever want to switch things up, try pairing your S’mores Cookies with a refreshing glass of milk or whip up some Pineapple Cookies Tropical for a delightful cookie platter that everyone will love!
Make Ahead Options
These Chewy S’mores Cookies are a fantastic choice for busy home cooks looking to simplify meal prep! You can prepare the cookie dough up to 24 hours in advance by mixing all ingredients, then cover and refrigerate it. This not only saves you time but also enhances the flavors as they meld together. When you're ready to bake, simply scoop the chilled dough onto a baking sheet, add your toppings, and bake as directed. Alternatively, you can freeze the formed cookie dough balls for up to 3 months. Just bake them directly from the freezer, adding an extra minute to the baking time, and enjoy delicious, fresh-baked cookies with minimal effort!
Storage Tips for S’mores Cookies
- Room Temperature: Store Chewy S’mores Cookies in an airtight container at room temperature for up to 5 days. This keeps them fresh and chewy.
- Fridge: If you prefer a firmer texture, place the cookies in the fridge for up to a week, ensuring they're tightly wrapped to prevent drying out.
- Freezer: For long-term storage, freeze baked cookies in a zip-top bag for up to 2 months. Allow them to thaw at room temperature or warm them briefly in the oven.
- Cookie Dough Storage: You can also freeze cookie dough balls for up to 3 months. Bake directly from frozen by adding a minute or two to the baking time.
What to Serve with Chewy S’mores Cookies?
Warm milk or a scoop of vanilla ice cream perfectly complement your nostalgic cookie creation, making every bite even more delightful.
-
Glass of Milk: The classic pairing cuts through the sweetness and beautifully enhances the cookie's rich flavors.
-
Hot Cocoa: Cozy up with a mug of hot cocoa, bringing a warm chocolatey indulgence that resonates with the s'mores theme.
-
Vanilla Ice Cream: A scoop of creamy ice cream atop a warm cookie creates a heavenly melting moment, elevating your dessert experience.
-
Fresh Berries: Tart raspberries or strawberries provide a refreshing contrast, balancing the sweetness of the cookies while adding a pop of color.
-
Chocolate Milkshake: Blend up a thick chocolate milkshake for a fun twist; it's a treat that will bring smiles all around.
-
Whipped Cream Topping: A dollop of whipped cream on the side can add lightness and creaminess, making this dessert feel extra special.
-
Graham Cracker Crust Pie: Serve alongside a slice of chocolate or fruit-flavored pie for an unexpected yet delightful dessert table.
-
Nutty Granola Bars: A wholesome addition, these bars can add crunch and nutty flavor for a more balanced dessert selection.
-
Sweet Tea or Lemonade: A refreshing beverage can cleanse the palate, enhancing the cookie experience with a bright, zesty touch.
Indulging in these pairings alongside your Chewy S’mores Cookies will create an unforgettable dessert moment that brings warmth and joy to every gathering!
Expert Tips for S’mores Cookies
- Soften the Butter: Use softened butter instead of melted to achieve that perfect chewy texture; melted butter can lead to flat cookies.
- Chill the Dough: For a thicker cookie, chill the dough for 30–60 minutes before scooping. This helps retain their shape while baking.
- Reserve Toppings: Set aside some mini marshmallows and chocolate chips to place on top before baking for an appealing, bakery-style finish.
- Watch the Baking Time: Keep an eye on your cookies and pull them out when the edges are golden but the centers are slightly underbaked, ensuring the perfect chewiness.
- Don’t Overmix: When combining the dry and wet ingredients, mix gently to avoid tough cookies; a little flour should still show for best results.
Chewy S’mores Cookies Recipe FAQs
How do I choose the right ripeness of ingredients?
Absolutely! For the best results, make sure your butter is softened, not melted, as this plays a crucial role in the texture of your Chewy S’mores Cookies. If it’s too soft, the cookies may spread too much; too hard, and it won’t cream properly with the sugars.
How should I store Chewy S’mores Cookies?
Store your delicious Chewy S’mores Cookies in an airtight container at room temperature for up to 5 days. This will keep them fresh and chewy. If you're looking for a firmer texture, consider refrigerating them while wrapped tightly to prevent drying out.
Can I freeze these cookies?
Certainly! For longer storage, freeze baked Chewy S’mores Cookies in a zip-top bag for up to 2 months. To enjoy them later, simply thaw at room temperature or warm them briefly in the oven for that freshly baked taste. You can also freeze the cookie dough balls for up to 3 months; bake them straight from the freezer, adding an extra minute or two to the baking time for perfect results.
What if my dough is too wet or dry?
If your dough seems too wet, you may want to add a tablespoon of flour at a time until you reach the right consistency; it should be stick but manageable. On the flip side, if it's too dry, a tiny splash of milk can help bring it back to the right texture. Remember, adding ingredients gradually is key to achieving that delightful chewy consistency.
Are these cookies safe for pets?
No, Chewy S’mores Cookies are not suitable for pets. The chocolate and sugar content can be harmful to dogs, and the tasty marshmallows are high in sugar, which is not healthy for them. Always be mindful of keeping such treats out of their reach!
Chewy S’mores Cookies That Bring Back Sweet Memories
Ingredients
Equipment
Method
- Preheat your oven to 350°F (180°C) and line a baking sheet with parchment paper.
- In a large mixing bowl, cream together softened butter, brown sugar, and white sugar until light and fluffy.
- Beat in one egg and one teaspoon of vanilla extract into the creamed mixture until just combined.
- Whisk together the all-purpose flour, crushed graham crackers, baking soda, and salt in a separate bowl.
- Gradually add the dry mixture to the wet ingredients, stirring gently until the dough comes together.
- Fold in the chocolate chips and mini marshmallows using a spatula.
- Scoop out generous amounts of dough onto the prepared baking sheet, leaving space between each scoop.
- Press additional mini marshmallows and chocolate chips onto the tops of the dough balls before baking.
- Bake for 9 to 11 minutes until the edges are golden brown and the centers are slightly soft.
- Cool on the baking sheet for about 5 minutes, then transfer to a wire rack to cool completely.


Leave a Reply