
While decorating for Halloween, I caught a glimpse of a stunning Spiderweb Chocolate Cake that sent my imagination racing. Halloween is the perfect occasion for sweets that don't just taste great, but also entertain and thrill. With my collection of 14 spooky dessert recipes, including this show-stopping Spiderweb Chocolate Cake, you'll have all the inspiration you need to impress both kids and adults alike. Each recipe brings a unique twist, ensuring your Halloween gatherings are anything but ordinary. Not only are these desserts quick and easy to prepare, but they also promise to be crowd-pleasers that will leave everyone smiling. So, are you ready to create something spectacular this Halloween? Let’s dive into these hauntingly delicious treats together!
Why Make the Spiderweb Chocolate Cake?
Simplicity: This cake is incredibly easy to make, perfect for bakers of any skill level.
Spooky Appeal: The spiderweb design not only looks impressive but also adds festive flair, making it a standout centerpiece.
Crowd-Pleaser: Rich chocolate flavor is guaranteed to satisfy both kids and adults, ensuring everyone at your Halloween gathering will be delighted.
Versatile: Pair it with other treats like Ghost Meringues for a complete spooky dessert table!
Make-Ahead Friendly: Prepare it a day in advance to save time on the day of your Halloween celebrations.
Creative Decorating: Let your imagination run wild while decorating the cake, tweaking the design to suit your theme!
Spiderweb Chocolate Cake Ingredients
For the Cake
- Chocolate Cake Mix – A rich base that ensures the cake is moist and chocolatey.
- Eggs – Help bind the ingredients together and add moisture.
- Water – Necessary for mixing the cake batter; use coffee for an extra flavor boost!
- Oil – Adds moisture and a tender crumb to the cake.
For the Frosting
- Butter – The key to a creamy and fluffy frosting.
- Powdered Sugar – Sweetness and a smooth texture for the frosting.
- Cocoa Powder – Enhances the chocolate flavor in your frosting.
- Milk – Adjusts the consistency of the frosting to your desired thickness.
For the Spiderweb Decoration
- White Chocolate – Melted to create the elegant spiderweb design on top.
- Black Gel Food Coloring – For adding spooky depth to your frosting if desired.
Indulge in this Spiderweb Chocolate Cake recipe and create a fun centerpiece for your Halloween gathering that will impress everyone at the table!
Step‑by‑Step Instructions for Spiderweb Chocolate Cake
Step 1: Preheat and Prepare
Begin by preheating your oven to 350°F (175°C). As the oven heats, gather all your ingredients for the Spiderweb Chocolate Cake. Lightly grease two 9-inch round cake pans with cooking spray and line the bottom with parchment paper for easy removal. This preparation will ensure your cakes bake evenly and slide out effortlessly.
Step 2: Mix the Cake Batter
In a large mixing bowl, combine the chocolate cake mix, eggs, water (or coffee for extra flavor), and oil. Using a hand mixer or whisk, blend the mixture for about 2 minutes on medium speed until the batter is smooth and well combined. You'll notice small bubbles forming, indicating that it’s ready for baking.
Step 3: Bake the Cakes
Pour the cake batter evenly into the prepared pans. Place them in the preheated oven and bake for 30-35 minutes, or until a toothpick inserted in the center comes out clean. As the cakes bake, enjoy the rich chocolate aroma filling your kitchen, signaling that deliciousness is on its way.
Step 4: Cool the Cakes
Once baked, remove the cakes from the oven and let them cool in the pans for about 10 minutes. Gently run a knife around the edges, then invert the cakes onto wire racks to cool completely. This step is crucial, as cooling prevents the frosting from melting when you decorate your Spiderweb Chocolate Cake.
Step 5: Prepare the Frosting
While the cakes are cooling, prepare the frosting by creaming softened butter in a large bowl. Gradually add powdered sugar and cocoa powder, mixing until combined. Slowly incorporate milk until you achieve a smooth, spreadable consistency. Your frosting should be fluffy and creamy, ready to enhance the sumptuous chocolate cake.
Step 6: Frost the First Layer
Once the cakes are completely cooled, place one layer on a serving plate. Spread a generous layer of frosting over the top, ensuring even coverage. This will act as a delicious glue to hold the layers together, making your Spiderweb Chocolate Cake taste even better.
Step 7: Assemble the Cake
Carefully place the second cake layer on top of the frosted first layer. Apply a thin coating of frosting around the sides and top of the cake, creating a crumb coat. This layer ensures crumbs don’t show through your final frosting and gives a neat appearance. Chill the cake in the fridge for about 15 minutes to firm up.
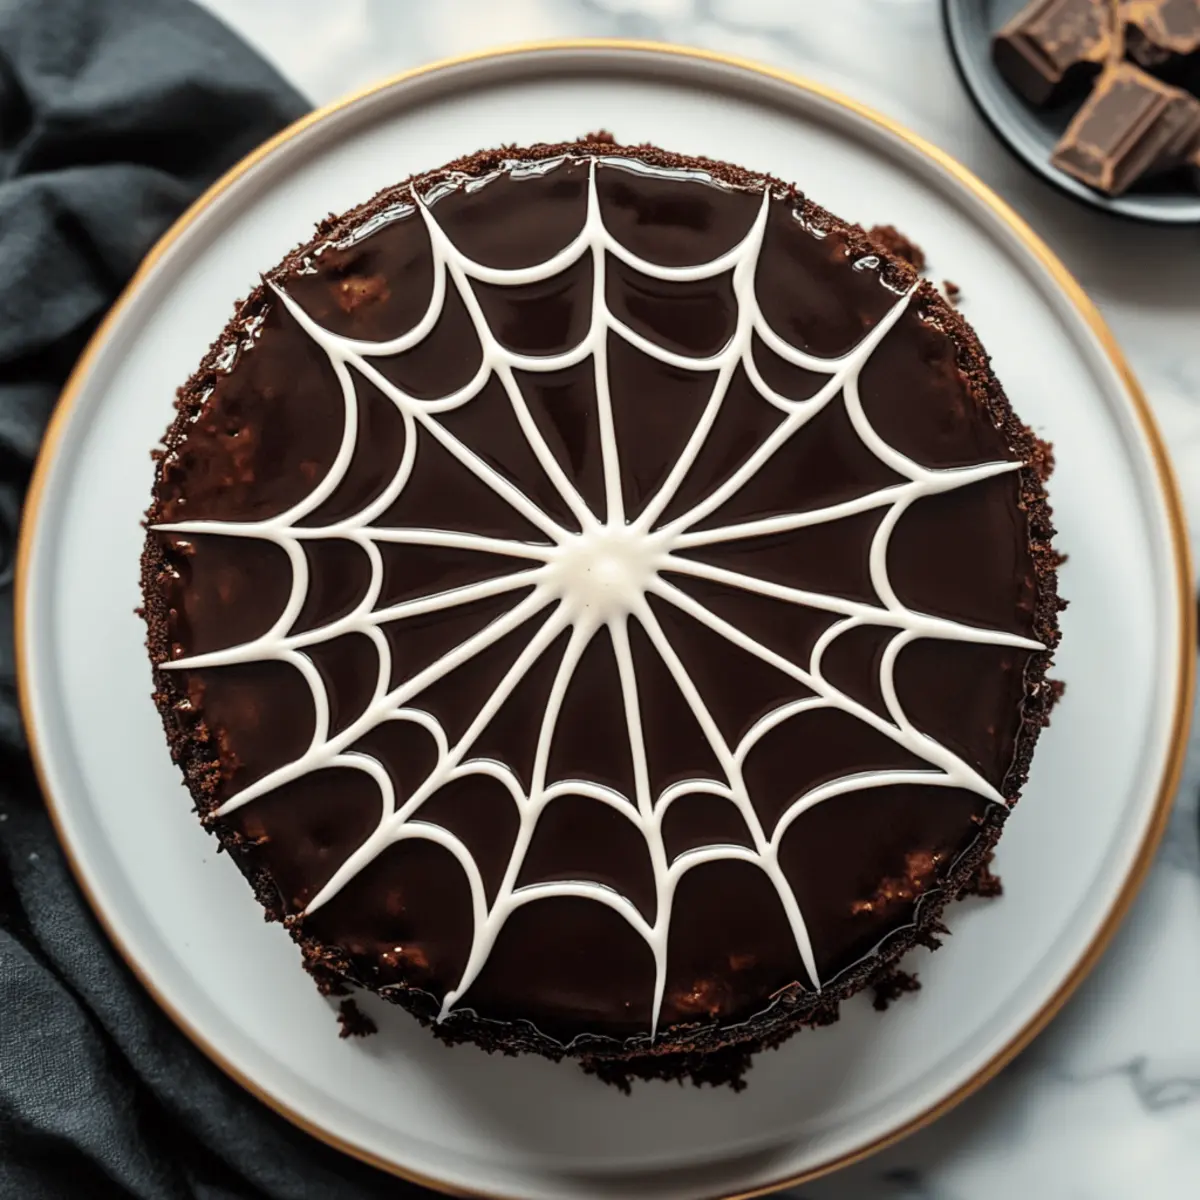
Step 8: Create the Spiderweb Decoration
Melt the white chocolate in a microwave-safe bowl, heating in 30-second increments until smooth. Once cooled slightly, transfer the melted chocolate to a piping bag or a small zip-top bag with a tiny corner snipped off. Pipe a swirl pattern on top of the cake, starting from the center and working outwards to create the spiderweb design.
Step 9: Final Touches
Using a toothpick or a small knife, lightly drag lines from the center to the outer edges of the web, enhancing the spiderweb effect. If desired, mix a few drops of black gel food coloring with leftover frosting, and pipe little spiders or accents on the corners for a spooky finish. Your Spiderweb Chocolate Cake is now edible art!
Step 10: Slice and Serve
Once your cake is beautifully decorated, slice it into decadent pieces. Serve the Spiderweb Chocolate Cake at your Halloween gathering and watch it disappear in delight. This impressive dessert is sure to be the centerpiece that everyone raves about while enjoying the festive spirit!
How to Store and Freeze Spiderweb Chocolate Cake
Fridge: Keep the Spiderweb Chocolate Cake in an airtight container for up to 3 days. This helps maintain its moisture and frosting quality.
Freezer: If you need to store it for longer, wrap the cake tightly in plastic wrap and foil, then freeze for up to 3 months. Thaw in the fridge overnight before serving.
Reheating: While it's best enjoyed fresh, you can pop a slice in the microwave for 10-15 seconds for a warm treat that enhances the chocolate flavor!
Make-Ahead: Consider baking the cake in advance, storing it in the fridge, and decorating it just before your Halloween gathering to save time and keep it fresh!
Make Ahead Options
These Spiderweb Chocolate Cakes are perfect for busy home cooks looking to save time while still impressing guests! You can prepare the cake layers up to 2 days in advance. Once cooled completely, wrap each layer tightly in plastic wrap and store them in the refrigerator to maintain freshness. The frosting can also be made ahead and stored in an airtight container for up to 3 days; just give it a good stir before spreading. When you're ready to serve, simply assemble the cake by frosting and decorating it. This way, you’ll enjoy a stress-free Halloween celebration with delicious desserts that are just as delightful!
Helpful Tricks for Spiderweb Chocolate Cake
-
Ingredients Ready: Make sure all ingredients are at room temperature before mixing. This helps the cake batter blend smoothly and bake more evenly.
-
Check for Doneness: Use a toothpick to check the cake after 30 minutes. If it comes out with a few moist crumbs, the Spiderweb Chocolate Cake is perfectly baked!
-
Thicker Frosting: If your frosting feels too runny, increase the powdered sugar gradually until it reaches your desired consistency to maintain the beautiful spiderweb design.
-
Cooling Time: Allow your cakes to cool completely before frosting to prevent melting. A cool cake leads to more precise decorating!
-
Piping Technique: Practice your piping technique when creating the spiderweb. A steady hand will produce cleaner, more defined lines for an eye-catching decoration.
-
Chill Time: Don't skip the chilling step after applying the crumb coat! This gives your final frosting layer a smooth finish and keeps everything in place while you decorate.
Spiderweb Chocolate Cake Variations & Substitutions
Feel free to get creative and customize your Spiderweb Chocolate Cake with these fun twists that’ll leave your guests in awe!
-
Gluten-Free: Use a gluten-free chocolate cake mix to make this cake accommodating for guests with gluten sensitivities, maintaining the delicious flavor and texture.
-
Dairy-Free: Swap the eggs with flax eggs and use plant-based butter and milk for a delightful dairy-free version that everyone will love.
-
Coffee Kick: Replace water with brewed coffee to enhance the chocolate flavor, adding richness that will have your taste buds dancing with joy.
-
Choco-Mint Delight: Try adding a few drops of peppermint extract to the frosting for a festive chocolate mint flavor that brings holiday cheer.
-
Nutty Crunch: Fold in crushed walnuts or pecans into the cake batter for a delightful crunch; the texture adds a wonderful dimension to each slice.
-
Spookier Decor: Instead of the classic spiderweb, use black frosting to create the texture of a graveyard, complete with tombstone-shaped cookie decorations.
-
Treat Inside: Consider injecting a gooey chocolate or caramel center before frosting for a sweet surprise that makes every slice extra special.
-
Mini Cakes: Transform this Spiderweb Chocolate Cake into mini individual cakes for a fun, bite-sized treat that’s perfect for party platters. You could even create mini versions of the Candy Corn Cheesecake Bars or Spooky Eyeball Truffles to complete your dessert table!
Let your creativity shine and make this cake your own to truly enjoy a memorable Halloween celebration!
What to Serve with Spiderweb Chocolate Cake?
Imagine a table brimming with delightful treats that complement your hauntingly beautiful Spiderweb Chocolate Cake, turning your Halloween gathering into a delightful affair.
-
Ghost Meringues: These airy meringues add a light sweetness that contrasts beautifully with the rich chocolate cake, creating a harmony of textures that your guests will love.
-
Bloody Red Velvet Cake Pops: These fun and festive pops bring both a visual scare and sweet bite, ensuring your dessert table is a spooky spectacle.
-
Pumpkin Spice Cookies: The warm flavors of pumpkin spice add a seasonal touch, making for a comforting cookie that pairs perfectly with the chocolatey goodness of your cake.
-
Witch Hat Cupcakes: The whimsical design brings an element of playfulness, and their chocolate flavor echoes the richness of the Spiderweb Chocolate Cake, creating a unified dessert theme.
-
Frankenstein Rice Krispie Bars: These colorful treats offer a fun crunch to complement the softness of the cake, appealing to both kids and adults alike.
-
Candy Corn Cheesecake Bars: The creamy cheesecake pairs exquisitely with the cake's chocolate, while the vibrant colors brighten your dessert spread for a festive feel.
-
Spooky Eyeball Truffles: These fun truffles not only look eerily delightful but also deliver a rich chocolate flavor that can double the chocolatey joy at your gathering.
-
Poison Apple Pie: For a more traditional dessert option, this pie adds a substantial fruity element that balances out the richness of the Spiderweb Chocolate Cake.
-
Bat Cupcakes: With their cute, bat-shaped decor, these cupcakes provide a playful visual contrast and also enhance the chocolatey indulgence of your dessert table.
-
Hocus Pocus Punch (Drink): A refreshing, vibrant punch complements the sweetness of your dessert assortment while keeping guests hydrated during the Halloween fun.
Spiderweb Chocolate Cake Recipe FAQs
What type of chocolate cake mix should I use?
I recommend using a high-quality chocolate cake mix for the best flavor and moisture. Look for one that specifies "moist" or "rich" on the packaging to ensure your Spiderweb Chocolate Cake turns out wonderfully.
How long can I store the Spiderweb Chocolate Cake?
Store the cake in an airtight container in the fridge for up to 3 days. This helps maintain its moisture and keeps the frosting fresh. If you want to keep it longer, wrap it tightly in plastic wrap and foil, then freeze for up to 3 months.
Can I freeze the Spiderweb Chocolate Cake?
Absolutely! To freeze your Spiderweb Chocolate Cake, let it cool completely, then wrap it securely in plastic wrap followed by aluminum foil. This prevents freezer burn. Thaw it overnight in the fridge before serving for the best quality.
What can I do if my frosting is too runny?
If your frosting feels too runny, simply add more powdered sugar gradually (about ¼ cup at a time) until you achieve your desired thickness. This step is crucial for maintaining the beautiful spiderweb design on your cake.
Are there any dietary restrictions I should be aware of?
Yes, the Spiderweb Chocolate Cake contains common allergens like gluten (from the cake mix) and dairy (from the frosting). For gluten-free alternatives, choose a gluten-free chocolate cake mix and use dairy-free butter or milk to make the frosting suitable for those with dietary restrictions.
Can I use a different design instead of the spiderweb?
The more the merrier! Feel free to get creative with your decorations. Instead of a spiderweb, use chocolate or colored icing to create other spooky designs—like pumpkins or ghosts—to match your Halloween theme. Let your imagination soar!
Delicious Spiderweb Chocolate Cake for a Spooky Celebration
Ingredients
Equipment
Method
- Preheat your oven to 350°F (175°C). Grease two 9-inch round cake pans and line with parchment paper.
- In a large mixing bowl, combine the chocolate cake mix, eggs, water (or coffee), and oil. Mix for about 2 minutes until smooth.
- Pour the cake batter into prepared pans and bake for 30-35 minutes or until a toothpick comes out clean.
- Cool the cakes in the pans for 10 minutes, then invert onto wire racks to cool completely.
- Prepare the frosting by creaming butter, then gradually add powdered sugar and cocoa powder, incorporating milk until smooth.
- Once cooled, place one layer on a plate and spread frosting on top.
- Add the second cake layer and apply a thin crumb coat of frosting around the cake. Chill for 15 minutes.
- Melt the white chocolate and pipe a swirl pattern on top of the cake for the spiderweb design.
- Drag lines from the center to the edges to enhance the spiderweb effect. Optionally, pipe spiders with colored frosting.
- Slice and serve the Spiderweb Chocolate Cake at your Halloween gathering.


Leave a Reply