
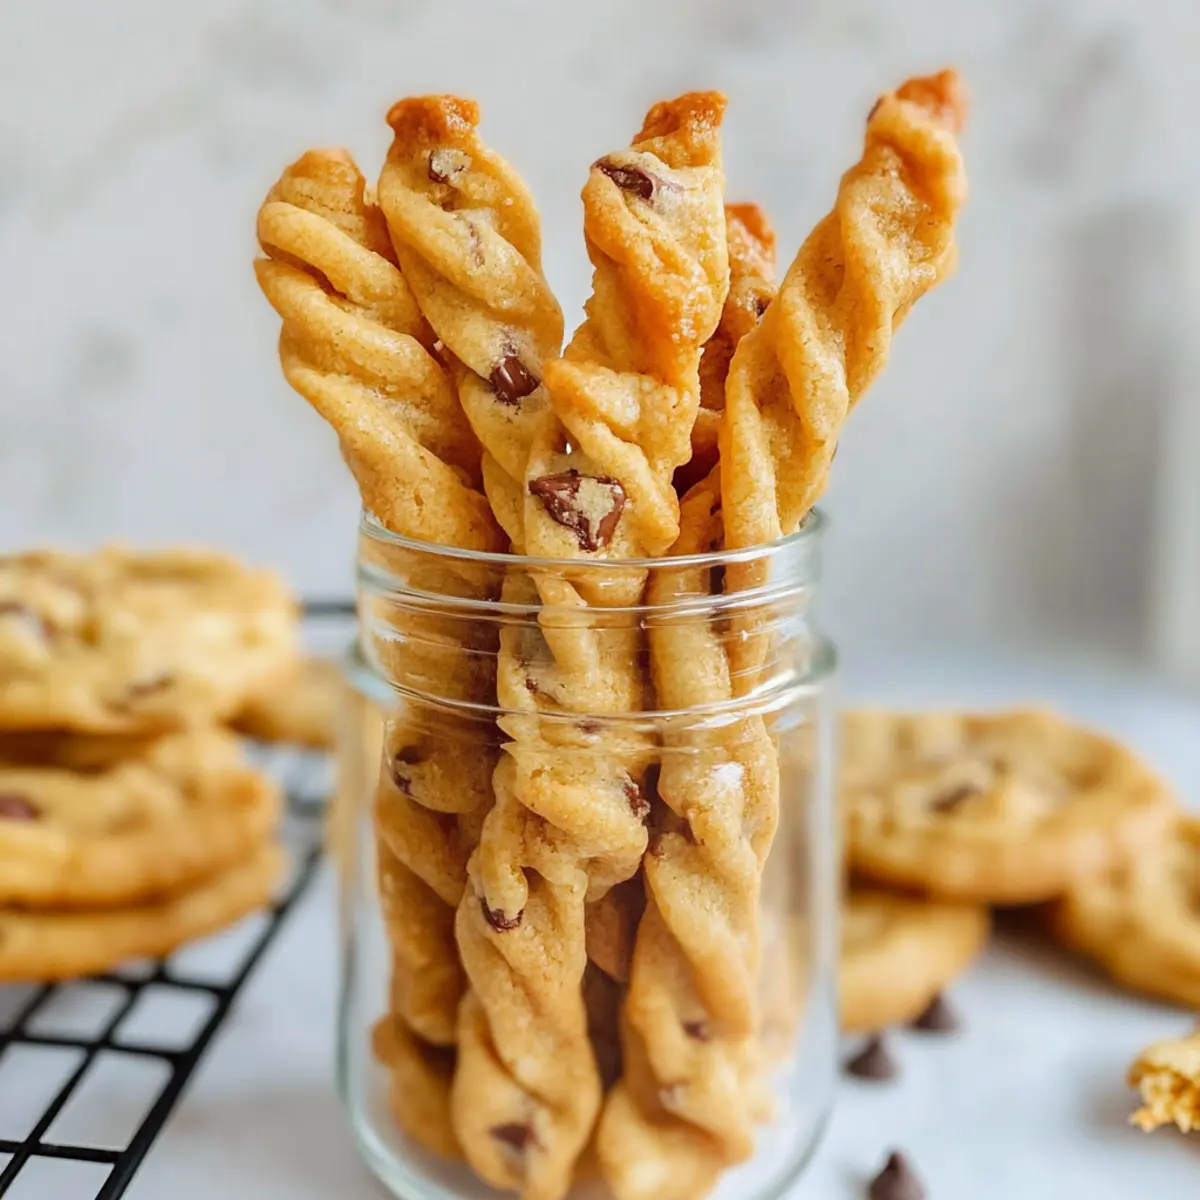
As I rummaged through the pantry yesterday, the faint aroma of cheese from an old packet coaxed me into a culinary adventure. That’s when I decided to whip up a batch of Cheese Straws—a recipe that is not only a throwback to my childhood but also a treasure for any home chef today! These delightful snacks are quick and easy to make, transforming simple ingredients into golden, crispy delights that will have everyone reaching for more. With their cheesy goodness and flaky texture, Cheese Straws are perfect for parties or cozy evenings alike. Do you ever find yourself searching for that perfect appetizer that leaves guests enchanted? Trust me, your quest ends here!
Why Are Cheese Straws So Irresistible?
Cheesy Goodness: The distinct, rich flavor of cheese shines through in every bite, making these straws an instant crowd favorite.
Quick and Easy: With minimal prep time and straightforward steps, you can whip these up in no time, perfect for surprise guests.
Versatile Snacks: Whether served at a party, with cocktails, or enjoyed as a snack, these cheese straws fit seamlessly into any setting.
Unique Textures: The crispy, flaky exterior promises a delightful crunch, while the cheesy interior delivers a soft, melt-in-your-mouth experience.
If you're looking for more cheesy delights, be sure to check out my Grilled Cheese Burrito or the charming Ham Cheese Croissant.
Cheese Straws Ingredients
• Prepare to savor the cheesy goodness with these simple ingredients that make up the ultimate Cheese Straws!
For the Dough
- All-Purpose Flour – Provides the structure; be sure to sift for a light texture.
- Sharp Cheddar Cheese – Ensures a rich, bold flavor; feel free to mix in other cheese varieties for a twist.
- Unsalted Butter – Offers flakiness; ensure it’s cold and cubed for the best consistency.
- Salt – Balances the flavors; sea salt adds a nice touch.
- Cayenne Pepper – Adds a bit of heat; adjust to taste for extra kick.
For the Egg Wash
- Egg – Promotes a beautiful golden-brown finish; you can use a milk wash as a substitute for a vegan option.
With these ingredients readily available, you’re on your way to creating delightful Cheese Straws that will transform any gathering into a feast!
Step‑by‑Step Instructions for Perfectly Cheesy Homemade Cheese Straws
Step 1: Preheat the Oven
Begin by preheating your oven to 400°F (200°C). While the oven warms up, line two baking sheets with parchment paper to ensure that your cheese straws don’t stick during baking. This preparation step will get you ready to bake those crispy, cheesy delights!
Step 2: Prepare the Dough
In a large mixing bowl, combine the sifted all-purpose flour, shredded sharp cheddar cheese, cubed cold unsalted butter, salt, and cayenne pepper. Using a pastry cutter or your fingers, mix until the mixture resembles coarse crumbs, with visible bits of cheese. This will create the perfect base for your Cheese Straws, ensuring they have a rich flavor.
Step 3: Form the Dough
Slowly add cold water, one tablespoon at a time, mixing until the dough just comes together. Be careful not to overwork the dough, as this will help maintain the flaky texture of your Cheese Straws. Once the dough has formed, turn it out onto a lightly floured surface and gently knead it a few times to bring it together.
Step 4: Roll and Cut
With a rolling pin, roll out the dough into a rectangle about ¼ inch thick. Use a sharp knife or a pastry cutter to slice the dough into strips, approximately ½ inch wide. These strips will transform into your delightful Cheese Straws as they bake, so be sure to cut evenly for consistent baking.
Step 5: Apply the Egg Wash
In a small bowl, beat the egg to create an egg wash. Using a pastry brush, lightly brush the top of each cheese straw with the egg wash, which will give them a beautiful golden-brown color once baked. This step not only enhances their appearance but also adds a nice sheen.
Step 6: Bake the Cheese Straws
Carefully place the cheese straws onto the prepared baking sheets, making sure they are spaced apart. Bake in your preheated oven for 12-15 minutes or until the cheese straws are puffed and golden brown. Keep an eye on them as they can quickly go from perfect to too browned!
Step 7: Cool and Serve
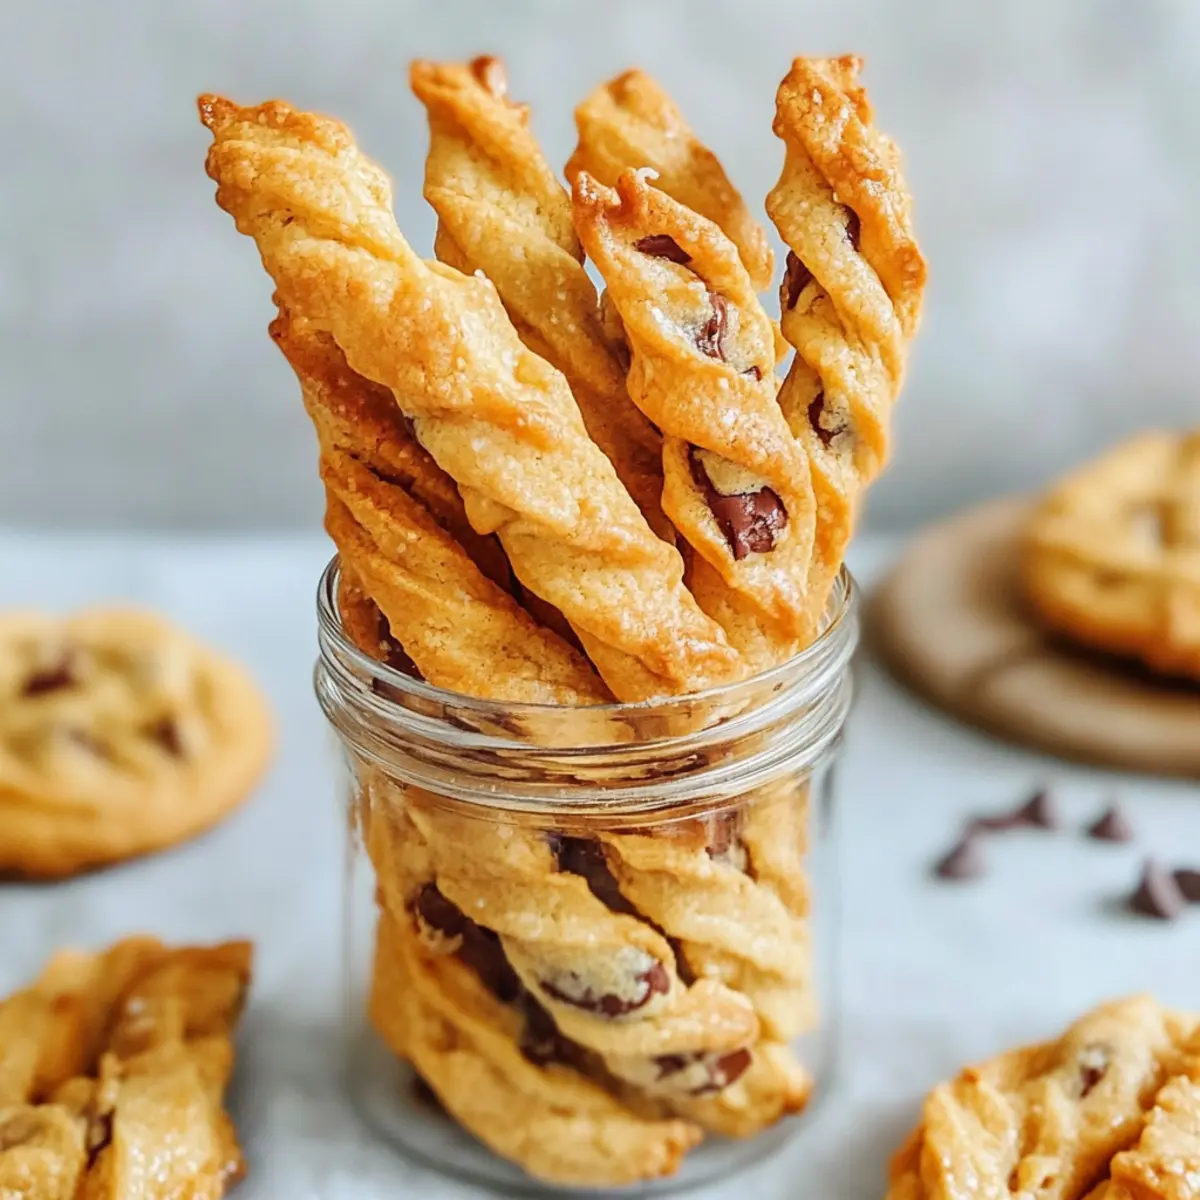
Once baked, remove the cheese straws from the oven and let them cool on the baking sheets for about 5 minutes. Then, transfer them to a wire rack to cool completely. Enjoy these warm, crispy Cheese Straws as a delightful snack or serve them as an appetizer at your next gathering!
How to Store and Freeze Cheese Straws
Room Temperature: Keep cheese straws in an airtight container at room temperature for up to 5 days for optimal crispiness.
Fridge: If you have leftover cheese straws, store them in the fridge in a sealed container for up to one week, but note they may lose some crispness.
Freezer: For longer storage, freeze cheese straws in a single layer on a baking sheet, then transfer to a resealable freezer bag. They can be kept for up to 2 months.
Reheating: To enjoy frozen cheese straws, reheat them in a preheated oven at 350°F (175°C) for about 8-10 minutes to regain their crispy texture.
What to Serve with Ultimate Chewy Chocolate Chip Cookies
Indulge in the sweet symphony of flavors that elevate your baking experience beyond just cookies.
- Cold Glass of Milk: A classic companion, it perfectly complements the richness of the cookies, offering a refreshing balance.
- Hot Cup of Coffee: The warm, bold taste of coffee contrasts beautifully with the sweetness of the cookies, creating a cozy moment.
- Vanilla Ice Cream: A scoop of creamy vanilla adds a delightful creaminess, turning your cookie treat into a decadent dessert.
- Chocolate Sauce Drizzle: A touch of warm chocolate sauce coaxes out the gooey chocolate inside and enhances the cookie experience.
- Fresh Berries: Light, tangy berries add brightness on the plate, making each bite feel a touch more sophisticated and refreshing.
- Nutty Trail Mix: The crunch of nuts in a trail mix provides a satisfying texture while complementing the sweet notes of the cookies.
- Spiced Hot Chocolate: A warm, spiced drink brings nostalgia while amplifying the chocolate flavor, perfect for chilly evenings.
- Cheesecake Brownies: These rich, creamy brownies harmonize with cookies, offering a dual dessert experience that will delight your guests.
- Savory Cheese Platter: Introduce a contrast with sharp cheeses which will balance the sweetness, creating a delightful mix of flavors.
Make Ahead Options
These Perfectly Cheesy Homemade Cheese Straws are fantastic for meal prep, allowing you to enjoy their delightful crunch with minimal effort when entertaining guests or snacking! To prep ahead, you can make the dough up to 24 hours in advance; simply store it tightly wrapped in plastic wrap in the refrigerator. When you’re ready to bake, just roll out the dough and cut it into strips, then proceed with the egg wash and baking. For optimal freshness, you can also freeze the prepared cheese straws (before baking) for up to 3 months. Just remember to bake them directly from the freezer, adding a couple of extra minutes to the baking time. Enjoy the convenience of having delicious, homemade Cheese Straws ready to go with just a little planning!
Cheese Straws Variations & Substitutions
Get ready to add your unique twist to these mouthwatering cheese straws, transforming them into your ultimate snack sensation!
- Gluten-Free: Substitute all-purpose flour with a gluten-free blend for a delightful cracker that everyone can enjoy.
- Herbed Delight: Incorporate dried herbs like rosemary or thyme into the dough for an aromatic flavor boost.
- Spicy Kick: Mix in a teaspoon of chili powder or crushed red pepper flakes for a zesty version that will awaken your taste buds.
- Smoky Flavor: Use smoked cheddar cheese for a rich, smokey twist that lends depth and intrigue to each bite.
- Mixed Cheeses: Combine different types of cheese, such as gouda or parmesan, to create a tantalizing flavor melody. They are sure to be a crowd-pleaser!
- Cheddar Variations: Swap sharp cheddar for pepper jack to introduce a delightful heat—perfect for those who love a bit of spice!
- Pesto Infusion: Mix in a tablespoon of pesto into the dough for a herby, vibrant flavor that adds a touch of green happiness.
- Nutty Crunch: Add finely chopped nuts, such as pecans or walnuts, to the dough for a delightful texture and flavor contrast.
If you're craving more cheesy recipes, don't miss out on my Grilled Cheese Burrito or the scrumptious Burnt Basque Cheesecake. Enjoy creating your perfect cheese straws!
Expert Tips
-
Chill the Dough: Before rolling out, chill your dough for about 30 minutes to prevent spreading, ensuring more defined straws.
-
Uniform Cutting: Use a ruler and a sharp knife or pastry cutter for even strips; this helps them bake evenly and look professional.
-
Monitor Baking Time: Keep a close eye while baking to avoid overbaking; a few minutes can make a big difference in achieving that perfect golden color.
-
Experiment with Cheese: Don't hesitate to mix different cheeses for unique flavors or even add herbs; creativity can yield delightful variations in your cheese straws.
-
Warm vs. Room Temperature: Serve cheese straws warm for the best taste, but they still maintain their flavor at room temperature, making them versatile for gatherings.
Cheese Straws Recipe FAQs
How do I choose the right cheese for my cheese straws?
Absolutely! For the best flavor, go with a sharp cheddar cheese that melts beautifully. You can also experiment with other cheeses like gouda or Parmesan for unique twists. If you want a milder taste, mild cheddar or even a blend of cheeses can yield delicious results.
How should I store my cheese straws?
To keep them crispy, store cheese straws in an airtight container at room temperature for up to 5 days. If left out for too long, they may lose their delightful crunch. For longer storage, you can refrigerate them in a sealed container for about a week, but they'll be less crispy.
Can I freeze cheese straws, and how?
Yes, you can! To freeze cheese straws, first place them in a single layer on a baking sheet, then put that in the freezer until they're firm. After that, transfer them to a resealable freezer bag, where they'll stay fresh for up to 2 months. To reheat, pop them in a preheated oven at 350°F (175°C) for 8-10 minutes to regain their crunch.
What should I do if my cheese straws are too soft after baking?
Very often, if your cheese straws come out soft, they may need a bit more time in the oven. Make sure your oven was fully preheated and try extending the baking time by a couple of minutes. Also, ensure that the dough wasn’t overworked, which can cause the texture to be off.
Can I adapt the recipe for dietary restrictions?
Absolutely! For a gluten-free version, substitute the all-purpose flour with a gluten-free blend or almond flour. If you want to keep it dairy-free, opt for vegan cheese alternatives. Just remember that cooking times may vary slightly, so keep an eye on your cheese straws while baking!
What if I want to add extra flavoring to my cheese straws?
The more the merrier! You can enhance the flavor of your cheese straws by adding herbs, such as rosemary or thyme, or mix in spices like paprika or garlic powder. Just remember to adjust the salt accordingly, especially if you’re using seasoned cheese!
Perfectly Cheesy Homemade Cheese Straws for Any Occasion
Ingredients
Equipment
Method
- Preheat your oven to 400°F (200°C) and line two baking sheets with parchment paper.
- In a large mixing bowl, combine sifted all-purpose flour, shredded sharp cheddar cheese, cubed cold unsalted butter, salt, and cayenne pepper.
- Add cold water, one tablespoon at a time, until the dough comes together. Do not overwork.
- Roll out the dough into a rectangle about ¼ inch thick and cut into strips approximately ½ inch wide.
- Beat the egg and brush the top of each cheese straw with the egg wash.
- Bake in the preheated oven for 12-15 minutes or until puffed and golden brown.
- Let the cheese straws cool on the baking sheets for about 5 minutes before transferring to a wire rack.


Leave a Reply