
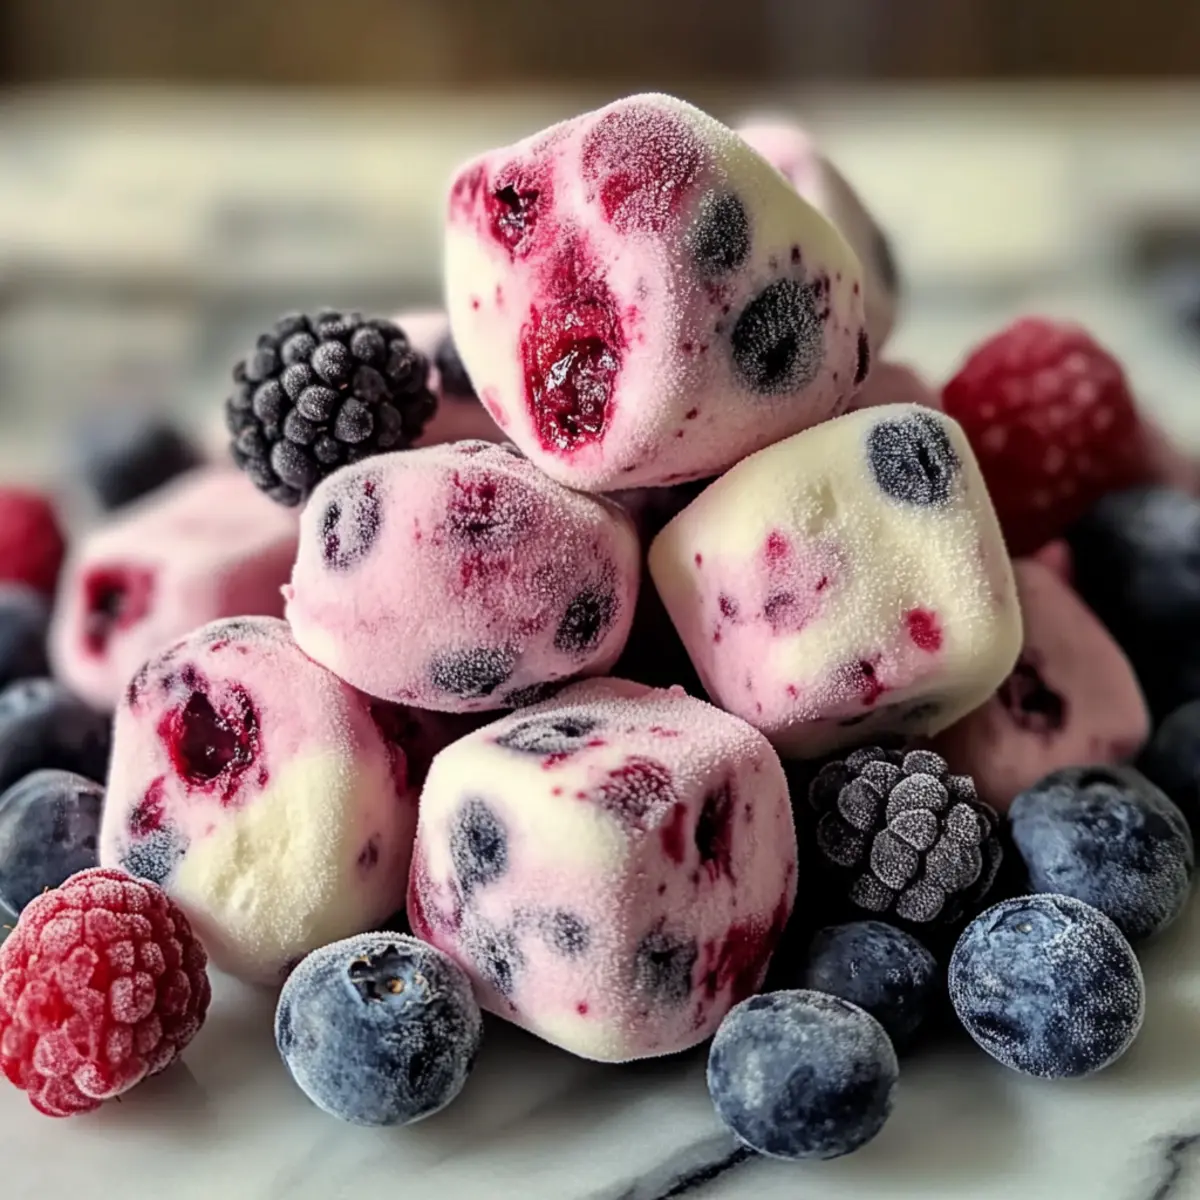
As the sun beats down and the heat turns up, I find myself daydreaming of refreshing delights that won’t weigh me down. Enter the world of Easy Frozen Yogurt Bites — my go-to solution for cooling off during those balmy afternoons. These healthy, no-bake treats are not just a slice of bliss; they’re customizable and kid-friendly, making them perfect for fun family kitchen sessions. With the creamy tang of yogurt combined with vibrant fresh berries, each bite offers a nutritious escape from the usual sweets. Plus, they’re quick and effortless to prepare, turning snack time into a delightful adventure. Are you ready to whip up a batch and explore the endless topping possibilities?
Why Are Frozen Yogurt Bites a Must-Try?
Irresistible Taste: Each bite is a creamy, fruity explosion that satisfies your sweet tooth.
Customizable Options: Tailor your Frozen Yogurt Bites with your favorite berries or toppings for a personal touch.
Kid-Friendly Fun: Get the little ones involved! They can mix and match flavors while learning the joy of healthy snacks.
Quick & Easy: This no-bake recipe allows you to whip them up in no time, just like my Butter Steak Bites that bring flavor without fuss.
Healthy Indulgence: Packed with protein and vitamins, these bites offer a guilt-free alternative to traditional desserts, perfect for hot days or post-workout cravings.
Perfect for Sharing: Friends and family will love these delightful bites, making them an ideal treat for summer gatherings or casual hangouts.
Frozen Yogurt Bites Ingredients
• Here’s what you’ll need to create these delightful treats!
For the Base
- Strawberry Yogurt – Creamy base providing flavor and sweetness; substitute with Greek yogurt or flavored yogurt for a richer taste.
- Unsweetened Almond Milk – Thin yogurt for easier mixing; substitute with any milk (dairy or non-dairy) or omit for a thicker texture.
For the Fruit Mix
- Fresh Raspberries – Adds tartness and texture; can be swapped with other berries like blueberries or strawberries.
- Fresh Blackberries – Contributes sweetness and juicy bursts; other berries can be used as substitutes.
For Freezing
- Parchment Paper – Prevents sticking when freezing; replace with a silicone mat if necessary.
Enjoy your homemade Frozen Yogurt Bites, a customizable treat that's as wholesome as it is delicious!
Step‑by‑Step Instructions for Easy Frozen Yogurt Bites
Step 1: Prepare the Berries
Start by rinsing your fresh raspberries and blackberries under cool water, then gently pat them dry with a paper towel. Halve the larger raspberries to create bite-sized pieces, while be careful to press the blackberries just enough to release their juice without mashing them. This vibrant fruit mix will add a delightful burst of flavor to your Frozen Yogurt Bites.
Step 2: Mix the Yogurt Base
In a medium-sized mixing bowl, combine 12 ounces of creamy strawberry yogurt with 2 tablespoons of unsweetened almond milk. Stir thoroughly for about 1 minute until the mixture is completely smooth and well combined. The almond milk will help to achieve a creamier consistency, making it easier to incorporate your fruits into the yogurt base for the perfect Frozen Yogurt Bites.
Step 3: Fold in the Berries
Carefully fold the prepared raspberries and blackberries into the yogurt mixture, being mindful not to over mix. Aim to maintain the integrity of the fruit, as you want those beautiful bursts of color and flavor in each bite. Take a moment to admire the vibrant hues of your Frozen Yogurt Bites mixture before proceeding to the next step.
Step 4: Scoop onto Baking Sheet
Line a baking sheet with parchment paper to prevent sticking. Using a spoon, scoop dollops of your yogurt-fruit mixture onto the prepared sheet, spacing them about two inches apart. Each scoop should be about a tablespoon in size; this will create delectable frozen bites that are easy to pick up after freezing.
Step 5: Freeze Until Firm
Place the baking sheet in the freezer and let the yogurt bites freeze for about 2 to 3 hours or until they are completely solid. Check a few test pieces by gently touching them; they should feel firm and not soft. The freezing process ensures that your Easy Frozen Yogurt Bites will have a delightful icy texture.
Step 6: Store for Enjoyment
Once your Frozen Yogurt Bites are solid, carefully remove them from the parchment paper and transfer them to an airtight container. If desired, layer them with parchment paper to prevent sticking. Store in the freezer for up to two weeks, ensuring you have a refreshing treat on hand whenever the craving strikes!
What to Serve with Easy Frozen Yogurt Bites
Imagine a sunny afternoon, where laughter fills the air as delightfully sweet, creamy bites melt in your mouth, perfectly complementing your favorite summer dishes.
- Fresh Fruit Salad: A medley of seasonal fruits enhances the fruity flavors of the yogurt bites while adding vibrant colors and textures to the table.
- Nutty Granola: The crunchiness of granola pairs beautifully with the smoothness of the yogurt bites, offering a satisfying contrast in each bite.
- Homemade Smoothies: Whip up a light smoothie with bananas and spinach for added nutrients that balance the sweetness of the cold treats.
- Chocolate Drizzle: A simple drizzle of melted dark chocolate elevates your yogurt bites to a new level of indulgence, perfect for a sweet finish.
- Berry Compote: Serve your yogurt bites with a warm berry compote for a deliciously tangy coating – the warmth juxtaposes perfectly with their icy nature.
- Iced Herbal Tea: Cool and refreshing, an iced mint or hibiscus tea adds a fragrant touch that complements the lightness of the yogurt bites.
- Chilled Coconut Water: Hydrating and subtly sweet, coconut water refreshes your palate, making it an ideal pairing for these creamy, frozen delights.
- Chia Seed Pudding: The creamy, nutritious pudding adds a delightful touch while echoing the yogurt's health-conscious vibes in a creative way.
Make Ahead Options
These Easy Frozen Yogurt Bites are perfect for meal prep enthusiasts! You can prepare the yogurt mixture and fold in your favorite berries up to 24 hours in advance, making snack time a breeze. Simply mix together 12 ounces of strawberry yogurt with 2 tablespoons of unsweetened almond milk, and gently incorporate your raspberries and blackberries. Then, scoop the mixture onto a parchment-lined baking sheet and freeze it. To maintain quality, keep the bites in an airtight container in the freezer and consume them within two weeks. When you're ready to enjoy, just take them straight from the freezer—no thawing necessary! You'll have a refreshing treat at your fingertips with minimal effort.
How to Store and Freeze Frozen Yogurt Bites
Fridge: Store any leftover Frozen Yogurt Bites in the fridge for up to 1 day, but they’re best enjoyed fresh from the freezer.
Freezer: Keep your Frozen Yogurt Bites in an airtight container or resealable bag for optimal freshness. They can last up to 2 weeks in the freezer; layering with parchment can help prevent sticking.
Serving: When serving, give them a few minutes to soften at room temperature for easier eating. Alternatively, enjoy them right from the freezer for a chilly delight!
Reheating: It’s not necessary to reheat these bites; simply let them sit out for a few minutes or enjoy them frozen!
Expert Tips for Perfect Frozen Yogurt Bites
-
Gentle Mixing: Avoid overmixing the yogurt and fruit to keep your bites looking vibrant. This maintains the lovely bursts of berry color and flavor.
-
Pat Dry Berries: Ensure your fresh berries are dry before folding them in to prevent an icy texture in your Frozen Yogurt Bites. Wet fruit can lead to unwanted ice crystals.
-
Customize Wisely: Don't be afraid to play with flavors! Mix different yogurts, try various fruits, or add toppings like granola, but remember that balance is key to maintain texture.
-
Freeze Thoroughly: Make sure to freeze your bites until completely solid. Test a piece to ensure they're firm before storing them in an airtight container.
-
Enjoy Soon: For the best taste and texture, aim to eat your Frozen Yogurt Bites within the first week. After that, they might lose some of their delightful creaminess.
Frozen Yogurt Bites: Endless Variations
Embrace your creativity and tweak these delightful bites to suit your personal taste!
- Nutty Crunch: Add a handful of chopped almonds or walnuts for a satisfying crunch. They’ll enhance both texture and flavor.
- Berry Medley: Swap in blueberries, strawberries, or even mango chunks for a fruity twist, creating a rainbow of taste in every bite. Each fruit brings its unique flair, making these bites even more delightful!
- Chocolate Drizzle: Melt some dark chocolate and drizzle it over the frozen bites for a decadent touch. This luxurious layer elevates your treats into a dreamy dessert.
- Coconut Bliss: Use coconut yogurt or add shredded coconut for a tropical vibe. This option will transport you to sunny beaches with every delicious bite!
- Greek Twist: Substitute the yogurt for Greek yogurt to up the protein and enjoy its thicker texture. The creaminess makes every bite feel indulgent.
- Spicy Sweet: Sprinkle a touch of cayenne or chili powder on top to add an unexpected kick. This bold flavor profile will keep your taste buds guessing!
- Sweet Swirl: Consider a drizzle of honey or maple syrup after freezing for added sweetness. This touch will transform these bites into an even more delightful treat!
- Frozen Fruit: Blend in some frozen bananas or mangos to create a smoothie-like consistency, resulting in a creamy experience reminiscent of soft serve.
As you explore these variations, remember to check out my delicious Air Fryer Donut recipe for another sweet indulgence!
Easy Frozen Yogurt Bites Recipe FAQs
How do I choose ripe berries for my Frozen Yogurt Bites?
Absolutely! For the best flavor and sweetness, select berries that are firm, plump, and free from dark spots or blemishes. Look for berries that have vibrant colors and a fragrant aroma—these are signs of ripeness. If possible, opt for organic berries, as they tend to be fresher and better in taste.
What’s the best way to store Frozen Yogurt Bites?
To keep your Frozen Yogurt Bites fresh, store them in an airtight container or resealable bag. They’ll last up to 2 weeks in the freezer. I often layer them with parchment paper to prevent sticking, which makes it easier to grab a few at a time!
Can I freeze my Frozen Yogurt Bites for longer?
Yes, you can! While I recommend enjoying your Frozen Yogurt Bites within 2 weeks for optimal taste and texture, they can be stored for up to 3 months in the freezer. However, the texture may change slightly over time, so make sure they are sealed well to maintain their quality.
What should I do if my yogurt mixture freezes too hard?
If you notice that your Frozen Yogurt Bites are too hard to eat straight from the freezer, you can let them sit at room temperature for about 5 minutes before enjoying. This will soften them just enough while still keeping that lovely icy texture. Another tip is to adjust the almond milk ratio for a smoother mix next time!
Are Frozen Yogurt Bites safe for kids with allergies?
Definitely! When making Frozen Yogurt Bites, consider any allergies your family may have—like dairy or nuts. You can simply substitute with non-dairy yogurts and milk alternatives. Always read labels carefully to ensure all ingredients are safe for your little ones.
What can I use if I don’t have parchment paper?
No worries! If you don’t have parchment paper, a silicone baking mat works just as well. Just make sure whatever you use prevents the bites from sticking. You can also lightly grease the baking sheet, but I find that using parchment or silicone is the easiest way to ensure smooth removal!


Leave a Reply