
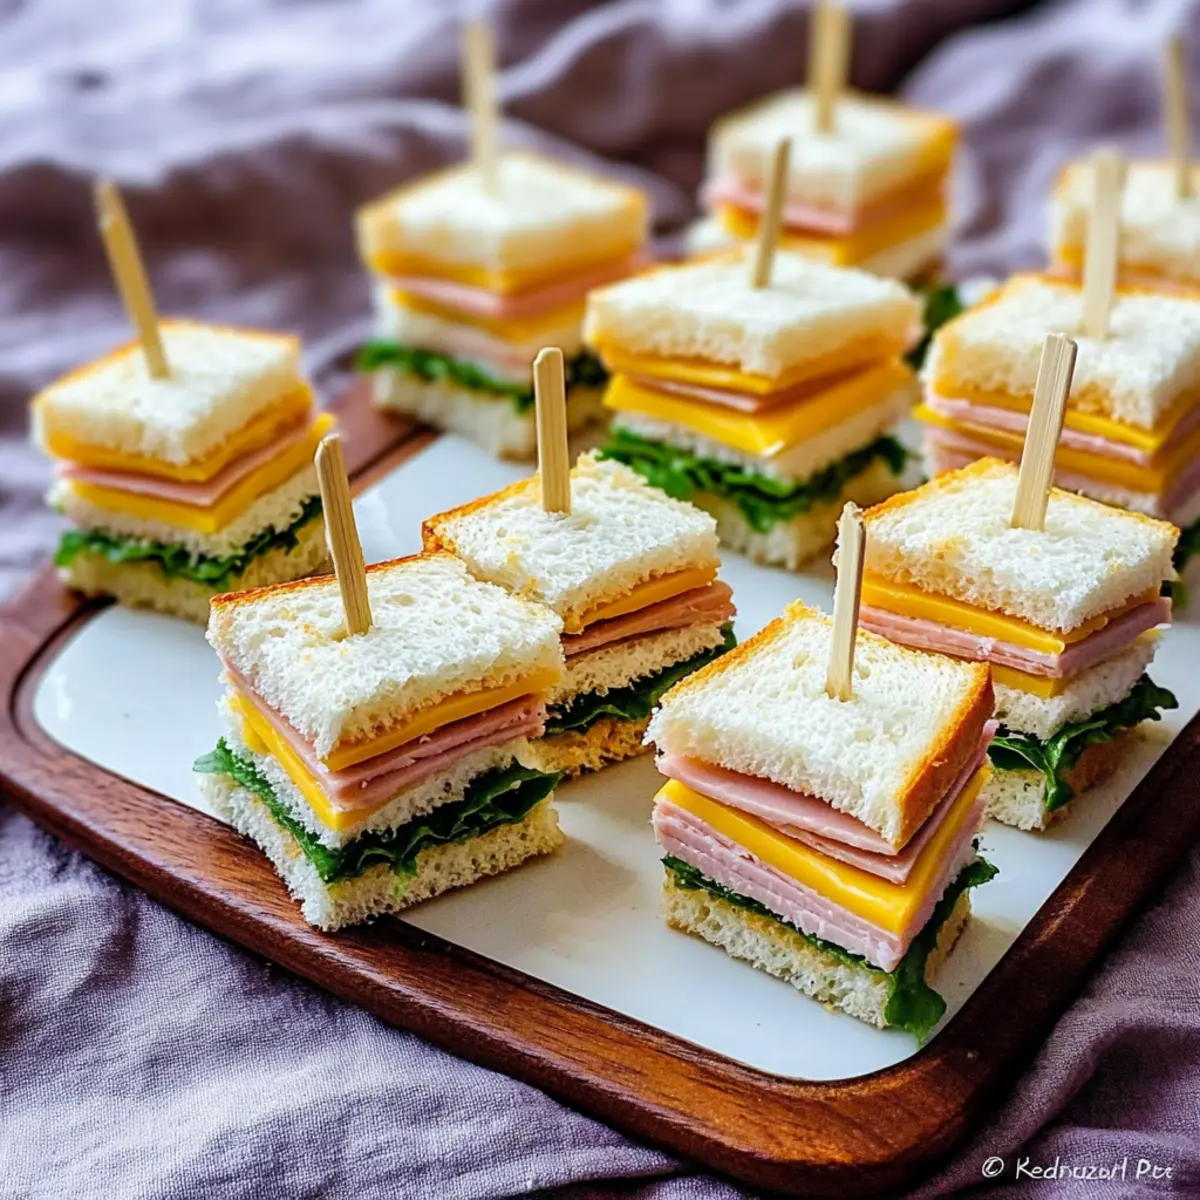
Stepping into the kitchen, I can almost hear the chatter of friends and laughter echoing from a recent gathering. As I reminisce, the star of the show was undoubtedly my Quick Mini Sandwiches for Party. These little bites not only play well with flavors but also save time, requiring merely 10 minutes to whip up. Perfect for any occasion, they keep guests satisfied without hovering around the stove all day. The beauty of these mini sandwiches lies in their versatility—choose your favorite cheeses, meats, and spreads for a customized treat everyone will love. Ready to elevate your next event with these crowd-pleasing delights? Let’s dive into the recipe!

Why Are Mini Sandwiches So Popular?
Versatile Creations: These mini sandwiches can be tailored to suit any palate, allowing you to mix and match ingredients effortlessly, making them ideal for gatherings.
Quick & Easy: With just 10 minutes of prep time, you can create a platter that will wow your guests without breaking a sweat.
Crowd-Pleaser: Their bite-sized portions make them perfect for parties, easily appealing to both children and adults alike.
Flavorful Options: Whether you opt for traditional combinations or unique twists, you'll be delivering layers of flavor that everyone will appreciate! Elevate your appetizer game with these delightful treats that are reminiscent of Huli Huli Chicken on the side or complement them with a refreshing healthy breakfast sandwich for a harmonious spread!
Mini Sandwiches for Party Ingredients
-
For the Spread
• Cream Cheese – Adds a creamy texture and tangy flavor; you can substitute with softened goat cheese for variety.
• Mustard – Offers a tangy kick; any mustard will do, but classic French mustard is a solid choice. -
For the Base
• Bread – Acts as the foundation; crustless white bread is convenient, but feel free to use whole grain or your favorite bread type. -
For the Filling
• Cheddar Cheese – Provides a rich, savory flavor; alternatives include Mozzarella, Gouda, or Edam for a fun twist.
• Deli Ham – Infuses protein and saltiness; opt for thinly sliced for layering ease. -
For Freshness
• Baby Lettuce Leaves – Adds a refreshing crunch; pre-packaged mixed leaves cut prep time, or substitute with any leafy greens you like.
These Mini Sandwiches for Party are customizable and perfect for any occasion, ensuring your guests leave satisfied!
Step‑by‑Step Instructions for Mini Sandwiches for Party
Step 1: Prepare the Creamy Spread
In a medium bowl, combine 8 ounces of softened cream cheese with 2 tablespoons of your favorite mustard. Mix thoroughly with a spatula until the mixture is smooth and well-combined. This creamy spread will be the flavorful base for your Mini Sandwiches for Party, enhancing each layer with a delightful tang.
Step 2: Slice and Spread
On a clean work surface, lay out 3 slices of crustless white bread. Using a butter knife, spread a generous layer of the cream cheese mixture evenly on top of each slice, making sure to reach the edges. This preparation will create a rich foundation for your mini sandwiches, ensuring every bite is delicious.
Step 3: Layer the Fillings
On one slice of bread, place a slice of sharp cheddar cheese followed by 1-2 slices of deli ham, depending on your preference. Add a few baby lettuce leaves on top for a fresh crunch. This colorful layering not only adds flavor but also visual appeal to your Mini Sandwiches for Party.
Step 4: Repeat Layering Process
Take another slice of bread and place it on top of your first layered slice. Repeat the layering process by adding another helping of cheese, ham, and lettuce. This step is essential for building up those delightful mini sandwiches, creating a satisfying balance of flavors and textures.
Step 5: Finalize the Stack
Add the final slice of bread on top, gently pressing down to help the layers stick together. This slight pressure allows the cream cheese spread to act as a glue, making your Mini Sandwiches for Party easier to cut and serve.
Step 6: Cut and Secure
With a sharp knife, carefully cut each sandwich in half diagonally to create perfect bite-sized pieces. To keep the mini sandwiches intact while being enjoyed, insert toothpicks into each half before cutting; this will make them easy for guests to grab.
Step 7: Serve and Enjoy
Arrange your beautifully crafted mini sandwiches on a serving tray, ensuring they are presented nicely. These Mini Sandwiches for Party are now ready to be served! They’re best enjoyed fresh, but you can also store them in an airtight container if needed.
How to Store and Freeze Mini Sandwiches for Party
Fridge: Keep mini sandwiches wrapped in plastic wrap or stored in an airtight container for up to 3 days. This helps maintain freshness and prevents the bread from drying out.
Freezer: For longer storage, freeze mini sandwiches by wrapping each one tightly in plastic wrap and placing them in a freezer-safe bag. They can last up to 2 months, but consume them within a month for best taste.
Thawing: To enjoy frozen mini sandwiches, thaw them in the fridge overnight. Reheat in the microwave for about 20-30 seconds to restore their softness before serving.
Make-Ahead Tips: Assemble the mini sandwiches earlier in the day or the night before, storing them in the fridge. Just make sure they’re well-covered to retain moisture!
Expert Tips for Mini Sandwiches for Party
-
Soften Cream Cheese: Make sure your cream cheese is fully softened for easy spreading. This will ensure a smooth and even distribution on your bread.
-
Secure with Toothpicks: Insert toothpicks before cutting each sandwich to help maintain their shape and make them easier for guests to grab.
-
Layer Wisely: Avoid overstuffing your mini sandwiches; too many fillings can cause them to fall apart. A balanced layer will keep them nice and intact.
-
Choose Fresh Bread: Opt for fresh, quality bread to enhance the taste and texture. Stale bread can result in a less enjoyable experience for everyone.
-
Customize Flavor Profiles: Don’t be afraid to experiment with different cheeses and spreads. Personalizing your Mini Sandwiches for Party can cater to various tastes and dietary preferences.
-
Serve Promptly: For the best texture and flavor, serve your mini sandwiches shortly after preparation, or store them in an airtight container to keep the bread from drying out.
Mini Sandwiches for Party Variations
Feel free to explore these delightful variations to elevate your mini sandwiches and cater to your guests' preferences!
-
Cheese Options: Swap the cheddar for Swiss or Pepper Jack for a flavor twist. Each cheese brings its own personality to your sandwiches.
-
Protein Variations: Substitute deli ham with turkey slices or roasted vegetables for a vegetarian delight. This simple change opens up a whole new world of flavors!
-
Spreads: Try using pesto, mayonnaise, or hummus instead of mustard for varied tastes. Each spread will add a unique character to your mini sandwich creation.
-
Bread Choices: Instead of white bread, consider whole-grain or even ciabatta for an artisan touch. The texture and taste will elevate your sandwich game to new heights!
-
Heat Level: Add sliced jalapeños or sriracha to bring a kick of heat to your sandwiches. Just a touch can dramatically change the flavor profile, delighting those who enjoy a little spice.
-
Herb Infusion: Mix finely chopped fresh herbs like dill or chives into the cream cheese spread for an aromatic flavor. It’s like a garden party on a plate!
-
Sweet Touch: Incorporate a layer of apple or pear slices for a sweet note. The crunch and sweetness balance perfectly with savory fillings, creating a delightful contrast.
-
Mini Sandwich Platter: Create an assortment with different fillings on a single platter. Pair them with dips or sides like a zingy spinach dip for a complete party experience. Just like alongside the irresistible flavor of Huli Huli Chicken or the freshness of a healthy breakfast sandwich.
These variations ensure that your mini sandwiches remain both exciting and satisfying for guests with diverse preferences!
Make Ahead Options
These Mini Sandwiches are perfect for meal prep, allowing you to enjoy stress-free entertaining! You can prepare the cream cheese and mustard mixture up to 24 hours in advance; simply store it in an airtight container in the refrigerator. Additionally, you can assemble the sandwiches and wrap them tightly in plastic wrap, keeping them fresh for up to 3 days in the fridge. To maintain quality, avoid cutting the sandwiches until you're ready to serve, as this helps prevent the bread from drying out. When it's time to impress your guests, just cut the sandwiches in half, add toothpicks, and serve—you'll have delicious Mini Sandwiches ready at a moment’s notice!
What to Serve with Quick Mini Sandwiches
These delightful bites are not just a snack; they can set the stage for a memorable meal experience full of vibrant flavors.
-
Creamy Tomato Soup: This warm, comforting pairing complements the creamy texture of the sandwiches and adds a rich, savory flavor.
-
Crispy Vegetable Chips: Their crunchy texture provides a nice contrast to the soft mini sandwiches, making every bite exciting.
-
Fresh Fruit Skewers: Bright and juicy, these sweet skewers balance the savory sandwiches, bringing a refreshing element to your spread.
-
Tangy Pickles: Adding a zesty crunch, pickles enhance the flavor profile of the sandwiches, making them irresistibly tangy and satisfying.
-
Simple Green Salad: A light and crisp salad with a citrus dressing adds a fresh, vibrant note to your party platter.
-
Chilled Sparkling Water: A bubbly drink enhances the festive atmosphere, keeping guests refreshed without overpowering the meal.
-
Potato Salad: Creamy and hearty, potato salad provides a rib-sticking option that pairs well with the lighter mini sandwiches, creating a well-rounded meal.
-
Mini Brownie Bites: End on a sweet note with these fudgy treats, perfectly portioned to satisfy any sweet tooth after the savory sandwiches.

Mini Sandwiches for Party Recipe FAQs
What type of bread should I use for mini sandwiches?
You can use any bread that you love! For these Mini Sandwiches for Party, I recommend crustless white bread for its convenience and softness. However, feel free to swap it with whole grain, sourdough, or even gluten-free bread to cater to different dietary needs.
How long can I store mini sandwiches in the fridge?
Absolutely! You can keep your mini sandwiches wrapped in plastic wrap or placed in an airtight container for up to 3 days. Just be sure to consume them as soon as possible to enjoy the freshest flavor and texture.
Can I freeze mini sandwiches?
Certainly! To freeze, wrap each mini sandwich tightly in plastic wrap, then place them in a freezer-safe bag. They can be stored for up to 2 months. For best flavor, try to enjoy them within a month.
How do I properly thaw frozen mini sandwiches?
To thaw, simply leave the frozen mini sandwiches in the fridge overnight. Once thawed, you can reheat them in the microwave for about 20-30 seconds to bring back their soft texture, making them just as delightful as when freshly made!
Can mini sandwiches be made vegetarian?
Yes, indeed! You can easily customize these Mini Sandwiches for Party by substituting the deli ham with roasted vegetables, avocado, or your favorite plant-based protein. You can also use hummus or pesto instead of mustard for a flavorful spread.
What is the best way to serve mini sandwiches?
For the best presentation, arrange your mini sandwiches on a beautiful serving platter. You can add toothpicks to each one to make grabbing easier for guests. Feel free to pair them with dips, like spinach dip, or a simple pickle platter to elevate your appetizer game!

Mini Sandwiches for Party: Quick, Delicious, and Customizable
Ingredients
Equipment
Method
- In a medium bowl, combine the cream cheese with mustard and mix until smooth.
- Lay out the bread slices and spread the cream cheese mixture on top of each slice.
- Layer one slice of bread with cheddar cheese, deli ham, and baby lettuce leaves.
- Place another slice of bread on top and repeat the layering process.
- Add the final slice of bread on top and gently press down.
- Cut each sandwich in half diagonally and secure with toothpicks.
- Arrange the sandwiches on a serving tray and enjoy!


Leave a Reply